For new, inexperienced or infrequent sewists, the idea of completing an entire sewing machine-based project can feel inspiring or downright daunting. With the fervor of back-to-school season upon us, and Olympic triumphs fresh in our minds, we, the beginner sewing gang, need achievable goals. We need a “win” in order to keep moving forward with sewing practice, so that we can work our way up to larger and more complicated projects.
What better subject to inspire us to thread our bobbins, than lunch? A hand-sewn lunch bag that you can flaunt at work, or will fill for your offspring with nutrients is the ideal practice project. It can be made in a wide variety of patterns and colors to keep lunch mix-ups from happening, requires minimal prepping time (ironing, cutting etc.) and it’s something that you will actually be excited to use.

Materials:
Half a yard of heavy weight (oil cloth, vinyl, canvas or upholstery fabric)
Iron
Sewing machine with thread
Scissors
Self-healing cutting mat
Ruler
Rotary blade
Pins
Velcro strips or super magnets or wooden clothes pins
Vinyl or felt stickers, iron-on patches, vintage elastic, findings, fabric pens etc. for quick, and optional adornment
Tacky or Fabric glue

Begin by ironing out any heavy creases in your fabric (unless using oil-cloth or other PVC-based, laminated cloth.) While working on your self-healing cutting mat and ruler, cut two matching 11 x 14 rectangles from the fabric.
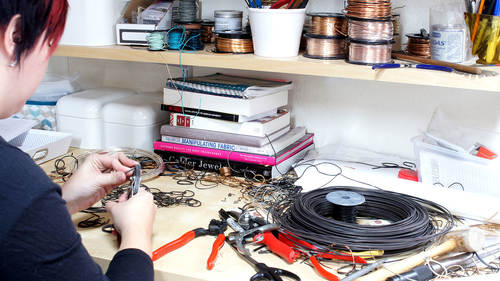
Next, measure and cut a 2.25 inch square from each of the two corners along one of the shorter sides of your rectangle. Repeat this with each rectangle of fabric. (In this example, three lunch bags are being made, one in a gingham, waterproof oil cloth, one in scrap canvas (red and white stripes) and Solarium Outdoor Fabric-Cotrell Garden water resistant outdoor fabric.)

With the right sides (darkest pattern side) together, pin the edges of two matching fabric pieces together, leaving the “top” of your bag and the missing square corners unpinned.

In the square corners, pull the two, 2.25 inch adjacent edges together, and pin them so that the “base” of your bag is closed with pins.

Use a size 2 zig-zag stitch with a ¼ inch seam allowance along the two sides of the bag, and around your pinched and pinned bag corners. Turn the bag right-side out when the two sides and base are sewn.
Pin down the top ¼ inch of the bag, and zig-zag stitch to finish the top.

You could be done with your bags at this point and call it a win!
For further practice, and to help thicker material keep a traditional lunch bag shape, add seams to the narrow sides of each bag. Use a ruler and measure the distance from the center seam to each corner of the bag (roughly two inches, right?) Measure the same distance at the top seam of the lunch sack. Pinch and pin the top of the sack, and work your way down to the bottom corner of the sack, pinning as you go. Switch your sewing machine to a straight stitch, and sew (with the smallest seam allowance you are capable of) from the bottom corner, up to the top pin. Repeat with each of the four corners of the bag.

Peel, stick and then hand sew velcro tabs in place for easy closure. For quiet lunch access, sew or glue super magnets into your sack, or simply use a wooden clothespin to pinch your bag closed.
Assemble your findings, patches etc. and have fun decorating! Keep in mind that oil cloth bags can be easily washed and wiped out, so using vinyl or Duct tape decorations will keep those bags in easy-clean-up-mode. If using canvas or any other washable fabric, consider the adornments you use, as they may not survive a hand washing unless stitched in place.

For more great simple sewing project ideas, check out Susan Beal’s Simple Sewing Projects for Beginners class.