Are you ready to take your hand made bags to the next level?
How about adding a little leather and hardware? Both are a great way to customize your tote bag’s exterior really make your bags stand out. Plus you get to use cool tools!
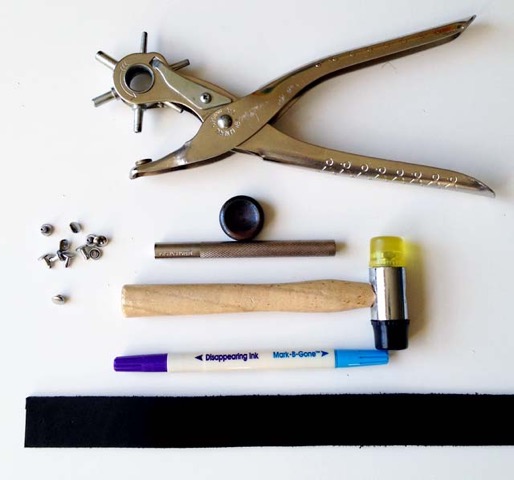
Top to bottom in the photo above, we have an adjustable hole punch, an anvil and rivet setter, a mallet, and a disappearing ink marker.
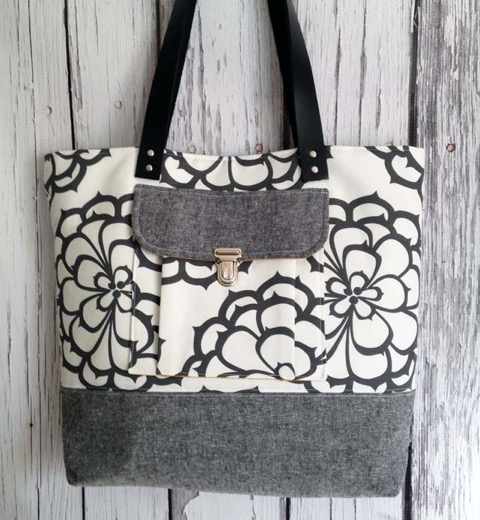
Of course, you’ll also need a bag, leather straps and rivets. (You can learn how to make the bag in my Build Your Own Tote class.)
I’m using a thick bridle leather strap and 7mm double cap rivets with a 7.9 mm post. My handles are about 25” long.

If possible, it’s a good idea to test out your rivets with the materials you are going to combine in your bag.
You’ll want to be sure that your rivet post is not too long or too short to go through your materials.
Here I’ve layered my canvas, stabilizer and leather scrap to set a practice rivet.
Decide on the placement of your handle. I aligned mine with the edge of the front cargo pocket on the medium tote from my Build Your Own Tote: Custom Exteriors Class.
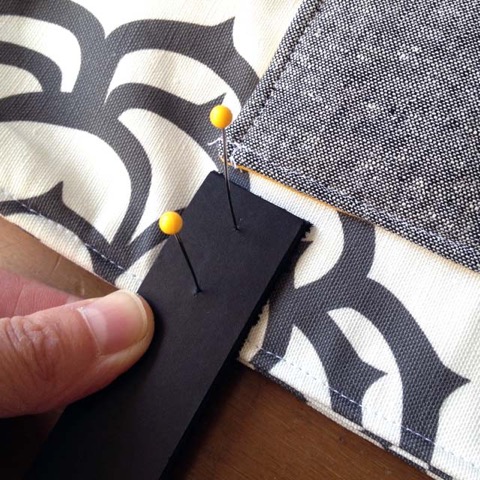
I want the bottom rivet to be ¼” up from the end of the handle and the other rivet to be ¼” down from the top of the bag. I centered 2 pins and poked them into the leather to make marks.
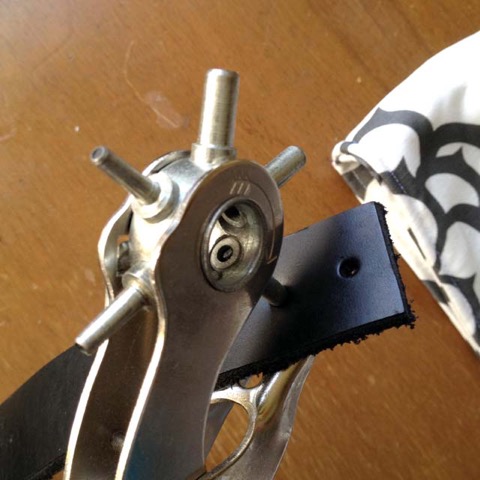
Next, punch a hole in the leather at each marking, big enough for the post of your rivet. There are also single hand punches available at leather goods stores. Copy this placement and punch holes in the other end of the handle.

Place your handle back onto the bag and mark the placement with a marker through the holes you just punched.
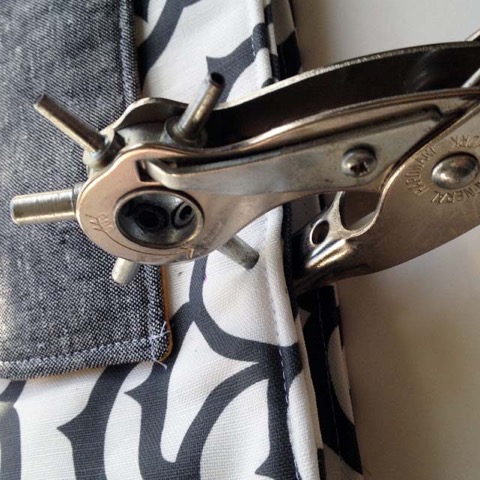
Punch holes through the bag where marked.
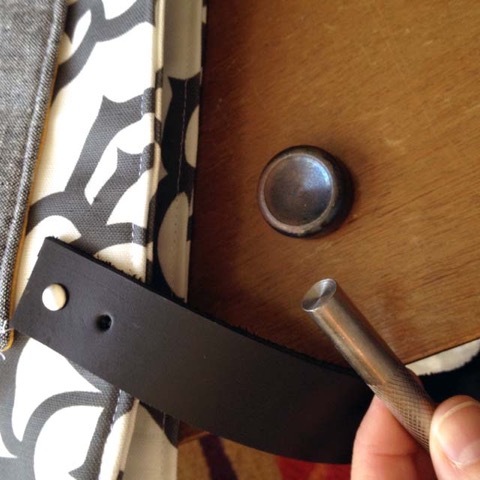
Push one rivet through the handle and bag holes. Snap the other rivet piece through the holes from the other side. Place the anvil under the rivet (inside the bag).
You’ll notice that both the anvil and the rivet setter are curved. This prevents you from denting the domed cap when you set the rivet.
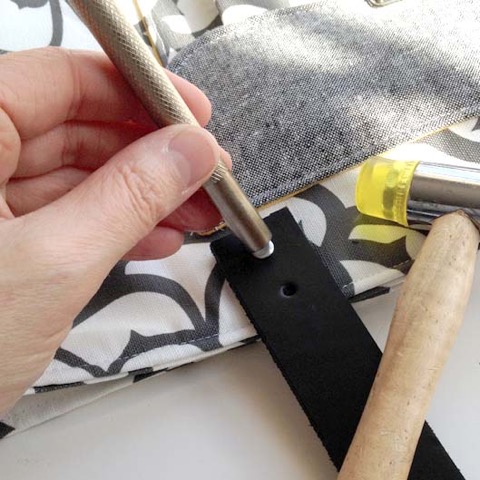
Place the concave end of the setter over the rivet vertically and give the end a few swift whacks with mallet. Give the rivet a little pinch and wiggle to check that it is secure and fully set.

Repeat for the second rivet, then the other end of the handle, making sure that it isn’t twisted. Copy your placement to the back of the bag and set the second handles in the same manner.

Beautiful! Setting rivets takes just a little bit of practice but you will love using them and the extra special detail they add to your bags!
For those of you interested in fabric handles, check out my tutorial on adding a pop of color with two-sided handles.
Are you ready to start selling your handmade craft projects?
Download our free PDF: Etsy 101: A Guide to Getting Started! This comprehensive collection of notes, worksheets, and slides from Marlo Miyashiro’s class, Etsy 101: Launch Your Handmade Shop gives you the tips and insights you need to launch a successful Etsy shop!
[subscribe2download link=’http://blog.creativelive.com/wp-content/uploads/2015/10/Marlo-Miyashiro-Etsy-101-Class-Workbook.pdf’ title=’Enter Your Email Download the Guide’ source=’Etsy-101-Guide’ type=’Download’ channel=’Craft & Maker’]
< >
>
[/subscribe2download]