Lessons
Lesson Info
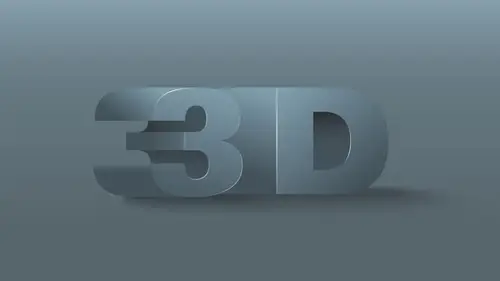
Create 3D Objects from Lines
so the extrude effects You can apply with anything that you draw, whether it be a closed shape or an open shape. And I can take my content and I can extrude the entire shape. But I can also go in and simply take an open line and extrude the open line as well go under my effect three D and I could extrude something flat like this and I could map that all out, do my extrude and set the depth right here on apply to flat piece or do a curvy piece as well. Either way makes no difference. You can edit the stroke weight on this or the color which is going to get changed the thickness of this piece in the appearance of that, just by going in and changing the color of that. And if you want to change the depth of that piece right there, you go in and just change the point size. Whatever size you want and be able to do it this way, you can then curve this piece. Anyway, I don't have to have a flat. I can actually go in and take this whole piece that I can do any type of curved piece arc tool or g...
o in and use my pen tool to create something kind of wavy anything that you want. We can go ahead and extrude. What makes the extrude really cool is any extruded piece that I have on here that I would like to further extrude. Let me go in and use my arc tool around the ends here. I'm in extrude this effect three d extrude and bevel Look in the preview here extrude disa depth of 1000 right there. So there is my peace. Here is my extruded content. I'm going to rotate this around a bit so I can see this little bit more like that. That's great. And then I want to go back in and I want to edit my three d here extrude and bevel applying to effect Take this click on the preview so we can see what's going on. Now when I go in and I do my three d bevel, I can apply a beveled edge to this shape as well. So I'm not stuck with having just the classic edges. I can go in and I can do different beveled edges here where I can go in and take those edges and render them in certain different styles. So if I don't want just corner edges here, I can go in and I can get, like, different saw tooth, um, edges on here, and this will actually go in and start to bevel the edges on this. Let's see if I can get something that's going to work. They seem to be having issues with the way this is rendering we take this perfect three d extrude and bevel extrude this whole thing right there. Okay, Now I'm gonna take this and the bevel. I'm going to go in and do kind of a complex bevel on here, and I can change the height of this so it becomes much more noticeable where I can go, we in and you can see it can actually take this entire shape and actually create here. It's kind of hard to see, but I got this little bevel that comes up, which gives me this kind of lump on my object, and it can control that so I can control the different complexities here. Kind of like do lumpy pieces on here and this kind of gives me kind of the serrated look to this actual beveled edge coming up along here. Now, you'll notice it does some kind of reared Wender weird rendering effects because these things overlap. If I go in and I set the certain types of devils to be too much where it comes down to, where it comes up, it starts to run into each other so it can't render that completely. It doesn't necessarily warn you of that. It will sometimes, But you can't go. And you can't do too much of a height adjustment on this in order to get this to work. So, like I said, this is not like super high strength. This is more just kind of, like, cool stuff that you can dio I'm gonna rotate this all around and it's gonna render with something is complex is gonna take a little bit of time, But you can see a little bit better how this is going to work with the different types of renderings here, doing the different types of devils and setting the different heights right there. I can create kind of like little for roles or things like that. So It's kind of cool. Don't get too ambitious with this because it's a lot for illustrator to handle. But for some of the cool stuff, I could go being and create kind of like a little slinky effect here. Like, if I want to create a rubber boot, we don't actually have to draw this. That's the cool part. I can just take the devil here and I'm able to go. We in and kind of create kind of this rounded little shape right here. And this is all with being able to just go we and and create a stroke around my object. You can see I've got some rendering issues here. The way this works just simply rotated again and let it rear ender and then click, OK, and then you got your shape right there. So some of the cool stuff that weaken Dio with this object and with the appearance panel here to be able to go in and do is just some of our basic extrude items. So fill this with nothing gonna put knows a blue stroke around this, and I'm going to create a basic shape in here so we can see how this is going to work. I'm just going to use my pencil tool to go in and draw a really quick shape here. She could get an idea of how we can draw a basic shape and extrude something Gonna go in there is going to kind of draw this little funky earn like this to keep the top open because I want to be able to extrude This whole thing's a really rough But I'm just gonna do the stroke right here. And the reason why I leave the top openness so we can see inside of our shape. So there's our basic shape. Used the effect three d used extrude and bevel. And I'm in the preview this and I'm going Teoh didn't want the extruding devil. I wanted to revolve. There we go, revolved. They click on the preview here, and it gives me this really weird shape and it's like, Okay, what's happened here and it's like, this is not the shape I've drawn. Well, I'm left handed, so I always draw on the left hand side of my objects. And as I do this, it's then taken the left hand side. This revolved around itself which end up with some funky vase, and it's like, Okay, now, this is kind of cool, but I wanted more like an urn shape. So I'm gonna go in and I'm going to set this to render not from the left edge, but from the right edge. When I do that, you'll see that then this will give me kind of more like a vase shaped that I could go in and I could actually turn. I could look into this shape because I left the top open, which is kind of cool Click, OK, to go back into preview mode and I'm going to actually edit the top of my vase here when it kind of turned this in and kind of create little lip inside here, go back into my normal mode. You can see by doing that that shape that I've just done here kind of reflects into this so I could actually create something that I could see inside and kind of loop back on itself. So if I want to create like, a roll top, I can do that all with a shape right here, which is kind of cool as I go through and do that. I kind of got that shape. So that could be a little bit of fun as well. I'm gonna delete these as I go along, because I don't want to take up too much of my memory as I go. So another thing I could do, and this is always fun. You want a credible tree? I'm gonna go. We end them is going to create a really quick triangle. Go in, create a triangle. Here, take that triangle. Gonna make it all green. In this case, I'm going to have actually a green shape right here. Gonna fill this and do it green. But I'd like to add a little bit of texture to this. So what I dio is go in and I'm going to create some kind of actually make these boxes so that they're going to come out from actually take thes sections out of the tree here like this and actually knock these out. Take these shapes. This is not part of the three D, but this is us something I want to show you. So this would be cool to create a tree that looks like this. What I'm gonna do is I'm gonna take half of this tree because I don't. I only want half of this tree to be able to revolve this around. So even when you draw full shaped like this, I still want just half of it. So I'm gonna cut this in half of the draw box over the top of this. Select both the shapes. I'm gonna subtract this. So this is the half of my tree that I want to use gonna revolve this tree around, which is going to give me these really cool little shelves on my tree. So if I used the effect three d want to revolve this around? They do this. It's gonna revolve everything. I want to do it around the right edge and you can see it creates this really cool revolved shape that I could then just move all over and there's my shape. The top wasn't connected. But this gives me this awesome shape around. So if you can create anything in a three d or just a slice effect, you can then extrude and revolve that around all kinds of shapes. You can go ahead and do this with it's really pretty cool and there is my little kind of my Christmas tree that's got these kind of, like, cylindrical blocks there making the whole thing and all it was was just going in and actually seeing this in outline mode, this was my shape. And then this is the result of that shape changed the fill, change the color. However you want to do that and you can go in and simply just change your object right there. So anything that you build is easily gone in and revolved around anything that you extrude, you can add it, those shapes and you can take those things out and you can put them together.
Ratings and Reviews
Nelson Mueller
Good course! It does exactly what it says, teaching 3D in Illustrator. He explains the different kinds of features very easily and what they do when applied. How different shapes transform when using different kind of options. It is a small course, but it was definitely worth it. I wanted to understand 3D in Illustrator and it fully delivered that.