Localized Edits In Photoshop CC
Lesson 4 from: A Modern Black and White Photography Post-Processing WorkflowBryan ONeil Hughes
Localized Edits In Photoshop CC
Lesson 4 from: A Modern Black and White Photography Post-Processing WorkflowBryan ONeil Hughes
Lessons
Lesson Info
Localized Edits In Photoshop CC
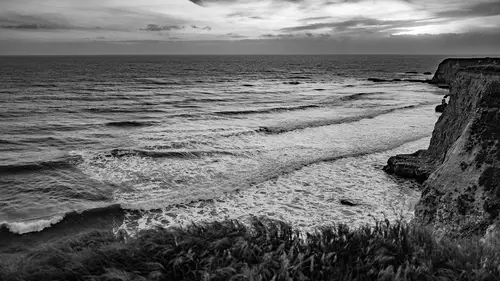
the problem with Panos. And this is where I want to talk about how and why we use Photoshop is that if I come over here and I look at that, I'm losing so much of the image and this is typical of panoramas. And so because it's raw, I can get back here to the full image. I'm missing a lot of this image. I'm gonna take it to here, and at this point, I'm gonna toss it over to Photoshop, and there's a couple different ways to do that. The way that I like to do it is to just hit Command E. And what that's going to do is we're now leaving the language. That light room understands Late room is a raw editor, and we got a photo shop, are pushing into pixels, and once we pushed it, the pixels weaken, do some unique things to it. I'm gonna flatten this, and as much as people make fun of it, I'm gonna use the magic one tool, and I'm just going to select all of these areas around here and what's really important. Those of you use content or film might know what I'm about to dio is You want to expand...
this in order to give it some area to fill? Sure, 12 pixels. What I'm gonna ask you to do is rather than fill something to remove something and ask it to fill something to add it must go ahead and add that missing content. And I'll tell you, if you have organic material like clouds and sky and whatnot, there's a pretty good chance it will work. Works well with most panorama. It's gonna sniff all around the edges of that, and it's gonna fill it in for me. And so you can see it does a pretty remarkable job of filling that in. It really does work now. I've heard crazy crazy questions over the years. I've had people say, Well, if you're standing in front of a billboard and there's text and you remove something, will it complete the sentence? It is magic, but it's not that magic. That would be just scary. Can't predict who's gonna be president can't complete any sort of text. But what it can do is it can look for patterns. It can look at neighboring pixels and there's a certain element of it that is random, You don't know exactly what you're going to get. But what you get in the end is a very convincing results. You can see some repetitive content in the lower right where it just didn't have a lot sample from. There's different ways to work around that, but that gives you an idea. Now what's neat about this is if I hit command W and just save that and we come back next to our raw file where we can see so much. Missing content is our edited file. They sit side by side, like room continues to be that container. And so what I want you to think of in terms of light room is not just a place to do almost all of your black and white editing, but home base for your images, the way you're going to get to your images, wherever you are, we'll briefly touch on mobile in a woman. OK, so that's one thing I love to do. Their, um, another trick that I'll show you were going to sort of Brighton Steve's eyes. Now Steve's Isar a little dark. This is a common problem. One of the things that happens with black and white as if someone has beautiful blue eyes. It gets kind of lost in black and white and you could try to take that individual color and adjusted It doesn't work that well. I have a friend of mine who does these amazing black and white portrait there really gritty. And the eyes always pop. And after begging him and begging him and begging and finally showed me his workflow and I'm gonna share it with you guys, which he probably wouldn't appreciate, But, you know, can't all be secrets forever. It's been a few years. I'm hoping he's all right with it. I'm gonna take Steve. I'm gonna hit command E. We're gonna send this over to photo shop and just like before, it's going to duplicate, uh, the layer. And there, Steve in photo shop. First thing I want to do when I'm getting ready to do any sort of selections. Double click on the zoom tool so we can zoom in and see his eyes, and we're gonna come into the quick selection tool. Um, this is the best way of making selections. And Photoshopped can say that as someone who spent many, many years on the team. Decadas product manager 15 years on the photo shop team. There are, I think, nine different ways to make selections. I firmly stand behind the quicks electoral. Don't let the quick in the name lead you to believe that it's not also powerful. The way we're gonna use it is using the control and option or control all key and dragging left to right to get a nice brush left to right is gonna change the size up and down. It's gonna change the softness. Use this constantly. Some of you might use the bracket key that is, and always has been a great way to change the size your brushes. But this is a much more visual way of doing it. And so what I'm gonna do when I get a nice small brush is just say, Well, I want that I and then I'm gonna shift click. I also want that I and if I don't want a part of the eyes, I'm just going toe option click and click above the area I don't want and so really quickly I did a good job of isolating Steve's eyes. Now I recently had an experience I I'm a user like you guys are. And I I, uh, appreciate and get frustrated by the same things. And the Photoshopped team made changes to the masking workflow. And the first time I came in, I just wanted to tear my hair out because it wasn't the way I was used to working. So for those of you had a similar experience, I want to show you that once you get used to it, it's pretty great. But when you first get in there like any change, it's a little jarring from select. I'm gonna come into selected mask. And this was this New world where I hadn't been here before and I didn't like it because it was different. But it's not a bad place to be. You have all your same controls. In fact, they're Justus, powerful Weaken Scare ourselves by putting Steve's eyes on any particular thing we want. We can visualize them on a variety of different settings, and we can adjust the edges, weaken, feather them, weaken, smooth them. We're gonna just the radius just a tiny bit. Maybe we'll feather that out a little. We don't need a ton of change. We just want it to be harmonious and to blend in here. This is especially powerful for selecting hair isolating hair. It looks different, but it works even better than the old refine edge. I'm gonna click, OK? And then what I'm gonna do is I'm just gonna command see to copy that layer Command V, and it becomes its own layer again. We can freak ourselves out by turning Steve's eyes off and on. What we're gonna do is we're gonna take advantage of a blend mode. That's the big secret is blend modes, which isn't a big secret at all. But I wasn't used to thinking about it in terms of eyes. And if we come in here and we do color Dodge, Steve's eyes just light up, all right, just it's subtle, but it just lights them up from inside. It's taking the color and it's opening it up, and it's a way of turning the lights on in someone's eyes. The combination of locally sharpening and using a blend mode is a really powerful photo shop centric way of just brightening up a particular area. And it could be it works just as well with a color photograph. The great thing about a blend mode is we can come in here and we can adjust the opacity, uh, weaken, tune it just the way we want. It's exactly the sort of thing Photoshopped does really, really well. Okay, so let's talk about what the black and white workflow looks like in photo shop, because historically it was always different. He did things in light from differently than Photoshopped. Well, you can use a black and white adjustment layer on the advantages of a black and white adjustment layer are that you can mask it and that you can have control over the layer itself. But the workflow that I'm gonna advocate in photo shop it's really easy to remember because it's exactly the same workflow as you would use in light room just to mix it up, I'm gonna show it to you in camera. One of the changes, as of a couple versions ago, is that we can use camera raw, isn't it, as its own filter a couple different ways to do it. One we could just come up here to camera raw is a filter, and it's gonna take us in there, and we're gonna be able to use it just like any other filter. But what I'm gonna do is I'm gonna convert this to a smart filter, OK? And like a smart object, that's just way of putting a wrapper around it and letting me undo anything I do to it were essentially training this to behave more like it does in light room. Um, So what I'm gonna do is come in here to filter camera raw filter. And now I have all the powers that I have in light rooms develop module. You might be thinking yourself, Well, why would I want to do this here? If I could do it in light room for global edits? You probably do want to do it in light room, the advantages to doing it in photo shop. Or you could do it with different file formats. You could do it with old scans, and you could do it to a selected area of the image. Eso just really quickly. The workflow is consistent. It looks a little different. It's auto. It's recover your highlights. It may well be that you come in and you do some DIY Hayes. It's black and white And if you want to interact directly with the image, you also have a targeted adjustment tool for that. Or I can just grab this guy and interact with it. It's just is easy to do. It looks a little different, and it feels a little different because the plug in architecture of Photoshop is almost years old, behaves very differently than something young like light room. Um, I'm gonna cancel out of this and show you that the other advantage to doing it in photo shop it's gonna look weird on purpose is that you can have, uh, a particular shape or area. It's just feather that, and you can come in here plug in, can't see the selection. It's a limitation of the architecture. But if I come in here and I make just that part black and white, you can see that we've applied that to just that area so you can actually have all the benefits of light rooms develop module with all the power photo shops, selection engine. Really great example. When you'd use that, you can see I've automatically generated a mask. The great thing about it being a smart filter, is by being a smart filter, you can always jump back in there and make any changes to it Going to show you guys another one that especially in black and white. I think my kind of blow your minds, Um, let's come in here and I'm going to grab a video now, This is something I spent a lot of time on as a product manager on the photo shop team. I believed that, um, as the cameras were not just generating still content but video content, and they were all passing through Photoshopped. We needed to have a certain level of support on. This was born largely out of frustration because I tried to get my head around nonlinear video editing, and it didn't go very well. I bought a nice lens thinking that would work, but as you can see, I didn't come up with very much in terms of content. What we really wanted was an experience that was a simple as I movie, but with all the power Photoshopped. And so if you open a video file in Photoshop, whether it's one off of your five d Mark four or your your new IPhone, it'll load into photo shop and it'll play as video motion here. And what's really cool about this is if you put a smart filter on it, put that wrapper around it, then you could do anything you do in photo shop. You could do lens correction. We could come in here and we could say, You know, this is, um this is off of my Apple IPhone seven plus, which it's not, but we could apply that to it or and we'll be applying that to video where we could do crazy stuff like Kamerad. Now this is one of those ones where I remember when this future landed and I remember thinking, Wait a minute. If we support video is a smart filter and camera rossa filter, that means I essentially have light room for video. And that's exactly what you have here. So I can come in here and I can say, OK, well, let's make that black and white. Let's recover the highlights. Let's add some clarity. Let's Ah, come over here and see Peotone it by using my option key buildup, that saturation a little click OK, and it's gonna take a second to play because we've applied a lot of instructions, but we just did. C. P. A black and white conversion of a video in Photoshopped. Um, so when you think of black and white in a modern photographic workflow, don't just think about stills. Think about HDR. Think about video because you could do all of that stuff. Photo shops a really great place to do video. I know it's not how you're used to thinking about Photoshopped, but photographers are increasingly being asked to generate video content. A swell it's still, and it's a really great way to do it. There's some limitations as far as the length of the video and the sound. If you want to go really deep on video, I'm the first to tell you photo shops Probably not where you want to make your next feature film, but it's perfectly adequate for color grading, adding text, which every movie you see comes out of Hollywood. The text was done in Photoshop really powerful way to go in. When you're done, you just come here and you say file and you you go ahead and you export this, and you have all sorts of different ways of exporting your file. So if I were to take that and if I were to file export render video, you'll see that the workflow we use here is we give you all sorts of different common presets. We use Adobe media encoder. We have different formats, and then we've got different presets for all different tablets and devices. So we really try to make that as easy as possible. If you ever feel like photo shop is just way too friendly, check out video editing and it's a whole different beast. So we're trying to make this Ah ah, lot easier. Um, right here. I do want to at some point of this workflow to mobile, but really quickly, let me just take a look at bridge. I know a lot of people. This is one of those things that's changed over time. Ah, lot of people think in terms of light room and Photoshopped. And that, I think, is the modern workflow it used to be. You were in Photoshopped most the time. He went to light room a little. Now it really is. You live in light room 80 90 95%. Your time is there, and a little bits in photo shop for retouching on things like that. But there are people that use bridges. Well, it's kind of where a lot of this started. So just for this section, for this particular sake, I'm going to use this. I want to do a little better job of explaining that smart object workflow because this is something that eluded me for a while. And I think if I explain it, it might help a little bit. And so for that I'm just gonna choose this image. I'm gonna open it. I came up with a really quick example of how to do this. So if I double click, that takes me to 100% with them and we confirm there's a lot of data here, right, Full resolution file. This is especially handy for a black and white image because you want that ability to get back to where you started. Maybe you want to go back to color somewhere along the line. When you're new to photo shop, all of us do something like this, right? It's 2400 pixels and let's say I want toe email it someone. So I make it 400 pixels all right. And now I've got this tiny file that's may be appropriate for emailing. Um, just for the sake of craziness, let's make it even smiles make it 40 pixels. I know it's ridiculous, but you see it and you're like, Oh, now I discarded all that information. Well, that's okay. I'll just I'll just change it. I'll just make it. Ah, you know, 2000. And then you get this and you never do that again because you discarded the information and then you tried to put back. It doesn't work that way. Well, as a simple ah, we have showing you how this does work. Here's where we started. Here's the original image. Same workflow. Only this time it's gonna be a smart filter. Okay, get a smart filter is a way of referencing the original, especially helpful for black and white because you can always get back to where you were. It's kind of like giving you that light room workflow that you just know in general, that safety net making it a smart filter. If I choose to make it the absurd 40 pixels, that's exactly what it'll be right on Lee, in this case If I choose to change the size to, say it's gonna hold together just fine because it's referencing the original. So it's giving you all of that flexibility. One of the other thing talk about as we're talking about image size, and this definitely applies to black and white because a lot of the time you're blowing up to a gallery size print or something. There used to be this whole workflow of incrementally increasing the size of your picture of 10% than 10% 10%. That's been around for a long time. It's still in a lot of books. I suppose there's nothing wrong with it, but I don't know anyone is doing that anymore. It's kind of like on Sharp Mask. It's nothing wrong with it, but it isn't the most powerful way to do it. Let me show you how I would do that. I would just come in here to image size. I would lock onto an area that's in focus. You've got this nice preview widget. That's my focus right there. And even though this automatically re samples, which is to say we choose the right algorithm for making it smaller or larger. In this case, I'm gonna have you choose, uh, preserved details in large. And what you can do here. We change this A couple versions ago, I'm gonna go way bigger. I'm gonna go from 3000 which was already bigger to again. Let's put that right on there and click to see before and after. The benefit of this is that I have noise reduction and I have a fantastic up sampling in here. If you get a good quality capture, you get a 12 megapixel capture off of this or 24 megapixel capture off of this. No problem turning it into a 20 megapixel or 40 megapixel capture. The more data you have, the larger you can make it. If you use this way of doing it, you're gonna get fantastic results. You can combat the noise in there, and we do a really, really great job of making of introducing pixels in there. Now, if you're working from a postage stamp size and you want to go upto a billboard, it's not gonna work. It's only as good as the data. We could do a pretty good job with ah Web resolution image to a print resolution image. But if you've tried blow up or genuine fractals or any of those, the technology that we put in here was intended to give you all that power and more. I love plug ins. I love that the third party has so much cool stuff, but I think that being able to resize an image is something that photo shop should fundamentally be able to do. It's a little tricky to find where it is, but if you just go in there and choose preserved details, you have a great way of doing that. It could be a real lifesaver, especially if you have a black and white workflow where you're blowing stuff up.
Class Materials
Bonus Materials with Purchase
Ratings and Reviews
creativelive student
He is a great teacher, but I resent the confusion over the wonders of producing and sharing photos and videos with apps and mobile devices, vs. producing fine art or high quality specialized portrait or landscape or wildlife, etc. Standards have not gone down just because so many people have great access to producing good things. Great literature is still great literature, no matter how many people write good things. Same is true for the visual arts. Short cutting the methods that produce great work, including producing great black and white and great prints, doesn't produce greatness. I love his idea, I follow them, but that is no reason to negate the traditional greatness that still has no shortcuts.
JIll C.
Bryan lays out a comprehensive, yet efficient approach to converting images to black and white and included many examples in this course. It's more than just clicking the "black and white" buttons in Lightroom or Photoshop. I especially like the suggestion to make Presets of the various B&W conversions I've used so they can easily be applied during import. Bryan also covered very quickly various other very useful and fun Adobe products including Adobe Spark Post and Portfolio, and I even made a Spark Post during class and posted it to my facebook page. Lots of interesting content in this class, which I'm definitely going to watch again!
Margaret Lovell
I wanted to learn more about creating a black and white workflow. I'm just starting out, and so far, my attempts have been fine. I want to get better at it. Bryan's course made the whole process seem easy and didn't rely on cheap outs in creating them. I learned how to better use Lightroom when it comes to creating black and white photos.