Lessons
Lesson Info
Clipping Mask
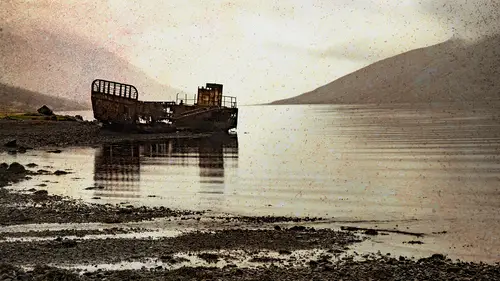
What I really want to do is clip or mask those top two layers, so they're Onley visible inside the black areas of the shape the cats to this is we have to remember that a clipping mask works. It has toe have transparency in order to work, so I would have to be on oval on a blank layer or a type on a blank layer Right now, if I go into a clipping mask, nothing's gonna happen. Because as far as force off concern, it's a big rectangle because it doesn't look at black and white. It looks at pixels, so because this whole layer is filled with pixels. If I try and make a clipping mask, nothing's gonna happen. I'm when I said, but nothing's gonna happen. I mean, it'll just look the same because it's clipping it with an entire rectangle, so there's no difference. Okay, so what I need to do somehow, he said knowingly on this layer is make certain areas transparent like, say, all the white areas transparent. So if you have tons of time on your hands, click on the Magic one tool and have fun for t...
he next four hours or use the blend of sliders with one little twist. That's the hidden trick that makes this work little tow. This layer I drag a bit. Oh, look, transparency, quick and easy, except for one little thing. And this is one of those Gutches in Photoshopped. That unfortunate makes people think I must have done something wrong because it didn't work. No, you haven't because remember, we look closely were seeing transparency. But look at that layer thumbnail as faras voters, often certain it's still filled with white. So it's still not a shape with transparency. It's fake transparency. And that's thing that, remember the blend of sliders is in order to be have that ongoing editing ability. It's not real transparency. So this is the second thing I'm gonna tell you today where, in order for this toe work, I have to potentially lose a bit of its editing ability. So the first thing I'd always try and hopefully will work is convert to a smart object. That will mean that now the transparency is real assed faras Photoshopped concern, but inside that smart object and still can you to edit it. And now, if I go to the layer above and choose create clipping mask. Have to actually have invisible. See how it's on Lee visible inside that one. Now the top one ignores that, because let's get a little closer here. See how this layer the bottom layer is the one doing the clipping. Here's the way you can always tell when you make clipping mask. The clipping layer in this case are shaped the name of the layers underlined and earlier it's being clipped. See how it's kind of indented that tells you that's the relationship. The indented layer is the clip e. That's not the real word that one below is the Clipper, which is not the real work, but that's the way to look at it. So the problem is this top layer. Now it has a mask on it. Let's turn that off for a second. So now you can see here's the problem is it's ignoring the clipping mask completely. Still looks kind of cool, actually, but it's ignoring. I want the top layer to be clipped by the bottom one as well. So, luckily I can do that. You just have to add it by saying I should actually say add two really, because that's what's happening. But that's just what it's called so nicely. How? See how both these layers air indented now they're both being affected by this same shape. So now we can start building on and saying, Well, now that I've got this overall shape, let's go back to the blend of sliders. Let's adjust camera raw settings again. All these things pile on top of each other, and this layer is still edible to a degree. Because I could, for example, look at and say, Well, maybe just needs to be free transform to be a little wider. So knows how I'm not transforming the photos. I'm transforming the shape, which is revealing or hiding mawr of those top players because of the nature of the way a clipping mass works. Okay, Is anyone getting terribly confused yet? No. Um, now, if when I back at the step where I took this layer, excuse me and made it a smart object, let me step backwards to the point of getting to that step. So blend if sliders. So again, we're seeing transparency. Hopefully most the time. The aspect of converting to this thing called a smart object will do the trick for you. But there may be a rare instance where it doesn't so the the hate call plain plan because it's much lower down the list and be if all else fails. This is what I would use. But I then lose the ability to edit the blend if slider. So if I'm 198% convinced that this is exactly why I want to look. I don't want to edit any further than what you can do is you add a blank layer below. I'm holding down the command or control key to add a layer below this. Then I take this layer and I emerge it down, which is again, words you will rarely hear me say in photo shop. But when you merge now, it's real transparency. But if you didn't, if you want to change the blend of sliders too late. But for now, just know that when you're have a smart object that preserves other details, you can still get you to edit. So in this simple example, as I'm experimenting just in this one thing I've got, let's at our clipping mass spec, and here you can also do it this way by optional clicking right on the layers panel. So now look at all the factors that I have to play with. I have the camera, smart objects, both of them I can edit. I've used a layer mask on the top layer, and it has blend if sliders the layer blow is being clipped by the shape. So this might at a certain point you might think, Wow, that looks pretty permanent, but really nothing about it. ISS other than the fact that in this particular example, I don't have the ability at the shape layer quite as much. That's not exactly true. Just so you know, let's look at this layer for one more second. So what's making the clipping mask? Work is not the fact that it's black. It's the fact that there's pixels there. So just to demonstrate that if I took my paintbrush and picked red just to make it obvious and I went like this, you mean like, why would you want to do that? Well, because he has got nothing. Do with the black fact. There's red now. Those pixels are visible when they weren't before, so if you're on this layer on you take your paintbrush and make it really big and say I need to show more of this area. Doesn't matter what color you have that's got nothing to do with it. It's pixels and transparency now, personally, that would drive me batty. I would make it black. It was like it just looks really weird, but it doesn't matter. That's the point, because I see people that are saying when you're making clipping mask, make sure your colors black, no nothing to do with it. It's pixels and transparency, and the transparency is the key part that traps most people is they bring in like I did initially. A scan on a white piece of paper and gold area. I have a shape. Actually, you don't. You have one flat layer without transparency. It's over the clipping mask toe work. There has to be transparency involved, but it could be, as we saw with the clipping mask with the type could be a type player. Cause type is on transparent. You take a shape tool on drawing oval, and it would be the same thing or whatever shape. But it has to have that transparency one way or another.
Class Materials
Bonus Materials with Purchase
Ratings and Reviews
Beatriz Stollnitz
Great class for anyone looking to blend a photo with a texture for a creative effect. Dave discusses Blend If, smart objects, Apply Image and many other techniques that enable us to get the most out of Photoshop when adding texture to photos.
Laura D
Loved this class. Dave covered exactly what I needed to know to add textures, including a multitude of ways to make the texture more or less subtle. I learned a lot. You do need some Photoshop background to understand all the content.