Creating and Editing with Color in Adobe Illustrator
Lesson 12 from: Adobe Illustrator CC for BeginnersBrian Wood
Creating and Editing with Color in Adobe Illustrator
Lesson 12 from: Adobe Illustrator CC for BeginnersBrian Wood
Lesson Info
12. Creating and Editing with Color in Adobe Illustrator
Lessons
What is Adobe Illustrator?
06:22 2Explore the Adobe Illustrator Interface
11:44 3Create and Save New Documents
07:03 4Zoom and Navigate in Adobe Illustrator
07:24 5Working with Artboards in Adobe Illustrator
18:09 6Introduction to Layers in Adobe Illustrator
18:52 7Rulers and Guides in Adobe Illustrator
09:04 8Shapes and Drawing in Adobe Illustrator
45:26Aligning and Combining Shapes in Adobe Illustrator
15:31 10Pen Tool in Adobe Illustrator
30:59 11Manipulating Stroke and Fill in Adobe Illustrator
14:38 12Creating and Editing with Color in Adobe Illustrator
17:35 13Painting with Gradients in Adobe Illustrator
10:35 14Getting Started with Patterns in Adobe Illustrator
08:10 15Adding Text To Your Document in Adobe Illustrator
08:44 16Formatting Text in Adobe Illustrator
11:34 17Strokes and Variable Strokes in Adobe Illustrator
16:56 18Rotating Objects in Adobe Illustrator
08:41 19Effects and the Appearance Panel in Adobe Illustrator
10:57 20Adding Photo Images in Adobe Illustrator
12:39 21Working with Linked Content in Adobe Illustrator
10:13 22Packaging your Project for Handoff in Adobe Illustrator
04:27 23Best Formats to Save Your Files
14:34Lesson Info
Creating and Editing with Color in Adobe Illustrator
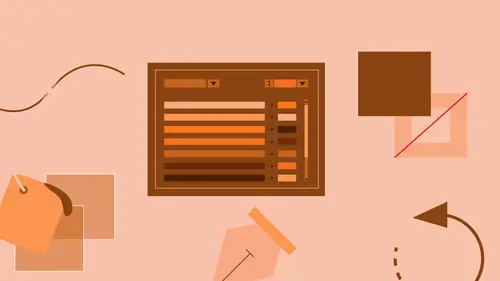
The other thing we can do with color, why don't you come right up here to the color, looks like a color palette, this is our color palette up here called the color panel. A lot of people gravitate toward this in the beginning because it's a way for you to make color. Swatch panel, you have colors created already, okay. The color panel you get in and you can just tear it up. You got this little grid, this thing here, the gamut bar and you can just go in and pick colors which is kinda neat. Now this thing is not really showing all of its options, so what I'd like you to do, we kinda did this once before, that little double arrow right there, just click on that maybe a couple times until you see the panel look something like this, okay? Now a lot of these panels over here actually have hidden options because they don't want to freak you out when you first get in here, all right? If you saw this, I dunno what you'd think but this allows you to go in and we can either pick a color visually,...
down here you can sample it, or you can come up here and mix the colors from the different user inks, and we'll talk a little bit about that. So there's a couple way to do this, now what I like to do is if you come down to the bottom of the panel here you're going to see a little gripper, grab that down, pull it down, click and drag and you can increase the color spectrum so you get a little more to look at, a few more shades of whatever you're looking for to be able to work with. The thing about color that we are... I have a print background and I always hammered, I'm never sampling color because what you see on screen is not what you're going to get when you print, right? It's just something to think about on the web we're a little bit closer to it but a lot of times when I work with color, I'm trying to work with values in different ways, let's say, and I'll explain that a little more as we go here. Now this document was actually set up as a print document. When you pick a document as a profile when we first started, remember that, we could pick print, web, and other, it tells Illustrator what kind of colors you can make. If you pick a print profile it's going to create CMYK colors. What does CMYK stand for? Cyan, magenta, yellow, black. And oddly enough, black, right, the K? Okay. Yeah so these are essentially printing inks and what we're trying to do is we're trying to make it look like what's it's going to print on a press. So you're taking these inks and you're kinda throwing them together and you're making a color, right? Now if we picked a web profile when we first started this we'd actually be working with RGB colors. So it'll completely switch what kinda color you're working with depending on what type of document you choose. What's really interesting about Illustrator is if somebody gives you a document, I get this all the time, somebody, my, she's probably, I'm going to shut up she's probably watching. I was about to tell a tale, but I won't. So when I work with certain people they'll hand me a document and it's all CMYK, like print colors, and we're going to the web which should be RGB so what you can do, you can actually come up to File. Why don't you do this with me? Come to File and when you first set up a document it picks what's called the color mode. You can switch the color mode here. So that means hey I'm doing print I want to be using RGB, I'm doing, sorry, I'm doing print I want to use CMYK. I'm doing web I'm gonna use RGB. If I'm doing on-screen presentation I'm doing RGB, okay? If I choose the different one, it's going to switch how these panels are gonna create color, it's going to switch to RGB for instance okay. Just something to think about as you work in here. All right, so we've got the different choices here now, another panel we can work with, we're not gonna touch right now, is called the color guide panel. Why don't you click on that one, color guide. This one's kind of a mystery to a lot of us, if you're a designer, how many of you are like designers? Okay, I'm not, I'll admit it, I'm the guy on the other side, okay? But if you take a look at this, this is actually a way for somebody to be able to get creative inspiration for color. So you can actually sample or grab a color from your artwork or one you make and you can say, if you look right here there's a little drop down menu, I can say, why don't you give me the complementary colors to that or the, you know, I don't even know what I'm talking about right now but triads or the this or... (chuckles) So different types of color is based on that initial color, okay? So it could be really cool for just trying to figure something out, you're trying to get working. I love this because I'll go in and I'll say, "Well, I love this color scheme that they picked for me "but it's a little too dark, a little too light," so I kinda go in here and work it. As you work, every time you pick something different it's just gonna kinda keep working that same color set. And what's great about this panel is you can actually just take the colors that it's going to save are right up here, just these five colors. There's a little button down here that says let's save my swatches, so you can save them all out really quick and kinda keep working so. Anyway, this is a great panel to go through to get color inspiration. We also have, and I know, color color is so much here but we also have what's called the color themes panel which is right here, now if you're in earlier versions of Illustrator this just switched in CC 2015, this was actually called Adobe Kuler. So that was a panel that was in here and this is. Anybody use Kuler? Adobe Color, sorry, it's now Adobe Color. Okay, it's pretty cool because you can go in and there are actually, the Adobe Capture app on your devices, you can use it to find color palette or something that you like color-wise, you can use your phone or your device to capture it, it'll pull the colors out of it. It'll save it up to a library and pull it right into Illustrator in designer Photoshop. So that's one of the ideas behind this color themes panel. You get to just capture the colors and immediately show them everywhere, which is great. I have a problem where I capture airport carpet color all the time, I have to stop, the library's like 6,000 things now, they're horrible, so, anyway. All right, so these are some of the ways we can go and make color so what we're gonna do is we're gonna go in and start to make some color, start to show you guys some of the right ways to do it including what's called global colors and work that way, okay? What I want you to do is we're going to come down here to the robot right down here. So I'm going to simply move down, use the art boards and move down, so we're going to use the hand tool to do it. So why don't you go ahead and select the hand tool. Click and drag, and just kinda move down. Like I said before, there's a lot of ways to navigate and move around, sometimes that's easier. Now we're going to go in and colorize some parts of the robot here using different methods, okay? I want you to select the robot body, if you wouldn't mind. That big rounded rectangle down here, so we need to have the selection tool selected. You know, I don't know how you feel about shortcuts for things, you don't have to love them, you don't have to use them, but early on I forced myself to use these two shortcuts. If you press the letter "V" you get to the black arrow. If you press the letter "A" you get to the white arrow. You're gonna be switching those a lot. I know if you're just learning, just starting, it can be a little daunting, but down the road, you can do that, so. All right, so let's go to the selection tool, the black one, go ahead and click on the shape down here. You can click inside of it, 'cause it's got a color fill. Now what we're going to do is we're going to go in and we're going to make ourselves just a color using the color panel, just kinda pick something, okay? So come up to the upper right, come up to the color panel, and click on the color panel icon. You're already showing what you need to show here, but we're going to go in and we're gonna mix our own color. So down here, we're gonna see the color spectrum. What I want you to do is let's pick some kind of color. We're gonna pick like a bluish color. So what you can do is you can actually click and drag, and just kinda move it around a little bit, to sample color. Or you can just click, it doesn't really matter. Now, is it filling up your shape with the color? How's that doing? No? Hm, I wonder what's going on here. Okay, so remember when I said before where this is something we have to watch out for all the time? I do this every day. You've gotta pick what you want to affect. You want to affect the fill or the stroke of the object. So make sure you click on the fill, which is that one right there, and then we can start to sample a color. Come down here, click and drag, or click and sample, and you can click as many times as you want. It's going to try to sample different colors. Of course, we're doing this visually, so it's, you know, what we get is what we get, but what it's doing is it's pulling from the color spectrum, it's putting the color values up there. Now if you look up here at CMYK, up at these values right here, these are all percentages out of 100. So basically if we say we want 100% of each ink, we're gonna pretty much get black, okay? So what we can do at this point is, we sample something, and we want to fine tune it, we can go to these little color sliders and just start to move them around, or you can, I know a lot of people, myself included, somebody else saying, "Hey, for this logo, we need to use this X color," and they'll give me the values, and you just type them in here, okay? Now the thing about these color sliders, that it took me, and this is really embarrassing, it took me about three years to figure this out, if you look at the slider itself, if you drag one, let's say I drag this slider right here, the overall color's going to be that purple. Does that make sense? Try it, I'm going to drag from here, to here, and it's now that purple color right there. That's embarrassing. I shouldn't have said that, but... So you can then go in and you can kind of adjust the colors if you want, because how am I going to know 10% more magenta is going to make it look like this? You know what I mean? So, the other thing that we can do here that I love, is if you, I get this all the time, people ask, "What if I have a color and I want to make "it lighter overall, or darker overall?" Everybody starts jamming with the sliders, and they're like, "Ah, if I just move each one a little bit, maybe it'll..." If you want to remember this, you can. This is a nice little tip, but if you're holding down the shift key, you can actually move them in conjunction together, and they actually go lighter overall, darker overall. It will not always work, because one of the sliders will be jammed against the end and you can't go any further, okay, but in this case it's letting me do it, so that's kinda neat, so that's kinda cool. That's not a tint, that's just how much of the color overall, more color or less color, okay? A tint is actually adding white to the mix. So we're making a color, that's great. Now it's listed right here, you can see it right there. There's a couple other things in here that I think are kinda interesting that I use all the time. These little boxes right here, if you want white or black, instead of fiddling around with the sliders of that, just pick white, black, I mean, it's right there. You'll also see that this is the last used color, which the next object you work on, it's going to be right there, which is kinda neat. Now what I'd like to do, I'm thinking the purple looks just special. I want to make the head of the robot the same color. So why don't you guys just click on the head of the robot, the head right up there, and if you look over there in the color panel, what we're going to do it, we're gonna just kinda pick the same color, okay? So why don't you go ahead and do that? I don't even remember what that was. Okay, this is the hard part. This is the part where you're like, "Okay, I made a color, "great, but I'm not thinking in the future. "I might want to reuse that color somewhere." So this is the point where instead of us trying to reinvent the wheel, we're going to take that color we just made, and save it, okay? If you ever think you're going to reuse a color, you want to save it again, so what I'd like you to do is click on the body again. There are other ways to get it there, but we'll use this. Come to the swatches panel. So I want you to come to swatches here. Now the swatches panel is where we're going to go, a lot of us will go, to create and edit color, that we save with this document forever, okay? If you want to save a color, the first thing you need to do is you need to select the object you want to save it from, which we do, we've got it selected. We then need to pick what color do we want to select, the stroke or the fill? We want to select the fill, okay? Make sure it's selected, so it's up front, and if you look down here, you're going to see to make a new color, there's a little button right down there that says, "New color." So go ahead and click on the new color button down there. It's like a little page icon. And that's gonna bring up this new swatch dialogue box. Let me pull this over here. There's some interesting things going on here. First of all, I... Name your swatch or not, I don't care. I mean it's up to you. What happens is, when you go over these with your pointer, these colors over here, these little swatches, it's going to show as a tool tip each color name. So sometimes it's important to name them, okay? For that tool tip. It's your call. Otherwise, it's going to put the values in the tool tip. If you look right here, color type, there are two types of color we can work with in here. There are process and spot colors. Now, you guys know spot colors? Like what a spot color is? Anyone want to tell me what a spot color is? I'm tired of talking. I don't wanna. (students laugh) I'm kidding. So, real quick, a process color is a color that usually, let's say you're printing with, that's made of other colors. On the device, so if you have a printer, like your desktop printer at home, you've got the four ink cartridges, or the one ink cartridge with all four of them in there, it's going to spit all those inks out there to make one red maybe, okay? That's called a process color, and it could be RGB, it could be CMYK, it doesn't matter. A spot color is a color that comes premixed. So I'm sure you guys have heard of Pantone PMS, that kind of thing? That's a company that actually does mix spot colors, and the idea is, you can actually go into their catalog, their catalog of colors, and you can say, "I want that green "right there for my company, so it's consistent every time." And they'll actually sell you a can of ink, okay? Premixed, ready to go. Thing is, you gotta get it on your printer somehow. That's where it might cost a little more money, or less, I don't know. But a spot color is one that's premixed technically, okay? So a lot of the stuff we're probably going to be doing for web, for onscreen presentation is probably going to be process colored. If you're doing print and you use Pantone colors, it's going to be spot color, but most of us are going to be doing process for now, it's fine. Leave it alone. All right, now, I'm going to do this. I'm not going to make you learn the hard way here. We're going to do it right away. There is an option here called "Global." You want to select it. Whenever you make a color, this is not default, but you need to make it your default, okay? So go ahead and turn it on. Go and select it. Every color that comes with Illustrator is not global. And what is a global color? I'm going to show you in just a second, okay? Global turned on. Color mode, you can choose different color modes if you really want to get crazy, grayscale, whatever. We're going to leave it at CMYK, that's fine. Same thing you saw out there, you can mix it up a little. You wanna change it, the color here. This down here, we gotta be careful with this, okay? I want to turn it off right now. This is on by default in the latest version of Illustrator, CC 2015. What this is going to do is it's going to automatically add the color to a library you have and freak you out. It's going to open a library panel and you're suddenly going to see the color appear, and you're gonna be like, "What did I just do?" So turn that off. I'll talk about that later, tomorrow, okay? And that's it. We got out color, go ahead and click "OK," and there it is. Now look at the colors in there. You're going to see that this new color has a little white corner, a little white triangle in the corner. That indicates a global color. Look at the other ones. None of them are global, okay? They still come with these colors that are not global, and here's what a global color is. And this is kind of surprising, but just watch me for a second. I'm going to go up and take this blue, and I'm going to fill different parts of the robot, okay? I'm just gonna fill the fill up there with with robot. Now, you figure that I just filled the parts of the robot with this blue right here, this thing. I can go over and edit that color right now. What happens if I edit that color? What do you think happens? It's only going to change the objects that are selected, which is crazy. So if I deselect everything, I come over here to edit a color, we're going to look at this in a minute, but to edit a color, I can double click a swatch, I can go in and say, "Hey, let's make it that." I can click "OK" and look at my color's not there. I would have to select every object that had the color applied to get it to work. A global color like we just created means, every color that has the color applied is going to automatically update. And in most cases that's what you want. Sometimes you don't want it, but in most cases we do. So let me back up here. I'm going to undo, undo, undo, and get my purple selected again, all right? So you guys have the swatch there. What I'd like to do, is we're going to go in now and we're gong to apply that fill to the robot head. So let's go select the robot head, and go ahead and apply the fill. Make sure you've got fill selected. You can do it up there in the control panel as well. Either way, and click on the fill swatch. There we go. All right, now, like I said, like I just showed you to edit a swatch that you have, you can just double click the swatch itself, so go ahead and double click on that swatch, right on it. That's not going to say, "New swatch," now it's going to say, "Swatch options," and we can go in and make a change, so let's go ahead and change this color up a little bit. I might make it like a darker blue, for instance. So keep looking at your sliders to see what you get, and you can change it up a little. It's a little bit challenging at first, but you can get it. And what's great about it too is you'll see right here, we have a preview selection, so you can select preview and it will show you what it's doing, which is great. Once you're done, go ahead and click "OK."
Class Materials
Bonus Materials with Purchase
Ratings and Reviews
Colleen
I've been trying to learn Illustrator on and off for years. This is the best instruction I've had! Brian is a great instructor. Finally feeling comfortable with it. It does use an older version but I just adapt.
Bill Neill
Great content and a good instructor. Not his fault the world marches on and doesn't stay in 2015. Any reasonably intelligent person will be able to figure out the changes since 2015 and how they relate to this course. It is early 2019, and I'm not having any trouble, but then I am reasonably intelligent and not to lazy to do some thinking.
a Creativelive Student
Pretty good so far but he's using a very different version of Illustrator and my currently updated version does not have the tool bars top and bottom for dealing with artboards.
Student Work
Related Classes
Adobe Illustrator