Basic Shapes, Touch Wheel, Contextual Menus
Lesson 4 from: Adobe Illustrator on the iPadJason Hoppe
Basic Shapes, Touch Wheel, Contextual Menus
Lesson 4 from: Adobe Illustrator on the iPadJason Hoppe
Lesson Info
4. Basic Shapes, Touch Wheel, Contextual Menus
Lessons
Introduction to Illustrator on the iPad
06:56 2Create a New Document and Setting Preferences
01:17 3Toolbar, Task Bar, Interface and Shortcuts
05:41 4Basic Shapes, Touch Wheel, Contextual Menus
12:01 5Guides, Grids and Smart Guides
03:53 6Direct Selection Tool, Path Features, Editing Points and Joining Lines
04:18 7Pen Tool, Pencil Tool, Blob Brush Tool, Eraser Tool
09:47 8Align and Distribute
05:25Lesson Info
Basic Shapes, Touch Wheel, Contextual Menus
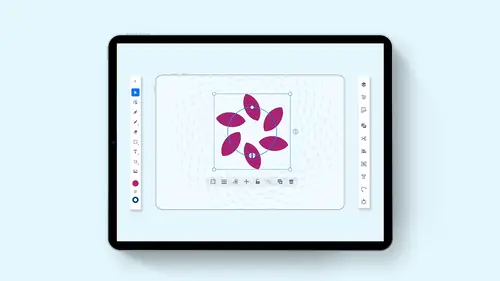
So let's get started here on just working with all the content that we have. Okay? Basic shapes. Super easy. Let me just back up here. We're going to start over with our basic shapes here, and we're going to see we've got our rectangle, ellipse, polygon and star. Let's just start with our basic rectangle. Click and drag with a rectangle on our document and a little tool hint showing us the width and the height. If I go in and I draw this and I let go, there's my shape right there. Okay, Great. Now, if I'd like to resize it, I could go and click on any one of my little dots. My poll handles here to resize the whole thing. This little lollipop that sticks out the top. I can click on this, and I can rotate my shape with this little anchor handle there. Now, if I'd like to undo something, I do have my undo arrow up at the top here and my read you arrow right here. But let's use some of those shortcuts. Okay? A two finger quick tap is an undue a three finger tap is a radio. Okay? You like t...
hat? Absolutely. It's a really cool feature. So when I draw my container here, I have my container and underneath. Bye. Object that I've drawn here is this contextual menu bar. What's going on here? First one is my opacity. Well, I don't have any color on here, but we will get to the opacity as we go through. Okay, but the first one is my opacity. Second is going to be the stroke. Wait. Okay, so I click on the stroke. Wait, Icon. And I scale this back and forth and I changed the stroke. Wait. Alright, pretty dynamic. Okay, great touch. Back on my shape. Get back to my contextual menu. This is gonna be my layer order. Bring the front. Send them back. I don't have anything layered yet, but that's how I would do it. Okay, I can also go in and move. But I'm working on here not having to stop and switch back over to my selection tool here, which I may or may not have gone back to you. Because when I select a tool, the tool usually stays active. So if I'd like to just move this around, I don't even have to worry about remembering to go back to the selection tool. I could just use this little plus right there that'll four headed arrow and move that all around. Nice feature. I can lock my object on the page. It comes up and shows that it's locked. Unlock it. You can see there's a lock in the upper left hand corner and simply touch it and it's unlocked. I could go ahead and Aiken Group or ungroomed things? That's my next little icon right there. I need more than two. I need two or more shapes in order to make this work. So let's create a second shape. The icon next to this is my plus, and this allows me to duplicate. The shape has duplicated duplicates right on top of itself. If I click and drag, you can now see I have two shapes right there. If I take my selection tool and I simply drag over and touch both those shapes, then you'll see that my group icon will become available. There's my group. There's Mayan Group. If I select one of these shapes here, click off, Click back on. So I get just one of the shapes and go to my layer order. This allows me to slide to the left to send it all the way to the back. Slide it to the right to bring it all the way to the front. If I have multiple objects, this will send it all the way to the back, dragging it to the left. This will bring it all the way to the front, sliding into the right click on my shape. Come back to my contextual menu. Trash can allows me to delete the object. Super simple. Okay, pretty nice. And this is gonna be the same for all of the shapes that I draw a circle. Right? Go over to the circle right here. And when I go in and I draw the circle, I get that as well. How do I constrain what I'm drawing? Okay, well, let's go over to buy guides right here. I'm gonna turn my snapping on and the snapping is going. Thio, allow me to use my smart guides. Smart guides are going thio. Be very helpful when I'm drawing, aligning or putting things together so that they'll snap together. So with my guides or my precision panel and my snapping turned on which is there by default. And so are the smart guys here. When I'm drawing my shape here, this allows me to see this line. When I'm drawing a circle showing me, I'm drawing a perfect circle. If I'm going through and I'm drawing a square and I'd like to have a perfect square, you'll see, I get that line from the upper left to lower right, constraining my shape. Well, what happens if I'd like to go in and I'd like to draw? Because I'm used to drawing holding down my shift key to constrain. Okay, well, my touch wheel allows me to do that. So if I take my circle or my square, I'm gonna grab my circle. And I would like to draw a perfect circle. Here we draw the circle. You can see if I could get some type of oval When I click on my touch wheel right here. You'll notice that when I click on the touch wheel center of the touch wheel is my shift key Shift constrains okay. Pretty awesome. Now when I'm drawing, you'll notice that when I'm drawing my shapes here, no matter what shape it is gonna click on this and I'm gonna draw a triangle right here. You'll notice when I click and drag. I'm always drawing from the left down to the right. Okay, so I'm drawing my shapes, triangle star, Whatever it may be, I'm drawing those shapes and I get those shapes. I'm gonna click on these and delete a couple of these so I get a little bit more room on my art board. What happens if I'd like to draw from the middle? So you'll notice when I click on a shape here and I draw a square right here? I'm drawing from where I click and where I pull. Okay. If I want to draw from the center, I'm gonna go to my touch wheel, click on it, and I'm going to go to the outer ring of the touch wheel, which is the option of the Ault. And then when I draw, you'll notice that I get a little tool hint at the top of my screen saying from the center, Yeah, that's what it does. So if I do the same thing with my circle and I go and click on the touch wheel pulled to the outer ring. That's my option. Or Ault. And that will allow me to draw from the center. That simple. Pretty cool. All right, so basic circle Basic square oval, whatever you'd like to have. Okay, moving it around because I have a tendency of going in and trying to move my circle or square around when I'm still in my circle or square drawing tool. So then I draw another one. So I have to get into the habit here of just using the great little move tool here in my contextual menu under here to move that around third shape that I have in here is gonna be my polygon tool. So the default is a triangle, but not a problem. Once I draw this triangle on the right hand side. You see, I have a little up or down arrow and I can slide this up or down and I can move. Make sure I select that again. I can slide this up or down and I can change the number of sides on that polygon active right there on the shape. Change it right. They're super cool. The star tool at this point, because this is version one. You get a star. Okay, that's it. You want more points in the star? Not yet, Folks. You get a five pointed, beautiful star. That's all you get. There's no modifications of the star right there. Okay, So why am I getting all of these shapes with this heavy border around the whole thing? Well, that's the last default that I went ahead and used. And we can go in and we can work with these shapes very easily. Go over your properties panel here when we've selected a shape. And here you can control the width and the height of your shape. The position on the page measured from the upper left corner of the art board. Okay, not page. Sorry. I can also go in, and I can rotate as well, and you'll notice because we don't have the ability to use a keyboard on here. When I click on any values, it calls up a little touch pad here, and this allows me to then use a little scroll wheel on the left hand side to manually scroll through any of my units here. In this case with the degrees of rotation. One thing that's kind of cool. Here is this little flick panning feature where you can just go in and you can just flick this little scale here to go ahead and just rotate it or make it larger, smaller however you want. Okay, you can also go in and just delete those numbers and say zero rotated back. Touch back on your screen and you're back to your selection. Here's where you can also go in and change the number of sides on your polygon. If you don't want to change it directly on here with a little up or down arrows right there changing the width and height here to again. You can change the width and the height of this by clicking on the value fields and changing those values with your little scrubby wheel right there. Pretty simple. We have our fill in our stroke here as well, so we could change our fill color or stroke color. We're gonna show you that once we get into our colors, if you want to have a slightly easier way of going in and just changing the colors very quickly and not have to call up your properties panel here by sliding this out. It does take up a fair amount of property on your IPad. Here, over here is our color. Pickers are color picker is here in the toolbar and this allows me to you simply click on the fill color. Once I've selected my object, I can slide my selector around the hue ring and then I could go with my saturation and brightness on. I can pick my hue and change the saturation and brightness of that color right there. The stroke is going to be the little ring right below this, and I can go in and I can change my stroke toe white black or turn off my stroke. Or I could go select a color and then go in and select that color of the stroke around my object picking and choosing what it is that I'd like to have to change the weight of the stroke again. Very easy to do dynamically. Go to the bottom on your object on the contextual menu here, and I can very easily ramp up the stroke right there. If I've got my stroke and my fil swapped. Not a problem. Go to the toolbar. Click on those little double ended arrows, and it swamps those right there. Nice and easy. So picking and choosing your colors is a pretty simple thing. Sure. You can do what? The properties panel here with your fill on your stroke. We will get to that. But it's a little bit more involved here. Still easy to dio. But this just makes it super nice to go in with your color picker. Pick and choose right there. Okay. Nice to have couple other shortcuts. That air really handy. You see here when we have our object selected, we have our contextual menu, and I showed you how to duplicate an object. It tells me it's duplicated and it duplicates right on top of itself. You wouldn't know that unless you knew to move your object out of the way. I'm gonna go back to this object here, and I'm gonna show you how to duplicate this Using the touch wheel. Remember, the center of the touch wheel is shift. The outer portion of the touch wheel is your option or your ault. And of course, when you option or all to click and drag something, you're going to be able to go in and duplicate that object. So whatever you're comfortable with whether you like to use the duplicate button and then move your object later or you'd like to simply select your object, use your touch wheel to come in and grab that and change your object. Here, make sure I was selected with my selection tool. Go back, grab my outer ring, which is my option royalty and duplicate it that way.
Ratings and Reviews
Raina Beutel
This course gave a great overview of the program tools and functions. Definitely a 101 level - best for someone with zero Illustrator experience, which is why I benefited so much from it. Thoroughly explained and perfect pace! Thank you very much! Looking forward to a future intermediate/advanced level class someday, to learn even more tricks and tips. :-)
Sara Chang
This is very helpful and exciting, thank you, Jason!
a Creativelive Student
Student Work
Related Classes
Adobe Illustrator