Lesson Info
11. Clipping Masks and Object Panel
Lessons
Introduction to Illustrator on the iPad
06:56 2Create a New Document and Setting Preferences
01:17 3Toolbar, Task Bar, Interface and Shortcuts
05:41 4Basic Shapes, Touch Wheel, Contextual Menus
12:01 5Guides, Grids and Smart Guides
03:53 6Direct Selection Tool, Path Features, Editing Points and Joining Lines
04:18 7Pen Tool, Pencil Tool, Blob Brush Tool, Eraser Tool
09:47 8Align and Distribute
05:25Lesson Info
Clipping Masks and Object Panel
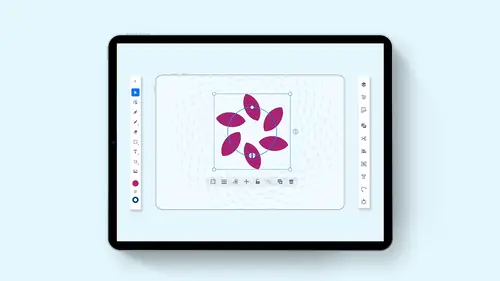
one more thing that I want to talk about here, because there's a couple other little things that go on in here that are kind of miscellaneous. But they're also super important, and that's going in here under the object menu. Now we've been able to go in, and we've been able tohave shapes here, single shapes here and under the object menu. We could go in and group those together, but we can also group Andan group right here at our contextual menu. But there's other things, too. So the expand feature is when we have multiple shapes put together like this. So if we have a couple shapes like this, put them together and we've gone in and we've used our Pathfinder and we've done something like this and we'd like to expand this so that we actually have both of these shapes or we want to go in and make this a compound path in the compound path is going to be when we put one shape over another like this. That's a compound path, and we didn't want to go in and we didn't want to go in and use AR ...
minus front feature. We could always go in and take our shapes here. We could make a compound path that way, which then allows me to go in and literally create what we call the doughnut feature. So that that will be creates a circle. So can a compound path isn't something that we do very often. But it's there if you need Thio. Other kind of features that may not be used all the time, but are super handy is going to be our clipping mask. Well, what's a clipping mask? Well, the clipping mask is very helpful. Say, I've got this shape right here, and I like this little fish scale, but I'd like to put it into this little fish shape. Well, I can't go in with my grid feature, and I can't mess with a bounding boxes of my grid, but I could certainly go in here, and I could create a fish shaped by taking a circle and drawing the circle here, going to my direct selection tool directly selecting this point, pulling that out, converting that anchor point there and giving this little fish shape right there. Okay. And then I could take this shape, go to my little touch. We'll go to my option or all section here. Rotate this all the way around. Of course. Hold my shift key down to constrain it, Make it a whole lot smaller and kind of get my little fish tail right here. Like so And like that Move that around kind of park. That right there is little teeny fish. Now, I'd like to add some scales into the main part of the body right here. Okay. So what I'm gonna do is I'm going thio take my body of my fish. I could group this altogether, but I'm just gonna take the body of the fish. I'm gonna put it over my fish scales right here. Think of this as when you're mounting a picture inside a frame. You put the frame on the front, and then you put your artwork in the back of the frame. So there's my frame, which is my little fish body. I'm a select both the fish body and my pattern that I created with my repeat. So the frame goes in front, artwork goes behind going to use my object menu. And now many create a clipping mask and it goes in and it creates a clipping mask. I lose my fill or my stroke of my frame. And then this clips it beautifully, too. That shape, if I double click, I get into and I isolate my grid pattern, which I could make larger or smaller, and then I could go back to and just simply select my shape and park it with this. And now it looks like I have a fish waffle. Okay, if I'd like to scale those up or down, I can always go in. And I could scale this smaller to get little fish, and then I could go in and I could expand my grid, go back, isolate one of those shapes. Then I'm just gonna change the line weight of that overall, affecting that that simple, pretty cool stuff. Okay, Now, one of the last ones we have here is the expand here, or the create stroke out of an outline. Well, some cases when we go in, say, we're using our pencil tool. We draw a line here, go back to my selection tool, and I change this right here. I may want to go in, and I may want to convert this into an actual rectangle and no longer have it be a stroke. Well, under the object menu here, I can go in and I can create a stroke out of the outline here. So now it becomes an actual shape, Okay, That I could then go in and I can edit the corners, and I can change that. It's no longer a line, but I can outline it. I could do that with anything that has a path. If I select a circle and I draw that circle switched to fill for the stroke, adjust the stroke. But now I'd like to change this stroke into a shape object menu. Great. The stroke. There you go. And now I've got that shape that I can then go in and I can change. And now it's become a shape and not just stroke. Just kind of cool. One other thing to convert to guide. So this is how we make guides on the page. We don't have rulers to pull down here, So what I'm gonna do is I'm going to use my pencil tool, and I'm gonna hold down the center wheel, which is going to give me the shift I'm gonna draw line, go over to my object menu. And with this line selected with the selection tool, I could go back in. I'm gonna say, Convert that to a guide. Okay. Turns into a guide. I can turn my guides island off here with my precision panel here where I can turn my guides on and off. But that's how I could make a guide, draw anything. Straight line, curved line, whatever. I want to turn that into a guide here. This is one of these things. It's a little bit more complicated to Dio, but I could take anything I do my little fish tail here. Go in. I can convert. Convert that to a guide. There you go and do that. So that's my object panel right there. Cool. I like it. Okay. So that pretty much takes care of our drawing, the shapes moving all around. But we haven't really talked about the properties panel yet. The properties panel is something that's quite interesting because we've got a lot going on inside the properties panel here. When we get to the appearance and we get to the stroke A Well, so what I wanna do is I want to talk about all the different things that weaken due to a stroke because we really haven't talked much about strokes. We've done all these shaped building and stuff like that. So I'm gonna go in here. And you know what? I'm going to save this file here, but how do I go in and save the file? Well, what you do is you click on the upper arrow and the left here, and it's just save the file, and it's brought it back to my home screen. Where did it save it? It saved it to your creative cloud account. Okay, if you're on the web, you can look this up in a Web browser. If you goto assets dot adobe com and you sign in using your creative cloud log in user name and password, then you could go in. You can see all these files you have files, you have creative cloud files and you can see these under all your creative cloud files, because that's where they're saving right here. Now, I didn't get to name this file right here, but I certainly could by going back to my home screen clicking on the three dots that air there on the right hand corner. I can rename Aiken duplicate this, and I can change the version. History. Do whatever I want. Okay, A lot of simple, a lot of things that I could dio if I click rename, I'm gonna go in. And I could go ahead and type this right in here, but I have no keyboard. You see, when I go when I do this, I get this little pop up in the lower left hand corner. I call up my keyboard. Okay, so I'm gonna go in and type in the name of my file here. There's my intro. IPad. It names it. It's done.
Ratings and Reviews
Raina Beutel
This course gave a great overview of the program tools and functions. Definitely a 101 level - best for someone with zero Illustrator experience, which is why I benefited so much from it. Thoroughly explained and perfect pace! Thank you very much! Looking forward to a future intermediate/advanced level class someday, to learn even more tricks and tips. :-)
Sara Chang
This is very helpful and exciting, thank you, Jason!
a Creativelive Student
Student Work
Related Classes
Adobe Illustrator