Lesson Info
13. Color and Gradients
Lessons
Introduction to Illustrator on the iPad
06:56 2Create a New Document and Setting Preferences
01:17 3Toolbar, Task Bar, Interface and Shortcuts
05:41 4Basic Shapes, Touch Wheel, Contextual Menus
12:01 5Guides, Grids and Smart Guides
03:53 6Direct Selection Tool, Path Features, Editing Points and Joining Lines
04:18 7Pen Tool, Pencil Tool, Blob Brush Tool, Eraser Tool
09:47 8Align and Distribute
05:25Lesson Info
Color and Gradients
So now on to color. How does color work on the IPad? Well, we've got our color picker got our color wheel. Are sliders things that you're used thio using illustrator on the desktop. And if you're new to illustrator on the IPad, you'll understand how well the color well actually works to be able to choose colors and Ahonen exactly on the colors that you want to use Now there's also ways that we can go in and pick up colors from existing artwork, and we're gonna show you how we can use capacity and blend modes to blend these colors together. Now, if you've used illustrator before and you have libraries of colors, you can also open up those libraries and bring them into illustrator on the IPad and use those colors in your creations. So let's see how this is done. So if we select an object here, we could go into our fill and stroke here just by clicking on Either are Phil or are stroke here at the bottom of our toolbar and up comes our color picker. We have solid colors, and we can also wo...
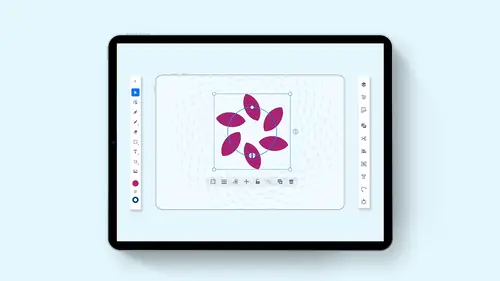
rk with greedy int. We're gonna stick with a solid colors right now. Get to the Grady int shortly. If you have your properties panel pulled up, you can also click on your fill here and then retract that and then go back in and get to your stroke right there. So you could do fill or stroke either one right here. I find this to be a little bit tricky because every time I do this, I click on something else, and I think I have to close this. So I keep clicking off this. So what you see right here, this color picker is exactly the same as the color picker over here. I just out of habit. Use this because you'll find that the properties panel does take up a fair amount of space on your IPad. Okay, so I'm gonna retract the properties panel here for now. I'm gonna do the color over here in my color picker Samos. The properties panel. It's just I'm used to this here so I can fill with white. I can fill with black. I can have no Phil right here, or I can use my eyedropper tool. And with the eyedropper tool, you can't just simply click on the object you're picking it up from. You have to grab this little focus wheel, which then gives you a little focus point, and you can then go in and you can touch and basically get the little crosshairs to pick up that exact color right there. So I like this feature takes a little bit of getting used to As I tried to do this. It's like, Why isn't it working? You gotta pull that little focus wheel and go over and land it right where you need to. It's nice because it zooms in really big, so you don't have to zoom in. You just simply drag that over. I like that feature. There it is picks the color that I have now. You can use the sliders as well. You don't need to. You use your hue or your saturation your brightness. One thing you have to set your hue ring and then you have to do your saturation and brightness. In many cases, your saturation will be all the way down here, so when you go around your hue ring, it doesn't look like anything's changing. Make sure you change both. Go and navigate your circle around your hue and then go do your saturation and brightness. You can also go in and slide your sliders. Here you can have different color modes by clicking on the three dots having C n y que grayscale hex code. If you're doing anything for the web hue, saturation and brightness sliders as well as RGB whatever you'd like to have, There you go. When you change the color sliders here, it will automatically close up your color wheel. Just use a little twirly to call that back up. Okay. You can also close this out so you don't take up much room. You can also have any of your colors here in your swatch panel. You can create one that you want from here and then create one there and just simply click the plus and it's gonna add it right there on your swatches. We do have access to all of the illustrator color books. So if you work with spot colors here or a certain color matching systems, they're here. Keep in mind that when you go in here, you then have to back out by clicking the back arrow to get back to your swatches. when it comes to libraries. We can't add things to a library from this version of the IPad. But if we have libraries, we can pull from them objects and color. So if I go in and I see these air all my different libraries that I've worked with here, I could go in and click on something here. And this is one of my libraries that I've done before. And I can pick these colors that I have right here, which is super nice again. Exit back out by clicking in the left arrow to get back to your swatches panel. Super nice. Easy to dio Love it. Okay, there it iss so super simple way to go through and work with color here. I like it. It's easy. It's intuitive. I found that I was able to get into it very quickly. So I like it. Switch your fill for your stroke here, which we've done several times during this video just by clicking on these two arrows right there. Of course, if you'd like to add a stroke two, you can and then grab that stroke color and change it if you want to like so there you have it. Okay, Awesome. Now I'm gonna go in, and I'm going to duplicate this shape right here. I'm gonna take the stroke off this. And now what I'd like to do is I'd like to have a little bit of fun with ingredients. So again, go back on your color wheel and switch from solid color here to the Grady int. And then we can have our Grady int our linear radio and then are free for ingredient here. When we go with our linear Grady int, you'll see we get our little handles here, and it's very simple. You click on one of the color stops here or here and simply change the color. Click on the color. Stop. Go over here, pick a different color. Activate that color stop. She was a different color. Right there. Want to add more color stops? Simple. Click anywhere on the line there at a new color stop. Don't click too many times. Make sure it's active. The color stop will become larger. Click on that and you can add that to it. Move those color stops around and you can also pull and change the angle of your Grady int ramp here longer short. These little bars in here are basically your fade for how fast or how slow those colors are gonna fade together or apart. You'll also notice that whenever you click on a color stop, we have the ability to remove it because we have a little trash can there we could just take that away like so. But we can also go in and control the opacity of our object as well. So if we click on one of our color stops, we can click on the opacity. Sliding to the left will go ahead and make that more transparent. So if we take this shape going back to my selection tool and put it over, you can see that that's now going to be transparent. Very simple. Okay, so there it is. Click on that click on the transparency and this is this is interesting because the slider doesn't go from 0 to 100%. Kind of like a little ratchet slider that you go down and it does section so you got to kind of ratchet it down and up and over. So how do you know what's what percentage you're actually yet. We'll give you the tool hint here, but pay attention over here with your little capacity slider right there. Okay, So as we're doing the opacity here, you'll notice that that color wheel is also sliding back and forth and giving us Ah, rapacity here. Okay, Different ways to go ahead and do that. So kind of cool. All right, so there's our linear Grady int There is our radial radiant where we can pull this in and out well as well. Cool, nice and easy. Now, the third one here, we have to go in and let's see what I have to dio have toe in group this. That's why my other Grady int wasn't showing up here my free for ingredient because I had it grouped together. So the free for ingredient here allows me to go in and add multiple points on my object going in picking different colors. And I can control these colors by simply clicking on that color stop and have mawr or less impact with this little radius ring around these colors so I can create a very dynamic and very interesting kind of shaded piece right here. Kind of like if I want to do a leaf. And that's all going into the color doing ingredient and clicking on the freeform Grady int here and just simply clicking, adding and moving these around and changing the highlights or the shadows or the interaction here and then get rid of him. I love that super cool. Okay, now, here's one other thing are blending. Modes are blending. Modes are super cool as well that are blending modes actually show up in our properties panel right here with our blend mode. I'm gonna show you why we would use a blend mode. I use them for doing a slip shadow. Grab my fire hydrant here. I'm gonna hold down my touch. We'll go to the outer ring. I'm gonna duplicate this right here. I'm gonna go over to my shape builder Pathfinder panel here. I'm gonna combine these all together into one shape like this to convert them all to a path so it just becomes one single shape. Okay, now, I'm gonna go on. I'm gonna grab my rectangle tool, and I'm gonna draw a rectangle over this whole thing and move it over so that I get kind of half this shape. Select both of those. Go to my Pathfinder or shaped builder panel. I'm gonna choose minus front. So I get half of this. I'm gonna convert it to a path. So I get just that shape. What I'm gonna do is I'm gonna do a slip shadow on the left hand side of my fire hydrant. So we take this shape and I'm gonna put it over here. And sometimes I have a little problem getting it to right where it needs to be. And that's because my smart guides may be turned on or my snapping maybe turned on. It's actually not my smart guides, my snapping, And it wants to snap the other locations here or other areas of this. So I turn off my snapping here so I could get that right in there beautifully. Okay, I could turn my snapping back on and retract that back in. Now, what I'd like to do is go into my properties panel here, and it can control the opacity of this. But you see, when I control the opacity, it just kind of makes it look pink and just doesn't look good. But I wanted to be darker That's where my blend modes come in Super easy. The blend modes that I use here are very simple. If I'd like to make something darker, I choose multiply If I'd like to make something lighter I choose screen So this is a great way to go in and dio a wonderful slip shadow on something And, you know, for whatever you want to dio I'm gonna do this again here just to show you again how I would do that. I'm a duplicate my leaf And then I'm going to go in and just put a box over the top of this here, and I'm actually gonna go Just take off the stroke so I can see just my box and make sure I get this. Now, you know what would be nice if I know exactly where that iss Okay, I'm gonna go into outline mode. Upper right hand corner. You get a little box of the eyeball now, we could go into outline mode here. So, in an outline mode, I can line things up perfectly. So here, if I want to get this box so it's lined up perfectly and I'm not trying to fight with a stroke or the fill or anything. I can do my outline on my preview mode. That's going to save me a lot of hassle. Select these two shapes. Go to my shape builder, Pathfinder here. I'm gonna do the minus front right there. Reveal this completely. Gonna convert this to a path right there. And there's my shape right there. Go back to my preview mode. Remove the stroke. Right. They're gonna put this over this whole thing right here to kind of get my shape in there. I'm gonna use my multiply mode. Kind of darken that up. Look at that. Very nice. Kind of creates that nice little slip shadow right there. So that's my color. That's my Grady INTs my opacity as well as my blend modes here. And I have to go to a couple different places. I could do a lot of this stuff with my properties panel with my fill in my stroke of these objects here. I just like the overall easiness of going in to my color picker on the side here, but the blending modes, I have to go through the properties panel in order to go ahead and do so pretty awesome. One more thing before we get out of this and jump in the text if I am going in and I'm drawing a shape right here, you know, there's sometimes when I just want to go in and I want to pick up the attributes of some other shape. But you know what? The one thing we don't have is we don't have an eyedropper tool here in our toolbar. So what do we dio? Well, we do have the similar qualities of an eyedropper tool. But what we actually have here is we're gonna go into our little scissor, which is our edit right here. And I'm gonna go in. I'm just gonna select, like, the red of my fire hydrant. And I'm gonna select my little scissors here, and I'm gonna copy the appearance of this. Now I'm gonna select my other shape, and I'm gonna go in, and I'm going to wait a second here. I accidentally clicked and drew another shape. There we go. Make sure I select that shape. There we go. Now I'm gonna go with in Sorry, I've got a copy. The appearance here. Select my new shape right there. And I'm going to then paste my appearance onto here and ask me fill stroke, color shirt
Ratings and Reviews
Raina Beutel
This course gave a great overview of the program tools and functions. Definitely a 101 level - best for someone with zero Illustrator experience, which is why I benefited so much from it. Thoroughly explained and perfect pace! Thank you very much! Looking forward to a future intermediate/advanced level class someday, to learn even more tricks and tips. :-)
Sara Chang
This is very helpful and exciting, thank you, Jason!
a Creativelive Student
Student Work
Related Classes
Adobe Illustrator