Lesson Info
5. Guides, Grids and Smart Guides
Lessons
Introduction to Illustrator on the iPad
06:56 2Create a New Document and Setting Preferences
01:17 3Toolbar, Task Bar, Interface and Shortcuts
05:41 4Basic Shapes, Touch Wheel, Contextual Menus
12:01 5Guides, Grids and Smart Guides
03:53 6Direct Selection Tool, Path Features, Editing Points and Joining Lines
04:18 7Pen Tool, Pencil Tool, Blob Brush Tool, Eraser Tool
09:47 8Align and Distribute
05:25Lesson Info
Guides, Grids and Smart Guides
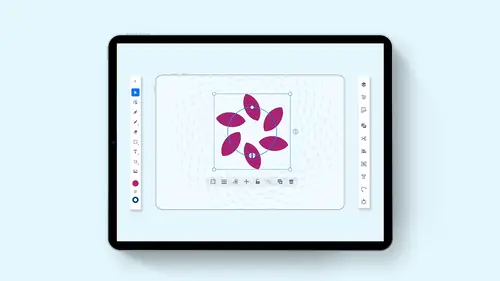
the one thing that's missing from this whole thing. The line. Where's our line tool? What's going on with our line tool? What? We're going to show you that because it's actually part of the pencil tool. Okay, so right now there is no specific line tool that you may be used to an illustrator. Okay, but it's part of the pen tool, so we're gonna get to that here. Now we're gonna jump down Thio. Our grids are guides and are smart guides here. Now, over here. We had our precision panel where we can turn on, are snapping here and are smart guides by default. What does that actually dio? But when we select a shape that allows us to see these guides that show up when we dragon object. So in this case, the center of the object I'm dragging is aligning to the object up above, or the edges or the centers or bottom left, right and snapping to each other. Those air smart guides. Okay, you can turn off your smart guides and then just move these all around so you don't get those But the smart guides ...
air Nice to be able to go in and very quickly Select your objects, line them up with each other. Top bottom, middle right center whatever you want and keep those all together very easily. Smart guides will also allow us to go through. And space are objects very nicely together here. So we've got the same spacing, too. Quite nice. If you're used to working on a grid, you can also turn your grid on here. By turning on the little grid button, you can change the color of your grid lines and the way you see your grid with just your solid lines or all your divisions subdivisions. In here, you can control your spacing and the number of subdivisions here with that, and change your grid structure. You can also turn on your snap to grid, so if you're drawing shapes and you want to snap to the grid to make sure it's going to be perfect, then you could go in, snap everything to the grid and be able to draw your icons, your alignment, whatever it may be by using the snap to grid feature nice and handy. Turn off the snap to grid right there and you can turn off your grid and then turn off your snap to grid Right there. Beautiful. Okay, so there's our grids. Where's our guides? Where is our guy? We have no rulers on here. So how do we get a guide? Well, interestingly enough, we can take any shape, any line that we draw, and we can actually turn these things into a guide. And we're going to show you how to convert these shapes into a guide here once we get down to our object menu here. So a little bit of patients and we'll get to it, All right, But we're gonna show you some of the other tools in here as we go. All right, so we've been working with our basic shapes here. I'm gonna grab these shapes again. I'm gonna kind of move these together, and I congratulate all of them together with my selection tool and move them all around. If I'd like to group these altogether. My contextual menu allows me to group in right there. That way, when I scale these things, Aiken, scale them all together. Do I want to constrain them? Okay. Go to my touch wheel. The center you notice is going to be constrained because that's my shift key right there. Shift constrains right there. Let go with a touch wheel and now I can move these all around. How do I get in and edit one of these shapes without having toe on group Simple. Simply select your group and double click on that shape that's gonna isolate the shape. You can move it around, you can change it. You can do whatever you want to with this shape. When you're done, click back onto the art board and then click back onto your object. And these things were all grouped together. So double click on an object is gonna isolate that change. Whatever attributes that you'd like to it, move it all around freely and independently. Click off it, You're all good.
Ratings and Reviews
Raina Beutel
This course gave a great overview of the program tools and functions. Definitely a 101 level - best for someone with zero Illustrator experience, which is why I benefited so much from it. Thoroughly explained and perfect pace! Thank you very much! Looking forward to a future intermediate/advanced level class someday, to learn even more tricks and tips. :-)
Sara Chang
This is very helpful and exciting, thank you, Jason!
a Creativelive Student
Student Work
Related Classes
Adobe Illustrator