Pen Tool, Pencil Tool, Blob Brush Tool, Eraser Tool
Lesson 7 from: Adobe Illustrator on the iPadJason Hoppe
Pen Tool, Pencil Tool, Blob Brush Tool, Eraser Tool
Lesson 7 from: Adobe Illustrator on the iPadJason Hoppe
Lesson Info
7. Pen Tool, Pencil Tool, Blob Brush Tool, Eraser Tool
Lessons
Introduction to Illustrator on the iPad
06:56 2Create a New Document and Setting Preferences
01:17 3Toolbar, Task Bar, Interface and Shortcuts
05:41 4Basic Shapes, Touch Wheel, Contextual Menus
12:01 5Guides, Grids and Smart Guides
03:53 6Direct Selection Tool, Path Features, Editing Points and Joining Lines
04:18 7Pen Tool, Pencil Tool, Blob Brush Tool, Eraser Tool
09:47 8Align and Distribute
05:25Lesson Info
Pen Tool, Pencil Tool, Blob Brush Tool, Eraser Tool
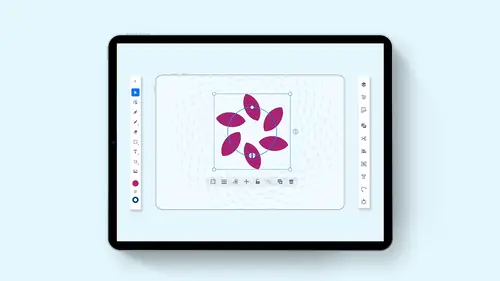
Now, what I'd like to dio is I'd like to get into the pen tool, and the pen tool here works very much like the pen tool does on the desktop version. But there are a few changes. Okay, I'm gonna go in with my pen tool here, and I'm gonna click and poll create a nice kind of arc here by clicking and pulling and keeping those handles level. So I go through and I'm gonna go back in. I'm gonna close this path there. It's so there is my rough circle right there. Okay, Now, if I go back to my direct selection tool, I can click on those points, and I can change those points. And I can also work the handles to and you'll notice the handles are going thio. Allow me to pull the handles longer, shorter, but they always give me a smooth point. So when I push up or down or left or right, it's always going to give me a smooth point if I go to my pen tool here and I click on one of those that's gonna activate that point, and then I can move those handles all around, but if I want to go in and I want t...
o break that handle, I could go and touch my touch wheel here and with my pen tool, I can click. And I couldn't do what they call this a break tangent. And this is basically a change of direction of the handles. Okay, so let's undo that here so you can see how that works. Alright. So I'm gonna take these back here. There they are. All right, So there's my handle. I'm gonna grab the pen tool, and I can move this all around, move the handles, but to break the handles so they go a different direction and they don't stay on the same plane. I'm gonna hold down the center portion of my touch wheel, and then I'm going to break those handles or break the tangent and change the direction right there. Cool. Another absolutely awesome feature is this. When I have my pen tool active and I've got a shape you can see, I can click, and I can pull those anchor points. But a new thing is Now when you grab an anchor point with your pen tool and you go to your touch wheel, touch the center and pull out to the side. This is your option of your ault and now very unique and cool feature. This allows you to drag that anchor point along that shape without really changing the shape a whole lot. That's new. I mean, that's not something we've ever been able to dio, which is really cool. So instead of going in and using the pen tool and putting another anchor point in there, this allows us to move that point along the curve. That's awesome. Totally new feature. I love it right there. We go back to our direct selection tool. Of course, we could go in and we can select an anchor point and we could go ahead and we could just delete that delete sections of our shape if we'd like that, too, and then if you'd like to join those open ones together, we can join those as well. So a lot of the similar qualities here, but definitely some unique features with that which I love now. Next one down is our pencil tool, and that is nested with our blob brush. And let's show you the pencil tool, so the pencil tool is very much our freeform drawing tool. Here's my pencil tool Could go in and draw some really nice free form shapes. How do we control how the pencil tool works? Well, once we select the pencil tool, you'll notice that the bottom of the toolbar we get this little squiggly line. These are our preferences. So we have a little slider that goes from smoothing from 0 to 10. What does that actually mean? Well, the smoothing doesn't actually smooth. Once you've drawn your shape, you're setting the preference for the tool for when you draw the next shape. Let's go back to my selection tool, and I'm gonna touch this and just get rid of this. So I'm gonna get more space to work on my objects. Let me go to my pencil tool. And here I'm going to set the smoothing to 10. Okay, when I set this smoothing to 10 and this is kind of the correlation doesn't really jive with me. 10 means you're going to get a very accurate rendering of your movements. Smoothing of zero means it's going to smooth it out very nicely. Seems to be counterintuitive to me, but that's the way it is. So with my smoothing of 10, if I go through here and I go back and forth, you're going to see that I could get a really jagged line. Okay, If we go back to my selection tool and delete this when I go to my pencil tool then and I select my smoothing of zero on, I do the same thing. You'll see that I can get a very smooth line, different dynamic way that you could go in and you can change this again. You set the preference for the tool. You don't smooth the line afterwards. So there it iss Okay, make sure you go back to your selection tool. So you get very different qualities out of your pencil tools right there. Very cool. How do you draw a straight line? Will you grab your pencil tool? Go to your touch wheel, click on the middle, which is gonna be your shift and just draw a straight line and you can draw vertical horizontal or at a 45 degree angle very quickly with that. Or if you don't want to draw at any of those, What you could do is you can just go in with your pencil tool. And when you draw, you can see if you just draw without that, you're gonna get a free form. Thank, but what makes this really nice is that once you draw the line here, I'm gonna undo this. I'm gonna go back to my selection tool, and I Congrats. This and I can very easily control the length of the line just by grabbing on this and grabbing the end of the line here, I can rotate this and I can control the length of line very easy once I go in and I create the line. So I like that feature. Okay, just pull on any of the corners here of your little bounding box, and you can pull the length here, or you could just make it wider or narrower. So there it is. Super easy to dio. Of course, if you'd like to duplicate a line, you can just select the line and then with this line selected, go to your touch. We'll go to the outer ring, which is your option, or Ault and go in and just simply duplicate it. So we do have a straight line function, and that is going to be the pencil tool right there. Hold down your shift to the center portion of the ring. Draw yourself a straight line. Don't hold down shift. Then you'll be able to draw the freeform line here. Very nice sketchily quality that you can have with this as well. But that's just the pencil tool. Giving us the same width when we draw nested with the pencil tool is gonna be our blob brush. I think it's an unfortunate name because the blob doesn't sound. Sounds like you're just gonna create blobs, but it isn't Your blob brush is going to allow us to do round or flat or chisel or terminal, which is basically going to give us different ways, like a kala graphic brush. So here's what we have. Let's do our basic chisel. Now when I come in here, you'll see that I get that basic chisel of a brush, and it, too, has the smoothing feature. So if I set the smoothing 20 I'm going to get a much smoother, much more flowing effect. If I set that smoothing to 10 and I really get some sharp angles, I'm gonna get the very sharp angles. Now, how do you control the size of the brush? Let me undo that by doing my double tap several times the size of this blob brushes here in the bottom of my toolbar. You'll see I've got my size. I've got my smoothing and I've got my properties or my brush settings. If I click on the size here, I can dynamically control how big or how small that blob brushes I can control, how spiky or how accurate or how smooth that's going to be. One is gonna be very smooth. 10 is gonna be very accurate. I can also click on my brush settings here, and I can change the roundness overall so I could go kind of flat. And I can also change the angle of the chisel as well. Now with the apple pencil to you can change the pressure dynamics. So what does this do? While the pressure dynamics allows you to go in with your settings Here, click over here and I'm just gonna very lightly touch with my pen and I'm gonna push harder. The harder I push the mawr I'm going to get now. This could be really wonderful if you're going in and you're doing some very nice sketch, early quality things where you're going in and you kind of like to add some dots or add some pressure. Now, the pressure sensitivity of the apple pencil to really comes into play here. From what I understand, the apple pencil one doesn't have that pressure sensitivity. So if you like to do the schedule equalities and you like that pressure sensitivity apple pencil to is definitely what you want to have gonna go back to my selection tool, grab everything and delete it from that contextual menu. Cool stuff. Now we can also work with our eraser tool. Just gonna draw container here, E think I'm just gonna switch the fill for the stroke by using my little flip buttons here, going to go on them to change the diameter or the thickness of the stroke there with my contextual menu with your eraser tool again, the eraser tool, just like the blob brush, allows you to click down here in your toolbar, control the size of them, control the smoothest to be very smooth or very accurate as well. A settings here, whether you want a round or a chisel or an angle for your brush? It too has pressure dynamics that allow you to go in and set the pressure right here So I can continue making this a totally round brush with the pressure. And then when I come in here, I can simply erase nice thing with your race or tool is that whatever you erase, it will simply go ahead and he'll So that could be kind of cool again. To Finger tap is gonna undo. So I could come through here, basically erase everything just like that, and I can control the size of my eraser as well. So if I want a larger space in there very easily, just go in, pass over that, divide them beautifully, Nice and simple, yet very effective. I like it. I like it a lot on a scale that down a little bit because you never know when that may become nice and useful.
Ratings and Reviews
Raina Beutel
This course gave a great overview of the program tools and functions. Definitely a 101 level - best for someone with zero Illustrator experience, which is why I benefited so much from it. Thoroughly explained and perfect pace! Thank you very much! Looking forward to a future intermediate/advanced level class someday, to learn even more tricks and tips. :-)
Sara Chang
This is very helpful and exciting, thank you, Jason!
a Creativelive Student
Student Work
Related Classes
Adobe Illustrator