Lesson Info
3. Toolbar, Task Bar, Interface and Shortcuts
Lessons
Introduction to Illustrator on the iPad
06:56 2Create a New Document and Setting Preferences
01:17 3Toolbar, Task Bar, Interface and Shortcuts
05:41 4Basic Shapes, Touch Wheel, Contextual Menus
12:01 5Guides, Grids and Smart Guides
03:53 6Direct Selection Tool, Path Features, Editing Points and Joining Lines
04:18 7Pen Tool, Pencil Tool, Blob Brush Tool, Eraser Tool
09:47 8Align and Distribute
05:25Lesson Info
Toolbar, Task Bar, Interface and Shortcuts
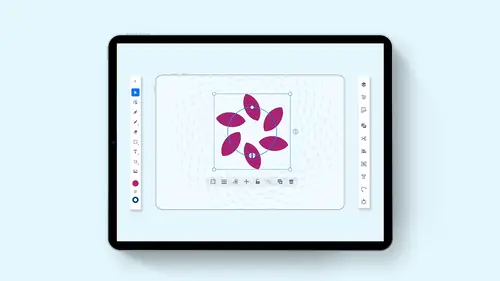
So let's take a look at what we have in terms of the interface. Right here we have our tool bar on the left hand side. Quick, run through of these tools. We're gonna cover all of them in this video, so we have our selection tool. Okay. We also have our direct selection tool which allows to edit our points and the anchor points. We have our pen tool. We also have our pencil tool and nested in the pencil tool is the blob brush. I know. Weird name for a brush. It doesn't just make blobs, folks. It actually does Cool stuff. Our eraser tool, our basic shape drawing tools here, which is going to consist of our rectangle. Our lips are try our polygon and our star, our type tools, our art board tool and our import function here. And then we also have our color picker here for our fill and our stroke of our objects. So that's the basic toolbar, right? Coming over to the right hand side. Here we have our task bar, and this is going to include our layers is gonna be our properties panel and let m...
e go ahead and just put something on the screen real quick, so these task bars when they fly out here, actually show something. So there's our layers. There's our properties panel. This is our precision, which is where we can do our snap to on our grid and are smart guides. We also have a very nice combined shape, which takes the shape, builder tool as well as the Pathfinder panel and puts these all together we have our edit panel, which is where we can copy and paste appearances. And we also have our aligned distribute and flip section going here. We have our object menu where we can expand Group One group, make clipping masks, make compound maths, outline shapes and also convert to guides. We have our basic type panel type on a path outline the type as well. We have our path panel, which is where we can go in and cut and convert anger points and do smart delete, join paths and simplify them. And then the ever so awesome, super cool repeat panel, which is going to be an absolutely awesome feature when we get to it. Okay, so simple stuff up here at the top of our document is our undo and our redo arrows. We also have our export save and publish button, which will get to at the end of this video. We also have our info panel. Now, this little information thing is really good to have, because when you're starting illustrator for the IPad here, there are things that just don't mesh with the desktop. There is no mouse. There is no keyboard. So let's just take a quick look at how this is gonna work on the IPad. So when I go in and view the gestures here because this is touch sensitive, let's take a look at this and see how this works. Okay, so here is what we have. A two finger tap is gonna undo what we've done. Cool. Ah, three finger tap is going to read Dio, and that's literally just taking your fingers here. Okay? And you can see on my screen these little blue dots that show up This is just two of my fingers right there editing endpoints. You can go in and simply tap. You can scrub back and forth with the values you can change your toolbar. You can show more options when you click and hold on a nested set of tools we consume and we can fit right here. We're gonna show you all of the's. Okay, let's go back to this little info panel here if you touch shortcuts. Well, one of the things with the touch shortcuts here is we have this touch wheel in the lower left hand corner and there is an inner and an outer ring of this touch wheel close out of this and I'm just going to show you the touch real really quick. It's this right here, so the touch wheel basically looks like this round dot that's sitting there on the lower left hand corner. When you click on this, you see, you get to rings. I click on the center ring and then I move my finger or the stylist to the outside ring. What does this do? We're going under and looking at this right here under our info section. Here. Let's view our touch shortcuts. Here's our inner ring, which is what they're calling the primary ring and then their secondary ring here. So when you want to move or select or do these things, here's what you do with this little wheel. Well, this is a little bit difficult to understand if you can't correlate it with something that you use now. So here's an easier way to understand this. Okay, if you're used to using illustrator and used to using a mouse and a keyboard, this center ring is this shift key. All right, This outer ring, when you click and pull to the outer ring is gonna be your option on a Mac or Altana PC. That's really handy toe have. Okay, so shift is the center ring alters the outer ring, and we're gonna be using this ring this touch wheel a lot in here for constraining, for drawing from moving for duplicating. So that's what I'm gonna be talking about. So here there, refer to these shortcuts here as the primary being the center. That's your shift key, your outer one being your secondary. And that's gonna be your option or your ault key when you're using illustrator on the desktop. If you've never used illustrator before, then this probably won't make as much sense. But if you have used illustrator before, I'm sure this is gonna make a lot of sense. Okay,
Ratings and Reviews
Raina Beutel
This course gave a great overview of the program tools and functions. Definitely a 101 level - best for someone with zero Illustrator experience, which is why I benefited so much from it. Thoroughly explained and perfect pace! Thank you very much! Looking forward to a future intermediate/advanced level class someday, to learn even more tricks and tips. :-)
Sara Chang
This is very helpful and exciting, thank you, Jason!
a Creativelive Student
Student Work
Related Classes
Adobe Illustrator