Lessons
Class Introduction
01:51 2Document Set-Up
15:39 3Panels
11:46 4Toolbox
08:22 5The Adobe® Workspace
05:17 6Shortcuts
05:33 7Saving Files
05:37 8Guides
12:42Text Frames
08:13 10Shapes, Fill and Stoke
07:43 11Arranging and Modifying Shapes
08:31 12The Pen Tool: Drawing, Stroke and Fill
06:52 13The Pen Tool: Handles and Anchor Points
08:27 14Pencil, Smooth and Erase Tools
05:46 15Strokes and Arrows
13:33 16Importing Shapes from Adobe® Illustrator®
08:57 17Placing Graphics
08:05 18Placing PDFs
04:22 19Placing Multiple Files
06:14 20Frames: Fitting and Manipulating
07:28 21Specialty Frames
05:52 22The Links Panel
21:34 23High Quality Display
06:48 24Clipping Paths
13:08 25Transparency
09:41 26The Gap Tool
03:55 27Color & Swatches Panels Basics
16:38 28Eyedropper Tool
10:03 29Gradient Swatches
05:31 30Character Panel
23:38 31Paragraph Panel
15:09 32Spelling & Autocorrect
06:42 33Text Frame Options
08:10 34Printing and Exporting
16:16Lesson Info
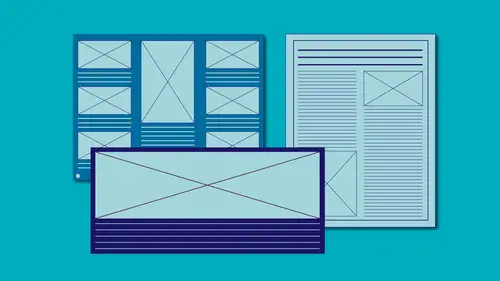
The Links Panel
I have just a simple graphic here. This is from the front page of the annual report that we have in the other file. But what's a little different about this is that I have layers that I have created in Photoshop inside this document. I'm not gonna really open it 'cause all I can do is just look at the different layers that I put in there, but the great thing is, is when I bring it into InDesign, or even after I've brought it in and placed it, I can access those layers. Whether they're illustrator layers or, I'm sorry, pdf layers or Photoshop layers, I can access those on import or when I bring them in. So I'm actually going to delete this really quick 'cause we're going to bring them back in and see that we can work with it when we bring in this particular graphic. So I'm gonna do place like we've been doing, command or control 'd' to hit place. And then I'm going to choose this tray that I happen to know is the layered one, and I also wanna show my import options because this is a tim...
e where I do have options on import that I can choose. So I'm gonna say okay to that. And now, normally, what we see is image and color, but because I have layers in this particular Photoshop document, I have an extra tab here available to me. And if I look at the layers, I can see these are the different layers that I've created in Photoshop. And the only one currently turned on is the background layer. So these are ones that I have been Photoshopped, but I can turn them on and off right here when I import them. And by having the show preview on, I can see what those different options look like. So I can turn on some of these, let's actually turn on, I know I have one where I have the logo up in the title here. And I turn that layer on, turn the visibility layer on here and now I can see it in my preview. So maybe I want to change it to black and white. So it's black and white, but the name is still in color. Or maybe, I'm gonna do some funky little effects that I have applied in Photoshop. So I can turn on the different layers here on import. So I'm gonna go ahead and say, before I say okay, I'm gonna tell it what to do when I update the link. So an earlier section, we talked about links, and I'm gonna go into the links panel a little bit more in this section, but in the links panel, it remembered what version, or what state it was in when I imported it. So I have two different options when I update that link. If something should change in that document, what do I want to have happen inside the InDesign document with the layers? Do I want to keep the layer visibility overrides, which means, no matter which layers I turn on and off in my Photoshop document, what does it look like in InDesign? Well, in this case, if I chose which layers I want turned on, I might wanna keep those layers, those specific ones turned on, even if I hadn't turned them off in my Photoshop document. Or I could say use Photoshop's layer visibility, which means whatever state it's in when I hit save in Photoshop, those are the layers that will turn on or off when I bring them into InDesign. So, in this case, I'm gonna say keep layer visibility overrides, and say okay. And so, now, when I place that document, I've got the name that's there. That's the layer that I turned on, the name layer, and the base layer that's there. But I can do that after the fact, so even if I've brought it in, and I realized, oh, I don't really want the name there. Or maybe I want three or four different versions in the same document. I wanna show the client different options that we have, and I only want to deal with one Photoshop file. This is a great reason to use this. So I can place this four times and then choose the different layer options on each individual photo. So, in this case, I'm gonna select this item, gonna go up to the object menu, and come down to object layer options, and, basically, this looks exactly like the document we just saw, or the dialog box we just saw, on import. Same choices, it's just now I can do it after the fact. So I can turn off the name and let's decide we want to turn on just sort of this green wash. I'm gonna turn on previous, so we can see what's happening. The emerald wash didn't really show up much. A little bit. Let's do invert. We'll actually just flip it, so we get the actual inverse of the colors there. That's definitely a difference. So to turn that on, and again, my same options about what to do with updating the link. So I can say okay to that. So you can see where you had, if you had this in the same document, or have it three or four times, you've only really created one document, so I don't have to maintain separate documents. I can have it once and turn layers on and off instead of saving out each of those in my Photoshop file. The other thing I can do is I can choose layer comp options. If you have a layer comp setup in Photoshop, and what that is, is turned, series of your layers turned on or off, and then you save it. So, for instance, I might have one that is set to this posterize effect with the name applied to it. I might have one that's black and white with the name and with something else, some other layer applied to it. And I can save each of those as individual layer states. And I can access those in InDesign as well. Same way, go up under the object menu, come down to object layer options, and down here, we have layer comps. If you don't have that option, it just means there are no layer comps in the Photoshop file. So this is something that was set up in the Photoshop file. So I have one called colorful. We can see what that looks like. So that's that posterize effect with the name. And I have one with no logo on it. And I have one that's the inversion. And then one that's black and white. And one that's black and white but with a color logo. So, again, I don't have to manually turn these layers on and off. I just use the layer comps that I built in Photoshop itself. So let's go ahead and choose this colorful one with the logo. And I can, again, manually turn the layers on and off. I don't have to just be stuck with the layer comps I came up with, but it's a nice way to know that somebody who worked on the Photoshop file already created those layer, those different layer comps, and then I'm able to just turn them on and off inside this document here. Let's jump over to this page here, and I just want to look at the different links. Actually, I'm gonna look at the links in the annual report that we have here. So, I said in the earlier section, that when we place an image in here, we're not actually placing the entire graphic inside the InDesign file. We're actually creating a link back to it, so when I place this image of these sunflowers here, I didn't actually make my file really get any bigger. I'm pretty much just placing it here, and it's maintaining where it was when I placed it. And that's how we get things like missing files or modified files is if they get moved, InDesign is expecting it to be where it was when we placed it in the document. So let's actually take a look at the links panel. And I'm gonna pull this off 'cause it is a big panel. We can see there's a lot of stuff underneath it, and it takes up almost more space than I have. In fact, I think, it might. I'm gonna actually just put this back really quick so I can find the bottom of it. There we go. Hopefully, that'll help. It was so big it was off the screen there. So I have this panel, has a lot of stuff on it, and it has two sections on it. So you can kind of see that I can select this section, make it larger. And so, what this does is it's showing me every place that I have placed a link, whether it's pdf or it's a graphics file. And you can see I have jpegs, I have some psd files, and when I place that in here, it references it back. Now, the great thing is, is it means that it has access to everything that's in that native file. In fact, that's what we should be doing when we place graphics if we have the option, we should place the psd file or the ai file directly in here. No need to save it out to a separate file type. Like, for instance, in the Photoshop files, we can leave them as psd files. We don't need to make them as tifs or jpegs or anything like that. It's best not to unless you, that's the only version you have, like, I have a lot of jpegs, and that's because I have purchased these on iStock, oh, I'm sorry, not iStock, on Adobe Stock, and they are in jpeg format, and that's great if I'm not doing any work to them. If I'm just gonna take them and place them, we can leave them as a jpeg. But for the most part, if I'm gonna do any manipulation to them in Photoshop, I'm going to save it out as a Photoshop file and then place that Photoshop file. And, again, it's so when we go to export, and it links back and says this is where the original sits, it can not only find where that sits, but it can have access to everything that's available in that file. We haven't flattened it, we haven't saved it out, we haven't made any choices for that file at all, it's still sitting in its native format, and InDesign can hook into all that information, so we wanna leave that. But this is a representation of all the images that are in this particular file. Some of them, you notice, look a little different. They've got this little drill down menu off to the side, and some of them have little clouds on them, and that means, again, I bought them on Adobe Stock. And if we had any issues, if some were missing or modified, we would see them in this column here. But we can see that everything is okay. And the ones that drill down, I look and I can see that I have four versions of that same image. Two of this one, two of this one. And that's because, what happens when I have more than one of the same image, it automatically puts them together in this folder. So with it drilled open, it looks like there's three. There's not. There's two that kind of make up this folder of the same name. So this is where it shows where each individual item is, which page each one is on. So, the nice thing is, is that I can tell it when I want to update it. I can update them separately, or I can update them together because it's grouped them together by the fact that they're the same image. In fact, this item, the one I just selected here, when I select it, it gets selected in the panel, and I can see where that is and what it's called, and I can roll over it and also see what the path is. In this case, it's Creative Cloud. But if I were to duplicate this image just by option or alt dragging across it, it now automatically created that group for me and grouped them together because now there's more than one instance of that. So what can we do with the panels? The linked panel. I'm gonna delete that really quick. Well, we can make sure that everything looks okay. Like I said, we wanna make sure there's no exclamation point and no stop sign in here telling me I'm missing or modified links. So the cloud tells me that I'm linked up, and the other ones are all okay. I can also jump to where a specific image is. If I'm looking at this and I think, I don't know, I don't remember where this ai file was, I can just click on the page number, and when I do, it automatically jumps to where it sits in the document. So these are just little hyperlinks that'll let you jump around and find that image quickly. Or I can select the image itself, and it will highlight it. This is great if I'm trying to remember what the name of the photo is that I placed. I wanna click on it, and it highlights it in the links panel, and I can see that. The other things I can do from here is I can make sure that the image is up to snuff, make sure it's, you know, exactly all the settings that I need. Like, one thing I'm gonna need to look into and make sure is working for me, is that I have a high enough resolution in my image. And we haven't really talked about that because I feel that's really a little bit more advanced. But one thing you will hear when you're working with a printer especially, they might tell you you need to make sure that your images are at 300, they might say DPI. We're working with PPI, which are not exactly the same thing, but for all intents and purposes, the numbers work out the same usually. So, basically, you're looking for a certain amount of resolution. That's dots per inch or lines-, pixels per inch is what those stand for. But they might say you need 300, so you've got this idea of to go to print, and if I look at this image, I need to make sure, in the links panel, that I do have at least 300 PPI available to me. So where we find that is in this bottom section. If I zoom in, I have two places where I see PPI. So, again, we're not gonna go into why that is, but I can look at it and say, oh, it's 300, but wait, I have this one that says 1237. What do I need to be looking at? Well, what I need to look at is the effective PPI. So what the actual is is the amount of resolution in the original file that we placed. But in this instance, I also placed it much smaller. When I made the image smaller, I actually gained resolution, so I need to make sure that my effective PPI is up to whatever the number is that, whether the printer told me, or I know what my laser printer can actually handle. Maybe it's only in a 150. So I need to know what looks good. Or maybe I didn't know for sure if my laser printer, but I printed out a bunch of stuff, and there was a certain number that suddenly things looked a little pixelated, so I kind of put it in my head, 150 is what I need. In this case, though, it says that I've got 1237, so I've got way more than 300, I'm fine. So I don't need to worry about it being more. It's just if it's less, we have to worry about that. So that's one thing you'll open up your links panel for. But for our intents and purposes, mostly today, we're gonna see what the name of it is, where it sits in the document, and also, how to update them. When we wanna change that out. So let's go ahead and do that. So I'm gonna scroll down. This is the sunflower picture, and I wanna change it out to a different image. So I can do that without actually deleting the frame that's here or even deleting the image, which I could do, I could click on the image and delete it, and I still have my frame here. For whatever reason, they have orange backgrounds. I'm not sure why. I don't know what I did way back when to change that, but I can delete that and then I can put a new one in if I want to. I'm gonna undo that though. I'm gonna do it a different way. So I'm gonna select this item, and these are grouped together, so I'm gonna actually ungroup those. I probably moved them around together at some point. And I'm gonna zoom in just a little bit, so we can see the image. And scroll over here. And then I'm going to go ahead and select this frame, and make sure that it's selected in my links panel. Go up to the links panel menu, and I'm going to tell it relink. So this is where I get to choose an entirely different image. So let's go ahead and make it, let's actually make it this mountain one that's here. And I can choose show import options. Again, there's nothing really, no choice really to be had, so I'm not going to turn that off, save me clicking through an extra document or dialog box. Let's hit open. So now when I do that, it automatically replaces it, and I put it in the same size that the other image was, so I may have to resize that. In fact, I can see, when I click on this image, I can't even see the edge of the image. I zoom out a little bit, I probably can. I can see that it's much bigger than I'd like it to be. So, normally, what happens when I relink an image, the first thing I do is select the frame with the selection tool. It's actually-, come on, select the frame there, with the selection tool. And then I go up under the object menu and choose fitting and tell it, fill frame proportionally. And then, from there, I can start manipulating, like we did in an earlier section, where I select the item, hold the shift key, and size that up, maybe move that around, and get it positioned where I want. But I didn't have to worry about resizing the-, or recreating the frame, deleting what was there and adding something new, and I was able to use the relink right from this dialog box. Now, if I wanted to delete, in this case. I've got two different ones of this, let's actually do the desert-, well, the desert, we don't have a lot. Let's do this one. So I have page 12, and 15. I have the same wheat image that's here. So let's move this over a little so we can see it. And then, instead of individually doing it, I could just replace the one on page by selecting the individual image here and choosing relink like we just did. Or I can select the enclosing folder and choose relink all instances. So if I wanna change them all at one time, I can change them all here. So relink all of those, and we'll change those into the sunflower that's here. So I say okay, both of those changed, and if the other sunflower had still been there, it would've also been thrown into that group as well. It automatically groups them all together. Again, we're gonna have to refit this and then resize it to whatever it is we wanna do. So maybe we'll just move this down a little bit and turn on our viewing mode to preview so we can make sure that where it's cutting off is exactly what we want. I think that looks good. So that's how we bring things in and manage them through the links panel. So by default, when you place pdf, you place the graphics file and Illustrator file, Photoshop file, whatever, it automatically creates that link so that it automatically knows when something has been changed. Now the great thing is, I come over here to this page here, and I wanna make a change to this, I can do that from-, right from within InDesign. Like, before, we were able to turn layers on and off, and that was great. But also, maybe I wanna create a new layer, and so, I need to go back to Photoshop for that. I can actually do that right from here. I'm going to go ahead and right click or control click on the image, and then I can tell it, edit with or edit original. Basically wanna use edit with. Edit original will just jump to whatever application is used for this specific file type. So if this is a jpeg, and in this case it's a psd, but if it was a jpeg, and I clicked on that. On my Mac, it might open in preview, so I generally don't use edit original anymore. I use edit with, and then I can choose what version of Photoshop I want to open that with. So I'm gonna do that, and it's gonna launch in the background. But what it's going to do is it's going to create that, like, a round trip version, so I can come in here, let's get this to fit in here, and I'm gonna turn on my layers, and maybe I just wanna go ahead and turn on the layer here, and maybe we'll create a whole new layer. Don't worry about what I'm doing, I'm just gonna do a layer really quickly here. Just throw in something where I change the levels or something crazy like that. Just to kind of wash it out really good. Just so I have something new. And I'm gonna go ahead and hit save. And when I jump back to my InDesign file, it automatically will update it. Now, because I had layers turned on and off, it's going to tell us, tell me that I want to keep the layer visibility overrides that we chose. But in this case, it went ahead and brought in the changes. So anything that I open up in Photoshop and make a change to, it will automatically update here. Because I started it in InDesign. So, again, let's try it with this one. 'Cause this one, we did not turn layers on and off. I wanna make sure we don't have any issue with that. Edit with. Gonna go ahead and open up Photoshop again, and in here, I'll just go ahead and, again, add something like this. We'll just add a filter on top of it. Let's just posterize it. There we go. That's great. I'm gonna click save, and when I-, whoops. It wants to update it. Let's not do that. Let's come back over here to InDesign. It wanted to update it, and now it's not gonna be linked to the same graphic. Let's do this. I'm gonna put this on my desktop. I'm gonna have to take an extra step here to do that. First, I'm gonna relink just to the one I just made with the posterize on. Because it was an older version, and I wanted to update it. So I'm gonna jump here, this one we just created, and I'm gonna replace that. Now, what I'm gonna do is start here in InDesign. Right click, or control click, and say edit with. And, again, by starting in InDesign and going out, we don't get an alert. It just automatically updates it for us. So I'm gonna go back to Photoshop, we're gonna go ahead, and we'll just remove that and say save, we don't even have to close it, but I jump back to InDesign, and that's updated for us. Again, because I started it in Photoshop. If I don't start it in Photoshop, and I just come over, I'm sorry, if I don't start it in InDesign, and I come over here, and I turn this on and click save, and I jump back to InDesign, it doesn't update because I didn't start it in InDesign. I didn't start that round trip. But it does come up and tell me, hey, some changes have been modified, and it does tell me I can double click it to update that. So I can just double click, and then those changes are made for that. So, again, if you wanna update it, and you wanna keep going round trip out to Photoshop, making changes, start in InDesign and tell it edit with, and just click save again. You don't even have to close it. Just click save and come back, and your changes are updated for you. But your links panel is what's going to keep track of everything and make sure everything, like I say, is completely up to date.
Ratings and Reviews
Susan
Fantastic course. I have used Illustrator and photoshop, but learned when under tight deadlines. We are going to begin using inDesign to publish a more extensive multipage newsletter, and I wanted to build a better knowledge foundation of this tool, rather than just diving in. The course was comprehensive and I feel that I'll be able to make a better product after taking the course.
Terri
Have loved Erica since I was a baby designer. She is a great educator, and even though I have been using ID for about 8 years, I just changed from CS6 to CC. This was a great refresher as well as a mental upgrade to new options and effects.
Gilbert Beltran
I enjoyed these classes. Learned the Indesign toolbox and picked up a few smart tricks. Erica is great at keeping up the pace and being very clear and easy to follow.