Lesson Info
5. Advanced Layout Techniques
Lessons
Lesson Info
Advanced Layout Techniques
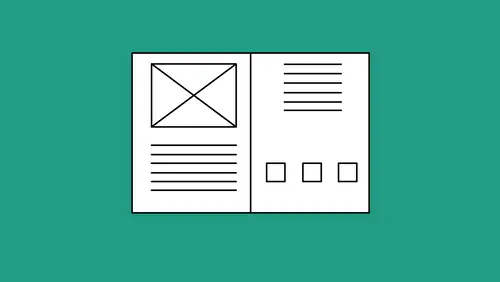
So now I wanna be able to set this up on master pages. If I'm creating a large document I'm gonna have several different layouts for my pages that I wanna have in my document, so that anybody can grab that page, put it into their layout, and have everything dialed in, everything. I don't wanna have to do much work at all, I want so much of this stuff dialed in that anybody could get in here, place an image, have it fit perfectly, flow copy, and have it automatically be formatted, get access to this stuff, do the automatic page numbering, everything's gonna be dialed in. So if I have started this content and I did not set up my master page to begin with I can always take my master page right from my existing layout. And if I go to my master page, which is gonna be in my Pages panel, and I double-click, you'll notice my master page has my original layout in it. And this is the reason why every time I add a new page it always is going to look like this, because it's always being based aft...
er my master page. Now I had gone in and I had manually changed all my pages, but if I add a new page it's gonna look just like my master page. 'Cause as you may have noticed, when you choose Insert Pages it says what do you want that page to be based on? That's the page right there. So there's my master page and every page that I have in my document is based on that master page, because of that little A. But I changed all of these manually here, so it really doesn't match this. So here's what I'm gonna do. I'm gonna go into my master page here and I can put all my content on this page right here if I want, or I can go in and I can take a page that I've already done here and turn this into a master page, either way. I can go and build directly on my master page here or, since I've done this, I wanna capture this as my new master, I can take this, right-click on the page here, and I wanna create a master page out of this. So I can go in and I can apply a master to the page here, but what I wanna do is I wanna go in and I wanna create a new master page. So I'm gonna need to go to my cheese grater here, 'cause I have a few items I can't get to when I right-click on there, and I wanna go in and take my Master Pages, create a New Master page right here. So if I select that page and create a New Master right there I can go in and create that in my document. Now every time I create a new master page there's always gonna an A master page, B master page, C master page, as I go, which is really nice. So that I can just follow it alphabetically down here as well. As I go through one of the things that I wanna do is I wanna keep track of my master pages, so you can go in here and you can name your master pages specifically what it's going to be. So if I wanna go in and I wanna create a new master page it's super easy to do, just turn one into this, or what I normally like to do is just take my content, if I have the content on the page, I can just simply copy everything from that page, go to my master page, and by double-clicking on my master page I can set all my Margins and Columns to be exactly what I want them to be, and I'll put my content right in here. I don't just hit Paste, 'cause then it comes in in a weird location. What I do is I choose the Edit and I choose Paste in Place. And it's gonna go in, it should have set it right where it was supposed to be, but it didn't do that. Paste in Place should copy directly from the same location. Oh, I copied from this spread, that's why. So it thought it was one page over the other. Wanna put all my content in here right where everything's supposed to be. Any guides that I put on my page here in the master page are now gonna show up on every page. So if I put my content in and I drop my guide down, I want this guide to be at 11 divided by three, so there's that guide. And I want this guide to be twice as far, so I'm gonna say times two, hold down my Option key and hit Return, there is my guides. So this is gonna be my master page. So now I can create pages that are based on this every time. Now these are going to be image containers where I'm going to put images in here. However, if I have an existing container and I go under the File menu and I choose Place and I place content in the image comes in full size. So that means every time somebody places an image in here they have to struggle to fit this in here. Absolutely not. So what I'm gonna do and make absolutely sure, so that these things are set up perfectly on the master page to work every time is I'm going to take my content, my actual container here, gonna go under the Object menu, and when I go under the Object menu here I can go under the Object and choose Content here and I can specifically say what this container is going to be for. And I don't normally do this, but on a master page it's very important. So I'm gonna say this is gonna be a Graphic container, which is why you have the X on that. And I'm gonna say OK, Graphic container is here. Now what I want is when you import an image into this graphic container I don't want it to come in actual size. I want it to fit perfectly inside the container, so you have no sizing what to do whatsoever. So now that I've converted these to image containers, or graphic containers, I'm gonna go under the Object menu and I'm gonna choose Fitting. And I'm gonna set the Frame Fitting Options on these containers, so that the end user doesn't have to go in and fit every single image. It's gonna fit perfectly. Object, Fitting, Frame Fitting Options. And here I'm going to say I want it in the middle and I want the Fitting and I want to fill the frame proportionately. What does that mean? Fitting the content proportionately means if I have a horizontal box and a vertical picture it will fill it vertically and it'll leave white bars on the side. Filling the frame proportionately will take it and it will fill it so that I have no space around my image, it will fill the entire container proportionately, the object may be taller, but the width will fit perfectly, or it'll fit the height perfectly and the width may be beyond. Either way I want it to fill the frame proportionately, I want no white space in the frame showing. I want the entire image in there. So it's gonna fit in the middle, fill the frame proportionately right there. And I've set those in my boxes, perfect, that's exactly what I want. Now if I come in here and I wanna be able to do something with a text container I'm gonna draw a text container exactly where I want it to be and if I go in and I set my text container and I want this text container to be exactly 3/4 of an inch shorter, so I have the same buffer zones, I'm gonna use my center point, the height I'm gonna say minus 3/4, so .75, and that's gonna do it right from the middle and it's gonna adjust everything, so that these, this width, this 3/8 is gonna be the same. I'm gonna snap that to it, so it's the same here. Now it's perfectly centered in there. Now for my type I'm not gonna go in and just have the type be a certain just whatever the default is. I can actually go in and set my point size, leading, kerning, tracking, everything in here, even create a paragraph style if I want to, so that when somebody starts typing in this box all my settings in here are gonna be exactly those settings. Just like that. Flush left, everything, a little bit of space after the paragraphs, awesome, good to go. Works out wonderfully. There's my setup right there. Now when somebody grabs this file and they need more content in here they can go right to these pages that I've set up here and they can go in and drop the files right in. I'm gonna go in and I'm just gonna remove these pages here really quick and I'm gonna go in and I'm gonna insert some of these pages in here, I'm gonna put in three pages all based on my master page right here. Let's see how this works. Now when I have a master page once I put these into my document here, I'm gonna split these apart just by dragging these off, 'cause I don't want a complete spread here. There we go. I'm gonna wanna go in and I'm gonna wanna put my content in here. Anything that's on the master page is completely locked, that's the problem. So how do I get to this content? Well, if I did want to get to this content here I could go in and specifically unlock an object if I wanted to move it or do something with it. Because these are all locked you'll notice on the page too anything that has a dotted line is an item that is on the master page. So that way I can distinguish between what I've done on my page and what's actually the master page template. InDesign is smart enough to know when you go in and place a file or you place text that because we have a graphic container here waiting it doesn't even need to be unlocked. If I wanted to do this manually I would have to unlock this and put it in. How do you unlock something? Well, hold down your Shift and your Command key and simply click and unlock that object, then you have access to it. But because I've built this so well I don't need to unlock these, it'll do it automatically. So here's my content, I go under File, Place, I have images that I would like to bring in. I'm gonna select multiple images, hold down my Shift key, select multiple images at once. I'm gonna click Open. I get my loaded cursor, I have four images here. Now my containers are locked, I'm gonna zoom in really close here, you can see what's happening. It's waiting for me to draw an image container, but when I hover over an existing container here, because on the master page I told this to be a graphic container and to auto-fit, that little cursor right there, you'll probably see this a little bit better here, that little cursor turns into the parentheses. If I have to draw one manually I get that cursor being a little square, if I touch this it's parentheses. Now if everything has worked out the way it should I should be able to click on those boxes and they should fit the content proportionately in there without having me unlock them. OK, pretty awesome, just like that. If I have a text container my text is right here. If I wanna type directly into here I can hold down my Shift and Command key and click and begin with my Type Tool, and when I put my content in, amazingly enough, that content is going to come in at exactly the same specs that I had put in that text container on that page. The right font, the right size, and all the other attributes. So you don't even have to worry about that. If I did have a locked text container, like this, and I wanted to flow in a Word document and I go under File, Place, I grab the Word document, you can see here it automatically knows when I hover over that it's a text container, when I click on that it flows it in. Now here's the one trick, because I formatted that text container before that formatting of the text only works for when I go in and I simply type in. If I flow in a Word document whatever attributes are in the Word document stay with the Word Document. So I don't have total control over it, but at least I do have the ability to go in at any point and simply put something in there, now it's gonna fit the content proportionately, meaning it won't go in and it won't show any white areas around. If I go in and fit the content completely this will fit ti all in here and if this were a colored container then I would see white all around. So you can pick and choose on how you set it up. But dialing these things in first, so that you can streamline the entire process, these things are of absolute importance. Another thing that we're gonna have here and I've started doing my document and it's like, oh my gosh, page numbering, how do I do this? Simple, because all my items are based on a master page here I can at any time change the master page elements and by changing the master page elements it will change everything in the document. Case in point, if I change all my containers here to a much larger border around there and I go back into my document everything has been changed. One location fixes everything. I wanna do automatic page numbering. Again, I'm gonna do this on my master page. And page numbering is a text container, so I'll need to draw my text container. And I'm going to put it here, so it matches my columns. And I wanna put in a page number. I'm gonna center that. And I can't just type in the number one, because if I type in the number one and I put this in here then that page one will be on every single page. Well, not every page is page one. So automatic page numbering on the master page, draw your text container, your automatic page numbering is gonna be under your Type menu, Insert Special Character, page number is a Marker, and we're gonna insert the Current Page Number. And that turns out to be a letter. People are like why is it a letter? It corresponds with the master page. If this were on the B master page then it would be on the B master page, it would say the letter B. No, you can't type in the capital letter A or B, it's just gonna give you a letter A or B if you type it in manually. This has to be the automatic page number, which for shortcuts is Shift + Option + Command + N for automatic or Current Page Number. Once I put that page number on the page, wherever I put it on there, it's gonna show up on every single page. And sometimes people do not like that page number on the first page, but because it's on the master page I can't go and get rid of that content, but I can. I can simple Shift + click and remove that content. If I go in and I remove a whole bunch of copy and I unlock my content from the master page and I move things around or delete it and I find out later I shouldn't have done that, not a problem. I can always take that master page, drag it right back onto the page thumbnail, anything that I removed goes right back into place. So that's a nice feature as well. So there's my layouts, everything is dialed in. And if something isn't quite right where I realize, you know what, I didn't wanna use that fit proportionately. I'm gonna double-click, gonna select all my containers, go under the Object menu, under Fitting, I'm gonna change the Frame Fitting Options to fit the content proportionately instead of fill it. I click OK and now when I go in and I place my files in here, I go under File, Place, and I grab my content, and I click Open, and then I click on the pages here it's going to fit the content proportionately. So very easy to change this kind of stuff. Always build this stuff in before, always build it at the high level, think of all the details, build it all in here, it makes life so incredibly easier. Grid structures, columns, master pages, automatic page numbers, put it all together. And here's the reason why it makes workflow so incredibly easy. You wanna create more than one master page, not a problem. You want a new master page, go to your cheese grater, say you want a new master page, comes in as a B master page, I click OK. Set all my settings the way that I want to. Maybe I want a two column format. So Layout, Margins and Columns, two columns. I wanna have my margins right there. One thing, wanna have my page numbers on this one too. I don't have automatic page numbers on my B master page, so I'm gonna jump back to my A master page here and I'm not gonna create a whole new text container and try to match the location. No way. I'm gonna copy it from my A master page, double-click on my B master page icon, I'm not gonna hit Paste, 'cause it's gonna put it right in the center of my screen, I'm gonna choose Edit, Paste in Place. Exactly where I copied it from the other one is exactly where it goes in the new one. Now the automatic page number shows up as, as I call it, the number B, 'cause it's a page number. There it is. If I would like to add more pages to my document, choose the cheese grater from the Pages panel, Insert Pages, be able to go in and say I would like three pages After Page four, based on my A master, my B master page. If I include that, and I do that, there is my layout. Now at any point in time if I would like to add content or change content on the master page I can go in, I can draw my containers, I can set up all of my content, and put my container on there, set all the parameters for my Fitting Options as well. Fit all the content proportionately. I may even wanna put text wrap around this, because I may have a text container and I want this image to be in here and wrap around my text. Not a problem. This is on my master page, dial in my settings, go under the Window menu, call up my Text Wrap, put my Text Wrap around my object, put my force field around there. There it is, it's on the master page, now every page that the master is applied to has this Text Wrap. If I wanna put a text container here I can draw a text container over this whole thing. I'm gonna start right here, put it there, I'm gonna turn this text container into a two column text container, 'cause I want my text to be in two columns. Object, Text Frame Options, two column text container. Can't see it, 'cause it matches right up to those columns there. Awesome, there it is. And if I wanna set the parameters of this text container with the right point size on here, if somebody wants to type in manually, I can do that. There's my content right there. There's my page. I go to my B master page, these are linked together, because I had gone in and turned off my Allow Document Pages to Shuffle, so it's stacking them all together here. Gonna pull them off by pulling way off the end to get that vertical line. There we go. So now if I do my content here and I wanna get to this text container, hold down my Shift and Command key, and when I begin to type it's gonna start right there at the bottom of my picture, because it's gonna create the text wrap. So if I Fill with Placeholder Text, see, it wraps around beautifully. If I wanna place an image in there, File, Place, grab my image, touch that, fits it proportionately, text wraps around there. Now I can move that around wherever I want to, text wrap is already there. So as much of the stuff I can dial in that I can certainly do. Go in, make that all proportionately, make that bigger if I want to, fill that however. And now every page that I have is gonna be the same layout without having me do anything whatsoever. Grids, guides, whatever I want. If I wanna put manual guides in the page I can do those on the master page as well. Whatever I put on the master page is gonna show up on every single page in the document that has that master page applied to it. Put it on my B master page, go to all my locations that have the B master page applied, I put that guide in the master, it shows up there. Pretty simple stuff. Now this is all using a single page document. Using a facing page document, which I had set up over here, it's ever so slightly different, but not really that much different. All those master page items I showed you still apply to this. The only difference is with a master page when you're dealing with facing pages is you go to your master page document and people are like, oh, I've got two master pages. Well, technically no, it's one master page, but we have a left hand side and we have a right hand side. Which is really important to understand, because I'm gonna paste my automatic page number again, because the last thing I pasted was my page number, I'm gonna do Paste in Place and bring it over. When I'm doing a facing page document here a lot of cases I'm gonna have symmetry on my pages. So what's on the left hand side is on the right. So if I go in and I put content on one side of the page it's much easier to design as a spread, so we can have the left look like the right. So if I have some type of chapter header I can go in and create my text container, snap to my guides here, and this could be my chapter header. And if I want to have this mirror the other side here I can simply hold down my Option key, click and drag, shift that over there, snap that to it, select my copy, change it from a right justified to a left justified, and be able to create a mirror image. If you only put content on one side, if I go in and I decide that I want this image right here or this picture, make this 2 1/2 inches high, and I would like to have this here, and I would like to fill these with colors to begin with, so that I can have content there. Whatever I build on the left hand side of my master page will only show up on the left hand side of my document, see. It isn't uncommon for people to go in and they build something on one side or the other. If I want this left hand content to be on the right hand side I have to go to my master page and build this so it is on the right hand side. I can't take my master page and drag a left hand master onto a right hand side, it just doesn't work. 'Cause what's ever on the left hand side of my master page is on the left hand side of my document. If I want them to appear on both sides I'm gonna set the content, I'm gonna set all my object, I'm going to set everything the way it's supposed to be before I copy anything, so that I have everything dialed in. Everything's good. Then I'm going to hold down my Option key, click and drag, move those over, so now my settings are gonna be identical and they're gonna be a mirror image. One thing that happens, this happens a lot, you create a new document, you have Facing Pages selected, and you've put in some pages, and you forget that you have Facing Pages selected, and you go through your document and you see that, oh, that's not what I wanted. If I go back into the Document Setup and I change this back to none facing pages it will break it into the single page one that you normally see. However, your master page is still two pages and this tells me that you started off with a Facing Page document. So which master page do you use to put your content on if you inadvertently started off as a Facing Page document? Well, here's what you do, just go, if you've set it up as a Facing Page document, changed it to a single page, just go into your Pages panel, double-click on that master page, and right-click, just double-click on the page you wanna get rid of, and just get rid of one of those two pages. Double-click on it and say hey, delete the master page. And it will just give you the single master page. So I see that quite a lot, because unfortunately the default, when you start up with the default here it's always Facing Pages. So if you see that and you have a double master page when your document, or you have a facing master page when your document isn't, just click on the one master page you don't want. Cleans it up, nice and simple, and you're all good to go. So there we have our facing master pages, everything's dialed in, you can put your content in. Anything you wanna put on here, text containers, images, backgrounds, whatever, put it on here, absolutely great, and lay the content out. Word to the wise though, if you put something in here and you use your master pages like this, if I go in and I put a text container over this whole thing, including over these boxes as well, and I go into my document here and there is my text container and I Shift + click and I get to this text container right here and I put content in, there it is. I can't get to these image containers, because they're locked and behind everything else. So when you do go in here and you do this and you use things on the master page one thing that I recommend is going and putting these things on separate layers. And the reason why is because if I wanna go in and I have drawn my text container over my picture boxes and I go under my File menu and I try to place a picture into these text container, or into these what I see as the image containers, it's actually using the text container that's on top as my location. But because I'm trying to put an image in my text container it doesn't know. And every time I try to click on these I can't get to it, because unfortunately I had created this text container on top of my image containers. Now if you do these on separate layers, if I were to go into my Windows and call up my Layers here and I were to create my Layers, so that my images are on this layer, and then I create a new layer here, and my text is on this layer, and I select the layer here. Layers are layers, so we can use them anywhere that we want to. If I have this on my text layer and I go onto my master page and I create a text container on that particular layer that text container is on that layer. So now when I go into my document here and I want to go and I want to put an image in here, I can turn off my Text layer to get access to my content, so I can place my images right in, nice, without going in and having to work on anything. Then I can turn on my Text layer and then go under my File menu and choose Place, and put stuff into my text. So a lot of things that I can plan on, but here's the way that I set up my workflow, pretty much showed you that. Couple problems that you run into here and how to set that up. But there we have it folks, all the ends and outs of going in and setting up templates, master pages really quick, understanding margins, columns, guides, and what they can do for you, going in and being able to use your measurement systems here to change, edit, add to, subtract from, flip and rotate, all of that stuff. So thanks for joining us and that's how to create layouts in InDesign.
Ratings and Reviews
Jayada
Great teacher! Love his classes
Clicks FromMe
Jason Hoppe is a great teacher.
Kara McDade
Student Work
Related Classes
Adobe InDesign