Lessons
Introduction to the Catalog Style System
23:54 2File Location and Methods
41:25 3Main Structure of Adobe Lightroom CC 2017
18:09 4Importing A to Z
27:26 5Image Selection Made Quick and Easy
12:34 6Methods of Image Organization
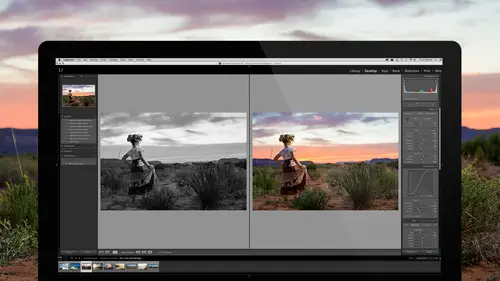
29:26 7Preferences in Adobe Lightroom CC
28:30 8Library, Develop and Map Modules
10:58Book and Slideshow Modules
07:50 10Print and Web Modules
13:08 11Developing Techniques
16:51 12Synchronizing Adjustments
23:05 13Additional Editing Tricks
13:13 14Fast Editing Presets
24:18 15Quick Develop Tool
06:57 16Using Local Adjustments
31:58 17Retouching Tools for Landscapes
22:45 18Dodging and Burning with Landscape Images
19:11 19Additional Landscaping Tools
07:30 20Retouching Tools for Portraits
28:17 21Create an HDR and Panorama
16:00 22Manipulating Image Structures
11:24 23Module Presets and Hidden Presets
18:37 24How to Create a Portfolio
26:06 25Connecting Your Portfolio With Lightroom Mobile
12:22 26Using Adobe Stock
29:58 27Publishing Images to Social Media
28:16 28Creating a Layout for Books
26:56 29Exporting a Book and Beyond
19:11Lesson Info
Create an HDR and Panorama
Let's go to something else that's cool. And that is when we're in Lightroom it used to be that we had to go to other, like we had to go to Photoshop or we had to go to some plug in in order to create panoramic images. And in order to create HDR images. So that's not the case anymore. So I'm going to go in and say let's make some HDR images here inside of Lightroom itself. So I'm going to look at a set of images that I shot in Grand Tetons. And I want to make and HDR our of it. And so in order to do that I tool a picture that had a low exposure. So the foreground wasn't very good but at least the sun was in. And then I took one that was a little brighter. Another one that's a little brighter. And then another one that's even brighter than that. So that I can get everything in. So I've got all- oh that's a different one actually, so let's not use that one. So this one, this one and this one. So I'm going to highlight all three of those images and when you look at HDRs you want to make su...
re that you're looking at them together as a threesome. So you see how there three- one, two, three. Sometimes you'll do seven, sometimes you'll do five. It just depends no how extreme the exposure situation is. But you want to take them rapidly together so things don't move. Like clouds are constantly moving across the sky. So your camera will have an HDR type setting that can capture three quick successions and you just want to snap them as fast as possible. But you also want to keep the camera as steady as possible. That doesn't mean you can't do it hand held, you just have to keep it really steady and go bam bam bam. As fast you can. So instead of just having to go bam bam bam you put it on a multiple burst mode and go dadada like that. It'll take care of it. In order to do that, once you've got those three images you right click em and you're going to say photo merge, right there kind of a third down and hit HDR. When you do that it's going to open up the HDR creator and what it's going to do is it's going to take raw images. It's going to merge them together as a raw HDR. So instead of a 16 bit raw image it's going to be a 32 bit raw image, which is exponentially greater. And now you can see that I've got the information from the sun up here on the one exposure, the darker one. And then I've got the exposure from the lighter image from down here. It just merged it all together. You had a question? Do you need to be able to bracket each one of those or are you just shooting three and then changing your- No, you bracket it in the camera. So you always want to shoot a bracketed exposure. Usually the stop different between exposures. And then just as many as you need to get the darkness and the lightness all in. So you want something that's too dark, something that's too light, and everywhere in between. Okay? And then you notice here that we've got an option to auto align. So it's actually going to line all these up. Even if I was hand holding it's going to line them up. And it's also going to give me some ghosting options. See this red stuff down here? The reason that red stuff is there is because it's saying I have to do some Photoshop editing to this. Not me, but Lightroom's going to do some tricky layering stuff to get the right, because these bushes were moving. So that grass was moving around. And so it's going to use multiple exposures to fix the ghosts that will happen as the movement occurs. So I'm going to just put that at medium. You can have it at low, high, just kind of play with those options to see which one works best for you. And then go ahead and hit merge. And when I merge those then I'm going to have a true HDR raw image. Which is very different then what you would get in Photoshop or some kind of a plug in. Because wheat they're doing is they're merging raw images to a TIF file, which is a 32 bit file but it's not raw. So it's still a destructive edit. What we want is a non-destructive raw edit. And that's going to come in the form of DNG. So we're looking at that raw now. This is a raw DNG and I want you to see the difference between this image- oops sorry. This image here, this image right here is a non-raw- it's a raw image but it's not an HDR and I can expose down by five stops and up by five stops. That's it, that's all the control I have in the exposure. But if I go to my HDR version of it, I can bring it down ten stops and up ten stops. So I have a lot more control over my image which means that because it's got so much depth in it now I can go in and control that sky and look I can get this sun back and all those little lines from the sun, the bursts. But then is can take the shadow up and look how much detail I have. And when I zoom in, look how clean it is. Even though I've brought the shadows all the way up to 100, it's still there's no noise in the shadows. None. And I can take the exposure back up a little bit until I get exactly what I want in those shadows. And then I'm going to come up here and look at the sky. And look, there's just no noise in the sky. And then I take the highlight down until I get what I want in the sky. See all that? It's just amazing what you can accomplish inside of Lightroom without ever even leaving it. Because you have total access to everything in it. And it's still a raw image, which means that's it's going to function for you just like a raw image. And now I can go in and paint, I can take my gradients and work on them. I can in like with just a radial filter and go ahead and brighten up the middle area of this photograph just like this. See that? So it looks like the sun is bringing that light in like this. So I want it to look like the sun is bringing that light to these. So I'm just kind of moving it around until it feels right and I'll warm it up just a little bit. See that? Yeah, I like it. And then I go like that. Add a little contrast to that area there, a little clarity. Good. So now I've got the right exposure that I want here. I've got the right exposure up here. It's nice and dark down here, I can do pretty much anything I want because now it's an HDR and I have so much more exposure latitude in this HDR. So it you have the ability, go ahead and do an HDR. And with that ghosting mode you'll be surprised at what it can accomplish. For instance, I have a shot here later on in this series where I've got this entire exposure set here, look at this. So there, there, there, and the kids are running out and playing out there right. So I've got this big HDR but if I click on the HDR that I made, look what I get. It chose one of the kids out there in the field and it got rid of the rest of them, even though they were moving. Look at how much they were moving. They were going all over the place. But it realized those guys are moving, I'm just going to choose one of them and then I'll HDR the rest of it. So it's pretty impressive, pretty powerful. So go ahead and play with the HDR options because they are very, very useful in working on images. Especially you are just out on the fly and you want to take a really great picture but you're like ah it's too bright over there, it's too dark over here and all I'm getting is the silhouette. Just shoot an HDR series, like five exposures and do it here. And it takes so little time that you'll actually do it. Plus, doesn't that look realistic? Like the stuff that we're looking at here, is not, is doesn't look unrealistic. It looks realistic. Where as before it used to be that when you did HDRs they looked really lame. They looked like bad paintings. But now with Lightroom's HDR it's just, it's real. It looks great. And it's super simple, you just saw me do one. So then the same thing's true if you want to do panaramics. So let's just look at some panoramic options here. So I can do a panoramic of this shot here and if you look at it I'm going to show you it in survey mode so you can see the full panorama of what I'm looking at. These are all the shots that I took. So I started on this end and went all the way to the other end. And when I do it I'll stand there and I'll zoom like this. Or I'll put it on a tripod and I'll go like this. And I want to make sure that every frame looks good as I go like this. And a panoramic is always going to be better when you do a vertical shot on a horizontal panoramic. Okay. So then once you've done that you just highlight all of them. And by the way, both on the HDR option and the panoramic option, you do not need to adjust them before you work on them. Because Lightroom is just going to take the original raw photo no matter what and work on it. So I'm going to right click this and I'm going to say photo merge panorama. And now it's going to go through and it's going to do a panoramic. Now while we're waiting on it there's three options. There's spherical, cylindrical, and perspective. Perspective is for when you have serious perspective lines. Like say you're in a city and you want to keep those perspectives looking correct. That's what that's for, is when you're in a perspective situation. So that it would show it to you like it's in perspective. Spherical is the concept is that you're in a sphere. So you're in the sphere and it wraps around you like you're in a bubble. And you've wrapped the picture inside the bubble so that you can look around like this. Cylindrical is if you're in a cylinder and you're looking around and there's no top and not bottom and it keeps it straight like this. Okay, instead of like this. So that gives you an idea of what it's talking about in those options. And so you just have to choose which one makes the most sense for your particular shot. Now look at this. So it stitched all of this together and there was a car driving down through them and what did it do? It shows one of the cars, not 15 of the cars. Cause I ended up shooting that car five or six times as I was going across it. The car's there, car's there, car's there, car's there. But it figured it out, chose one, dealt with it. Okay so now we have our pano but we have these white areas up here, here and here because it was stitching them together and I was kind of going like this. Cause I did the whole thing hand held, I wasn't even on a tripod. I just went chi chi chi chi chi like that. And so I'm a little downhill which I don't like too much but if I wanted to keep all of this information I could just hit merge and then I could use Photoshop to merge up the rest of the sky and merge down down here just using auto aware fill or auto fill- content aware fill, that's what it's called. Content aware fill in Photoshop and it would just fill it in. And it would look great. But I can also right from here use this thing called boundary warp. If I click on it watch what happens. It just warps the boundaries to fill in those gaps to try and fix it. And it does a pretty good job in most cases. So why not use that instead of having to go to- my mantra is don't go to Photoshop if you don't have to. Well, I don't have to so I'm not going to. So I hit merge. Now keep in mind that anytime you do something wide like this, give yourself some room so that when you do things like warping and stuff like that it doesn't crop off things that you don't want cropped off. So now this is just going to build us a pano. And while it's doing it I also just want to mention, I don't need to show it to you. But I want to mention to you the idea of if you're in a situation where you can't get a tall enough image, so in this case look at this picture. I can either do a pano this way, or this way. So this time I'm doing a pano up and down. A panoramic doesn't have to be like this. It can also be up and down, tall. So if you have building you can't quite get in you can start at the bottom of the building and go up and get the building as a panoramic up. And that's in this case, that's what I did. I shot this way. Because there was not way I could get all the way down to the river bottom all the way to the sky with one photograph so I took three photographs. See, there's the sky, there's the middle, there's the bottom. And then I panoramiced them up. And it'll do the same thing. It'll stich them together. So remember you just have a lot of options inside of Lightroom. So here's our panoramic image. All ready to go. And now we would just go in and with the crop tool and we would go ahead and straighten it up a little bit so that's it's not going downhill like I was going downhill. And you can use that angle tool to do it. Say okay, where is my horizon line? It's like right about there. There, there's the perfect horizon. And now I'm just going to put this in the right crop and that works. Close that crop. And then I can start working on the image but it is a completely raw image. Which means I now have the ability to adjust everything so if I would made a panorama in Photoshop I would now be stuck with whatever exposures I had made and all that kind of stuff and I'm done. But with a panoramic that's raw, it's a raw DNG I can work on it until my heart's content. I can reset it, I can turn it black and white, color it, I can do all of that. But one thing you want to pay attention to is in a panoramic if your have any dust, you're doing to have that same dust spot on a whole bunch. Which is why when you go to the spot tool you want to turn on your visualizer and see, one two three spots. But that's so much easier than hunting for it. So I just go in and click on here, click on here. And click on here. And then turn my visualizer off and the spots are taken care of. And I don't have to zoom in and look around. And that can be troublesome if you have five spots and you do a big panoramic. Then you got all over the place. So the visualizer is really really helpful when you're dealing with panoramics. And then of course you can adjust it and burn and dodge and all that because it's a raw image.
Class Materials
Bonus Materials with RSVP
Bonus Materials with Purchase
Ratings and Reviews
Melissa Maxwell
Worth every penny. I am completely new to Lightroom and it really is like learning a new language. Jared Platt did a great job explaining the most efficient ways to utilize Lightroom. There's a lot of technical jargon that can often make creatives lose interest, but it's important and useful information. I've watched several segments again and again. He's added years to my life and I am grateful. He's not my favorite instructor on this site, though, and I made good use of the 2x button on the screen.
Kat Jones
Well, I've been a Photoshop girl since the beginning and have dabbled with LR and thought I knew quite a bit about it!! It turns out I've just been playing with bits of it! This is an amazing course. I will need to buy it for all the tricky bits that I just haven't quite grasped. Jared is amazing. Clear, concise, methodical, smashing. Thank you, Creative Live. What a service! Cat Jones Wormit Fife Scotland PS - Delightful to see Jared's Scottish piccies - very familiar, although not with the model!!!
Elaine
What an excellent class. I'm a semi-beginner, already know the basics, but wow ... this class adds an extra layer of super AHA moments that shave years off your life! What a great teacher, thank you so much Jared!