Lessons
Lesson Info
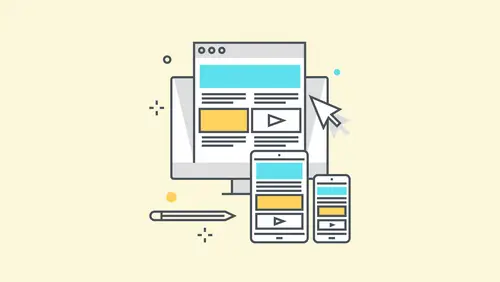
Exploring Widgets in Muse
What I'm gonna do is I'm gonna actually open up an existing site file that I have because we're gonna work from an existing file. So I'm gonna go in there and grab, let me go out to my tips file, and we're gonna start working with widgets. I'll start here. Now, this one, this file is just a site file. It's a typical responsive web page. It's got a few things, few bells and whistles. What I wanna start with is a page here, and hopefully most of you are familiar with responsive design in Muse and how it works. I'll talk a little bit about it as we go, but if you look on the right hand side over here, one of the more powerful features in Adobe Muse is there are widgets. These are, every time I teach, this is where people want to go, this is what they want to learn, what they want to go to, because this is the power. This is, if we want to add a slideshow, something like an image-based slideshow, and that's what slideshows are, they are image-based slideshows. You don't add any other conte...
nt, videos, things like that. We have compositions. Compositions are sorta like slideshows, but you can put just about anything you want in them. We have buttons. Buttons allow us to use a high DPI switch, which what we're going to talk about in just a little while here, and also just a generic button if we want to work that way. And I want to start there. This is relatively straightforward, but I want to show you a cool something-or-other that you can use, little animated feature, for a lot of content you work with. So what I'm going to do is I'm going to take that Start button. You're going to see it right here, just a little button. I'll drag it out onto the page. Now, I am working in my desktop mode, or my desktop view, the size for desktop, and when we work with content, we all, a lot of us probably know, that we can work with states in Muse. So states are a rollover active, that type of thing. If I have an object out here and I look in the upper left corner up here of the application window, with that object selected, we'll see the states up here. So we'll see normal, rollover. We'll see mouse down, and we'll see active. Now the great thing about these states is that when a user interacts with this object, we can kind of give a visual cue as to what's going on. If they're about to click, what does it look like that type of thing. But what I love about these is that, for instance, on the rollover state, you can actually come to Transition here and you can set up a fading. Basically it's an animated rollover, if you will. So we can go in and fade, and say let's set up a delay, duration, how long does it take. You can put in what's called easing, so maybe it starts slow, ease in, and ends slow, ease out, that type of thing, or you can do both. And that allows us, when we go in, let me actually test this. To test in Muse, we can hit Command P to print, technically, and test internally, or we can go to File, Preview in Browser if we want to do that, like preview page in browser, and if I go Preview, which we need to do, we're going to take a look and see what it does for us. So if I do the rollover, you see that animated state right there. And it's going to bounce back over to the normal state, but all we need to do is we need to set a transition then going back to that normal state. So let me go back over to Muse. If I go in the upper left corner, and I go to the normal state, I can set up a transition for fade there, and do whatever I need to do. And that way for all the different states for the object, it doesn't have to be a button, for the object, I can make it animate. So we've got a lot of things we can work with as far as widgets are concerned. I want to show you a couple out here that I absolutely love, so let me go back over. I'm going to open up another page here that I've got, or another site, rather, so let me go to File, Open, and we're going to start to add a few more different types of composition widgets and work from there. So I'm going to open up this page right here. I'll double click. And if you look in the widgets library panel, you'll see the compositions. Now, to me these are some of the best things we can work with, because we can do something like this. We actually have what's called a tool tip widget. Now, all the composition widgets work the same way, they're just set up a little differently, okay? I'm going to drag out a tool tip. And suppose we have this image out here, and what I'd like to do is I'd like to make it where if you hover over a part of an image, it actually shows a tool tip as part of the composition. Well that's exactly what this is, if I move this over a little bit. You'll see when we work with composition widgets, the actual target, or the thing that shows up, can contain just about anything. I can put a picture, text, video, all kinds, you can put a slideshow, you can put all kinds of stuff in here. But the way these composition widgets work is you actually have what's called a trigger, which is, let's say, like this little circle right here, and the trigger that somebody clicks on, rolls over, whatever you have it set to, will show this thing, this content. Like I said, content can be just about anything. So what I can do is I can take these little triggers and put them in different places. Let me drag this one over here for instance. And we can go in and, like always, we can set things like our states if we want to. Normal state, active, rollover, etc. And a lot of times what I like to do for these is I'll actually set colors and borders and maybe something that will make it look a little different. That way you can see maybe the border or the target or the object. Let me put a little color in there just so you can see it. There we go. Now with each one of these, you actually have this associated with each trigger, if you will, so this is the target area. We can put just about anything we want. Like I said, if you go in here, you gotta think of composition widgets, when you drag one out, as a group of objects. So the way we tend to work with these, you'll notice that I'm just clicking a lot. If I click on the whole thing, you're going to select the entire composition. If I go click one more time, I'm actually going to select one of the parts of that composition widget. I can then click again, and you can click fast or double click, triple click, jump into the object, you can select it, and you can remove it, for instance. I can go delete that content and put just about anything I want in there. So if I want to put in, let me go over to the widgets. I'll go to Social, and you're going to see we have a lot of social widgets over here we can pull in, and these are things we're going to use a fair amount. I could take a video, for instance. It could be just about anything. Anything I want to associate with that, I can just drag and drop in, and you can paste if you want to, and you notice that if I drag something in that, it's going to expand to kind of fit that content, okay? Now I could set options. I could go out and if I want to, for each one of these targets right here, these guys, I could actually press Escape, to not select the content within, but to select the actual target, the object. I can then set up colors, all kinds of things if I want to do that. So I actually have this object right here set as white. I could set it to no fill, do all kinds of things. For us to test this out, let me go in and select this again. I'll grab this object here. I'm grabbing the whole thing, let me back up a little bit here. There we go. I'll put this in. Let me put this down here so we can see the whole thing. All right, there we go. It should associate it. Now what we can do is we can start to go to each one of these triggers if we want to do something like that and have it show and hide different content, okay? So each of the composition widgets that we work with is going to allow us, and it looks like I haven't quite gotten that in there for some reason. It's not putting it in there. Let me try that again. I'll drop this in. You should see the highlights show up. It's actually going to show a blue outline. There we go. And now it will show and hide. So you've got to make sure you get that content in there. That actually happens a fair amount. And then we can go to each one of these if we want to, these targets, and move them next to or however we want to position it. So your design eye is how you want to set this up. You can do just about anything you want to. So these are pretty amazing that we go to set in and create these. Composition, like I said, all of these are set up, they work kind of the same way, but we have this trigger target thing, and they just look different and they have different defaults set. Now the great thing about the composition widgets as well is if you select the whole thing, just like most of the widgets in the widgets library panel, you'll see we have this blue option, this blue circle up here. These are all the composition widget options we can set. So we've got a lot of things we can do here. Now to start with, we just set it up with these circles, with these triggers and targets. If we want to make it so that we set up different transitions, we have it instead of fade or rollover, we can have it where they click, or do different things like that. There's a lot of ways that you can play with this to get it the way you want. Now we're not going to test this right here in the page like most of our content that we set up as widgets. We're going to want to go in and either test it within Muse, you can press Command P if you want to, it's kind of like the print command, but we're going out to Preview it. It is previewing it in a browser engine, but you can actually see we have our content, there we go. So each one of these triggers and targets is something that we can show. But we want to make sure make it look good. We also want to make sure we get these things so they don't really overlap, because these triggers, you're going to see they actually are going to go on top of all of the content. You can see that. All right, let me go back over. So we've got a lot of different types of widgets that we can work with, and one other thing I wanted to show you as far as this is concerned, let me go over to this page. If we want to, we can actually make it to where we put these inside of each other. And this is where the real power kinda starts to come in. We could actually have a tabbed panel system, or some kind of composition, maybe something like this. Let me actually put out a blank composition, there we go, something like that. And you're going to see once again, we have these triggers, down at the bottom, and we have the target for each. We can move these around if we want to if we select them independently. I can resize them. All of the composition widgets these days, as you'll find, are responsive. All the slideshow, the composition widgets, the forms, are all responsive, and what that means is if we change the size here and view it on a different screen, you're going to see exactly what it does, which is great. Now if we want to, like I said, we can nest these into each other. So if I have a slideshow, and I've got each one of these that I want to set up, something like this, I could actually come to the slideshows, for instance, so I'll grab a blank slideshow, and I can actually put a widget inside of a widget. Now you're going to see here that what's going to happen here is my triggers here are going to get hidden. So I can go in and select one. I can go out and try and move them around a little bit. Let me get all these lined up. Smart Guides are helping me align all this. I'm just clicking. There we go, that looks pretty good. And now when I go to each one of these, you're going to see that I can actually put a slideshow within the composition. So like I said before, when we go in and we start working in here, we maybe want to have something like a portfolio site, we want to show content, we can start to put these inside of each other just to make it that much more powerful. Now, you need to be careful when you do things like that because of the responsive nature. Sometimes it gets a little more challenging to make sure that this is going to look right when we have a smaller screen size, so you're always, always, always, whenever you do anything with widgets, just like everything else in Muse, if you're creating a responsive website, you want to make sure that you test things. Okay, so I just wanted to take you through a little bit about working with the different types of widgets we have available. There's a lot, and it's a big playground, and it's something that you can really kind of work on and test and try, and if you see a website out there, you'll see that there's a lot of ways to work with these.
Ratings and Reviews
Student Work
Related Classes
Design Projects