Lessons
Class Intrduction
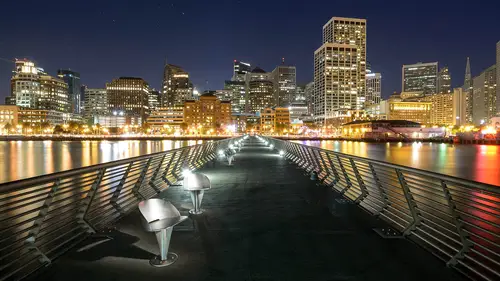
05:40 2Milky Way Image: Combining Exposures
04:32 3Milky Way Image: Simple Selections And masking
06:37 4Star Stacking: Combining Layers With Lighten Blending Mode
09:09 5Star Stacking: Layer Masks
05:06 6Car Trails: Merging Multiple Exposures
09:19 7Car Trails: Fixing Uneven Sky
08:38 8Light Painting: And Layering
03:12Lesson Info
Star Stacking: Layer Masks
when you think back to your basic composition, Um, bright areas of the scene always draw your eyes. The highest saturated part of the scene always draws people's eyes, and so does contrast areas. So when we're crafting our images within a photo shopper late room, we don't We don't want the brightest things to be distractions from our scene. Um, certain cases they can work, but in generally notice that I painted this so that this would be the brightest thing in the scene. So this is our general attraction. But then the next place my eye goes is down to these areas cause they're kind of bright. But really, where I want you going is back into here. So if I was to take a, um, an adjustment layer, let's say curves here, and I'm gonna put that at the top, which it did not go to because I was on a different layer. I'm gonna want to grab this and bring this all the way up to the top. Now it will adjust everything. So when I adjust this curve now, what I'm gonna do is sort of dark and down, and...
if I do that of course it's happening to the entire image. So what I could do is paint out the areas that I don't want, which is kind of a pain, because what it actually have to do is paint out everything up in here. And that would take a long time. But what it could also do is just go to this layer and I can hit Ault delete. And that would be all option delete, Um and that what it does is it fills with the foreground color. So if I wanted to fill it with white, I would hit Commander Control delete. If I wanted to fill it with black, I would hit Ault. Delete. Now, this change isn't coming through anywhere and own. The only place that will come through is where I paint with white. So I grab my paintbrush and flip flop my color toe white and I could go down in here and paint this lower area in where it got a little bit too, a little bit too brain. All right, that's a bit heavy handed. I feel so I'm gonna go back and make an adjustment, maybe make it not so much so. And if I feel like this got too dark now, which does look a little bit unnatural. I'm gonna click on the mask again to ensure that I'm actually painting on my mask and I'm gonna use my brush tool, and I'm gonna paint black. But instead of using 100% to paint, I'm gonna top my five key on my keyboard. And that gives me a 50% opacity. And now I'm bringing some of that back. So we always hear that, Tim, we always hear that White allows the change to come through, and in this case that changes the curve. Black doesn't allow it to come through. Will Gray allows some to come through and there's two different ways you can paint gray the first way. Let me just go back in time here, the first ways to choose black and use a 50% opacity. And what that will dio is filling that white, which is the painting? I just did. But if I go into the black, it doesn't ruin it. All right, Let me undo that by hitting Command Z or control Z. Now the other way to do it is by actually choosing a gray and so I could double click on the foreground icon and choose somewhere about a middle gray click. OK, now, same color lips. First of all, I gotta change my opacity back 200%. So I'm tapping zero, um, same color gray. But if I go into the black, that actually paints gray over the black. So two different methods for getting that gray on the mask it just depends on what you're wanting to dio. In this case, my choice was to actually choose the foreground color of black with the opacity of 50% so that if I went out of the lines, I wouldn't mess up the rest of the mask. And again, the whole goal there was to let some of that change come through and some of it not because it just got a little too dark in this corner and I could even do the same thing in here, maybe get down to 30% and take some of that out there just to kind of Brighton that up. And you can see how your creating these different tones of grey on the image. All right, so I'm gonna click on my mask again to return that to the view. And there's are finished image really wasn't hard at all. As a matter of fact, the easiest part of it was blending the stars together. It took me more time to actually darkened down this area than it did to blend the stars. So that's a great technique, folks, for being able to control the foreground light in the amount of light painting you're gonna do in the frame by star stacking rather than doing one long exposure.
Ratings and Reviews
Constantin Simion
Very good!!! Mr. Cooper presents simple Photoshop tools that can make a substantial improvement of the pictures in a way that everyone can understand.