Lessons
Day 1
1Introduction
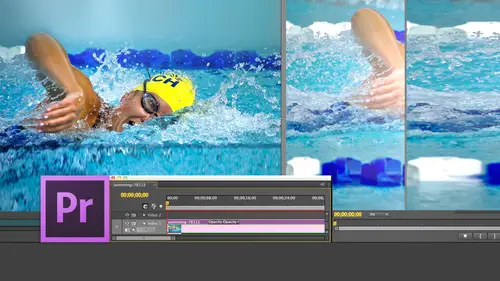
15:18 2Post-Production Workflow
26:52 3Troubleshooting
12:20 4Setting Up Hardware
29:32 5Create A Rough Cut in Prelude
43:29 611:30 am - Introduction to the Adobe® Premiere® Interface
31:56 7Configure Preference Settings
22:47The Media Browser
10:03 9Capture and Import Media
37:09 10Reviewing a Clip
29:17 11Create an Edit
24:18 12General Q&A
14:18Day 2
13Editing Review
18:24 14Editing in the Timeline
35:10 15Trimming
36:13 16Organizing the Timeline
31:19 17Labels and Markers
14:18 18Transitions
24:57 19Introduction to Audio
31:26 20Audio Editing
45:36 21Mixing in Audition
26:51 22Audio Effects
37:41Day 3
23Normalizing and Syncing Audio
24:54 24Text Effects
38:12 25Blend Modes
14:48 26Motion Effects
43:07 27Filter Effects
34:28 28Chroma-Key and Lumetri Looks
19:56 29Color Correction
57:31 30Editing a Mini-Doc
41:09 31General Q&A
26:54Lesson Info
Audio Effects
we've talked a little bit about effects. We've talked about the fact that there are video transitions inside the effects panel, and if the effects panels not showing, you go up to the window panel and show effects that keyboard shortcut there with the big fat arrow. That's the shift key Shia Type the shift key and type the number seven to reveal the effects panel. So under under our video transitions we looked at before, we also have audio transitions off which there are cross fades. There's a constant gain, constant power and exponential fade. What constant gain allows us to do is to grab the the transition and drag it to the end of our clip, drag it to the end of our clipping and struggle to find the end of our clip. There it is right there, and then we grab the edge of the transition and drag it out the same way as we did before, highlighted to be able to show it in the effects control. And this is a constant gain. Now look closely at the shape of this curve. Notice that it's a stra...
ight line going from faded out to fade it in this is called a linear or constant gain transition. A constant game transition for audio is going to be best when you're fading to or from black. If you're cross fading between audio sources, then you want a different transition. But when you're fading to black or fading from black, the constant gain is probably going to sound the best. This allows you to set the direction I tend to use, Ah, one or two second audio fade. But you can also grab the edge of this and drag it out to be whatever length you want. Soap operas are infamous for five and 12th boom pom pom minute Fe, JDA Black for the better part of a week, and then we go to commercials and we've got this aligned here, and that's the way it works again. You change the clip inside the effects control panel, but there are other transitions that we can apply. If I highlight this and hit the delete key, constant power is different. You're going to see that has a different shape and notice here with constant power. There's, ah, curve to this, and this is due to the log rhythmic nature of audio. If I have two clips doing a linear fade at the exact center of that fade with those crypt clips cross, there's a three D B dip in volume. So the audio goes, you comes back up. I did a pitch, but it's actually a lowering in volume in the middle of that linear fade. So what we do is we boost each of those curves by three db to make it a curved shape. And that's what's happening here. We've boosted the curve up by three D B, which means I cross fade from crickets to air conditioner. The volume of the background sound remains the same. If it was linear, it would dip. Three db. But because it's curve, it's smooth, so the constant power transition is best used when you are cross fading between constant sounds, the constant gain is best used when you are fading to or from black and again, you can set the duration, and you can set that appear. Or you can grab the wing down here and drag it back and forth again. We'll delete that clip the exponential fade. Um, exponential fade looks like it's pretty much like that other fade we used before. I haven't used that in so long. I thought I would open up, see if visiting. Interesting. There's nothing interesting here, so I'm just know, nothing interesting to see here. Just move along. So we're gonna move along and we're gonna constant gain. Best for to and from black. Constant power. Best for Kant. Cross fading between two musical clips Cross fading between study, State background noise cross fading between, say, two people talking. So that's transitions. Let's take a look at an audio effect. Well, what we're saying is that we want to standardize the communications standards, the protocols, they're used in space. Okay, so let's spot what we're saying and go to that marker. Letter C is the razor blade tool. We're gonna cut the clip right here. And no, that's not what we're doing. What we're saying is that we want to standardize the communications standards, the protocols, they're used in space and we're gonna cut the clip right there and we want to apply a telephone effect. Well, the reason that I cut the Clippers, I want this to be unaffected. I want this to be unaffected, and I want this toe have the effect. That way you can compare easily the the results of adding this filter. So this time is that working with audio transitions, we're gonna go to a new category called audio effects. And there are a lot of those the AU effects stand for audio units. Those are the ones that ship with your Mac, and they may or may not be on your system. I've got Premier and I've got a variety of versions of final cut installed on his laptop. These I've seen since final cut four and maybe earlier. So I'm not exactly sure if they shipped with final cut or not, so I can't promise they'll be there. But they the AU stands for audio units, and most them are just really not even worth getting out of bed for. But the others are shipping with Premier, the ones that don't have a you at the front and most of these air designed for people with no taste. So we're not gonna work a whole lot with this stuff, But I do want to spend some time till the key finding the one that I want. I mean, I could do this with a low pass and high pass filter. But there's no all right if I could spell there just low pass. OK, good. We got that one and high pass time for math class. And no, I'm not calling on Jim. Human speech goes from a range sorry human hearing goes from a range of 20 cycles per second to 20, cycles per second. Although that encompasses all of human hearing, it does not encompass human speech. Human speech is a subset of that. The male voice starts around 200 cycles and goes to about 6000 cycles. Female voice starts around 400 cycles and goes to about cycles. So 200 to 6000 for a guy, 400 to 8000 for a girl. And there's all kinds of exceptions. And don't yell at me. We're just trying to give you some ranges to work with. Kids start like way above that cycles and go up, and I'm just exaggerating for effect. Kids just squeak. If I want to warm up a voice, I boost the low end around 200 cycles for a guy. If I want to warm up a girl's voice. I boost the low end around 400 cycles. If I want to improve diction, I boost the high end around 3000 cycles for the guy around 4000 cycles for the girl. Problem is, and I havent forgotten you'll be there in a second. The problem is, if I try to represent full Fidelity voice on the telephone circuit, our telephone system would collapse. Years ago, they realized that they cannot provide full frequency sound on a telephone wire. The bandwidth is just too great, so they restrict the band with of a telephone circuit. So it starts at 350 cycles and ends at 3500 cycles. So 3 50 at the low end, which means most of the base is ruled out and 3500 which means most of the high end trouble is ruled out. In fact, Susan, did you know that the difference between the letter F isn't Frank an SS and Sam, both of which are called Fricka Tibbs and both of them are formed by air whistling between the tip of your tongue on the top of your mouth? The difference between the letter F and S is 6100 cycles for a guy and 8000 cycles for a girl. If you say the letter f and just try this will just embarrass everybody in public for second. Just say the letter f And now say the letter s theme differences. It is formed exactly the same way. But the S has got the hissing sounds and the f does not that difference. That hiss is 6000 cycles for a guy and 1000 cycles for a girl. Is that not a cool piece of trivia or what? I already knew that, Larry. You already knew it. Yeah. See, this is why I love associating with people of your calibre. Thank you. So if what we want So the telephone, if I'm listening to somebody on the telephone. You did not know that, Susan, you were just making that up. You said I've got you already know this. So I just wanted to confirm, Like, make you look like you are correct. Make sure that you looked like you were correct. You guys over here. So what you gonna do is the telephone doesn't pass that frequency. Even if you had perfect hearing and an $800 telephone that telephone circuits cut off at 3500 cycles. It is impossible for you to know if the person you're talking to is said. Meet me at F Street or meet me. It s street because the frequencies aren't passed by the phone. So you have to ask. The person you're talking to is that efforts in Frank and or s isn't hotel because the telephone doesn't pass those frequencies. Even if you wanted it to s and hotel. How about S isn't Sam, So anyway, we will. What we need to do is we need to create a filter that passes all frequencies above a certain amount and passes all frequencies below a certain amount to give us the look of a sound of telephone. The problem is 300. I'm still recovering from Susan. Knowing those frequencies, I'm still in shock about that. The problem is, a frequency response of 352 3500 is actually pretty good if you've ever listened to am talk radio, which I know all of you listen to on a regular basis and person calls in the voice couple of a couples of telephone circuits into the radio station makes that voice sound pretty good. The reason telephone sounds so cheap is the microphones and speakers. The handset has not because of the circuits themselves. So we're gonna add a filter to here. And that filter is a low pass filter What a low pass filter does. I'm gonna grab the filter and dragon on top of the audio. The low pass filter will pass all frequencies below a certain amount. So we're gonna set this to 2500 cycles. We want to pass all frequencies below past the low frequencies below 2500 cycles. Then we're gonna add a high pass filter. The high pass filter passes all frequencies above a certain number. And I'm gonna use 500 cycles. If I did 3 50 3500 you'd say, almost sounds normal. So I've got to be Excuse me. Even Mawr Restrictive. I've got to pass everything below 2500 above 500. Now, see if you can hear a difference they have at the Jet Propulsion Laboratory. We've been working for the last six years, okay? And some people imagine when you what are you doing. You're building this interplanetary in and and hoping somebody will come and no, that's not what we're doing. What we're saying is that we want to standardize the communications standards. Protocols were used in space because if we do that each time now, could you hear a difference? Now, if you cut to a tight shot of Jim holding a phone to his ear and I hear that audio coming in as Jim is talking, I will send in a heartbeat. You'd sell that shot as him listening to the telephone, but you never, ever, ever recorded the audio on set. At this quality, you always record audio on set at the highest possible quality because it's easy to degrade, cause now if I grab the role tool, which is right here and I grab this, this is the cool reason of setting. It is a filter. I change where that clip at it occurs. And now listen working for the last six years or so on the design of an interplanetary extension of the Internet filter is applied to the clip. If I change the duration of the clip, you doing your building and no, that's not what we're doing what way? Standard wherever the clip boundaries are, is where the filter transition occurs. So what I'm able to do here is I've got perfect audio. I slice the clip, which is a perfect example of where we use it. Through edit. I slice the clip. I apply the filter setting just to that part of the clip that we care about. Poof. Instant effect. Kelly. Can you do that with key frames as well? So that you do it by time rather than what clip it's. You'd never use key frames. Key frames? Are you gonna be spending all your time adding and deleting key frames? What the best way literally the best way is? Slice the clip and enroll that until it gets to be exactly where you want. It's instantaneous. It could be changed the heartbeat, and you don't have setting key frames and moving key frames and change the lines and key frame. No, no, no. Just apply to the clip. OK, key frames. Would you would you would be swearing at me. By the time you created 1/3 key frame, It would. It's just there are times and places to use key frames. This is not it. And can you apply multiple? Can you apply that effect to multiple clips at one time? What is the number one interface rule of premier? It is not a carts, I think. Therefore I am. But it is instead remember off hand. This is a quiz. Anybody remember, Scott, select something. Do something with Yes, yes, yes, exactly. Right. So if you select something to do something to it, all you have to do is to select the clip or clips you want. The filter applied to drag that filter on top of the selected clip, Adobe says. We could also double click, and I'd never believe that. So select the clips Dragon on top of the selected group of clips of filters applied to all the clips at one time. But it applies them at the default value, which means that I would have to go back on a clip by clip basis and adjust the filter. This is terrible. This is a waste of time. What I need to be able to do is I need to be able to select the clip and copy the effect and paste the effect in tow. all other clips and not surprisingly, if we select the clip, go up to edit select copy, select the Cliff. We want the effect pasted to and go down here, see where it says paste attributes. We can paste attributes. I don't want to paste any video attributes. I don't want to paste any audio attributes except the filter. I click. OK, And now instant clips with effects paste without having toe. That makes it really easy paste attributes. And you can select exactly the attributes you want. A paste Nicely done. Thanks. You're welcome, Alex. This goes back just a tiny little bit. The when you with the audio there's your two basic types of trend dissolves transitions Whenever If you use the default, is it? Which one is it? But there is no default. Oh, like the Yeah, Yeah, yeah, yeah, that's shift command. D whatever stupid software. D for a transition. Can you imagine d for a transition? What sense does that make? All right, I may be done, but probably not likely. All right, Let's just see your shift Key scroll. We'll find where our transition went. I thought I had it. All right. Select the clip shift, Command de There it is. Drag it out. No, no. Select. Okay, so select the transition and it's a constant power. So it defaults to cross fading because it's it sees that there's audio on both sides. It defaults to the correct one. And although it is true that constant gain will probably sound better when you're fading to and from back black, the world will not end if you use this one. And this is absolutely preferred one to use when you're cross fading between two study state sources like music. So yes, settle work, other questions. Larry, we have some questions about sinking audio when we ask a couple of those can. Alright, Awesome. Uh, Lewis s said I recorded audio separately from the DSLR. Should I sync audio first or do all audio work last and cut the sequence using the reference on camera? A great question. That is what I'm gonna do. What I One of these I've dropped until tomorrow is how to sink dual system audio. We're gonna cover that first thing in the morning. So when you shoot on a DSLR how you sync audio to it, So that's gonna be the very first thing tomorrow, just cause we won't have enough time today. So if that was the question is going to defer it always, always, always, always sync audio first and then add it. Don't ever try to go back and sync audio later. It will drive you completely nuts so you sink your audio before even bring the clip into the timeline. Once it's sunk, then bring it to the timeline and edit with the correct audio. Anything else is you're gonna be spinning your wheels and you're gonna be really angry because finding the sink later it's gonna be tough. I think we do have a star. Um, because of your in depth knowledge with our telephony system, you were able to pull out the 3 53.5 K to know that that's what you're high and low pass would be to get that effect. Is there a source material that you would recommend in learning other effects that we could do, say, underwater or any of those types of effects, where it is a constant noon high pass, low pass chart or reference material to know those things? One of your books perhaps, or any book by J. Rose are OSC. He's been writing for a long time. He's in a long time. Audio engineer would be definitely worth reading, Um, any book about audio? So don't read any books by people who are writing about premier or avid or final cut because somebody who's writing about video editing can spell audio. And that's about the limit of it so well except my books. But aside from that, but look at books for pro tools or audition, and they will go into more discussion on audio filters how to use them. So what I would do is is use pro tools is the bigger, more well known name. But the filters work the same frequencies of the same regardless, whether you're in soundtrack or pro tools or, uh, sound, forge or or audition, they all work the same, and they have the same name, so they may have a different interface. But any audiobook covering that would be a good choice. All right, Larry, one question. This is from debt home. Who said Is there a way to sink beats in music to cuts in picture easily and quickly? The dream questions in after effects? Yes. In motion. Five. Yes. In premier? No. Now what we can do? Read the question again. Is there a way to sing beats and music to cuts in picture easily and quickly? No, not the way he's asking. But what you can do is this command a delete? Um, I have here some music, Tyler, this is gonna be a bit loud and we'll turn on way force by clicking the wrench. Pull that down a little bit. Notice that yellow tool tip. If we look down here at the bottom, it says and I'm pulling it down about negative two db because these red clip lights came on. This happens a lot when you're editing because you're mixing sources. It's it. It is never okay, But you're not doing any damage when all you're doing is playing. If I were exporting that, that would cause distortion clip, and that would be bad. Now what we can do and the only thing that I'm thinking of if you hold the command key down and type, see if we can do this. No, that's just expands the video track. We can't expand the audio track by pulling down here, can you? Susan, I'm gonna ask you a hard question for just a second. All right? Can you see any pattern in this musical wave form that might indicate where a heavy drumbeat exists? Possibly the spiked? Yes, exactly right. Let's take a listen. It would be useful if I actually turned the volume on there We go wear hearing the tap of the drum at that point and notice that it's really loud and it's really sharp, and it's really short. So what I would use if I needed to sink to the beat of the music is I would zoom in enough that I can see that percussive beat, and then I would then just simply say, that's for my cuts. Have to be. There is no automatic way to cut their, and by the way, music has a time signature where there's four beats toe, a measure for almost all rock music, three beats to a measure for waltzes and for some classical music and five beats to the measure for jazz. But 95% of music being created has got four Beach, the music bum 234 boom 234 and you want to edit on the downbeat, that big, heavy first beat of the music of a measure and the musicians will tell you where it is. You can feel it. It's where that that strongest beat is of the four beats you. Generally, when you're cutting to music, you want to cut to the down beat beat one of the measure. Another thing that, uh, we can do is he is so smart the last six years or so on the design of an interplanetary extension of the Internet. Okay, so we're gonna edit that down to the timeline press the period key. I never pay attention of my my play head. I'm just not tuned into that. So I'll just delete the gap backslash key to get it to Phil. And I'm going to normalize this now that we've solved the issue of the master gained Go to clip audio options. Audio gain normalized the maximum peak you'd never normalize. 20 It's too loud normalized to negative three. There's more in another role that I have at the Jet Propulsion Laboratory. We've been working Spiteri extension of the Internet. Okay, so that's about what I would expect in terms of level. Now what was I o que? One of things that you'll often want to do is you want to improve diction or you want to improve the warmth of the voice. We do that with a filter that's called the e que, which stands for equalization filter. No, I don't. I never If I'm getting into EQ, you are moving over to audition. But to use the eq you you grab the EQ, you filter dragon on top of the clip load, click on a clip to selected, go to the effects control and there's the effect called e que. You are able to reveal what the interface looks like by clicking the edit button. And this opens up the e que editor. Now, this looks really scary, but what in fact, it's doing just make this a little bit smaller. We're gonna leave it there. Is it rep Let know I'm going to zoom in where we kill. This represents human hearing. Human hearing in all audio applications is representatives arrange from 20 cycles per second at the low end of 20,000 cycles at the high end. This is true of every audio app base is always on the left. Trouble is always on the right, and it's dividing this range of human hearing into five bands below human hearing. Sorry below human speech, low human speech, mid range human speech, high range human speech and above human speech. If I slide down here just a bit, what I'm able to do is I say, crank this gain up right around 200 cycles and noticed that ive ableto ad or remove frequencies around this range. If I click here, I'm able to change the frequency range itself. So if I was warming up my voice, I would warm my voice up around 170 cycles and I'd add between two and four db of game. This is a spice. When you're warming up voices, you're just enforced, reinforcing some specific frequencies. You're not creating a mountain. You're not building something this big. You're just adding a little bit of emphasis at that frequency. Now there's a raging debate between audio engineers about whether you're better raising a specific frequency or lowering all the other frequencies around it. It my feeling is, if your audio is recorded soft as all onset audio is raising frequencies is okay. If your audio is recorded hot as music is, then you want to pull all the other frequencies down, because if you boost it, it's going to distort. But here he's 6 to 12 db below zero. Raising it three or four db is not gonna hurt anything, but never, ever. 13 db That's just way too much. So if I wanted to warm my voice up. Or Alex's voice or Scots Voice of Jared choice between 172 100 cycles is where and put it. If, on the other hand, I wanted toe warmup, Susan's voice or Janice's voice, I'd raise this frequency around around 400 cycles. Now we're raising a range here. It's not exactly 400 cycles that would create a tone. We're adding a little bit of a hill in here, and I'd add between two and four db of game. I used to really obsess about this, but then I invested in better microphones, which have better bass response, and I don't warm up voices much at all. I'll buy a better mike that has a better low end frequency response. So uncheck this to turn it off. What I do do almost always in my mixes is I'm gonna boost dragged down. I'm gonna add between three and five db of gained between 28 3000 db between three and five DP of gain around 2800 to 3000 db for a guy because what this is going to do is this gonna pick up their diction? It's gonna make their constants pop. It's gonna add clarity. And for a girl, I want to move this from roughly 2800 to 3800 to 4000. I raise it 1000 cycles. This makes it easier for older folks who may not be listening a good speakers or may not have perfect hearing. It just allows that that voice to cut through a little bit like removes a little bit of the fog bank it. I'm wondering in the case where you would be doing the interview you and Susan, for example, and you wanted to optimize the audio. Would you, in that case, too, through cuts in between No, I would have my audio member I recorded Channel Moneo model. So I'm on one track and Susan's on the second track. So I've got EQ. You dialed in for me on my clip on a one anti coup for Susan. Dialed in for her on a two. This is one of the really big reasons for recording dual channel model in an interview. I've got level controls separate for both of us. Editing control separate, and I can add filters that are separate. So this is, by the way, the Q determines the shape of the curve. Askew goes up, the shape of the curve gets gentler. A queue of one is just ducky. Leave it alone. Don't worry about it. Feel good. Hold your head up amongst polite society, everybody will still like you. Um, let's see what else? I'm gonna talk about that tomorrow. Gonna talk about that tomorrow. Oh, well, we've talked about that if you have. If you If you are finished with the content today, we can ask a couple questions. Okay. Okay. And then what? I want to do what? Spend the rest of time asking questions. Tomorrow. What I want to do is to show off a couple of audio effects that I didn't have time for sinking dual system sound is one. And then what I want to do is to go through like, a minute exercise and show how I would cut Ah whole package together from bringing in the clip, listening to the audio, setting it in, setting out adding B roll. And this time, unlike everything else we've done where I don't care about content This time I care about content and make it look good. So we'll have that the first thing in the morning. And then we'll shift gears into effects, which we will spend the bulk of the day doing. Perfect. If that meets with your approval, it absolutely does. OK, we've got a question from Alex and we'll turn it back over to Perfect. Open that window again for just a second. I just had open quickly. Edit button is it opens and then I see it says presets there. So if you normally did this for this was a woman's voice, could you save this as a woman's voice? And then it would just be there every time. Maybe, maybe not. Maybe not. This, by the way, bypasses the filter. I know that because I just rolled over. This is a really cool tip. If you don't know what's going on, roll your mouse over it and see what the elder tool tip says. The reason that I'm not sure I don't see it is that I don't see a save. You know, Let's just check farther down. And there's so much that you can do with an e que filter. I mean so incredibly much that that this is like, sort of shaking hands with a storyteller. You know, you've got great stories. You just got to spend the time. This does so much that you deserve to spend time learning the two most powerful filters that we work with in audio is an EQ you filter and some sort of level control, especially when you're in a hurry, like a broadband compressor or ah huh limiter, Which just this. This just no time. But e que is so powerful. All of all, the low pass and high pass filter is, is a specialized form of any Q filter to create a telephone effect or warm up a voice. So you learn about it. It's really cool, Susan up to you, absolutely, Kilts asked. What is the easiest way to get rid of air conditioning noise. Um, let's just see the D noise Air filter will do it. Let's see if I even like it. And premier No, I don't like it. Premier. I'd move it over to audition. Audition is phenomenally good. There's two. There's three programs that you could consider using. Audition is published by Adobe. It's a great editing repair mixing problem. It'll reduce clicks. It'll remove noise. It will remove. Reduce noise. Remove home. It's got a brand new feature called Sound Remover, which allows you to grab a siren. You can take the siren out even though it varies and frequency. It allows you to have noise reduction where you can remove the sound of air conditioning It. I cannot stress enough using the right tool for the right job. An audition allows you to make that possible. Another really good programs, published by Sony Creative Software, runs on both Mac and Windows. It's called spectral layers. Spectral layers pro to spectral layers allows you to bring in audio, and you've heard those those. Natalie Cole did a duet with her, her father, who died when she was extraordinarily young and they were able to take and wrap both their voices where his voice could disappear. And then they were singing and do it, and she was singing Well, What they're able to do is they're now able to grab audio as objects, even though the frequency changes and pull objects out. Not something as simple. That's a siren. But something more complex is as ah ah, human voice singing and lift that out of a mix of an existing stereo clip The way that we adjust volume, we can now start to play with pitch and sounds, objects and spectral layers conduce, um, amazing repair work. So for things like noise and home and clicks and pops exploded peas pop tease. This is the sort of stuff you just move our toe audition and clean up because it's fast. It's easy. It's unbelievably good. Yields good results, and it's already built into the workflow that you have with Premier. Do you have to sample those sounds like air conditioning noise while you're on set? Does they hope to do that or well, if you think about it, If you and I are having an interview right now, all I need is the break between you answering a question and me thinking about the next question. If I had 1/2 2nd sound of that, that air conditioner, that's all I need. I don't need a huge amount of time getting room tone is great, and it's always a good production practice, but it's not required. I need 1/2 2nd of clean of the noise, maybe 1/4 2nd but over and that's that happens during every interview. While there's let me think that was such a good question. Oh, no, that Paws is only need. So as long as Robert Altman it's not directing, were good. Even if Robert Altman is directing, there's a point between they say cameras are rolling and he calls action. That half second is all I need. Awesome, Thank you. Nice try, though. You didn't try to trip me up and keep working at it. All right, let's ask a couple more questions before we wrap. So if you guys have any final questions in the studio audience for today, think about what those are Travis City Productions asked. What is the difference in premier between normalizing Max Peak versus All peaks normalizing Max Peaks? I think and I'm not totally clear Normalizing Max Peak versus all peak. So I remember the choice. I wonder Let me say I don't know when I look up the answer because I suddenly realized there could be two contradictory but equally valid answers. So I'll check that I could get back to you. Could you make a note? Ask me tomorrow I will highlight it and make sure that we have that some good. All right. Okay, so, um, I want to dio good one here. So, um, it asks in music to stereo. Is it better, um, to record in stereo or can you record in mono when there's just a single? So if there's a singles solo singer, would you prefer to record in mono? Oh, well, let's back up a step. Yeah. How do you record Bonneau? The key thing you need to understand about recording is that the way you record has nothing to do with the way you output. You're always gonna output a stereo pair always. But I'm gonna almost always put a single mike. I mean, how Maney, wait. Let me ask a question. Kelly, you haven't answered a question in so long. we'll put you on OK, you are now in your clubbing phase, okay? And you are going to the club and you are watching the lead singer in the club sing. How many microphones is that person singing into one. So therefore, how many mouths does that person have? They have won the Hominy Mike's one might. And is that a mono or stereo feed? That's Amman. If it's right, so that's what you record. You did fabulous. So that's exactly what you record. You got one mike on the lead singer. You got one lead coming off the bass guitar. You got one lead coming off lead guitar. You got drum kits air. Different drum kits are miked in one of two ways. You either mic a drum kit with two mikes over the top of the drum kit about eight feet away, about eight feet high to pick up the whole gestalt of the entire drum kit. And you do this when you're in a hurry. But if you really want to impress the clock, you mike the drum kit with 24 mikes, there's a clip mike on every drum, plus two Presidents Mike's plus two room Mike's about 50 feet back, and you take all 24 of those mikes. New sub Mix them together. So a single pot on a fader and they're already stereo when it comes into the sub mix. But each mike each mike is mono. See record all of your audio as a mono signal and you bring it in. And now I can take the violins and pan them a little bit left and I take the the timpani, and I panned out a little bit, right. I take the drums, put them centre Customs are always center. The lead vocal is always singing the backups or spread across the spectrum from left to right. You have that kind of pounding control when you have individual mikes on each thing. Sound person making noise always record model mixed area
Class Materials
bonus material with purchase
Ratings and Reviews
Jfraz
I love this class. It is highly technically, but there is an awesome wealth of information to be had, even if you are a beginner. I've been struggling for a while, trying to look at YouTube videos and whatnot, but this class helped me make better sense of what I needed to do in all of my video editing. You get such a great foundation that's going to help you go further.
Valentine
I recommend Larry Jordan's course there is a lot of in-depth information that will help the beginner as well as the advance premiere editor. The only thing is that his humor is a big corky for my taste but if you look beyond that you get a lot from his teachings. He genuinely wants his students to succeed and get paid well in this field which its nice.
a Creativelive Student
This is one of my favorite courses on Creative Live. Larry Jordan teaches in a way that I can follow and is easy to stay focused on. He has a crazy amount of knowledge about this topic as do all the Creative Live teachers. I love this site so much, has done more for my business than all the other sites I have used combined. Keep it up CL!!