Lessons
Day 1
1Introduction
15:18 2Post-Production Workflow
26:52 3Troubleshooting
12:20 4Setting Up Hardware
29:32 5Create A Rough Cut in Prelude
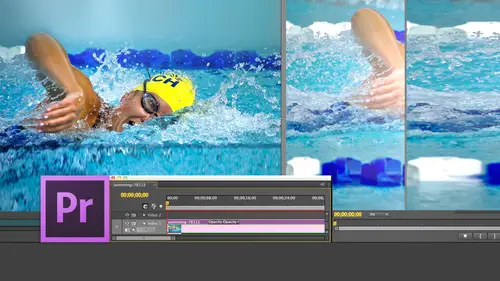
43:29 611:30 am - Introduction to the Adobe® Premiere® Interface
31:56 7Configure Preference Settings
22:47The Media Browser
10:03 9Capture and Import Media
37:09 10Reviewing a Clip
29:17 11Create an Edit
24:18 12General Q&A
14:18Day 2
13Editing Review
18:24 14Editing in the Timeline
35:10 15Trimming
36:13 16Organizing the Timeline
31:19 17Labels and Markers
14:18 18Transitions
24:57 19Introduction to Audio
31:26 20Audio Editing
45:36 21Mixing in Audition
26:51 22Audio Effects
37:41Day 3
23Normalizing and Syncing Audio
24:54 24Text Effects
38:12 25Blend Modes
14:48 26Motion Effects
43:07 27Filter Effects
34:28 28Chroma-Key and Lumetri Looks
19:56 29Color Correction
57:31 30Editing a Mini-Doc
41:09 31General Q&A
26:54Lesson Info
Color Correction
color correction fixes image problems. Color correction is generally done inside. Premiere Color grading gives your images a specific look. Color grading is generally done using speed grade or DaVinci Resolve or other color grading software, which has done outside premier after he read it, is over. Primary color correction adjusts the entire image for the entire clip by the same amount. A primary color correction would remove ah blue color caste or de saturated image. A secondary color correction adjusts a portion of the image for the entire clip by the same amount. A secondary color correction would change the color of a red dress to blue or make the red color oven apple redder or a blue sky bluer. Today, we're looking exclusively at primary color corrections, a way for monitor displays, gray scale image values. The way for monitor tells us everything we need to know about the grayscale value oven image but tells us nothing about color. The vector scope displays the color image values...
, and the RGB parade displays the amount of red, green and blue in an image. There are two parades scopes. I prefer the RGB parade compared to the other one. Others other scopes inside Premiere, but these three are the most important. The wave form, by far is the most important scope you can use inside any video editing package. The vector scope is second. The RGB Parade is a distant third. And whether using premier CS 55 or six or C C or final cut 567 or 10 or or Avid's Media composer or Sony Vegas, all scopes work the same. Everything I'm telling you in these slides is exactly the same. Regardless of what software you're using. We read scopes exactly the same way there calibrated the same way. So this applies to everything. There are seven grayscale categories. This is the scope from premier. It's the wave for monitor the orange lines to orange horizontal lines represent 10% differences in white level. This line near the bottom and my little mouse pointer doesn't work. But notice that there's an Arab Well, let's start at the top. The category that goes from ah 120% down to 100% is called super white. These are illegal white levels that go that are between 120% and 100% The problem is, most digital cameras shoot at these levels. The 100% line represents video levels at 100%. This is the maximum your video level can go. Highlight levels between oh about 65% or 100% are called highlights. Grayscale values between 35 65% are called mid tone. So we're mid grays, or mids, and shadows are video levels between 0% and 35%. Thes of the three broad categories of grey scales shadows at the lower third mids in the middle. Third, highlights in the upper third at zero itself is black below zero from zero to about 20% below zero is called super black and super black also is an illegal level. So the range of gray scale member that's shades the black and white that we want to work within. Our video starts at zero. Black goes to 100% and it's divided into shadows for richness, mid tones for emotion and highlights for energy. So let me show you how to display the video sculpts using the reference monitor how to switch between the different video scopes and use them to evaluate images, then we're gonna come back for some more theory. And then we're gonna look at how we can do color correction of some of those images making sense so far over there. Hit that key hit that key hit escape. This is a great Ian. It represents 100% white on the left, 100% black on the right or phrasing that differently. 0% black on the left, 100% black on the right, or 100% white on the left, 0% white on the right. This radiant represents every shade of black, white and gray from white to black. That's the definition, but we can't prove that unless we look at the scopes. So let's change our workspace. Go up to video, go down toe workspace, go down to color correction, and it relays are scopes out so that we can see different elements. If I double click this clip, it loads that radiant up into the source monitor and scopes air displayed down here and what's called the reference monitor. We click on the wrench and we do two things. We want to make sure that it's gang to the program monitor and our scopes. There's our vector scope. There's the wave form. There's the RGB parade. We can also see scopes in groups, which, if you have a larger screen display, makes sense in a small screen like this. It would be just a jumble. You always always, always start with the way for monitor, so I'm gonna click on that. And this is a very small representation of the monitor large that we saw a little bit earlier. Let's just make our picture smaller here so I can make the scope bigger so you can see what's going on. This blue green line represents the pixels that are inside the image. There's are 10% lines going across sideways, and there's the pure white on the left medium, grey in the center and the black on the right hand side of the screen. As we look at the way for Monitor the Weaken say things like the left side of the screen is bright. The middle of the screen is brighter than right side but darker than the left, and I can say the left. The right side of the screen is darker than everything else. The left is the brightest centers in the middle and right, Stark, I can say things like left and right, but I can't say things like up and down, up and down in the scope represents the brightness of that particular pixel. So while I can say the left side is brighter, I can't say where up or down on the left side that bright in which is located notice also, I've got two bars over here, a green bar and the blue bar. They represent the range from low to high of luminous values green and chroma values blue. Which gets me to this section right up here. Intensity controls how bright your pixels are for right now. We're gonna leave it at 50% in a minute. We're gonna make a little bit brighter to make it easier to see if you're dealing in an analog environment meaning videotape you would worry about set up. We're in a digital environment you never, ever have set up turned on set up should always be turned off. Chroma indicates that it's going to show you color information as well as grayscale information and you never look at color information. So you want the intensity to be whatever it helps you to see the scope set up should always be turned off, and chroma should always be turned off. This represents the grayscale values of this clip. Let's take a look at this next shot. Now I've got a blue ball as I look at the way for monitor. It starts in black. It becomes lighter and lighter. It gets to about a maximum of 40% gray and then goes back down to black. I've been reading scopes now for more than 40 years, and I can say the left side is dark. The right side is dark and the center is brighter. But there's no way I could say this is a ball, a circle of square, a triangle, a pipe. You can't make content decisions. Looking at the scope. I can evaluate the technical image, but I can't evaluate the content of the image. If I look at the third shot, look at this mountain range. Now we're starting to see a significant range in pixels. There's two ways that we could describe an image. There's a low key image, and there's a high key image. Ah, low key images where the wave form is all in a very narrow band. There's not a lot of black, grey and white. It's all sort of like a foggy day. It's all in the middle or ah, high key images where there's a wide variation between the absolute darkest part of an image and the lightest part of an image. As we take a look at this particular image, we see that our black levels that's the shadows under the shrubbery, is sitting right at zero. Right where it needs to be. Zero is as dark as any part of your image can get. Then we've got a good band here. We got another band here, and we got 1/3 band here and noticed that the brightest part this is the snow on the mountain. Is it 90%? We could go asshole I as 100% but we can't go over 100% white levels over 100% are illegal, so this darker band here refers to the shrubbery. That's this area here. The middle band here refers to the lighter gray of the mountains, and this is the snow at the top of the mountains, and I I don't know that because I can say, Oh, well, that looks like snow To me. You could have sky that's that brought you have clouds of that right? I'm just saying, what looks like to be the brightest part is the white snow at the top. But although the snow looks like it's really bright, it, um, it's not 100%. It's only 90%. Let's do one more, and then I want to switch to a different scope. Take a look at that night shot on the Yarra River. Look at our scope again. I've got pixels that extend all the way to 100% but there's not a lot of them. The bulk of the pixels air below 30%. The darkness of the river, the darkness of the sky. But I've got brightness coming off all those spots of light, that little bit of gleam of the setting sun over there. I see that right up in here, but you would never, ever say this is a daytime shot. It's a nighttime shot. We can see that the bulk of our pixels air down there. Let's take a look back again to the very beginning and look at our other key scope for right now. Click on the wrench and switch to the vector scope. Imagine if you will, that I had a six inch knitting needle. The tip of the needle is painted pure black, and the head of the needle is painted pure white and every shade off black, white and gray lives along that knitting needle. Every shade of black, white and gray with pure black here and pure white. Here, if I take that ninny deal and I push it through the north pole of a grapefruit and I keep pushing until it gets to the bottom of the grapefruit. Now inside that grapefruit, right along the centre access is every shade of black, white and gray, with black at the South Pole quite at the North Pole, and it shades from white to black is a single line in the center of this great proof. Now, if I take a machete and I cut that grapefruit of the equator and I open that grapefruit up, there are all of my colors and the dot at the center of that grapefruit is that knitting needle containing black and white. That grapefruit is the vector scope. There's my knitting needle right there. That's a single thought. Why? Because the black and white values are running perpendicular to my screen, which means that every shade of black, white and gray is a single dot in the center of the vector scope. As I move out from this dot, I add saturation. And as I move around the grapefruit, I add color hue. This is the color red. This is magenta. This is blue scion green, yellow, back to read. There are three primary colors red, blue and green between. A primary color is a secondary color. Between red and blue is magenta between blue and green is scion between green and red is yellow. What's interesting about secondary colors is they are always exactly, ah, 180 degrees. Apart from the primary color. Secondary colors, when added to primary colors, always cancel and go to gray. So if I've got a green screen key here, the reason that I can get rid of green is I add the opposite color magenta and the more magenta I add. The green gets canceled to gray, and I make all that spill on a chroma key disappear. So red, blue, green, magenta, scion and yellow. Let's take a look at our second shot, our first shot. Everything is a single dot because there is no color. Here are second shot Look at that rich line that extends out from no saturation too richly saturated, landing right on top of the blue target. There's our mountain range shot, a little bit of a plunge toward blue science because of the sky, a limit of yellow and green because of the shrubbery but not particularly saturated. Or look at the Yarra River. Richly saturated Look at this huge spike out toward blue and scion green here. Yellow orange, huge saturation compared to our mountain range compared to the Yarra River, the mountain range Yarra River. The vector scope tells us everything we need to know about. Color tells us the Hugh tells us the saturation, but doesn't tell us where those colors are located. I can't say the color blue is up or down, left or right, I can say left to right with the wave form, but I can't say up, down, left or right with a vector scope. I can simply say the color exists, but not where the color exists. In general, you were just shadows to improve richness or vibrancy. You adjust highlights to improve sparkle or energy or add life to an image. You adjust mid tones to change the time of day or emotion, and I need to emphasize all these rules can be broken. Now. Notice that every one of these terms richness, vibrancy, sparkle, energy, life, emotion. They're all dealing with grayscale values. As I adjust the darker shades of gray, I add richness is I adjust the mid tones. I changed the time of day as I adjust. Hi, I'm not touching color at all. The biggest adjustments you can make to improve the quality of your image is not a color adjustment at all. It's a grayscale adjustment. We adjust the shadows to improve richness. We adjust the highlights to boost life and energy. We adjust the mid tones to change the time of day or emotion. So for me, color correction manually is the heart of color correction. We use the video scopes in the tools of the three way color corrector to bring your images toe life. I'm going to start with a bit of theory and then I want to show you how it works. In a real life. I've already explained the great proof. The great food is a three dimensional representation of the color that we see with our eyes. There's a grayscale value, the center pole, the knitting needle that runs down for the center with grapefruit. And there's a color value the surrounding part of the sphere that contains all the colors. Now think about this. Great. Prove for a second. Okay, Great foot. Looks like this roughly. The closer you get to the South Pole, the less room you have for saturation because all your colors are contained inside that sphere of the grapefruit. So I've got very little saturation at the South Pole. I've got very little saturation at the North Pole. I've got the greatest range over all of my colors at the equator, the middle of that grapefruit. So when we're adjusting colors, you're not adjusting colors and highlights. Really? You're not adjusting colors in the shadows much. You're adjusting colors in the midterms, so there's three rules of color correction. Rule number one White levels must never exceed 100% and black levels must not go below 0%. Both of these are fireable offenses. If I deliver a master to Disney or DreamWorks or Fox and my white levels go over 100% the very first thing they do is they take that file that they take that tape and they run it through what's called a recording scope. It plays the tape. No person watches it. No human being sees it. I could have the most compelling content in the world. Nobody's gonna care, because the recording scope is simply looking at audio levels, video levels and chroma levels. And then it records on a little piece of tape. Every time my white levels exceed 100% I'll never forget had this happen to me. I was doing the behind the scenes work for the eighth seasons of X Files. I was delivering the final Master DVD to Fox so they could then burn that toe a DVD, and I had 1/2 of one second off. One scene from my white levels went to 102%. 15 frames. That was it. They bounced it back, and the producer was livid that I had managed to let a tape master, go to Fox because when it comes back from Fox or any studio, it has the words on it that every producer hates to hear. You must fix this at your expense. They hate that phrase. So he had to call me and had to pay me to correct life. Never have people pay for mistakes that I make. But I also will admit I've never worked for that producer again because my white levels for 1/ a second and 1/2 hour show 102% versus 100% taught me my lesson. Really well, white levels must never go over 100%. Now when I color correct, I don't even set him at 100%. I set my white levels to 97%. They don't have to equal 100%. They just can't go over 100%. Black levels must not go below 0% now. Final Cut seven and Premiere Pro CS six and C C Do what's called Trapping. They trapped. They block what? Black levels at zero final cut 10 davinci resolve. Do not they allow black levels to extend below zero. So you need to be cautious here. You want to make sure that your black levels don't go below 0%. This is a big rule. It gets people fired. It costs you work. Don't do it. The Onley exception is you can get away with white levels over 100% if you're going exclusively to the Web, because the Web is very forgiving. The Web works in a digital whitespace, not an analog white space. And the Web will ally to have black levels at any level that lie to have white levels at any level, and you can get away with it there. But if you're going to DVD for going to cable, if you're going to broadcast, white levels cannot exceed 100%. Rule number two equal amounts of red, green and blue equal gray. Janice's sitting there writing it down frantically and she says, Yeah, yeah, I understand. Understand? Who cares? Equal amounts of red, green and blue equal gray. So let's flip that around and turn it into the most powerful statement for color correction. The most powerful statement for color correction is, if something is supposed to be great, it must contain equal amounts of red, green and blue. So if I look at something on the RGB parade, or if I look at something on the vector scope and it's supposed to be great. But the vector scope dot has moved off center or the RGB parade shows different levels for red, green or blue, it instantly tells me I've got a color cast and it also tells me how I have to fix it. I'm going to illustrate this in just a couple minutes. If something is supposed to be great, it must contain equal amounts of red, green and blue and the third rule to remove a color excess blue. You add the opposite color Hello to remove green in a chroma key. You add magenta to remove a blue cast because you white balance to camera incorrectly. You add yellow to remove orange because you were shooting inside with daylight setting, she add blue. Remove a color. You add the opposite color, so the basic procedure is this. You apply the color corrector three way filter to a clip or group of clips. You evaluate the contrast that's the grayscale values that you use the way for monitor for you then evaluate the color. We used the vector scope for that. Then you always adjust the grayscale values. First, you always set the black level 20 1st you set the white level not to exceed 100% 2nd and the reason is changing. Grayscale always effects color. And so you want to make sure that the gray scale which will affect your color gets changed first. And that way you get easily reproducible results that you can count on from one time to the next. Then, if necessary, adjust the mid tones, adjust the color and to guard against excessive white levels, you apply the video limiter effect. So let me show you how to apply the three way color corrector effect to a clip. How to adjust the grayscale values of an image, how to correct a washed out image, how to adjust the color elements of an image, how to correct a color caste, how to adjust skin tones to get a pleasing result. And how to add an adjustment layer for the video limiter effect to make sure your white levels in your black levels were not excessive. Then at the end, I'm gonna give you a table of numbers that you can use to make sure your skin tones look good regardless of what ethnic group you're working with. So there's a lot of stuff we have to cover. Let's start with this. I'm going to go back to our mountain range. There's more clips here, but Jim on Lee gave me 45 minutes to do color. Should have asked Susan. So anyway, we're going to select the clip. We go up to the effects menu, go down to video effects, go down to color correction and the color corrector filter. The only color corrector filter I want you to work with is called the three Way Color Corrector. We're gonna grab the three way color corrector, and we're gonna drag it on top of that selected clip. Select the clip to load it up into the effects controls tab. Go to the effects controls tab, and this is the three way color. Corrector will press Tilda so we can enlarge it just a bit and let me show you what's going on. The three way color corrector is called the three way color corrector because it divides the color portions of your image into three wheels. This changes the colors of your shadows. This changes the colors of your mid tones. This changes the colors of your highlights, and I can tell by looking at my eager studio audience that they already to start grabbing controls on the color wheels and start to make changes. And this is absolutely wrong. You always adjust grayscale values first. Most cameras today shoot with elevated lack levels. Shoot was seriously elevated white levels and shoot really good color. So the thing that you can do the best, the easiest and fastest is not to touch the color at all. Because in most cases for color repair, your colors are gonna be fine. In most cases, your grayscale values are gonna be screwed up, so we want to fix that. We adjust the grayscale value with the input and output level sliders. This is again different for you. Final cut people in Final Cut. It's a single slider in premiere. It's a double slider. There are also additional controls down here that'll allow additional manipulation of the image. Don't even mess with them. Just leave them alone. So let's take this back and take a look at what we can do here. The very first thing that I want to do is I want to evaluate this image. So I click on the wrench and you always evaluate based on the wave form. First we've seen that are black levels air sitting right on black. But let's watch what happens to the black levels. If I grab the input level and drag it higher, notice how, when the black levels go up, the image itself gets foggy. This is, in fact, the definition of a foggy day. A foggy day is a day that has no dark black snow highlights. It's all a mid tone grey. It's also a true statement that if we wanted to make a foggy day, look less foggy, make the fog disappear. You simply pull the black level down by grabbing this output. Slider up. Come on. People are watching. Thank you. Just pull the black level down and all that fog disappeared. Well, we can also adjust the white level As we grab the white level. We can make a image appear dimmer, given a nighttime look, or we can make an image appear brighter. You hear another confession there are two inputs sliders there to black sliders in putting out. But there's to fight level sliders. And I have discovered in doing this demo that I always grab the wrong one. So if you grabbed the wrong one and your image starts to move in the wrong direction, stop dragging that slider and grab the other one. So most of the time you're gonna be pulling black levels down, which is this slider, and you're gonna be pulling white levels up, which is this slider. So most of the time you're working with the top rope. This slider right here in the middle is the mid tone grey slider. As we grab this. Watch this. Let me just pull this down. This is a really cool effect right there. Look at the time of day, I would guess probably 10 in the morning. It has a nice, bright day. Sunshiny kind of look, watch. What happens is I start to change the mid tones. We're gonna take this from 10 o'clock in the morning. We're gonna take it from 10 o'clock in the morning. The four o'clock in the afternoon. All I did is I adjusted the grayscale value the mid tone. I'm adjusting the time of day. I want to have it be just after dawn. The light is just catching the peaks of the mountains. All I did is it just the grayscale slider? I haven't touched the black levels. I haven't touched the white levels, but I've totally changed the time of day by making a simple gray scale which is also called a gamma adjustment. Gamma gray, mid tones. They all mean the same thing. So most of the time, most of the time, your black levels will be too high. You gotta pull them down all the time. You're white levels will be too high, You gotta pull them down and most the time you don't need to touch your mid tones. But if you do, you'll need to make him just a bit darker. And when you do, it's gonna add some additional quality to your image. By the way, just for those of you to do your own shooting a really important reminder. When in doubt under exposed your image, it is much easier to bring an image up to proper levels than to fix an image which has been overexposed. Do everything you can to not overexpose or shoot through windows when you want the detail. Because once you've over exposed that there isn't anything on the planet that can fix it. The process of overexposing by definition throws image detail away, which cannot be brought back later. Under exposing is all by a stop or half. A stop is always a good idea. Let's take a look at the our river. Okay, I could make that darker if I wanted, because if I look at the scope, my black levels are elevated. And although it only looks like they're elevated by about three or 4% or 4% makes a difference. I'm gonna grab my slider here and just pull my black levels down a bit would be useful. I was in the right window. Select the right clip. Alright, Time out. We have got Teoh regroup, so I'm gonna go upto workspace editing. I don't want to apply this filter to all of my clips. Wanted a time. I don't have that much time. What I want to do instead is to select all of my clips. Go to the effects window window effects. Have you noticed It's better when you sing to your computer, because that way it just knows that you love it and it doesn't get in your way. And it doesn't crash. I have absolutely a believer in that. So then we grab the three way color corrector dragon on top and notice how it's applied all selected clips all at the same time. Then we go back up to window workspace, and you thought we'd never use workspaces again. You thought day one that was just something Larry was using to stall for time. Wrong. I had a point there. Now we switch back to color correction, select our number to clip and go to the effects controls. And there is our controls again. I could grab the input slider and drag it a little bit lower. Have the black set right at zero. See how they're essentially nestled right at zero. And look at how much more night like this appears. Turned the FX thing off. Just that 2% difference, 3% difference. And drop in a black level down. Look at how I'm wiping a layer of fog away and it just has mawr richness mawr mawr depth. Okay, now What levels? Air. Okay. Noticed this green slider over this. A green pipe over here. This indicates how far down here black levels go. How far up your white levels go? So sometimes it's hard to see all the pixels. Remember this intensity I talked about before? As I grabbed the intensity and drag it up. I make it easier to see you never, ever, ever dragged the scope so bright that all your pixels have the same value. You want to see texture in the scope. You want to be able to see where the clumps of pixels are. I generally run my scope around 70% because I want to be able to see the detail in the fainter portions. But I never want the fader portions to be the same brightness as the rest of the pixels. Okay, let's go to another clip here. Ah, this is a good one. This is a balloon ride. Look at what our scopes look like. Are black levels up around 15% white levels right at 100%. But look at the bulk of the pixels. Are all that between 50 and 80%. Their high mid tones in the highlights. There's nothing down here in the shadows. There's no richness. This has this washed out look colors. Find if we switch over to the vector scope. I don't have any problem with the colors. Not particularly saturated a little bit toward blue and a little bit toward green yellow. But I mean totally okay from a saturation point of view, but not OK from a grayscale point of view. So select the clip. That's the first step. Whatever clip you select gets loaded into the effect controls tab. And I'm not gonna touch the colors at all. I'm gonna just simply set my black levels down until they land gently on the black line right there. I pulled those down, went for about 15% down to zero. And I'm gonna set my white levels alone because they're already 200%. But this is a classic example of where the mid tones to make a difference. Watch how we move this from about Oh, noon, where it's all kind of hot, dry and washed out. We're gonna move this to a romantic balloon flight around six a tonight, just by pulling the mid tones down and There's been a slight change and look at that. It went from 60 60 to 82 between 20 and 40. And look at the emotional difference. Compare. This is before this is after. Was it before? This is after all we did is we adjusted the grayscale values. Take a look at another one blooms. Take a look at the scope. I've got a blue balloon here, right around 3%. It's blue. It's not black. It should not sit at the zero line because it's not black, it's blue. And then my brightest balloon, which is the yellow balloon, is right here. It's 60% now. There's actually a speculator, which we can't see. It shows up here. There's a reflection off the yellow balloon, which I'm going to ignore. For the purposes of this example, we would clamp it with the video limiter, which I'll show you in just a bit. So the first thing I do is select the clip. My black levels were fine, but why? White levels are too low. I'm gonna pull my white levels up and look at what happens. I went from this to this and we could improve the the richness a little bit. Just make the sky a little less in your face. But look at how we've made a significant difference in the quality of that image. We've added life and energy to it in a way that hasn't been added before. Save that story for minutes. Yet this next. Let's look at the vector scope. Look at the difference here. Look at the sharp spike that we've got toward blew a sharp spike towards yellow and red. You remember before I said that there were illegal white levels where your white levels exceed 100%. There's also illegal chroma levels, and it's hard to describe exactly where the illegal chroma levels are cause we're dealing with a circle A sphere like this, but I'll give you a hint. Each of these color targets the outside targets, the one that are farthest away from the centre are color targets for standard definition video. The inner targets are the color targets for high definition video. They're using different color space is different color coordinates, so we don't have the same level of saturation and high def that we do with standard death, a clip is considered safe. The color levels of a clip are considered safe if you connect the tops of the targets with a straight line, which forms a loosely defined rectangle. If you're chroma, levels are inside that boundary. You're chroma. Levels are safe now, remember, for STE, the outer targets are appropriate for HD. The inner targets are appropriate. So for HD, I'd connect the tops of these inside targets. As we get closer and closer to pure white and closer and closer to pure black, I have less and less room for saturation at the mid tones. I actually can exceed that. So this is a really good, easy to calculate standard. If you can draw a straight line between two targets than your video is okay, if we go back to the Yarra River, notice if I collect the top, connect the top here to the top. There, all this yellow is excess looming that's outside the safe area. This would get rejected because my chroma levels air to hot. Look at this area here, from the top of blue to the top of green. It's right pushing up against that safe area. I would probably back saturation down just a little bit because I like staying employed and I want to just pull that down a bit. In point of fact, mid tone slightly exceed this. But if you don't have a scope that absolutely triggers a warning when you have excessive chroma levels, erring on the side of employment is a good choice. So let's go back again. Uh, see, that's the button. I'm on a press now. Move on to the next one. This next one is amazing. Let's see where to go right there. Next one. We would call her white, but she isn't light. The background is white. Her sweater is white. She's not white. She's mid toned gray, She's got black hair. She's got a white background and she's got a mid tone grey face. There are no white people. There are no black people were all mid tone Grey people. Some of us are mid toned gray, a little bit lighter, some of the mid tone gray, a little bit darker. But every single one of us is a mid tone great, and you know this as well as I do, because if you've ever got yourself cleaned up in a bathroom and you had a piece of dead skin, which you would never tell anybody about in public. You know, you're gonna pick that dead skin up and look at it. And that skin zgray. It's always great gray, maybe leaning yellow. And the reason is that which gives our skin color is not our skin. It's the red blood under our skin, and every single one of us has the same red blood under our skin, so the color of all of us is the same. But the grayscale values change, and you thought I was never gonna come back to gray scale. Grey scales are everything when it deals with making people look good because nobody's white. Nobody's black were all mid tone grey. Another example, right here. Take a look at her. Her sweater is white, her top is black. She is mid tone. Great. Now I can hear you say, Larry, Larry, Larry, Larry, Look at this, she skin toned. How can you say she's mid tone? Great, Because when the wave for monitor looks at the image, so if I could do this really easily, when a way for monitor looks at the image it doesn't see color, it sees this. It doesn't see that That's green grass. Maybe that sand. It doesn't see these air trees. Maybe that's a rock wall. It doesn't know what color she is. All it knows what gray scale she is when we're working with the contrast values which were always doing first. We're always working with black and white. Now the thing I like about this, this image and let me make it a little bit bigger so we can see the scope again. Her sweater is white, her top is black, her skin is mid tone. Let's take a look at what that is. If we look at the scope, there is her blacktop almost, but not quite There is her white sweater. Write it 100%. She's not 100%. She's not a zero. She's a midtown. Now, in a few minutes, I'm gonna give you some specific settings that you can use for your own skin tone color correction. But for right now, just for her, I'm going to say that female Caucasian skin is a skin tone between 50 and 70% female. Caucasian skin is a grayscale value between 50 and 70% and as we look at the vector scope, this is magical. See this line right there that goes up left about 10 30? It's called the Skin Tone Line. That line represents the color of red blood under skin. If her skin was right here, where my cursor pointer is, that's the color of red lipstick. If the skin was this color right here, where the tip of my pointer is, that's the color of a brass telescope. The difference between the color brass and red lipstick is 15 degrees. When you want people to look normal on screen, you want their skin tone to be on or two degrees above that skin tone line. Wait a minute, I can hear Jim saying, Just a minute, Larry, Time up. There's something wrong here. As I look around the room, I look at Alex and Scott, Janice and I see well, their faces aren't the same color. And and Kelly looks different than Meghan and Megan looks different from Jared. And what's wrong here, people? If directors wanted actors toe look like real life, no one would wear makeup. And yet anybody that appears on television, yes, even me have got makeup on why we don't wanna look like real life. We want to look normal. Normal is on the skin tone line. Now, in truth be known, an environment where I'm not wearing television makeup. My skin leans toward red. It's my Irish heritage. I have lots of red. But when we pull that on camera, we wanted to look like I haven't been a lobster sitting out on a beach for last two weeks. We take some of the read out we add limited of yellow, and we make it orange that comes out looking like TV. You don't want people to look like real life now. If Scott was out sunbathing over the weekend and fell asleep and came back in looking the side, the the bright red of a lobster and he shook my hand, I'd say, Well, he's standing there strength in his hands. He's the color of a lobster, but he's likely to be alive. I would say Scott, how do you feel? And he would say pain, but he'd be alive because real life tells me that he's been sunburn, but you can't get away with. In fact, in fact, Star Trek first generation Captain Kirk is on the bridge, Bones is sitting next to him, and all of a sudden the door opens and the Klingon walks through. What's the first line out of bones? Mouth? It's not. Gosh, Jim, what did you have for lunch? It is. Get that green cling on off the deck. Now I hate to break it to the Children in the audience, but there are no Klingons. They're actors in costumes and makeup. And thus far as I've been able to see from my vast travels around the world, there are no green screened people around anywhere. Which means if somebody comes in with green skin, you got to say something in a dialogue that says, No, your television is not in need of adjustment. This is a character playing a particular part that you're supposed to suspend disbelief and believe that this is what this person looks like. There's a green skinned cling on that just walked onto the deck. This is an essential piece of dialogue to say your TV didn't break after that suspension of disbelief says Okay, Klingons existence in this world and we accept green skinned Klingons or orange or brown or whatever shade of cling on, it happens to be in this generation of Star Trek. Otherwise, we want skin tones to be on the skin tone line. Now, if you are lighting someone in a music concert, you're throwing stage lights on that. All bets are off. This is normal studio lighting like we have here. You want to make sure that their skin tone is directly on the skin tone line or within two degrees above it. And here we have a problem. Take a look at her. She's got a beautiful white T shirt. She's got a black vest, but there's a color cashed in her skin. And if we take a look at this in more detail, if we go over to the way for monitor are black levels were pretty good. There's her black vest right here. There's or white T shirt. She's somewhere in that mess. We have spikes to go all the way to 100%. So in terms of shading the amount of contrast between black and white perfectly OK, but the vector scope well, we don't look like we've got anything in particular is the red of her top. There's a magenta. This this This just looks wrong. But how do we fix it? Because I can't figure out exactly where the skin is in this vector scope. Hot A wife? How do I determine where skin is? And what's the color of the grass or the blond hair that's yellow. How do I make sure I'm adjusting the right thing? We take advantage of something we already learned. So I select this clip. We go up to the effects menu and we go down to video effects. We go down to transform, we find the crop filter, we grab the crop filter, we drag it on top of the clip, select the crop built to select the clip, go to the effect control, twirl up the color corrector filter, go to crop, and I'm going to drag the left edge in right there. Drag the right agin right about there. I'm gonna drag the top down. And what I want to do is I want to find skin, which is which is lit the brightest part of the skin that's not overexposed. Just hide everything except pure skin. So what we've got there is we've got nice, well lit skin Let's take a look at what it looks like on the way for monitor. We said that Caucasian female skin should be between 70 and 50 and 70% well, she pushes 80% so she's a little hot. We gotta pull the white level down. What's it look like on the vector scope? The vector scope says that it's way the heck over here for us. Any more yellow would be gold. Actually, gold is up here, but it's really yellow. It needs to be on the skin tone line. Well, the scopes have just told us exactly what we need to know to be able to color correct this scene. So first thing you always always do is you evaluate the grayscale value. It's a little bit hot, so the first thing I'm gonna do is go back to twirl up cropped world down the color corrector, go back to the white levels and just pull the white levels down a little bit down. It's the other slider. Always guess wrong. Poor white levels down to about there because she needs to be between 17 50 70% of the white levels a little bit too bright Then I go to the vector scope. We could adjust the color of each individual wheel and there's an advantage to doing that. And if I had more time, I would go through in more detail how we could do this. But this happens to be a global screw up in color, so I'm gonna check the master check box. This means that all three of these wheels are gonna work in concert. I'm gonna grab the dot at the center of one of these wheels and just drag it and notice what I just did to the, um What's the word? I'm looking for a vector scope. I just pulled the color right on the vector scope. It went from yellow to the line. Let's go back down to the crop. Look at our image. Look at our exposure. Look at the wave form. This is the effect. Before we added the filter, this is the effect. After we added the filter, we've turned it from a cheesy image that we wouldn't use anywhere into a publicity. Still, for the star of our movie, it's that easy. If you follow the steps, you set the black level to 100% set the white level equal to 100%. I personally set white levels to 97%. I pull him down just a little bit. You always adjust the grayscale value first, and then you take a look at the vector scope. If the colors are are out in the vector scope, The first thing that I will do is I would try to color correct based upon a grayscale value. But what we've just done is I've given you the the answer that you needed using the crop filter to be able to call the correct directly on skin tone. If I took a close up of Kelly right now, okay, and the wall was green and Kelly's face was red, people wouldn't care what the color of the wall is because Kelly's face is wrong. As soon as I make Kelly's face look correct, nobody cares what the color of the wall is. They will believe any color you show them, as long as skin tone, green grass and blue sky is accurate. We have three colors programmed in our memory skin tone, green guy grass and blue sky. Get those three right. Any other colleagues show people whether it's a green cling on or a pink iguana or a Purple Panther, they'll believe all of them as long as skin tones are correct. So let's put a button on this before I turn it back over. Here's some settings that you can use to color. Correct your images. Female Caucasian skin is 50 to 70%. Grayscale male Caucasian skin, 45 to 65%. Grayscale Asian skin 35 to 50 and so on. Down the list. Caucasian skin is on the skin tone line. Asian skin is two degrees below the skin tone line. Everybody else is on the skin tone line saturation, with zero being the center of the vector scope and 100% touching. The line connecting red and yellow female skin is 40%. They're more saturated than guys. Our guys or slightly less than 35% Asian and Hispanic, a 30% female, black, A 20% and male black skin at 15%. Yes, there's variations between people, But if your goal is to make someone look, quote normal, close quote, these numbers will keep you inside the safe zone. Color correction is the last step in editing. You don't waste time correcting images that you don't plan to use when you're measuring, always trust the scopes. Never trust your eyes because you never know if the monitor you're looking at has been calibrated. The monitor could easily be screwed up. The scopes are always correct. The three way color corrector provides precise controls over both gray scale using the input and output sliders and color using the color wheels, you want to keep the three rules of color correction in mind. No colors over 100% adding opposite colors councils to gray and equal amounts of red, green and blue equal gray. You want to stay legal? I should show the video limiters. So I'll do that the video limiter. But the key is, once you're black, levels are set right? Once you're white, levels are set, right. So you know that you're safe. Everything else is art. And if it looks right to you, then it is right. Show you the video limiter filter real quick. And then we're gonna turn over to Jim into Susan. What we have with the video limiter filter. Let's get here. There it is. Okay, with her. If we look at this scope, she's pushing 100%. The white levels are right. It white, but she's They've just over exposed her face. So I want to pull that down. And then I want to make sure that I don't have any problems with this. So I go to the clip. I'm gonna pull the mid tones down a bit because look at what? How much better she looks when we set the mid tones to the range of 70% supposed to. This isn't like fashion photography, where it's stylishly overblown. This is what you would want somebody look like when they're under studio lighting, and all I did is I left the white levels at 100% the black levels for her hair and zero, and I just pulled the mid tones down so that instead of being at 85% she's at 70%. We guard against excessive white levels through a new filter effects color correction. It's called the video limiter. The video limiter is always applied last. The video limiter must be at the bottom off all your filter stack, and here's how you said it. You simply apply the video, Let it limiter. You set the minimum signal to zero. You set the maximum signal to 100%. This means that no blacks will go below zero and no whites will go over 100%. Leave the rest of the settings alone. The video limiter guarantees that your exposures, your grayscale values will be correct. It prevents your blacks from going into super black and prevents your whites from going into super White Jim way. Have a question in the studio audience. Scott is that is the signal, Max, what you personally usually set to 97. Yeah. What I would probably do is I would set the signal max to 100%. So if I had, like, a speculum that was peeking over 90% it would trap that I would still set my white levels to 97% and I would use this is a guard to make sure that nothing gets illegal. I could absolutely, if I wanted to set this to 97%. Back in the days when PBS really cared about video levels, they had a standard that said no levels exceeded 90% but and broadcast his commercial broadcast to set it to 100%. I would for my personal use. I would set my white levels using the filter to 97% and set the video limit to 100%. And where's the filters that you're referring to? Where's I have missed that somewhere. Say that one more time. I've missed what you're setting to 97%. I'm adjusting the quite slider word, says the on the on the color corrector filter. I'm using this input level slider watching the flight levels, for instance. Here notice that my white levels are writing 100%. That makes me really nervous because it could be 100.1% and I'm fired. So what I'll do is I'll grab this slider and I'll just drag them down side drag this slider. Never remember. Drag this down, drag the slider down until it hits 97%. Now I got just a little bit ahead room in case I need it. Video limiter is set to 100% but then I use the sliders to set white levels. The 97% see your eyeballing the 97%. No, it's right here, there's 100%. There's 90%. There's 95% 96 97. So I'm setting it. The 97% on the way for monitor other questions from the room. Okay. From the Internet, Billy Joe asks, Can you save color corrections as presets to reuse them each time you come back as a shortcut? Or do you just find that you notice where your levels are and reapply them each time? If I had, the answer is yes and no. Okay. If, for instance, this shot, we're gonna pretend that this shot and this shot will make it thes two shots. Let us pretend that these two shots were the same person talking same person on camera. Select the clip. Who has the filter settings you like? Goto Edit coffee. Select the effects. Hang on from the top. Select the clip that has the settings you like. Go to edit. Copy this copies everything, including the content of the clip. Select the clips that you want to apply those filters to and go back up to edit. But don't say paste that will paste the clip. You select paste attributes. Paste attributes allows you to say, Do you want to pay some motion attributes? No capacity, no time. Remapping, No cropping? No, But I do want to paste the three way color corrector and a video member. So when I click OK, it now pastes those settings from the good clip into the said the clips that don't have that setting so I can and copy the settings. Can I say this is a preset? The answer is yes. But you got to be careful with presets because it really varies on a shot by shot basis to set that as a preset select the clip that has the setting you like right mouse click on the name of the setting. Save that as a preset. And remember that shows up in the effects window in the presets category. We've already seen where that shows up, and it's treated exactly same. You treat that as a finished color correction filter dragon on top of whatever clip you want it applied to, and you've now color corrected that clip. So, yes, you can do it by copy paste attributes, and you can do it by saving is a preset
Class Materials
bonus material with purchase
Ratings and Reviews
Jfraz
I love this class. It is highly technically, but there is an awesome wealth of information to be had, even if you are a beginner. I've been struggling for a while, trying to look at YouTube videos and whatnot, but this class helped me make better sense of what I needed to do in all of my video editing. You get such a great foundation that's going to help you go further.
Valentine
I recommend Larry Jordan's course there is a lot of in-depth information that will help the beginner as well as the advance premiere editor. The only thing is that his humor is a big corky for my taste but if you look beyond that you get a lot from his teachings. He genuinely wants his students to succeed and get paid well in this field which its nice.
a Creativelive Student
This is one of my favorite courses on Creative Live. Larry Jordan teaches in a way that I can follow and is easy to stay focused on. He has a crazy amount of knowledge about this topic as do all the Creative Live teachers. I love this site so much, has done more for my business than all the other sites I have used combined. Keep it up CL!!