Lesson Info
5. Create A Rough Cut in Prelude
Lessons
Day 1
1Introduction
15:18 2Post-Production Workflow
26:52 3Troubleshooting
12:20 4Setting Up Hardware
29:32 5Create A Rough Cut in Prelude
43:29 611:30 am - Introduction to the Adobe® Premiere® Interface
31:56 7Configure Preference Settings
22:47The Media Browser
10:03 9Capture and Import Media
37:09 10Reviewing a Clip
29:17 11Create an Edit
24:18 12General Q&A
14:18Day 2
13Editing Review
18:24 14Editing in the Timeline
35:10 15Trimming
36:13 16Organizing the Timeline
31:19 17Labels and Markers
14:18 18Transitions
24:57 19Introduction to Audio
31:26 20Audio Editing
45:36 21Mixing in Audition
26:51 22Audio Effects
37:41Day 3
23Normalizing and Syncing Audio
24:54 24Text Effects
38:12 25Blend Modes
14:48 26Motion Effects
43:07 27Filter Effects
34:28 28Chroma-Key and Lumetri Looks
19:56 29Color Correction
57:31 30Editing a Mini-Doc
41:09 31General Q&A
26:54Lesson Info
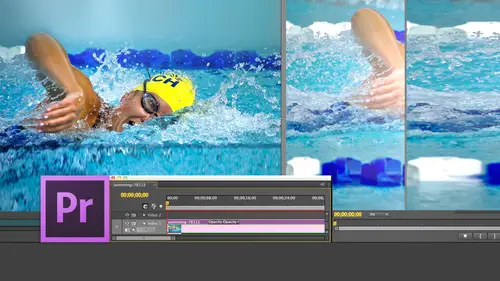
Create A Rough Cut in Prelude
What I want to do is I want to talk about Prelude. Probably it is used to ingest, which is a fancy word for import tape. Lis Media for Premier Pro If you're not shooting tape Lis, if everything you record is on HTV or DV tape, then you'll never use Prelude at all. But if you're shooting stuff which is going on camera cards, then you'll use problem. It's a standalone program, which is specifically designed for media review, ingest logging, Rough Cut and for transfer to Premier Pro. So one of things that's come up is I was listening to questions at the break, and chatting with With you guys is there's a lot of confusion over what Kodak do I use. And when do I use the Kodak to camera shoots? And when Dwight Trans Code remember, that simply means to convert, and we're working in a multi format world where some people shooting on account and five D and some people there shooting on on JBC campers and summer shooting on you got all this different stuff to work with, so we're gonna try to cov...
er that over the next a little bit of time, But The short answer is, Premier allows you to combine different Codex in the same timeline and edit them. This is the power of harnessing the graphics processing unit, which is there's two chips inside your computer. There's the CPU, which is the main calculation engine. And there's the GPU, which is like a parallel processor. The CPU calculates everything one. Step it at one bit of time. It's like a single file line moving over a bridge. The CPU calculates one bit of time, and the faster that line could move is simply determined by the CPU. GPU calculates multiple lines the same time, eight across 16 across 32 across 64 across here because it's able to do multiple things at the same time. It's really, really good at stuff like video Photoshop, anything dealing with bit maps. The GP was really good, so by combining the power of the CPU with the power of the GP, which is what Premier does were able to work with a lot of separate Codex at the same time. The way that premier works, however, is you can only have one codex per timeline. One frame rate, one image size so say you got five D footage and and go pro footage and JBC camera footage should drop all those to the timeline, and it will render calculate to have them all match the same format most of time. That's gonna be perfectly OK. You can just work with it that way. But for people that are obsessing about getting the highest possible image quality, trans coding before you bring it in for editing will simplify your life. Witness Jim, the guy that you were talking to on the Web, who has a number of editors that are working at the same project at the same time. Having a standard house standard Kodak House standard frame size house standard demonstrate converting everything that how standard will make your editing a lot easier. So for people that are just getting started and we're codex or causing intense mental confusion that just ignored them, drop it to your timeline in your edit and premier will be fine for people that are obsessing about absolute efficiency. Absolute quality workflow editing, team based editing. Having a standard Kodak will make your life a lot easier. Okay, um, you guys questions doing okay. So far, all right, The shift into problems One of things that I found really helpful is let's discuss how to start prelude. It's the same way you start any other application, but we'll go through this notice that I have my applications folder started. You know that? It says it says applications. That's why we know it's the folder. And there is a folder called Prelude, and Inside the folder is probably the application itself for those of you that are on the PC now but thinking of joining the Macintosh community, and I'm not looking at any one person in particular. But a really cool trick is to grab the icon for the program that you tend to use. A lot simply dragged the icon down to the dock and you can dock it inside the dock, which makes it easier to access. So I'm not going to use the application folder at all. I'm going to go down to the dock and click Prelude. Probably itself starts up by the way Prelate is new and had the product manager for Probably is a guy that used to run a company called Automatic Duck named West Plate, and West is on vacation now so I can talk about him. But he does a wonderful job of moving media between different applications. He was the perfect choice for the product manager for president because that's exactly what probably does is it moves media from one point to another. It allows us to review it to take a look at it and decide which we want to use or not. So let's let probably fire up, and we're going to see the first of our adobe interfaces. This is a standard file picker that says, Do you want to work with a recent project or do you want to create a new project? Because this is the first project that we've worked with? We're going to create a new project and because I have a very hard time thinking about what I want to call this project, we're going to call this Larry's first project. Notice that by default it stores it inside a Projects folder. Well, that's OK, and I'm sure it's a perfectly fine folder, but it's never where I store stuff, so I'm going to click this downward pointing arrow, which opens up the whole file picker dialogue. I'm going to roll over and select my second drive, and I'm going to scroll down here, and I'm going to create a folder called New Folder Prelude Projects. There needs to be river on that. And then we click create. Now, all of my projects are gonna be stored inside that same folder, Which means if I ever need to find them again, I know where they are. Because otherwise if we start them on the desktop not that anyone that we have known in this room would ever store anything to the desktop, Susan. Anyway, if we stored them to the desktop and then what we may not be able to find I've seen your desktop. I'm surprised you can find anything on there. So we're gonna click the save button, and we've now created our new project. Prelude has four panels inside, and the active panel is indicated with five. And Jim you me Math? Exactly. Same. How many panels do we have? 45 I could never tell. These numbers are just too big for me. Anyway, the active panel has a gold box around it and you make a panel active by clicking on it. Now, this is a really cool trick, and I wish other software did it notice. Down here. Marker Type is an itty bitty little lonely panel which, but if you press the tilde key, it instantly blows up to full screen. This is none of this. Zoom in, zoom out business. Press the tilde key. It's back to its normal size again. The tilde key for those of you wondering is above the tab key and below the escape key. Press Tilda and it blows up. Press till the back and it blows down. Now here's the secret. Which ever window your mark your cursor is in is the one that enlarges, whether it's selected or not. So you put the cursor in the window. You want to enlarge, press the tilde key and it end largest. This is just cool. Anyway, um, so how do we capture notice that there's four tabs across the top, and I just zoomed in here and I don't hear any screams coming from the control room, so it sounds like they're keeping up with this. Okay, there's four steps you in just clips, which means you're able to review them. You're logged clips, which is where you're able to say whether you like them or not, you can list clips and you can Rough Cut. This is the exact same order we work with Inside Prelate in Just Log list and Rough Cut. So we click the in just window and the in just screen opens up on the left hand side is a list of all the hard drives that were attached to our computer. Have got my boot drive. Got my second drive. I've got my third drive. This is my preview window where I'm able to review clips and this is my settings window, where I'm able to do stuff with clips I have media stored on the second drive. So I click it and this is very much for those of you that know Adobe Bridge. I'm able to see the files inside this viewing panel, and as I scroll down here, these air all the folders and files that are on my boot drive and I click Um, source Media double click it to open it up, and these are all the folders I have inside. Now. I don't some of these air ready to be imported. I wouldn't use problem at all. But as I scroll down, I've got a folder here called MH 03 11 08 15 a 03 This looks suspiciously like that folder naming convention we talked about before. This was shot by miles Hail. He and his wife, Fran, run a, uh they build model railroad scenery and they're based in ST Louis, and they sent me some footage that I could use for my training. He shot a number of projects. For me, this is 1/3 project he shot shot in 2011 August 15th. He only used one cameras, the egg Cameron, and he sent me three different counter cards. So I followed my same naming convention. Now double click this to open it up, and we now see inside is this is a format that we see with a lot of cameras. D. C. I am Miss and Private. We go to the D. C. I am folder double click it Go to the folder, which should be named differently, depending upon the camera. Keep double clicking and finally we get down into the actual camera images themselves and what it's doing with this word processing is It's looking at each of the files and building thumbnails so I can see all these different images at the same time. Now, one of the new features that we have inside privileges what's called hover scrub. If I put my cursor inside here and drag left or right, I'm able to view the footage just by moving my mouse Left or right. This is a feature inside premiere as well as inside Prelate, so I don't have to do anything. And if I click this notice that when I click on it there's a mini timeline down here and okay, this is a question for Jared because he knows the answer. What is the keyboard shortcut to play? Any video in se? Quick time player. Amazing. The space part Now inside Final cut. What key would you press to play a video? The space bar? Yes. So therefore, what key would you press inside? Prelude To play a video for the $64, question, I'm gonna go it with What is the space? Yes, finally, success. The goal is you already know how to use the application and you've never seen the application before. Just my tears tears down my face amazed him. I'm in the presence of greatness. Space bar to play the clip. How would I stop the clip space? Yes, And it also supports the J K L Keys. If you type the letter J, it goes backwards in real time. Case stops l goes forward in real time. J twice goes backwards at double time. L twice forwards a double time J three times back was back a triple time l three times goes forward triple time and in all cases, K stops. The clip just doesn't get better than this. This is just like this is life at the peak. Is that not cool? I am learning, Larry. I am learning. So this allows me to review my clips and I'm going to decide that I want to use this This Jim, are you sitting down? I've always felt that it's time for everyone to get into training. I really want to get into it myself. Actually, all I know is that upon No, but you know, how can you not love training about trains? I mean, is that not like just the best that it gets? This is This Beats Susan's joke in the pre show. This really is. This is not really hard to do, Larry. So I'm gonna just I'm gonna click here, and I'm gonna grab the many timeline back and forth and find where my train comes in. Um uh, you've been editing Janice. You've been editing with Final Cut. Okay. Have you ever seen prelude before? Okay, good. So this is your first time with probably you've never seen the application open before. So here's the question I have for you. What keyboard shortcut would you use to mark the beginning of a clip? How would you I Yes, I And notice what happened? Many timeline. It instantly said an eye and in right there to indicate that this is the part of the clip that I wanted in just I don't want to grab all this stuff where there's nothing going on in a camera shaking. I want to start right before that engine comes in. And by the way, we are capturing footage. You're not trying to edit it here. You want to give yourself some room, some handles from space before the start of the clip. Now we're gonna go forward. I'm gonna drag that play head over to here until both trains clear the shot. And I want to set the end of the clip that I'm gonna in just what? What I what key could I possibly press? It would allow me to do that. What is Oh, yes, exact ups. I pushed the wrong key. So we're gonna just go back to here and find a spot. Type the letter I And and because Janice was so perfectly correct, we're gonna type the letter O. And now, in our many timeline, we've got a gold bar. The new case. The part of the clip we're gonna capture. I don't have to waste hard disk space bringing that in. Now, remember, this is native media. It's already been copied to my third drive. I'm not doing anything with the source files. I'm gonna make a copy of the source files stored on my second drive and use that for editing, so that Yes, I'm increasing my hard disk space, but it means that my source files are never, ever, ever touched there, Christine, which means that I can always go back to them and recapture this if I ever need to do that again. Now, you ask a quick question at any time. Um, when you scrub now, when you click and scrub, does it only go through the in and out? No, I can scrub from beginning to end. Okay, Thank you. And I would Yeah, it is. The energy out is only done for ingest the scrubbing always goes to the very beginning of clip of the very end. Thank you. Now, here's the trick. Notice that I've set the in any out here. This does not capture the clip Onley when you check the check box, does it capture the clip? So let's say that you can't remember the keyboard shortcuts for in and out, or nobody ever told you the shortcuts for in and out. So you just simply click on the clip you want to bring in and check the check box here, for instance, I'm gonna check this check box. It will then bring in the entire clip. You don't have to know the energy out genealogist makes it possible for you to select a portion of clip, not the entire clip. If you are capturing the entire clip, then over here on the settings panel. We have a number of options. First is we can transfer clips to the destination. What this means is it's gonna make a copy of the clip from the folder in which the source media stored and put it wherever you want and notice that I've set. I've set a primary destination of Prelude Media. So what I've done here is I'm gonna browse for a location. I go to my second drive member. The third drivers were my source media storage, second drivers where Prelude Media is stored and I go down. And I have created a folder called Prelude Media. I created this. Maybe it's called Fred's Media or Project 23 meeting. You can create any number of folders he wants. You can have different. You are not locked into a single folder, but I've made it simple cause this demo is something short. I've just created problem media and click choose. Now all the files that I capture are going to go into that folder. This is getting back to that very first step on organization. Think about where you want your file store. Think about where you want your file's name, the more you spend time thinking about it at the beginning. At least a little planning's like building a map. Once you've got the map build, it's easy to get to your destination. If you don't have a map and files are scattered all over, how you supposed to find them, then? If we wanted to, I could add a sub folder, which allows me to say I could put all the dailies for one day in or all the videos related a particular subject. I'm not going to do this if you are captured. You are also able to trans code transco to get us a fancy word. That means convert. I can convert from one format to another. There are any number of formats that weaken trans code to. I'll just leave this magnified years. You can see it. These Transcoder formats are based upon settings inside Adobe Media encoder, so you can create any setting that you want if it isn't part of the preset by Adobe Media encoder, and we're gonna learn how to do that on Day three by default, the settings that exist for quick time are on Lee are Onley either compressed which of these or standard death. Another case, every single one of these settings is wrong. Every single one. What you need to do after you've downloaded the creative cloud version of Premier and probably you need to go back to Adobes website and download the prelude presets because they forgot to ship them with the initial release. And when you download the prelude Priest the sorry, we state that correctly you need to go back to adobes website and download the pro rez presets which will then give you access to trans coding into progress. It should have been included in the initial release and it was not. I created a preset. And this is one that I did just before the show started, which is pro rez for 22 which is a perfect Transcoder format on the Mac. For those of you that are on Windows, a really good Transcoder format is a VC intra a V c intra I n t r a 100 ABC intra 100 years, ABC intra 50. There's also ABC Intro 100. You want to use the ABC intra 100 Kodak for your Transcoder. You then select this and now it will automatically convert all of the files from the camera native into quick time. If all you're doing is cutting and you're not doing affection standing a few transitions you don't need to transco from premier will be fast enough to do what you need to do. But if you've got a lot of different formats, Canon five D, you've got some some hero foot GoPro footage. You've got some Panasonic footage. You got JBC footage. You got all this different stuff mushed together, trance coating to a single common format. It's gonna make your life a lot easier. And that's one of the key things that Prelude can do. Stitch clips together. Let's say that you're doing a bunch of B roll of traffic and rather than bring in each B roll clip is a separate clip. You want to just sort of bring in all your B roll? Sorry, B roll. This B roll is a news term. It means pictures that illustrate what people are talking about. So if I'm interviewing ah, gas station owner about gas prices and I want to take pictures of cars going by or pictures of cars at the gas station gassing up the interview is the talking head or the a role we call it. Generally, the main video than the B roll is pictures that illustrate what that talking head that person on camera is talking about. So B roll means pictures that illustrate what's being talked about. If you're bringing in a bunch of B roll, that is, say, shots of traffic, maybe you don't want them a separate clips. You want to stitch them all together as a single clip. When you say stitch clips together, it then combines all your clips into a single clip. It just means there's fewer clips that you're looking at inside your project window. I tend not to do it. This is a new feature in the CC release, and I wanted to mention it to you. If all you are doing is copying files and not trance coding, you're able to verify, Verify me, make sure that the copy is exactly the same as the native format. But when you Transcoder Verify has turned off because the two files no longer match, we can add multiple destinations. Let's say that I want to make a backup copy, so I've got my edit media stored on two different hard drives because I'm paranoid and it's not necessarily a bad thing to be paranoid when you're doing editing with video, so I can now have a copy this to to destinations hard drive to and hard drive for. For most of my editing, I don't do this, but there's an unlimited number of destinations. So for somebody is working on a really high budget project, and you absolutely, positively can't lose the media by a couple of extra hard drives, you can make three copies at the same time and store them to two different hard drives. You can also rename your files clicking here, and you can create a name that applies to files they're going to all your destinations or just some of your destinations. You can set a template up that describes what the template is. This is very cool, and it's worth seeing help files for in terms of how you can structure that. Alex, you have a question? Yeah, Larry, Is there a type of Kodak that Prelude cannot handle like dot NTs or anything like that? Oh, yeah. I mean, camera manufacturers love inventing Codex every day and it takes a while for software to catch up. It's entirely conceivable that prelude or any other application not be able to edit a Kodak. So whenever a brand new camera is shipped, there's always a lag time between when that camera ships and when Codex are available, you absolutely have to check adobes website to see what Codex Air supported. Back before the recession hit, we were getting a new Kodak a week. Now we're getting a new Kodak a month Anders Kodak, and there's families of files within that code deck. So you absolutely, absolutely cannot assume. That's just because you own the camera. It's supported by Premier. You must must must check adobes website to make sure that your camera is supported. Because I've gotten way too many emails from people that say, Larry, I just bought this camera. I shot my project, and now I can't bring it into editing application. Whatever. Well, fool, if you decided to check the website before you bought the camera, you'd realize it was an unsupported Cameron, you're screwed. Now. What you gonna do? Okay, They don't like to hear that. So So I'm gonna just bring in some shots that makes sense. Alex, I'm gonna just bring in some shots bike by clicking here and see I've got that one. Got this One will check that. And when you're done, what we've done is we've been able to go through and select just a portion it we want or the entire clip and we click in just now. What's actually happening is in the background, hidden in a way that you would never see, is it? It's opening up Adobe media encoder and Adobe Media encoder is bringing those files in in the background so that now I could be looking at a different clip for bringing in other stuff for switching out to a different application. And we just have to I just have to see if it's running. Oh, hush. And there is Thea. I never heard that before. Those are our clips all getting trance coded into this Kodak. Okay, so just pull this up. This is Adobe Media Encoder. We're not gonna talk about it today. I will not take questions on it today. We're gonna talk about it on day three, but just look at the blinking lights to be really impressed. This is very cool stuff going on. And then we go back to Prelude and our clips are going to start to show up inside here as fast as the injustice done. See where it says the project file. They're the clips are being added in real time, and you can see this gold bar at the bottom, which is showing the status of the ingest. So we're able to see and this this icon we down here indicates their sound with it as well as video. And again that hover scrub Susan, Isn't that hover? Scrub cool. I love that part. This is just this makes life so much easier. And remember another that chime you may have heard of my Mike indicates that all the encoding is done in the past. All we had to look at it was a list of files here. We can actually see what the files themselves look like, so it just makes life a whole lot easier. Now, Jim, you get to redeem yourself after that math error earlier this morning, Do you remember the keyboard shortcut that's located above the tab Key and below the escape key on every known keyboard that allows us to enlarge a window to full screen eyes above the tilde that you are so quick. I tear. There's just there's just no grass growing under your feet. It's just amazing. Toe watch the tilde key. And now, if I wanted to have it, go back down in size, what key would you press again? Starts with same same teaser. It's just tears. Tears come to my eyes, just listening. That kind of expertise. It's amazing. Now look down here in the lower left corner. We can look at our clips as a list we can look at our clips is thumbnails. And if we grab this slider, we can increase the size of the thumbnail to just all unreasonable proportions just by grabbing and dragging that back and forth and again, hover scrub still works, regardless of size of the clip. The sole purpose of working with Prelude is to allow us to review our footage before we ingest it to review it after it's been ingested, and then we can start to do what's called logging. We can add metadata, but more importantly, we can start to add markers. Let me illustrate when I click on the logging tab are five windows reset. There's our project panel, which has all of our clips in it. Our monitor panel, which is when I double click on a clip. Two things happen at once. One. It loads up into the monitor panel and it loads down to the timeline. And then we have a list of markers over here. Scott questions Quick question. When you selected format for quick time movie, Was there a specific reason that he selected that format to come in, or would you have selected him before? Or another one? There are four Kodak families which are really good for what it called mezzanine files files, which are really good for editing, which handle color correction rendering effects. Exporting their optimized for editing those families. Air programs on the Mac A V C H D, which is from avid on both Mac and PC, ABC. Intra from Panasonic. And maybe there's only 30 C uniform you have to buy so off the ones that ship progres A V, C H Progress on the Mac Dnx HD on Mac and Windows and ABC intra on Mac and Windows. If you're on a Mac, the best format to use is progress because the Mac can read and write progress, but the PC can only write. It can only read it, can't write it. So on the PC, the best format to use without having to download formats would be a VC interest, ABC and for 100. So I selected pro Redskins. It's a wonderful mezzanine format that gives me all the benefits of editing. Teoh. Convert my files into the way on the PC, you'd select ABC. Intra, no, Um, right. But above that, that was the Kodak. But the format you're choosing is quick time. Correct? Are there other ones? And why are you choosing quick time? Pro presents a quick time format depending upon there's nothing wrong with using quick time on both Mac and Windows. Quick Time is a wonderful container format for video. It's designed for video, and it works well on both Mac and Windows, so the format on Windows would still be quick time. But inside quick time I'd use the ABC Intraco deck on the Mac and use quick time and inside it I'd use the progress Kodak. What I have here is I have one of things that's confusing about Prelude is that when it loads the clip into the timeline, the clip exactly fills the timeline. So you're never really sure. Are you looking at just a piece of the clip or you're looking at the whole clip by default? It's the whole clip. We can zoom in by typing the plus key weaken. Zoom out by typing the minus key, and it zooms out until it fills the timeline. Sometimes you can sort of see grey edges around it to know that you're seeing the entire clip. I've spoken strongly to Adobe about this, and you can see they have not made any changes whatsoever anyway. What we do here is we are not trying to edit. We're trying to find select, so I want to create a marker. There are five or six markers down here in the default marker. We've got sub cliffs comments, flash cue points, Web links, chapter and speech transcription. The two we care about the most are sub clip and comment. What I'm able to do with the sub clip marker is to mark the beginning of a clip and the end of a clip. A sub clip of region off one of these ingested clips. And then that sub clip can be sent over to premiere. So it just sends the sub clip so that when premier opens up, the media's already been Transcoder has already been captured. So premier links to the media and displays that sub clip. So, as as Janice's editing assistant is looking at all these clips, they could be some clipping just the highlights. Send her the sub clip list and she opens it up and she's got it is their own sequence inside Premiere. And if simplifies the whole process of moving files back and forth. I mean, it's like blinding fast will see that this afternoon. So I want to set a sub click Marber marker. So I just click the word sub clip and look what happens right here. It's now laid in a marker over the course of the entire clip. I wanna have this marker end here. Janice, You did such a great job before. What keyboard shortcut Would you guess we would use to set the end of a marker? What keyboard shortcut to used to set the end of a clip. Oh, just no grass growing under her feet. Exactly. Right. You know this already? Because you've been doing some editing or for people that don't understand. Oh, that air new. You grab the end of the marker and you drag it to wherever you want the shot to end. So I want the shot end. Let's see what I wanted. And I wanted to start just before this train comes in right about there. And I wanted to end just before the other train comes in right there. So I've now created sub clip, so I'm gonna give this sub clipping name trained moves left to right. This is a killer train shot. So I've just given this marker a name sub clipping name that that name will transfer over to premiere, and I have a description for it. Well, let's say I want to have this other shot start with The train comes in. So, Janice, I won't even ask her this time because I know she knows. The answer will just click This sub click button over here creates a new sub clip and notice these clips can overlap. They don't have to be sequential. And I'm gonna find where that train comes in and find out where the train leaves and type Janice's letter O the out highlighted Go up to the marker title and say, train moves right to left train drives toward camera. All right, there is no limit to the number of markers you create inside a clip. There's no limit to the number of clips that you can capture. There's no limit toe to to, and I can add a comment marker. So we'll click on comment. By the way, these all have keyboard shortcuts, and they all have. This is like the number one, the number to the number three. But whether it's shift water shift to I can never remember. So I just click the button and here I've got a comment marker and we'll call this train clips. I could also, by the way, set the out by clicking the out button up here way too difficult or whatever marker is selected. The letter o sets the out. Whatever marker has selected the letter, I sets the end, or you can grab the in and drag it back and forth. If your keyboard centric like I am, I live for keyboard shortcuts. You know, if you hate keyboard shortcuts cause you can't remember them. Then you can grab this and drag it back and forth or click this button. So what were what were using Prelude for is the process of reviewing media, putting in markers for media comments and sub clips, and the sub clips are then built into a rough cut that we can then send a premiere. Now here's a trap, because Adobe needs to fix this and they will in a future version. But they haven't yet. What you need to do in order for these markers to be remembered is you must save the clips you go up to file, go down to save keyboard shortcut his command as or control s on PC. Remember, command and control are synonyms, and option and Ault are synonyms. So you say safe. Several things happened at the same time. Notice here that I have a different icon than I do here. This indicates that this clip is a sub clip. This clip is a sub clip. So my sub clips start to show up inside the project panel and once you start to get ah, lot of sub clips going toe a list sometimes is easier. See this icon? That's the icon for sub click. This is the icon for sub click. This is the icon for Standard Clip. So why do we care? We go up to file. We go down to create rough cut keyboard. Shortcut is in. This is how we get our files from Prelude to Premiere. So far, we've used files for review. Sorry. So far we've used probably for review. We've used it for logging. We've used it to set sub clips to determine exactly the portion of clip that we want. And now we need to set that up in a form that could be quickly sent to Premiere. So we create a rough cut. We're gonna call this Larry's rough Cuts now. In real life, I would store the rough cut list in some sort of form folder where it's stored with the project. In the case of today, this is going to last until about 10 clock this afternoon. I'm gonna trash it so like Susan, I'm going to store it to my desktop. But unlike Susan, I've only got a couple files on my desktop, so I'll be able to find this again in the future. I click Larry's rough cut click save, and now I open up the rough cut by double clicking it. I am now able to grab clips and just drag them in to the rough cut and notice that there's clip one. There's clip to There's Clip three and it's not. It's assembling them. It's not overriding. It's putting the whole clip in. If I want to change the order, I just simply grab the clipping dragon and I can move it from one place to another. I'm building what what Hollywood people would call us elects Real A selects, really is simply a listing of all the clips that I like, and I'm selecting knows I'm gonna send those over to premiere. So we've used it for ingest. We've used it for logging, and now we're building this select surreal the list of clips that I like and this rough cut can be saved. I'm gonna just move this over to here, notice that there's my comment marker called train clips. There's no comment with this clip. There is a comment with this clip, and these first and last are sub clips in the middle one is a complete clip when I saved that rough cut, what I'm able to do is I'm able and I'll do this after lunch is we're going to send that rough cut over to Premiere and these clips will in about half a second, all load into premiere. She use prelude to review your clips. Mark Eclipse Put our selects a rough cut together and then instantly I mean, like, really fast send stuff to premier. This is why we use Prelate if you're not working with tape lis Media, if you're working with tape or if you're working with files like quick Time movies that are already on your system, you never use Prelate Use Prelude four. Tape Lis Media Susan A gym before shift gears. Any questions? Absolutely. Okay, we had a question that came in from Cayenne, who asked, I'm able to bring in video directly from my canon five D three into final cut. No Transco FC Peace X Thea if you substitute No, that's okay. If you substitute premier, the question will still be the same because they both do the same thing. Just pretend, he said Premier can the latest version of Premier not bring this footage indirectly to. And then Debbie asked, Why is it recommended? Use prelude for Import of tables Media Isn't it possible to directly ingest into premiere? And I know we're talking about why it's good to use prelude, but why not just go straight? And the answer is a Canon five D shoots a quick time dot movie files. The movie file can be imported directly because it's already in a form the computer could read. But there are many cameras that shoot files that are not dotted. Movie files there. MTs files rmX F files their files where the video is stored in one folder. The audio, stored in a separate folded up metadata, is stored in 1/3 folder, and they have not yet been assembled into a form. That software, either premiere or final cut, can read those of the formats. ABC HD comes to mind where you have to assemble them as part of the ingest process. So the person on the Internet is absolutely correct that if you have a dot M O V file, all you have to do is import that will see that this afternoon. But if you have a format which is not in portable. It's not a contained movie. It's in pieces overall, your folders, Which is why we have to capture. I copied the entire folder from our card to our hard disk. There it's got all be stitched together, and that's what prelude is doing. So there's three ways that we get stuff into Premier oneness. If it's coming in from videotape that's capturing. The second is if it's already in a form that can be playable by the computer like a quick time movie that's imported. And the third is if it requires assembly. That's tape Lis. That's what prelude is doing. And Prelude is building a form of the file so they could be played back inside premiere or final cup. So you only use prelude in those situations you would go straight into premier. Otherwise right capture is premier. Import is premier ingest for formats, which cannot be. If you can't double click on a file and play it back, then it has to go through problem. Okay, that's a great tip. Cool. Yeah, that's a great way to answer that. Thank you. Um, and quick question from Laurie Itin. Can we rename clips in Prelude. Yes, and that's what the rename file is. You can also rename files. One should never do a demo with millions of people watching. If you click on the file name inside the name folder, which I just did re name the file so clearly it can't be done. Megan, go ahead. Yes, I am. Just have a quick editing question. I'm wondering what is the most common use for the comments that you encounter yourself? What is the most common type of comment that you make when editing? Oh, I use it as yellow sticky notes. Legal needs to approve logo in shot needs, color correction. So it's a sticky note that I used to myself to say, Hey, pay attention or some issue with this clip. And then for those people who are putting it directly into premier instead of going through Prelude, I'm assuming that that feature also is does called markers later on. Okay, Is there an advantage to doing it in Prelude as opposed to premier? No, there's no advantage. It's just a question of, um, is there something about this clip the editor needs to know? And if, for instance, Maybe this shots blue. So you want to say there's a color cast with this shot? You might want to just put that as a marker, and the editor can then see it when it loads to premier. But it's clearly if if the clip isn't touched by prelude, then you can't add the marker. You have to add it in premiere. So it's just a question of Is it convenient? Because as soon as soon as Adobe did not include comment markers, then everybody would want them. But just because it's there does not mean you have to use it. Question. Jared. Well, I was just gonna ask while we're waiting. Judging from your desktop, do you consider your internal drive Drive number one? Um, you're pointing out this question. Uh, this outlay over here. We've got the boot drive, which is Macintosh HD and a second drive into third drive, so I never consider this drive number one. I consider it the boot drive. The reason I've named the second and third drivers. I refer to them as the second driving third drives so much in my training that I just decided to name them that so that they reinforce the training. But you could call these anything you want. There's there's no magic to the drive name. It's just that these are three physically separate units. We have a very, uh, creative producer who feels that any piece of paper on the table is offensive me. My table is littered with sheets of paper, and normally I would have my hard dives here and I would just pat them and show you where did your pathum and show you that there. But they're actually down below. So imagine if you will, that I've got these big, huge hard disks that are sitting on the table. So they're just under there when I am working with source meet. Remember, we talked about storing source media. Here's how I store source media on my third drive right there. See? It says, Third drive. On my third drive, I create a folder called Source Media. Inside the Source Media folder, I create a folder for every one of my clients inside the Client folder. I create a folder for each one of my jobs inside the job folder. I create a folder for each card that I shoot for that particular job. So if I shoot four cards as I have here, I have four folders, one for each card. You copied the entire contents of the card to that folder and notice the naming convention. It's the JM. It's a just a moment Productions project is J. M. For just a moment. Productions. It's a second project said. There's the project code. There's the date I shot the project. It's the A camera that b camera The first card, the second card that was shot that day. Each card gets copied into its own folder, which is stored inside the Project folder, which is stored inside the Client folder, which is stored inside the Source media folder Ah Love Organization. I never have to worry about where my stuff is stored, and I mentioned that earlier, and I wanted to stress that again. It's just makes your life so much easier
Class Materials
bonus material with purchase
Ratings and Reviews
Jfraz
I love this class. It is highly technically, but there is an awesome wealth of information to be had, even if you are a beginner. I've been struggling for a while, trying to look at YouTube videos and whatnot, but this class helped me make better sense of what I needed to do in all of my video editing. You get such a great foundation that's going to help you go further.
Valentine
I recommend Larry Jordan's course there is a lot of in-depth information that will help the beginner as well as the advance premiere editor. The only thing is that his humor is a big corky for my taste but if you look beyond that you get a lot from his teachings. He genuinely wants his students to succeed and get paid well in this field which its nice.
a Creativelive Student
This is one of my favorite courses on Creative Live. Larry Jordan teaches in a way that I can follow and is easy to stay focused on. He has a crazy amount of knowledge about this topic as do all the Creative Live teachers. I love this site so much, has done more for my business than all the other sites I have used combined. Keep it up CL!!