Lessons
Day 1
1Introduction
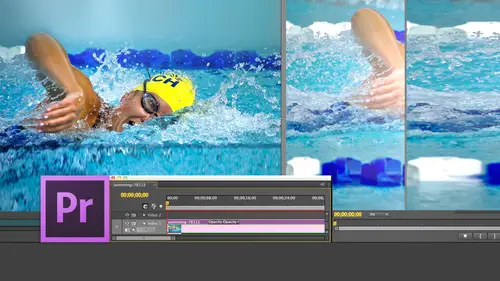
15:18 2Post-Production Workflow
26:52 3Troubleshooting
12:20 4Setting Up Hardware
29:32 5Create A Rough Cut in Prelude
43:29 611:30 am - Introduction to the Adobe® Premiere® Interface
31:56 7Configure Preference Settings
22:47The Media Browser
10:03 9Capture and Import Media
37:09 10Reviewing a Clip
29:17 11Create an Edit
24:18 12General Q&A
14:18Day 2
13Editing Review
18:24 14Editing in the Timeline
35:10 15Trimming
36:13 16Organizing the Timeline
31:19 17Labels and Markers
14:18 18Transitions
24:57 19Introduction to Audio
31:26 20Audio Editing
45:36 21Mixing in Audition
26:51 22Audio Effects
37:41Day 3
23Normalizing and Syncing Audio
24:54 24Text Effects
38:12 25Blend Modes
14:48 26Motion Effects
43:07 27Filter Effects
34:28 28Chroma-Key and Lumetri Looks
19:56 29Color Correction
57:31 30Editing a Mini-Doc
41:09 31General Q&A
26:54Lesson Info
Mixing in Audition
I want to send a mix over to audition. I want to talk about that quickly, and I want to talk about some additional audio tools and other stuff. So during the break I created a ah, been that has music in it, which has absolutely nothing anything to do. This is blues music, strong blues, and he's talking about interplanetary Internet. There's no relationship at all to the music and the audio. So we're just gonna lay in a couple of music clips here and notice that I am dragging. And already the whole front row of the audience is just agog, saying, Larry, why are you dragging? And the answer is when I'm editing on V one a one a two when I'm building my essential audio, my talking heads. It's always faster, Ted it using the keyboard shortcuts always because you're setting it in your setting out. But when you're building effects, laying in sound effects, laying in music, we don't really know where those clips were going to start. When you don't when you want to be fast and accurate, you used...
to keyboard shortcuts. When you want to be fast and in accurate, you drag because with dragging, I want this clip somewhere in a timeline. But where? I have no idea. I got to figure it out. Once it gets into the timeline, I want to be fast and inaccurate. So you're gonna see me dragging a lot when I'm building effects? Because I don't know what I want the effect to be. I don't know what I wanted, where I wanted to start. I just want it on the timeline so I can start work with it, so you'll see me drag a lot tomorrow. But when I'm building the talking heads now, John Janice, I'm gonna ask you a question a second. So brace yourself when I'm editing talking heads. I'm always using the power tools Now, Janice, you're sitting down. What keyboard shortcut do I press to mark the beginning of a clip when I have a talking head? I And what? Clipped what keyboard? Why press when I type the end of the clip and then to edit down to the timeline? What key do you press to do? An override at it, period. Right. So I've just edited talking head clip number one. What? Keyboard shortcuts sequence. Would you go through for talking head clipping over to the same one and for talking head clipping over three. The same and four same and five same. Six same seven same 18 so I don't have to repeat this eight times. It's exactly the same thing. So this is why I show you once and explain what it is. But I'm not going to go through it over and over again because a normal sequence has got 20 quip clips, 50 clips, 150 clips, 200 clips. That's a lot of time saved using the keyboard shortcuts. But for me to spend time building a 200 clip that we'd all die of boredom. So no reason to do that. Let us pretend that this sequence here is incredible. Unbelievable content. Sound effects. Titles that will Titles don't make any difference because it's audio. We're mixing. I want to get this over to audition. You would think to get it to audition, you'd go to the file menu. You'd think so, but you'd be wrong. It's not in the file menu. Even though you're sending files, it's in the edit menu. I have no idea why we want to edit this. Now if I have a clip selected, say, I've got hum in a clip, I could send the clip over to audition and auditions. Hum remover is to die for its called D Hummer, and it takes home and harmonics out of a clip like nothing I've ever seen before. It is really slick, but in this case I want to send the sequence. So here's how you find the sequence that you want to send over here in the project window. Select the sequence with the sequence selected. Go up to the edit menu, go down to editing Adobe Audition and notice the clip is great out because I didn't select a clip, I selected a sequence. When you click it, it opens up this dialog where you're able to name the files that you're sending to audition. Normally, it would be the same as the project, but it doesn't have to be. It could be rough mixed wander temp mix. 23. Whatever you wanna call it, it defaults to storing the files in the Adobe Audition Interchange format, which is in the Projects folder, which is on my second drive. I like that. Leave it alone. I could spend the entire sequence or just a piece of it. We're talk about work areas tomorrow. If you check export preview video, it will build Ah, video clip, which then moves over from premier to audition to allow you to mix two picks inside audition. I recommend you check that. And if you're working with audition sorry If you're working with Premier CS six, there's a bug in premiere which requires this to be checked in order for you to get the file back from audition to premiere. So make sure export preview video is checked. You can render the audio clip effects, but I never do because the effects are always created inside audition. You can send clip volume, key frame metadata if you want, but I'm doing all of my levels inside auditions, so I never check that. But I do want it toe open. Audition this, it sends the file. The other thing is noticed. Audio handles here. Your audio engineer is gonna want at least five second handles and they will beg and plead with you for 12th handles. More handles are good. So here's how I set my my system up to send to audition. I always give it a name. I always send the entire sequence. I change handles to five seconds, or at most 10. I check the top and bottom check box, but not the middle to, and it will remember these settings from one sending to the next. So once you've got the set up, it'll remember it. Let's zoom back out. Click OK. What it's doing now is it's compressing a small version of this video in a very economical form that can be read by audition. That doesn't take a lot of CPU clock cycles to playbacks of the bulk of our time is spent waiting for this video to be prepped in the speed of this depends upon the duration of your project and the speed of your CPU. Then it creates an XML file, sends that extra mile file over to audition and says, Hey, I'm here, see what our problem is and there's our project. There's our video up here, and one of the things that makes Audition unique is that audition Onley allows one video clip per project. So inside premiere, you have all your separate video clips. This is why it has to export the video clip because it's gonna build it into a single clip. There's only one video track. There's only one video clip, and it loads up in here and notice I'm getting an offline indicator. There was a problem creating that file, but this is audition, and now I can go through and mix our entire project inside audition and make it sound wonderful. Let us pretend that I've now made it sound wonderful because I either have to tell you everything about audition or nothing. And I'm opting for nothing because I just don't have the time. So we're gonna pretend that we made this sound wonderful and you can audition does so magical things. We now need to get this back to premier, go up to multi track and say, Export toe Adobe Premiere Pro. Remember, we went at it, added an audition that sent it from premier. Then we go to multi track export to Adobe Premiere Pro. This again gives us the ability to give the project to name. It's going to send it is XML data, but here we have several options we can export. Each track is a stem or build stems. Now stem Zahra, a term where all of our dialogue is a stereo pair. All of our effects or a second stereo pair. All of our music is 1/3 stereo pair, the's air called stems. They're very popular at the higher end of audio mixing. Let's say that I need to do a Spanish language version of my program. I want the music. I want the sound effects but need to take out all the English language and replace it with Spanish voice actors. So I keep the music stem. I keep the effects stem, but I take the dialogue, stem a, replace it with a Spanish dialogue. If I'm cutting trailers, I keep the dialogue. I keep the effects, the explosions. But I take the music out because trailers we're gonna cut the film up so much that the music is gonna be totally broken. So I do all of my editing with dialogue and effects. Then take the music and lay the music back in. After the trailer's been set, I want to be able to have separate control over my dialogue over my affection over my music. So there I would create stems in this particular case, I want to mix down the session. Now This gets back Jim to the woman who asked the question or the person asked a question on the Internet. Can we create a mono file, a stereo file or 5.1 file notice here? When I'm going out of audition back to premier, I could say Create a model file so I could have a model file safer posting to the Web. I could have a stereo file for broadcast. I could have a 5.1 file for theatrical. I could export one both or all three of these and have them all built into the premier project. In this particular case, I'm just going to create a stereo file. Notice the bottom check box open in Adobe Premiere Pro and you click Export. Let's go back to zoom back out. The actual exporting the file is really fast, and then we have the ability to specify. Do we want this file added to a new audio track or built into an existing track? I want to say Add this to a new track click OK, mute the other tracks. And now when I play this back. I'm playing our mix. So this ability to quickly round trip the video audio edit that we've done because all of our clips air perfectly spotted for time. But now we need to remove some home or add some reverb or add sweetening or build stems, which can be done in premier but can be done so much better in audition. It becomes a matter of just a few seconds toe. Send it to audition than to do. The mix, which can take a much time, is a video edit. If you want to really put time into it and then bring it back toe premier. Okay, so that's a very, very cool procedure. Yes, ma'am, I just have a quick question. I'm wondering, where does this fit into your overall workflow at the very end after you've got picture lock, So you have picture lock. You've decided this is it. It's done. It's finished. You then send it over to audition for the mix. At the same time, you send a picture up to a color grader to do the color grade, Then you marry both the finished color graded and a finished audio mixed together just before final output, and you lay it off the taper. You output to a file, so it's the very it. Step nine. It's step nine necessary. Step eight is the audio mixed. Step nine is the color mix. Step 10 is Thea. Put in Step 11 is archived in a workflow that we talked about yesterday, and then it's. Do you always do it as a whole correction? Or if you have, say, a particular clip that you've added in that is worse than others or has special needs? Do those get addressed separately? Or is that something that's again, all in the whole package? It generally depends. What I'll do is, if I've got a clip that's got a problem, I'll load that clip in to audition to see if I can fix it. If I can fix it, then I'll use that clip in my edit because I know that it could be fixed later in post. But I don't actually fix it. I just tested to see if it could be fixed. The basic rule of thumb is leave all of your clips in their native state until you move to the audio mixing and clean up everything. At one time, an audio engineer, especially an audio engineer, does not want a video engineer doing audio corrections, cause they know in their heart of hearts that were completely inept and ham fisted. And so therefore, a video guy should never do any audio changes. Just give them the native file and they'll fix it from there, as as witnessed the conversations going on in the control room right now, where the audio guy says, Finally, someone takes audio with the respect it deserves and rest the guys looking. I'm saying, No, we don't. So it's There's always a dichotomy between the video people in the audio, people in the audio People are always the downhill toe, which everything rolls, and they still need to fix it with no budget in no time. But it's the last step before color grade. Uh, other questions. Anything quick from our Yes, sir Scott, can I get on record now that you may come back and teach a class? On addition, you can get on record. Whether they'll listen to either one of us is an entirely different issue. I would love to do that. That would be fun. Mixing audio for video is just, It's just so much fun. It's just it's all in the imagination. It's really cool. Larry, we have another question from a meat Sankaran. Who said, At what point would you decide to add audio to the master track? And what what an example of that audio be you would never, ever, ever, ever, ever, ever, ever, ever at audio to the master track, all the master track is is an audio gain being able to set levels, and the reason of master track exists is how do you fade seven level seven tracks of audio to Black. You could either put key frames on every single track, or you put a single key frame on a master track and you fade the master tractor black and it fades all your tracks to black. It's a way of controlling the gain off all of your tracks at the same time, you'd never, ever at a clip to it. You use it for level control only, and even though in my notes, I said, gain controls, input levels, control output or whatever, who knows what that gained level environment is used? We just throw those terms around synonymous Lee and only purists and snobs try to figure out what they actually mean. Any other questions? Yeah, Trap City asked about how you handle a round trip to audition. So let's say you get it in tow, Premier, and then you need to go back and forth. Here's the trick. Yeah. If remember, Meghan was asking me, I'm just cruising it because I know you were doing other things. And Susan, do you have a chance to tell you that? That's a bad question, but Megan just asked, She said, Where do we do? The audio mix and the trap people fall into is they say, Well, let's just send this project over to audition and we again go to the Edit menu would send it to audition, Correct. And then we bring the audio file back and then a video editor in a fit of absolute blindness. And you Bree moves a sound bite from point A to point B, which then destroys the mix. I mean, destroys the mix. So what? What you would like to do is to be able to send that change project and just have it reflect the change you can't do it. So that would mean that now, because they moved one clip from point A to point B. You got to send the whole new sequence over and you got a remix. Everything from the start remixing everything from the start means you've wasted all of that time and money in the original mix. So there's no round tripping. It doesn't go, doesn't go Premier Toe addition to Premier to audition to Premier to audition It goes Premier auditioned to the mix Finish the mix, bring it back and you're done. She wait until pictures are locked. You're not gonna make any more shot changes. You're not gonna make anything. You could add titles later. You could add languages later. You can you can add even color correct later. But you cannot change clips. You cannot add a talking head. It's locked. Then you send it off to the mix. And is that more of Ah, what I think the where the question resonated from was, is that more of a workflow thing? Or is that you just absolutely can't take the file back over and make any changes? You can absolutely take the file back over at any time, but you have to start at the beginning and remix everything from the start. Okay, great. I think that's where there is no way to pick up in the middle or say I'm gonna pick up from this last mix and just make this because now suddenly you, as the audio editor, have to conform to match picture, You say? Okay, they move this clip over. Did they give me the notes? How many frames over do they move it? I've not got a manually move that clip over that many frames, because if you don't, you either have to start at the beginning and take the feed, or you've manually gotta move every clip and make every adjustment, which is so enormously time consuming is to be not cost effective. Right? Okay. Thanks for the clarification. Other questions? We have a question here, Kelly. I use logic and pro tools. Can you, um, export into a no ml file from premier as well? And a f which is even better. So yes, you could do all MF in a f. What? Why is a I which that one. Why is that better? I didn't say better. I just said you can do both The benefit of om F. One of the cool things about O N f. Which stands for open media framework, is that when you export is an om f, it not only creates the list of clips, but it actually includes the clips in the OM file So you could take that Oh MF file. You could put it onto a thumb drive and you could mail that drive across country and the clips will arrive safe and sound. A f is like XML. It's just a point of file that does not necessarily include clips. And I could be wrong here. And if I'm wrong, I'm willing to admit defeat. But I think a f like XML is just pointers to your files, whereas oh, MF, which I'm sure about includes your files. Now the good news is, oh, MF exists Works great, includes your files but it has a two gigabyte limit. So if I have ah file ah, program that's an hour long. Now I know you know the answer, Janice, because you've been editing for a long time and I'm not even bother to ask you the question about how big a stereo file is an A F format for one hour but a stereo. A off one hour file is 640 megabytes in size, 320 megabytes for our model file. So if I have 10 tracks of audio and if there's audio four the entire hour, which would be extremely rare, but we'll just pretend 10 times 320 is 3.2 gigabytes. You can't put that into a no MF file and oh, MF files do not honor ins and outs inside the project. You have to export an entire track you can't say set the first in and out for the first half of an intern out for the second half, she have to export all of track 12 and three for the hour. Then all of track 45 and six is a separate file and emerge those OM files together. If you do in shorts like 20 channel 32nd commercials, you're never gonna run to the limits of a norm file. If you're doing feature films, you're gonna slam into him all the time. Because of that two gigabytes limit. That limit does not exist with a F and A. F is still supported or math hasn't been supported for 15 years, which means we use it every day in Hollywood, but it's still a nun supported format. Other questions. In addition, when we export from Premier a case in point to save things, let's say you know that your client is crazy about switching up audio. Once we've exported all the various tracks from Premier into audition, can you save that project as whatever come back here? They make their change. Export all of that again. Take the one file that's been changed, put it onto the old track and then re export it and put it on line four again and replace that mix down as a backup safety plan. Well, anything that you bring into Audition would be saved as an audition project, so it saved with all the clips intact so you'd be able to send the file from premier to auditions. Save it, do incremental changes. You could take a week to do. The mix mixes air not necessarily done in five minutes. They could take quite a long period of time as you start to do sound design and layering of sound effects, so you save the project at the end of every day. So you have that mixed. They're finished and complete. So if you ever need to go back to it, you can open the mix up and go back to it. What we dont have that stability toe automatically conform clips based upon changes made in premiere and have those changes automatically show up in audition. You have to do the conforming manually, but it can be done. Is just enormously time consuming and requires really, really good notes from the point of the video editor saying, This is what I changed because if you don't get a note, you may not spot that to second explosion. They dropped in and there's that big explosion on the screen and there's no sound effect to go with it. It feels kind of flat. So what we're missing is the automatic conforming process. Absolutely. You can save the file and go back to it in Premier end or audition at any time. Other questions, you ready to keep going? So let's take a look at a couple things that we ran into first was the master thing, and Jim, I'm glad you asked me about that because it's easy to make a change and not realize you did it because you could just grab the slider down here and just by accident, drag the master gained down and set it to some ridiculously low level. And your life is over. As you know it, I know what that feels like. Anyway, let's, uh, weaken delete a track I think we can delete attract by going over the track header. That's see, I know we can delete a track. Charity is go to the sequence menu, go to delete tracks and you can indicate whether you want to delete audio tracks. You could delete all empty tracks. This allows you just to consolidate for space. I want to delete track four. So go to delete tracks. Audio four, click. OK, and now I got rid of that fake mix. I'm gonna highlight my audio clips and make them disappear because they have no relevance at all. What we're talking about something that we spent some time looking at during the break is these Tracks Inc controls what these should always be dark. What they allow you to do is to maintain sync between your audio and video clips so they should always be dark on Ana. Just like always, basis. But one of things that we ran into is how do we change? Ah, clip from stereo tamano or from dual channel mano to stereo. Member of the interview that I did was Susan earlier today, where I'm recorded on Channel one and Susan's recorded on Channel two. How do we make sure that that's not a stereo pair? It needs to be. Both of us need to be modeled, but I need control over Susan's level, separate from control over my level. And the answer is, you select the clip inside the project panel, go up to the clip menu and go to modify under clip, modify notice audio channels. When you select audio channels, we have several options. One. Let's say that it was just Susan being a narrator. I want to just hear her voice on Channel one. I don't want to hear anything on Channel two, so click on Channel Two and turn it off. Now I've just got track one playing. I've got nothing on track to if I want to hear channel to, but I wanted to be a stereo clip. Right now it's dual two channels, dual channel mono. But if I want to be a stereo clips, set it to stereo and notice that now I've got these. Two clips are a stereo pair, but it's added a second Steri appear because of this thing up here. See where it says number off audio tracks. I want to set that toe one. I just want to have a single stereo pair coming in. So you convert Ahmad a stereo pair to dual channel mono by setting this from stereo to model, specifying the number of tracks that are contained. There's Channel one, Channel two. It's now dual channel mono. If you have a dual channel model clip that you want to convert to stereo to the exact same thing, select the clip, change the channel format to stereo and say I have one stereo pair. The reason. There's multiple options. Quick time allows us to have up to 24 tracks of audio in a quick time movie HD Cam S. R allows. I think it's eight tracks some p two Media allows four tracks some cameras record just to track, So we can have lots lots of audio channels inside our files to work with, depending upon what Kodak and format we've selected. So it's entirely possible, for instance, for me to have four stereo pairs inside a single quick time movie. The mix dialogue, stem effects, stem music, stem. Each of those is a stereo pair a tracks of audio inside a single quick time movie, and they can all be transferred from one place to another with all the audio detail that we need. In this case, I'm gonna move this back to a stereo clip and click, OK, And because that doesn't affect clips in the sequence, we're gonna just edit him back down to the timeline. And now I have a stereo pair. If I expand the clip shift plus notice here is I zoom in. Nope, sorry. Time out. Hit that button. Try this button As I zoom in notice. I now only have one volume control. A dual channel mono clip has a volume control for channel one and a volume control for channel two. A stereo clip has only one volume control for both left and right channels. And, uh, hang on, guys, I'm gonna play. Some audio here sort of warn everybody, so there's no problems. I play it back because we can do things now with the Internet that no one ever really seriously thought we could do. But there's more. Notice that as we now grab this and drag it up, we're able to change the level over here and we can add key frames. Command, click, command, click command, click and drag down. We can have our key frames, same as before, so we can do everything with Syria. Clip we do with a model clip. It's just that we're dealing with both channels at the same time, and we'll just highlight a key frame and deleted, highlight a key frame and delete it. Highlight a key frame and delete it. So let's do a couple of audio effects before run out of time. There's so much stuff I'm gonna have to roll some stuff to tomorrow. Can you come back tomorrow? Jim and Susan, could you join us? What would that be? Asking too much. I go fishing, but I could I could be back at least for half the day. That would be great. E was gonna edit in premier. But do you know you should come back to what? We talk about effects, and we're gonna We're gonna talk about some other cool stuff as well, but because that way I can concentrate on audio till the end of today. Thank you for giving me an extra day to come back way. Love audio like it's excellent. I'm so proud of you. My heart glows with pride in having just have no video. Editor says they love audio. Have you ever noticed that? They say I need to buy more third party effects if I don't have another lens flares. I'm not a good editor. They never say. I wonder if I could make my audio sound richer. They just never say that.
Class Materials
bonus material with purchase
Ratings and Reviews
Jfraz
I love this class. It is highly technically, but there is an awesome wealth of information to be had, even if you are a beginner. I've been struggling for a while, trying to look at YouTube videos and whatnot, but this class helped me make better sense of what I needed to do in all of my video editing. You get such a great foundation that's going to help you go further.
Valentine
I recommend Larry Jordan's course there is a lot of in-depth information that will help the beginner as well as the advance premiere editor. The only thing is that his humor is a big corky for my taste but if you look beyond that you get a lot from his teachings. He genuinely wants his students to succeed and get paid well in this field which its nice.
a Creativelive Student
This is one of my favorite courses on Creative Live. Larry Jordan teaches in a way that I can follow and is easy to stay focused on. He has a crazy amount of knowledge about this topic as do all the Creative Live teachers. I love this site so much, has done more for my business than all the other sites I have used combined. Keep it up CL!!