Lessons
Day 1
1Introduction
15:18 2Post-Production Workflow
26:52 3Troubleshooting
12:20 4Setting Up Hardware
29:32 5Create A Rough Cut in Prelude
43:29 611:30 am - Introduction to the Adobe® Premiere® Interface
31:56 7Configure Preference Settings
22:47The Media Browser
10:03 9Capture and Import Media
37:09 10Reviewing a Clip
29:17 11Create an Edit
24:18 12General Q&A
14:18Day 2
13Editing Review
18:24 14Editing in the Timeline
35:10 15Trimming
36:13 16Organizing the Timeline
31:19 17Labels and Markers
14:18 18Transitions
24:57 19Introduction to Audio
31:26 20Audio Editing
45:36 21Mixing in Audition
26:51 22Audio Effects
37:41Day 3
23Normalizing and Syncing Audio
24:54 24Text Effects
38:12 25Blend Modes
14:48 26Motion Effects
43:07 27Filter Effects
34:28 28Chroma-Key and Lumetri Looks
19:56 29Color Correction
57:31 30Editing a Mini-Doc
41:09 31General Q&A
26:54Lesson Info
Motion Effects
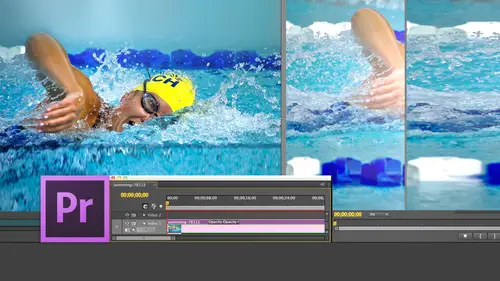
motion effects allow us to change the speed of a clip. They allow us to change the position of a clip the size of a clip losses to animate the movement of clips. The motion effects are one of the core effects that we have inside. Premiere were use it constantly for just about everything in this Here, for instance. I have ah, woman that is running. Okay, now it's the wrong size, right? All right. Stop yelling at me. Here we go. Get rid of Dr Cerf, Period. There we go. This is why knowing the size of your images such a big deal Because you want to make sure that you don't have black edges around your clips. Okay? She's running. All right. There are four ways that we can change the speed of the clip. I'm gonna show you two ways now, and I'm going to show you two more ways after the break. One of things that we can do. Let's just find this shot right there right before her heel hits the ground is we can convert this entire five second image to what's called the hold frame. I can replace th...
e clip with a freeze frame. To do that, you go up just right, Mouse Click on it. Select the clip. That's what I failed to do before. Select the clip. See where it says Frame hold. What this does is it takes the entire clip and I want to hold on. I can hold on the in. I can hold on the out or I can hold on a marker So I'm gonna freeze frame on the in and click OK, now the entire clip has been turned into a still frame off the frame at the end. Don't do that and I want a freeze on Say, this clip writers her heels about to hit that becomes my new in. So I say go up to select the clip clip video options frame hold on the end point and now the entire duration of that clip is a free strength. This is nice when you wanna have an entire clip turn into a freeze frame. But far too often I want to say freeze just the first frame and then have it start moving again. We can't do that with a whole drink. We have to do it with a freeze frame and here Freeze frames inside Premiere are significantly more awkward. Then freeze frames inside. Final cut. Here's how they work. You put your play head on the shot, you want to freeze. If the clip is loaded into the timeline, you then go to the program monitor. If the shot is loaded into the source monitor, you go to the source monitor. Process is the same. You put your play had on the shot. You want to freeze and you see this camera icon here When you click it, it takes a snapshot of the frame underneath your play head, and it saves it to your disk. So I'm gonna call this still frame. You could call it anything. And frankly, still, frame is too generic. You'd never be able to find it in a large project. So I'm gonna call this still frame and it allows you to save it in any of five formats. My strong recommendation one that I've had the least problems with, especially in terms of color shifts, is to save it is a dp X file. The second option is a tiff image. If marketing needs at image for posting to the Web that export as a tiff because marketing may not be able to read DP extremes. If you are exporting this to bring it back into premier as a freeze frame, export is a DP X never, ever, ever, ever used J Peg way to lossy looks too bad. P and G's are okay. I prefer tiffs, but P and G's air good targets air specialized. Perfectly acceptable. But not all software reads target files. So for four, Premier Export is a. D p X for photo shop marketing, Web use as a tiff, they'll compress it to what they need. The key is not only Teoh. Make sure you set this toe dp X, but you also check import into project. Otherwise, you're gonna have to find that still frame and important when you click. OK, get now brings that still frame in. I can now grab this still frame edited into my project and edited so that it matches. And so now that's the DP ex steel frame I just created. I play the project and it picks right up and continues playing. This is significantly different than final cut and final cut. You simply type shift and it created this still frame and a viewer, you brought it down here. We need to click the camera icon, export this still frame, make sure the check boxes checked to import the still frame into premiere, and then you can add it. So hold frames. Allow us to freeze an entire clip based upon the in or the out at exporting. A still frame allows us to create a still frame as a standalone clip, a standalone file which could be brought in and used anywhere in our project. Whether we're using it as part of the beginning of the end of a clip or freeze in the middle, we could do anything we want with still frames, knowing that they are a separate file, which we then have to edit back into our project. Remember, Ah hold frame turns the entire clip into a still frame based upon the in the outer marker off freeze frame. We can export any frame and stop motion for that particular point in time. Another common speed effect is slow motion. If I select the clip here and go up to the clip menu, go down to speed duration keyboard shortcut. His command are a dialogue box appears that allows me to change the speed of a clip. Now there's a couple things that weaken Do one. We could dial in the percentage of speed. The change that we want less than 100% of slow mo more than 100% is fast, mo or I can say leave this alone and instead dial in the duration that I want. I want this to be 70 say seven seconds and it will then automatically move that to be seven seconds. Well, in this particular case, I want to, uh let's see where my duration command are. You and also get there by right mouse clicking on the clip. I want to illustrate this button right here, which you may not know much about what this does Is this unlinked the speed change from the duration? If this is linked and I set this duration to 50% notice it. Susan English is such a hard language. It really is. Let's try this again. If I said the speed is 100% the duration is five seconds. If I set the speed to 50 notice that the duration automatically changes whenever you have a constant speed change. It always changes the duration of the clip and pushes everything to the right of it downstream. When this is unlinked, set this back to 100 when this is unlinked. Now, when I change the speed, the duration does not change. This means it a place from the in until it reaches the end of the original duration and doesn't play any further. If you slow a clip down, that means you'll lose frames off the end. If you speed a clip up, it'll pull frames after the out in. So this allows you to disconnect the speed of a clip from the duration of a clip. If you want to clip to run in reverse, click here. If you want to have it, push clips down or pull clips up. Check here, in this case, just to do a 50% speed change will click that click OK and noticed that our clip is a lot longer and she's now running at half speed. Well, there's something else that we can do, and that is we can do what's called a variable speed change, and I'm gonna use some hummingbirds that I shot there were. I actually do have a hummingbird, a V ery in my backyard, and you're looking at the hummingbirds. This was shot with a D V camera on a tripod about a year and 1/2 ago, and what I want to do is I want to be ableto have a variable speed change. A freeze frame freeze is a specific frame. Constant speed change changes the speed of the entire clip by the same amount or a variable speed change changes the speed of the clip during the clip. Maybe I wanted to be a normal speed, and then I wanted to be a slow motion and then go fast motion, whatever. There's a couple different ways to do this. But here's one way that will work, right? Mouse click. Sorry. You see this little effects window right here? That little effects, not a window. It's a button. When you click it, it pops up three choices. Ah, motion effect which were about to get to go past the effects which we've been playing with and time remapping speed. What time remapping speed allows me to do is to set speed key frames. The easiest way to see this speed key frames is a type shift plus and make the clip bigger. And now when we look at the clip, let's just pull this bar down here now when we look at the clip, this line represents the speed of the clip above the line. Gray means fast motion below the line. Blue means slow motion, and the line itself is 100% speed. We set key frames by command clicking, and there is a speed key frame and there is a speed key frame and there's a speed key frame. If I want the speed toe increase, I grab this line and I get up and noticed the yellow tool tips as I'm speeding this clip up 120% here. If I grab this line and drag it down, I'm slowing the clip down to say 50%. And here, for instance, I want to speed this up to 100%. And then I want to slow this down to say, 0 25% by the way, a tip on slow mo that because we can select any percentage from 0 to 100% it's often a question of What's the best speeds to work with? The best speeds for slo mo are speeds that divide evenly into 200. So 100% 50% 25% 33% 15% 10% 20%. If the number divides evenly into 200 it will give you a nice, smooth, slow mo speed. Others may give you a little bit more jerkiness, especially, by the way, if you get below 20% If you need slow speeds below 20% you're gonna end up with a very jerky, still frame kind of look here. A better package to use is published by revision software called twixt er T w I X T e r twixt T o r. And this will create extraordinarily slow motion scenes with really, really great quality. So as you get below 20% consider investing in revision. So we now have a slo mo clip that looks like this back slash to have a fit in the window a little bit faster than normal boom bird and then slow mo. Now we're in slow motion. Of course, he's not flying. There we go, that slow mo and then we'll pick it back up again fast, mo, and I'll just jump forward a bit and slow mo and it's so slow. There it is. There's our bird coming in for landing. We can also separate these and create a ramp as it slows down. Noticed. I've added ramp here and I can separate these now. I'm slowing down to that speed and speeding up to that speed by grabbing the key frames at the top and dragging and it ramps down to the speed that we expect or ramps up to the speed that we wanted to go to next. There's a lot more we can do with this. We can play with the Rams. We've got busy eight controls so we can have it be a curve rather than have it be a linear ramp. You can grab one of the key frames dragon left or dragon right to be exactly what we want. I don't just don't have the time today to show you how it works, but the concept is simple. You click on this FX badge here, you select time remapping speed and the way that we learned how to apply key frames for audio is to hold the command key down and click on the line command. Clicking on a line creates a key frame, and here I've got a key frame, a point of change during playback, which is allowing me to change not the audio levels, but to change the speed of the clip so that speed changes. But there's a whole other wealth of stuff weaken do inside the effects controls we've seen that we can adjust blend modes in the effect controls. What I want to do now is to show how we can adjust things like picture, image and picture size, the's air to high definition clips from Pond five, which is a great stock market place. I got them from Pond five and I've got a blue clip and I've got a gold clip. I select them because it's easy to see a color difference between the two clips. If I select this top clipped by default, the top clip is always 100% full screen, always 100% opaque. We learned yesterday with transitions that if we type shift D, which I figured out them pneumonic for shift D is shift. Dissolve if I want to add a dissolve. You type shift D, and it automatically adds a dissolve. So as I play it back, I dissolve from the blue clip to the gold Clifton from the gold clip back to the blue clip again. But sometimes I don't want to dissolve from one full screen image to the next. I want tohave both images on screen at the same time. This is called picture and picture, because the top image always blocks the bottom image. You always apply your effects to the top image always, which means that if I'm going to see a split screen or if I want to see a picture in picture, I need to change the top image. So we select the top image and we go back to a tab that we've spent a little time with that we're gonna spend a lot more time with. Called the Effect Controls. There's two tabs that that control effects. The effects tab will just drag it over here so we can see it. The effects tab is the collection of all the audio and video effects that we can work with. Once in effect, has been applied to a clip. We modify that effect in the effects controls tab. There's three categories to the effect controls tab by default time remapping, which is another way of changing the speed of a clip. It does, in the effect controls window what we can do inside the timeline. But it's the exact same process, just a little bit bigger screens to see what's going on the opacity window, which allows us to not only apply blend modes but to change the opacity off a clip. I could make the clip translucent as I looked from one clip to the other by changing its opacity. This is essentially what a dissolve is. A dissolve is changing. The opacity from one clip toe, another toe have it become translucent to opaque. But up here, the motion allows us to control the position of an image, the scale of an image, the rotation, the anchor point in an anchor anti flicker filter. There's a big difference between final cut and premier. I knew I'd remember the name of the software some point. There's a big difference between final cut and premier in final cut. The center of an image is to find us the 00 point this makes it really easy to do modifications based upon simply changing the sign of a number of positive 100 toe. A negative does a symmetrical move around the center Point premiered A drops its Centrepoint from photo shop, where the top left corner is zero point. This makes it harder for us to do position adjustments because now we actually have to change pixel values rather than simply changing signs to move from saying the bottom of the frame to the top. And this takes ah, bit of rethinking. And in fact, it's better to not worry about the actual pixel values, which is easy. And in final Cut, it's much harder in Premiere, but instead to click this icon right there. When you click this icon, it turns on a special mode, which allows me to change the size, grab a corner and drag, grab a corner and drag, and I can now scale, which is the fancy word that means size. I can scale this gold image, click anywhere inside the image and Dragon Round, and I can change its position. Remember, we need to pay attention to action safe and title safe when we're compositing, which is the fancy word. That means combining two images. We composite two images orm or into a single image. We click the Wrench icon and at the bottom of the wrench icon, turn on safe margins when safe margins air turned down. We can then make sure that our margins are images aligned with action. Safe Now. We saw this yesterday, but I want to go through it one more time. There's a couple of extra bars here that we haven't seen before. We're still in a transition phase between four by three video and 16 by nine video. Believe it or not, there's a lot of cable services out there right now that are transmitting in four by three video because they don't have the bandwidth for 16 by nine and they don't have the band with for high death. And there's a lot of local access cable that's being put together for by three images. This and so Hollywood. When they're shooting programs, they shoot what's called 16 by nine, protecting for by three, they will shoot a 16 by nine frame. That's this big rectangle here that almost jumped out of the frame, but they will make sure that all their actors and action is inside a four by three rectangle. So when somebody enters, they're gonna enter. But they're going to stand inside this, which is action safe for four by three. This is title safe for four by three. This marks the vertical center. This marks the horizontal center of the frame, so I have action. Safer 16 by nine. Action. A title safe for 16 by nine. Action safe for four by three and title safer four by three, all displayed in a single set. A safe sounds. Now this isn't overlay. It is not actually in your video. If you were to export, these squares would not be there. It's simply designed to help you to align your graphics and notice. What I did here is I took the picture and picture, and I aligned them so that it sits right on the edges of action. Safe. That's ah, okay, thing to do. I do it all the time, but you don't want to do stab your picture go all the way down here. You don't want to take it all the way to the edge because there's a good chance that a piece of it may get lost. So in terms of framing special effects and adding text and phone numbers and that sort of stuff, you want to try to keep everything inside action safe. That's the outer of the rectangles. So how do we create a picture and picture? It's real simple. I've got full screen dissolves in There's my picture in picture or what you'll see for newscasts all the time. The graphic will be over the shoulder of the host faded in right there. Let me give you another example. If I have go back to my second project, I got a D. V and scale this back here. Command minus. That's at Dr Cerf. This is a typical illustrated lecture kind of thing. Let's no, I want the wide shot. Give me the wide shot. It'll still work. Drag that over notice. I'm dragging. Why? Because I want to be fast and in accurate. I wasn't carrying about what? The content is dragging us fast as long as you don't try to be accurate at the same time. Now I want to take an ad. Um, this one. Yes, we'll drag that in. So he's talking about some astrophysical concept and I grab this clip, select the effects controls, twirl down motion. I want to scale this to 35% which is one of my favorite sizes for picture and picture. Puts the picture right there. Click on this icon. I can then drag the image upto action safe. And as long as we're here talking about picture picture, there's one more thing we talk about in just a few minutes. Which air filter effects filter effects are inside the effects tab inside the video effects folder, and I want to look for a drop shadow. So in the search box here, when a type drop, grab the drop shadow dragon on top and now select it and back in the effects controls. I've now added a control for drop Shadow Sethi opacity to 90% set the distance to say 15 and set the softness to save 15. Make the distance little bit bigger and notice what's happened up here is I've now added a drop shadow. I've added a drop shadow around that to make it pop against the background again. If I take the softness for the drop shadow and make it a whole lot softer. Notice that now I've got this nice soft drop shadow, which separates the image of the sunset from Dr Cerf talking, and it fades. Selected type shift deed at a dissolve at the beginning of the end and play it and it fades right in. But what happens if we don't want it to fade in? What happens if I wanna have it slide in? Well, that comes back to another video transition we talked about this yesterday, so I'm going to go take out the word drop. By the way, to clear the search box clicks the click the X and type the word slide. And there's our slide under video transitions. I'll just grab that video transition dragon in space bar. Wrong direction. Highlight the slide scroll down and I want to change the direction. I think I can change the direction. I remember how to change the direction somewhere. Maybe, maybe not. Does his brain function? There we go. So now we just slide it in from the opposite side. No key frames, nothing special. We just simply grabbed one of our transitions and slid it on. Let's try one MAWR clear this. Let's do a push and drag that on. Highlight it. Go up to here and again. We can set this to be reverse, and it pushes the frame on without us having to worry about anything. See how all of a sudden the stuff that we're doing inside premiere everything builds on something else. We thought transitions were about full screen images, but now we can use transitions for picture and picture. We thought that we could scale something, and we can, but not when we scale something and it's on top of something else. We can see what's below it. It's like this, this onion that was slowly unpeeled with without crying Anyway, we unpeeled the layers of the onion and were able discover that everything that we've learned yesterday and the day before is what we need is foundation to be able to do what we're doing today without us having to reinvent the wheel. It all sort of unfolds nicely, as as we start to explore it. So picture and picture a lot allows us toe have two images on screen at the same time. Let's just try something different by the way to get rid of, in effect, select the clip. Go up to the effect controls. Notice the word drop shadow, highlight the word drop shadow press the delete key and it's gone. So we take out drop shadows that easily or any other effect that easily. I want to do a split screen. I want to see Dr Surf on screen and I want to see the picture on screen. But I want to have a different look. Here's a different look. Let's go up. Click Hold on, Dragon the scale and notice It says position if you click. Hold on, drag in the right hand number that controls vertical position. I could click this and drag it, but then I wouldn't be able to show you what those numbers mean or I could click. Hold on, Dragon. Set this to be the the horizontal position. Let's highlight doctor Surf. Click on this. I'm gonna scale him down. Put Dr Cerf up here. What the? I'm just clicking on it, dragging it down there. And now I've got a different kind of split screen. I've got Dr Surf with the image and they're both alive and well. Now what's interesting here is that I can save this as a preset. I can say this isn't a preset for something in the upper third. I've gone to all this effort. I've applied all this special stuff to it. We can save it as a preset. Now the questions Can I remember how to do that? That's an entirely different issue. And no, it's not there. Where did I do the priest? There it is, right Mouse click on the category in this case motion, and you can save this as a preset. Now, the preset Onley includes the settings in motion. You would then have a separate precept Rapacity. You'd have 1/3 preset for, say, drop shadows. You're able to set and save a preset. So once you've gone and created ah, very special effect. You can then use this over and over again to save yourself some time later. The way you get there is you right mouse click on the category. The effect category that you want to save is a preset and click on save preset. I should mention while we're here before I forget. Not so totally inappropriate. Let me just make a note todo we'll talk about it this afternoon anyway. The we've got picture in picture. We did split screen with adjusted capacities. We've created still frames. Now how do we animate text? Funny, you should mention that. Let's go back to our project. Let's go down to our text wherever we put that What we call it sheep Lower Third? Yes. How quickly we forget. So we'll pull this up, Put it inside. We want to put it sitting right on action. Safe. We're doing this for the web, after all. So it needs to sit on action Safe notice that it automatically superimposes the text over Dr Surf. What I want to do is I want to animate this. I want to put the text in over Dr Surf. So backslash key. So it all fits inside the window. There we go. Put the play head at the very beginning, which I am want to forget to do. You always want to have anything that you do is done at the position of the play head. So let's grab our sheep lower. Third, put that in Member. I'm dragging simply because it's fast and inaccurate. The clip lasts as long as the duration of the title is based on the duration of the clip. You want the clip to be up for only a short period of time. You make it very short. It's only there for the time. The Clippers on screen. You want the last for a long period of time, then dragged the clip out. The duration of the clip determines how long it's going to appear on the screen. We could at a push we could add a dissolve. But that would mean that I wouldn't be able to teach you this next technique, which is key friends Now. You remember. Key frames are a point of change during playback, and we always work with key frames. In Paris, we first saw key frames with audio levels yesterday, so it's not a new concept, and we saw key frames again when we were doing speed remapping. In both cases, we created key frames with the command key. We had a beginning at an ending key. Frank. We may have more than that, but they always work in pairs. Let's do the same thing here. Where would we go if I wanted to change the position of the word texture? Highlight the clip go up to the effect controls. There is a keyboard shortcut for that effect. Controls is shift five, and the effects window is shift seven. For those of you who feel that they have to use the keyboard shortcuts in this particular case, I just click wildly around the screen until I find it. Anyway, the position. See this stopwatch command right there? That's the thing that turns on and off key frames. This is directly stolen from after effects, which is really useful if you no after effects. And if you don't know aftereffects, you'll never figure it out. That's me. Took me forever to find this. Anyway, this turns key frames out, so put the play head where you want the first key frame to be. I'm going to use the up and down arrow keys. Wait a minute. I'm using the up and down arrow keys to move between clips. How come I'm not stopping on the second clip? Because it's not enabled When you check this. Now it's enabled, and when I use the keyboard shortcuts, it'll stop two ends and outs of clips on this track. Turn that off and the up and down arrow keys pretend there's no clips. There is just a shortcut way of navigating through your timeline, so I'm going to enable it by clicking here land on the first key frame, you'll notice appear that all of my numbers are on the left hand side of the screen. There's nothing on this side of the screen. This is the settings side of the window. This is the key frame side of the window, and this vertical line right here. If I grab it, I can increase or decrease the amount of room that's devoted to key frames as well as two settings. So I want to set a key frame. So here's the secret. Two key framing effects. You always create your finished effect first and in key frame into it. So, Jim, for instance, I want to have the word texture here on screen. I create how I wanted to end up, and then I add key frames to get it there. If you start with something and you don't know where you want it to end up, you're gonna spend your life chasing key frames, and it's never gonna work. You always create the finished effect. First and then key frame into it. Okay, so watch how this works. This is where I wanted to end up, and I wanted to take about that long toe appear. This is an arbitrary number. Most of my effects are between six frames and 20 frames. I'm just picking something that I put in a play head there. However long that is, we go up here, notice that as I move the play head in the timeline, it's also moving up here. They saw two different views of the same, I think so. I'm gonna put my play head where I want a key frame to be and I click the position. I think it's It's a little stopwatch. Several things happen at the same time. First, it creates a key. Frank. That diamond shape represents a key frame. Second, and for those of you that have seen final cut seven, this you should recognize this allows us to move to the previous key frame. This allows us to move to the next key frame, and this indicates that the play it is parked on a key frame. Then I hit the up arrow key and I moved back to the very beginning of the frame, and I create a second key frame by clicking on it or by changing one of these parameters. I always I'm like a belt and suspenders kind of guy. I wanted both. Create the key frame and make sure it's at the right spot. And now watch what happens. I'm gonna click. Hold on, drag on position. I'm going to drag the word texture until it disappears just outside the frame right there. Now, to make this really slow and easy, I will use the arrow keys and I'm arrow keying in. And it moves from its starting position, just off screen to its ending position at the second key frame. And because I set the second key frame or I want the effect end, adding, the transition in becomes really, really easy because all I had to do is to set one parameter, which is to say, started off screen, and I've animated the text. If you want the word texture to come on screen faster, you just grab your key frame and move it. Earlier, the distance between key frames determines how long that effect is gonna take. Want to change a key frame. Click. Hold on, Dragon. Now it's gonna take forever for that text to appear. You want to fly in so quick, people don't even notice. It dragged the key frames quite close together. And if you need more space up here, type the plus key. The plus key allows you to zoom into allows you to zoom into the key for Mary in the same way that plus Key allows you to zoom into. The timeline of the Plus Key allows you to zoom into the the program monitor and again we'll just drag this over to make it even faster again. Space bar. There it comes. What's what. Let's make this even more interesting. I'm gonna put a play. I'm put a key frame here for scale, so we'll click the stopwatch and will jump to the next key frame and click a key frame here. I wanna have the video start at 50% size and then I want to have it get bigger. So let's see what happens. It's a 50% size. I got to scale it a bit down space. Far. Come. Whoa. Look at that. It comes in at 50% size and then as soon as it's fully in the frame, it zooms up both in size and in position. This is the second really big secret of working with key frames, and that is that you almost always are combining effects. I'm changing the position and I'm changing the size. I'm changing the position and I'm adjusting capacity. I'm changing the size and I'm adjusting capacity. Let's just do another one. So I go back to this key frame here. I'm gonna add an opacity key frame. Click that stopwatch that sets a key frame, go back to here and set this level 20 When I do as soon as I change a parameter, it sets a key frame so I can either set. I start set the starting key frame by clicking the stop watch. I can then add additional key frames, either by clicking the open diamond or by changing a parameter. And key frames are always set at the position of the play head. Now I'm gonna use the arrow keys to move slow. It's faded to total transparency. It fades in and and largest so looking at the entire effect. Done, multiple parameters are combined to achieve the effect that we want to achieve. I've got a position set of key frames. Noticed there's two of them starting and ending. I've got a scale key frames notice. There's two starting and ending. I've got opacity, key frames. Notice. There's two starting and ending now. We could also do rotation. You'll never guess what rotation does, why it rotates and notice where it's rotating. It's rotating around what's called the anchor point. The anchor point is that point around which an object rotates, which is right there. Well, what happens if I don't want the anchor point to rotate right there? We can move the anchor point, and that's what this control allows us to do. I'll save you the effort you can experiment with on your own. But if I wanted it to rotate around the top left corner, I'd set this 200 And now when it rotates, I got to find it. It's rotating around this point right up here, which are due 202 100 and now when it rotates, it's rotating somewhere other than around the center, though the anchor point determines the point around which something rotates and we can keep frame. All of these key frames are a point of change. During playback, we always work with key frames and pears. We turn key frames on by clicking the stop the stopwatch icon, and we adjust key frames by dragging them side to side toe. Affect timing or change the parameter setting, the amount of position or opacity, a rotation or scale. We change that, and that changes the value of the key frame and then finally build your effect first and then simply use key frames to transition into the effects much faster, much more reliable. And and it's gonna decrease your stress. Jim. You, uh, you still keeping with me here? We've been covering a lot. This is what this is. The basics of motion effects. Go ahead. I am in. Key frames are huge, and the concept and the understanding of them think you've done a great job presenting their potential and their power. So it's so far, so good. I'm keeping up cool. So now there's 1/3 category of effects. We've got text effects, which allows us to put text on the screen. We can change the formatting of text we can change the position of text. We can save Texas templates. There's a lot of stuff we can do with the title er that I was only able to gloss over just a little bit. Motion effects allow us to change the speed of a clip. Still, frames hold frames, constant speed change in variable speed change. They allow us to change the position of a clip. The rotation of a clip, the scale of a clip capacity of a clip, the time remapping variable speed changes. All of that's controlled by default on a per clip basis. Inside the effect controls tab. The third category of effects that I want to touch base with is filter effects. We've already seen this a little bit with the drop shadow effect, but I want to go farther because the rial fund of effects in almost all video editing software motion effects are like the engine room. It has to be there, but the really cool, sexy stuff is in the filter effects, and we're gonna do this in a couple stages between now and when we take a break for lunch, we're gonna talk about a variety of common filter effects when we come back after lunch, we're going to spend a lot of time with a single filter, which is the color correction filter. So once you understand how they work, you're gonna be able to play with these way more than you will ever want to admit in public. So let's let's switch back to our project file on Let's go to, um oh, to reset. By the way, notice I highlight a clip. You see this hookey, curvy arrow here. When you click the hookey, curvy arrow, it automatically resets the clip back to which default settings. This resets the clip back to which default settings. These three categories motion opacity, time remapping are permanently attached to every clip, and you can't do anything about it. Others filters that you add are listed below here, and you delete them by highlighting the name and hitting the delete key. We saw stew that earlier this morning with the drop shadow setting, So let's just tuck Grand Canyon over. That's just tuck Grand Canyon off to one side and let's look at, uh, and because the safe zones interfere with what I want to show you, I'll just take those off Okay, Here's a shot of the Grand Tetons. We were using it before with our radiance. One of the things that we often want to do is we want to add text to an image. The problem is so this is a really good example. Uh, where to go peaks. We want to add text to an image. And the problem is, when we add text to the image, it's sometimes really hard to see. So I want to make that text more visible. We'll just change the color toe white click. OK, we will add a drop shadow, which starts with the word shadow, and they hide it at the very bottom where it doesn't need to be. But you'll be okay for right now. Okay, Susan, here's a test. You ready for this? Wait, wait. Going ready, Larry. Okay, so in a second, we're gonna even I test. When a highlight the sheep go to effect controls, click the hookey arrow to reset everything. Because it's that way because it's a standard def clip. That's why. So we'll just increase this until it's a biggest. We can possibly get it. Good. All right, So here's the problem. That we've got the drop showed a shadow Makes this This is just wrong. Let's go up. Create a new title. Susan, you deserve the very best. So we're going to create an HD title and we're gonna call it grand. We're gonna call it that after we click the Textual Grand Majesty, we're gonna hit the escape key. Highlight that text, Turn it into something really big. Now, remember I was saying before, you should never use something like Baskerville because it all the letters tear out. Well, that's a true statement, but it's only a true statement. If using small sizes, be useful if I could actually type well brand Majesty, notice that when when center the text by clicking here and centering the text. Press the escape key to get out of text entry mode dragnets over hold the shift key down and dragged this text Hold the shift key down Drag this text up when I'm doing headline text like this There's so many pixels here that even though that's a thin M, I've got plenty of thickness that I could get away with with a Sarah font because I've made it really big. If we're doing this a 24 point it would tear out. You wouldn't be able to read it, but this isn't 24 point. It's 362 point Big text. When I'm dealing with headlines, the line spacing between two lines is almost always too big. You want to tighten that line, spacing up, and that's called leading. If you grab the leading and drag it up, you want to squeeze your text a little bit closer together because it makes it just easier to read. So when you are working with small text 18 24 point, you leave the leading alone. When you're working with headline text, you'll reduce the leading to reduce the space between characters.
Class Materials
bonus material with purchase
Ratings and Reviews
Jfraz
I love this class. It is highly technically, but there is an awesome wealth of information to be had, even if you are a beginner. I've been struggling for a while, trying to look at YouTube videos and whatnot, but this class helped me make better sense of what I needed to do in all of my video editing. You get such a great foundation that's going to help you go further.
Valentine
I recommend Larry Jordan's course there is a lot of in-depth information that will help the beginner as well as the advance premiere editor. The only thing is that his humor is a big corky for my taste but if you look beyond that you get a lot from his teachings. He genuinely wants his students to succeed and get paid well in this field which its nice.
a Creativelive Student
This is one of my favorite courses on Creative Live. Larry Jordan teaches in a way that I can follow and is easy to stay focused on. He has a crazy amount of knowledge about this topic as do all the Creative Live teachers. I love this site so much, has done more for my business than all the other sites I have used combined. Keep it up CL!!