Refining Your Edit: Using Markers
Lesson 16 from: Adobe Premiere Pro CC Video Editing: The Complete GuideAbba Shapiro
Refining Your Edit: Using Markers
Lesson 16 from: Adobe Premiere Pro CC Video Editing: The Complete GuideAbba Shapiro
Lesson Info
16. Refining Your Edit: Using Markers
Summary (Generated from Transcript)
The topic of this lesson is using markers in Adobe Premiere Pro CC to leave notes and make edits in a video timeline.
Q&A:
What is a marker in Adobe Premiere Pro CC?
A marker is a tool that allows you to leave notes and make edits in a video timeline.
How can you add a marker in the timeline?
If nothing is selected, pressing the "M" key will add a marker in the timeline. If a clip is selected, pressing "M" will add a marker in the clip.
Can you add notes to markers?
Yes, you can double-click on a marker and add notes to it.
Can markers have a duration?
Yes, markers can have a specific duration. You can set the duration when creating the marker.
Can markers be deleted?
Yes, markers can be deleted by selecting them and pressing the delete key.
Can markers be used to line up actions in a video?
Yes, markers can be used to mark specific statements or actions in a video and help align them with the corresponding visuals.
What is the advantage of using markers in the editing process?
Markers allow you to leave notes for yourself, mark specific points in the timeline, and easily locate and reference certain sections.
Can you customize the interface in Adobe Premiere Pro CC?
Yes, you can customize the interface to suit your workflow and preferences.
What is the purpose of the dropdown windows in Adobe Premiere Pro CC?
The dropdown windows provide access to various functions and controls related to different aspects of the video editing process.
How can you find specific functions or controls in Adobe Premiere Pro CC?
You can use the search box in the application to quickly locate specific functions or controls by typing in keywords.
Lessons
Understanding Editing: Bootcamp Overview
07:25 2Understanding Editing: Overview
25:25 3Understanding Editing: Video Examples
25:07 4Tour The Interface: Digital Video Workflow
16:38 5Tour The Interface: Project Panel
12:28 6Tour The Interface: Choosing Your Shot
07:18 7Tour The Interface: Music And Voice Over
10:31 8Tour The Interface: Video Tracks
05:26Tour The Interface: Edit Markers
08:46 10Building a Rough Cut: Cut Planning
21:46 11Building a Rough Cut: Selecting Media
25:01 12Building a Rough Cut: The Edit
30:50 13Building a Rough Cut: Edit Points
13:43 14Refining Your Edit: Preparation
10:29 15Refining Your Edit: Making Cuts
25:19 16Refining Your Edit: Using Markers
16:31 17Refining Your Edit: J and L Cuts
15:57 18Refining Your Edit: Replace Edit
05:04 19Working with Audio: Overview
17:43 20Working with Audio: Levels
13:36 21Working with Audio: Music
10:00 22Working with Audio: Mixing And Syncing
14:50 23Transitions: Overview
13:44 24Transitions: Effect Controls
09:31 25Filters & Effects: Overview
18:05 26Filters & Effects: Using Multiple Filters
22:18 27Motion & Animation: Motion And Animation Overview
09:40 28Motion & Animation: Movement With Still Images
26:56 29Motion & Animation: Picture In Picture
10:57 30Motion & Animation: Motion Effects
17:08 31Titling & Graphics: Overview
27:11 32Titling & Graphics: Advanced Tools
11:03 33Titling & Graphics: Roll And Crawl Effects
08:01 34Titling & Graphics: Working With Photoshop
12:17 35Speed Changes: Overview
21:12 36Speed Changes: Stills And Variable Speeds
06:23 37Color Correction: Overview
07:39 38Color Correction: Lumetri Scopes
11:32 39Color Correction: Contrast
21:37 40Color Correction: Advanced Tools
15:12 41Color Correction: Adjusting To A Master Clip
07:45 42Finishing: Prepping for Output
14:53 43Finishing: QC Edit Points
24:56 44Sharing & Exporting: Overview
29:05 45Sharing & Exporting: Size And Quality
24:46 46Ingesting Media:
28:39 47Ingesting Media: Transferring And Importing
31:15 48Media Management & Archiving
26:10 49Multi-Camera Editing: Overview
14:26 50Multi-Camera Editing: Creating A Sequence
20:04 51Multi-Camera Editing: Switching Multiple Cameras
15:31 52Multi-Camera Editing: Finalizing
12:37 53Creating Timelapses: Shooting Strategies
18:04 54Creating Timelapses: Editing Images
14:21 55Creating Timelapses: Importing Strategies
18:47 56Creating Timelapses: Animation
05:58 57Advanced Editing Techniques: Take Command Of Your Timeline
22:36 58Advanced Editing Techniques: Transitions
07:57 59Advanced Editing Techniques: Keyboard Shortcuts
12:00 60Advanced Editing Techniques: Preference Hacks
21:15 61Thinking Like an Editor: Editing Choices
31:55 62Thinking Like an Editor: Telling the Story
23:50 63Special Tools: Warp Stabilizer
17:59 64Special Tools: Morph Cut
06:56 65Special Tools: Green Screen
20:16Lesson Info
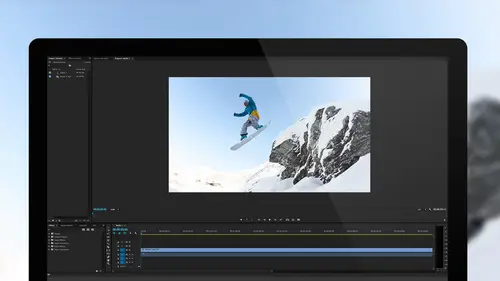
Refining Your Edit: Using Markers
So let me go ahead. I'm gonna hit the Command + Minus, and I'm throwing a bunch of keyboard shortcuts at you. I like saying them if I'm doing them. I don't expect you to necessarily remember them. But, you don't want to see like magically something happens, and "I don't know what he did." So, we talked about Shift + Minus. And then I'm gonna go ahead, bring that down, gonna tighten this up a little bit. Hotel photography, for me, it is a business; I take people on trips around the world. This is where I want to start putting some nice B-roll in I think. I just came back from the Galapagos a couple of weeks ago, and the whole purpose of these trips is taking photographers to these places in the hopes of getting great photographs. That's a great soundbite. I want to leave all of this in. I'm the photo guide. I'm the photo instructor. Maybe, so this is what I'm gonna do: I'm thinkin' about cutting this. I'm not sure. Gonna make a note to myself. Gonna use something called a ma...
rker. Marker just basically puts, literally, a little, looks like home plate, on your timeline or in your clip, depending on what's selected. So you can leave yourself notes, and you can do things with markers. So, it doesn't get seen in the final show, but this is a note to myself. So, I wanna show you the two different ways: If nothing is selected, places in the hopes of getting great photographs. If I hit M right now, it puts a marker in my timeline completely unrelated to this clip, which is really where I want to see the note of what I might want to cut out. Mkay, just wanna point that out. There are times with a marker, in the times that you wanna put a marker in the sequence to line things up, or... I'm gonna undo that, Command + Z. If I had the clip selected and I hit M, move this over, it puts the marker there in the clip. So now, if I move this clip, I still know where that change is gonna be. If I go ahead, and I double-click on a marker, I can actually see the marker. Just make a new marker at the end and show you what I'm gonna do So, I'm the photo guide. I'm the photo instructor, but I've set up really great itineraries for photography. I think "But I set up really great itineraries" is good. I'm the photo instructor. So I'm gonna go ahead. I hit the M key twice, Marker Marker. If I could actually have the vision to see the little spot, which I can't. If you double-click on a marker, you'll actually get into this also. You can write yourself notes on your marker. You can say, "Oh this is just a note to myself. "It's a comment. I can say okay." Delete, maybe? And there's a lot of different types of markers that you probably will never use if you're doing DVDs for chapters and whatnot, segments (mumbles). Mostly, I use them for comments, okay? And a thing about a marker is it can be a specific spot or it can have a duration. I'm gonna go ahead, and I'm gonna hit OK on this note here. So, if I wanted to write a note to myself, for a chunk, maybe it's ready to finish the show I can go in here, and I can go "Oh, double-click Marker." My clip was selected; let me undo that. Marker, same dialogue box comes up. It's like check for accuracy. And I want this to have a duration, 'cause I want to see it. So, I'm gonna say, "Oh yeah, make this five seconds long." Five seconds, by the way, is five zero zero. Always think in terms of seconds and frames. That's the big thing for people who've stepped out of the world of photography and into the world of video. It's like, "Wait, there's a whole new set "of sub-numbers," hours, minutes, seconds, frames. So, five zero zero will end up being five seconds, 0 frames; okay, I hit OK. And what I have now is I have this marker here that says, I can't spell is what it says, "Check off for accuracy." But, I can see that in my timeline, and it's a very useful note. So, it's really nice to be able to work with markers that way. So, I wrote this note here on this clip if I want to delete it, and I can come back later. I'm gonna go ahead and delete this marker. 'Cause I can go to the clip here, and park it on the marker, mark it in point, out point, and at this, I don't have to even listen to it again. I can go ahead, and I can do that extract edit or the lift edit. Close the space. Hopes of getting great photographs, but I've set up really great itineraries for photography. So, it's an easy way to leave yourself notes, and then say, "Oh yeah, I'm gonna go back and remove this," or "I want to look at something," or "I need to color correct something," or "I want to add a filter." Or, even a note sometimes is, when he's talking about it, you can create a marker and say, "Oh, I want to show a picture of a tortoise." Or, "I need to show a panorama at this point." So, you don't have to go back and say, "Where was he talking about that?" So, you can leave yourself notes. Remember usually notes for B-roll, you want to put on the sequence, 'cause you're not moving things around a lot. And also, when you play it back, you can see easy what's on the sequence then on the clip. But, there's times also when you want to put markers to line things up. So, maybe you have an action you line, you put a marker when somebody's saying a specific statement: "tortoise." And you say, "Ah," and you have a picture underwater of the tortoise swimming, and you put a marker on that. And you line them up, so the action in the video lines up with what they're talking about. I'll show you how to do that as soon as I take this question. It is specifically about that. When you're working on a timeline like this and you're working on the audio and video track, is it your methodology to maybe drop in those markers and say, "I'm gonna come back and put some pictures in," or in the flow of things are you stopping, and going out and finding a picture, and putting it on the timeline, and then moving forward? Just a question about No, I think that's a great question. Both ways work. I find that I try to get the narrative down, the radio edit down, knowing I can dig for the pictures. Because, it becomes distracting sometimes. So that would be, you know, a note, piece of paper, a marker, look at my markers later. And I can keep editing and say, "Now, let me go back and start searching "for my B-roll or start looking "through my photography to find the right shot." That's the advantage of this whole non-linear environment. 'Cause in the old days, when we did it tape-to-tape, you had to put stuff in that, because you could only move forward. It was really hard to move back. You had to actually copy the tape over. Here, and this is where the earlier question that you have to get your head wrapped around it, I can rearrange things up until the 12th hour or 11:59 and still be in good shape. Yeah, depending on how your thought process works, that's, you just cleared something up for me. Here I am trying to lay in everything as, 'cause when I wrote I edit in my head as I'm going. And I get more-or-less a finished product at the end, but I can see where that was just getting completely balled up Yeah, you have to re-write (crosstalk) So, taking it in sections like that, and then leaving those markers with the notes, for me, makes great sense. That's great. And I'm glad that kind of opened up a new world. And just to even make things easier or more complicated, one of the things I like to do is, you know, I think of things in chapters or acts, like you'd write a book, or paragraphs even. So, I might, if I'm doing a longer show like a documentary, I might make four separate sequences for each act of that documentary. And at the very end, take those four sequences. And we'll show you this in the finishing part of the show of the course later on. I put all four those sequences into a master sequence, so now, I don't have to worry about this chunk being right and it affecting this chunk, and affecting. They're all independent until the last minute when I can drop them in, and I can treat those sequences kind of as a giant clip, which we'll learn about. You know, you can throw a filter on it, or you can audio correct it. So, you can start cascading them in like Russian dolls I guess. What you can do is you can nest a clip, and you actually put clips inside of a sequence, or a giant clip, and then work with that as a chunk. So, you have that power, and we'll be looking at some of those skill sets. So, we've got our basic story. I took that out. I think we're gonna just throw some B-roll in to see how it works. But I've set up really great itineraries for photography. And he talks on a lot of stuff, but just to get the point across, I think we're in good shape. I mentioned at the beginning, at the outline, that you can customize your interface. And we've talked about the interface throughout the previous lessons in a very broad sense. And really, as scary as it is, at this point, in this corner, you just basically have your project or your bins, and you can have multiple tabs there. And your media browser, and that's all we're using now. And as we move forward, we'll add things such as effects controls and whatnot. This is pretty basic; we've learned that we have the source monitor. And if I want to look at the audio, I can do switch to that, and it just lines up. So, if I mark ins and outs here, they show up in the other place. And I do want to point out, when you do put a marker on a clip, and I'm just gonna go ahead and just do one arbitrarily here. So, I put a marker in this clip. What's in this window depends on what you bring in this window. So, most of the time, we've been bringing stuff in from our project file into this source window. But, there are times when you may wanna go back and see maybe where the marker is or put the marker or reference something on the timeline, and all you have to do is double-click on any clip in your timeline, it loads that clip back into the source monitor. if you need to do any modification, which is what we're gonna do when we start adding filters and working with audio and whatnot. So, even though it looks like it's from here, and this is one of those things that... It is kind of weird to get your head wrapped around. Is, "Wait, but this is the same clip that's here "and that's there, 'cause it all came "from the same medium," we know that. But, when you're cutting a show, you may use the same piece of footage in a couple of places, so if you use it at the beginning of your show and you want a special effect on it but use it also at the end of the show without the special effect, you don't want it to ripple back and be on both. So, as soon as you bring any clip from here to here and from here into your timeline, it creates what is called a new instance of that clip, which is, I'll say, semi-independent from the original. So now, I can make all the changes I want to the clip that's in here. And if I bring, go back to the original, and I want to choose another chunk of it, it's clean again, it's fine. As soon as you bring it in, it kind of says, "Okay, I'm kind of making a copy." But doesn't really, it's digital, so it doesn't take up space, so you can affect it without affecting the original. And that's why, when I double-click on the clip here, it loads it back into there. And I can see markers and my ins and out points. So, if I go ahead to this short clip here and there is my in and out points, I'm gonna go ahead and hit the Minus key. There's a question earlier, it might have been actually on the break, where, "Does it remember my in and out points?" Well, as soon as you make new in and out points here, it forgets them down here, but if I double-click, it remembers the in and out points of the clip in the timeline. So, I can see that; I can see the duration. So, by double-clicking, I can move anything back in, and this is gonna come into play in a greater understanding when we start working with the audio, putting an effect on it and wanting to modify that effect. It all happens taking the clip back into here. So this is where you control stuff. This is just what the viewer sees. When you get your hands on this stuff and you start playing with it, you'll see it. You'll also see, as we start applying filters, how this all works, but I wanted to point out, as I went down that rabbit hole, is... I put the marker here. The markers show up there. As a matter of fact, there's the marker I just threw in, and there was my trim marker that I wanted, that I had before it. And you don't see it, because I've already cut it out. So, you don't even see where the gap is, right there. Nobody can see that. Markers are very useful; they stay with it until you remove them. Guess which dropdown window controls all the things you need to know about markers! Yeah, this is a dead giveaway: Marker. So again, I want to talk a little bit about, when we look at the interface, these dropdown windows. Because they're actually very useful if you give yourself a chance to think about them. We learned about marking in and out, I and O. Talk in a moment about marking a clip. Marking selections and whatnot, you not gonna go through at the beginning. But you all said some other controls here. If you hit the Shift + I and Shift + O, it actually jumps you to the in and out point. So, let's say you mark an in and out point in your timeline, and you want to go to it quickly. You could hit the Up and Down arrow keys until you get there, or Shift + I, Shift + O. We also learned that you could remove them. I don't have one selected, so you see it's grayed out. 'Cause there are no in and out points, but there's your Option, on a Mac, and Option + I, Option + O, Option + X. And then here's our markers! Well, M was making a marker, right? If you want to jump to a marker, Shift + M jumps to the next marker. Previous marker? It's grayed out. Because there is no previous marker of what I have selected, Shift + Command + M or Ctrl + Shift, I believe on Windows. So, markers are M, and if you want to edit a marker, there you go. And then this is really useful: clear all markers. 'Cause sometimes you get just cluttered. You've done all the work, and it's like, "I don't want to see these anymore." Don't remember the keyboard shortcuts, 'cause you're not using markers that much. Go to the dropdown, and that's why I want to talk about the dropdown windows just a little bit. Because, these are really useful. If you wanna do something right, let's say you wanna edit something on a clip here. You don't know, "I want to delete that." Well, I'm looking here; what do we normally do? We go, "Oh, I don't know. I want "to edit that," and you go, "Is it there? Is it there? There?" And then you start doing this, right? How many people have done this? I've done this, okay! But if you sit for a second, you go, "I want to do something on a clip." The engineers probably had some forethought when they did this; well, it won't be under Help. Window, that's gonna affect windows. That doesn't affect the clip that I have, you know, selected down here. Am I doing something with the title? No. Well, we know it's not really a marker thing. Well, it could be in Sequence, 'cause I'm in my sequence, could be in Clip, could be in Edit, but it's probably not a File thing, that's for new stuff. I've narrowed it down to three areas. So, if you just think for a second before the dropdown, what area are you working with, it will help you find those dropdowns. Now, a nice thing for those who are using a Mac OS, and again, I use both. As a matter of fact, there's some really cool stuff that you can do with Premiere with a Surface tablet, the touch screen. But if you don't know where something is, if you go into the search box and you say, "Oh, I want to do something with markers," I type that in and, this is true on all the Adobe applications, it will tell you where that is, what the keyboard shortcut is. So, you can quickly get to it. That help can be really helpful when we're working on this stuff.
Class Materials
Bonus Materials with Purchase
Ratings and Reviews
a Creativelive Student
I've never even tried video editing before this class. I opened the program once and panicked. After only 9 lessons I was able to throw a short video together (basic of course, but still pretty cool). I wish all of my teachers growing up were just like Abba. He goes over everything without dragging anything on for too long. He repeats things just enough for me to actually remember them, and he is funny. He keeps it fun and shows that even he makes mistakes. I can't even believe how much I have learned in less than a quarter of his class. I have a long way to go and am very excited to learn more. This class is worth every penny and more! I was hesitant on buying the class because I have CS6 and he works with CC, but I have already used what I've learned in his course to create a video. The first 9 lessons were already worth what I paid for the entire course. Thank you, Abba! You are an awesome teacher! You have me absolutely obsessed with creating right now! I highly recommend! You won't find this thorough of a course for this decent price!
Patricia Downey
Just bought this yesterday and cannot stop watching!!!! What a FANTASTIC teacher-- just love the way he explains everything. For someone like me (who has a zillion questions) it is perfect. As soon as he introduces a feature, he explains several aspects in such a way that's easy to grasp and remember. So, so happy I got this. Thank you Abba and CreativeLive!
a Creativelive Student
I am only on lesson 19 and I am so glad I bought this class, so worth it and Abba packs so much information into these lessons its crazy. I will for sure have to come back and watch again when I need to remember to do stuff or need a refresher. He is funny and quirky and a great teacher. I so recommend this to anyone wanting to become a better video editor!! I am coming from being self taught and using iMovie and he makes it so simple and understandable. Can't wait to learn more :)