Lesson Info
13. Working with Music
Lessons
Class Introduction
03:37 2Exploring the Interface
11:29 3Meet Premiere Pro
08:43 4Building a Rough Cut
06:11 5Setting up a Project
07:10 6Importing Media
10:55 7Working in Timeline Part 1
15:21 8Working in Timeline Part 2
18:44Refining Your Edit
10:00 10Trim Tools
30:47 11Working wth Audio
13:28 12Adding Music
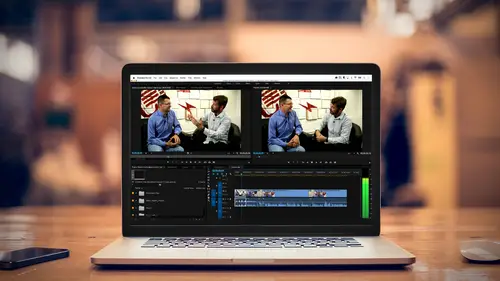
10:47 13Working with Music
16:53 14Basic Transitions
17:02 15Advanced Transitions
12:07 16Working with Filters & Effects
25:30 17Working with Nests & Sequences
13:09 18Motion Effects
26:03 19Rendering & Positioning
06:03 20Titles & Graphics
18:50 21Basic Color Correction
11:33 22Exporting & Archiving
23:30Lesson Info
Working with Music
I know you've been waiting with beta graph for the last two installments of working with audio and just a couple of things that I wanted to get to before we ran out of time. So without further ado, let's go ahead and continue where we were. The last thing I just did was I brought in the music. We did a three point edit. We basically timed it in the sequence as to where we wanted it to start and end. And then we just put an end point, dragged it in, and our timing was perfect. So if we listen to this and I'm going to go ahead and hit the plus key and zoom in. We had dialed down the volume of music to about minus 12. So it's not going to blow out. And I wanted it to be full volume when we're starting the show, but we're gonna duck that under. We're gonna dip it down to hear some of the sounds effects. And when Colin starts speaking, I want to gradually bring that out. But 12 is the volume that I want it to be cause that's considered full volume for the show that we're cutting. So let's g...
o ahead and play the music and see how what works with the video that we're showing. (upbeat music) The beach is a beautiful place with so many. So nice, the music adds a lot of energy if we watched that without the music, it would just be a bunch of visuals, so it's always good to add a little bit of music. You can also refine your edits sometimes once you put the music in. You know, you hear the beats. You want to do those beats on a cut. Once you bring it in you might say, "oh yeah, I need the cut to happen right here in a beat." And we learned in a previous part of the class how to do a roll edit, or how to do an extend edit. So you can have that cut directly on the beat. Now I want to do a couple things with the music. First of all, it ends very abruptly. So we don't want that. We want it to slowly fade out to the point where they don't even notice the music has disappeared. And we also want to make sure it's soft enough that when Colin starts speaking we can hear what he is saying. Just something else too, as we start bringing the volume of the music down, it kinda prepares the audience that something else is gonna happen. That that voice is gonna come in. So it's pretty critical that you actually work with this. And we learned some of these techniques earlier, but I want to put them into play in this part. So let's go ahead and I'm going to zoom in to my audio. And I'm gonna make the audio bigger and I'm just doing that with command and control. Make things bigger. Scroll that up. The joy of working with a finite space. I'm gonna do something here, so I can teach you something else. I'm going to actually grab part of my inner phase and stretch out the bottom, giving me a little more real estate. All I did was put the cursor between the two sections and dragged up and I can fix that later if I want that space back. But now I can actually see what's happening to the music and I can see exactly where I want to start ducking it down. So here the music is playing in full. (upbeat music) And I have the sound effects of the drone and I want to make sure I can that so maybe I want to bring the drone sound effects up. I want to bring the music down. But I want to point out something that I mentioned earlier in the course and that is audio is additive. So even though if I play this music by itself. It's exactly at minus 12 dB. Once I start adding additional sounds, it's going to get louder. As a matter of fact, let's go ahead and play the music without anything under it. (upbeat music) And we see it's hitting minus 12 exactly. As soon as we add the background drone noise, it's not that loud. You'll see it will be a little bit higher. (upbeat music) The beach is a beautiful. So then as soon as Colin comes in bam, it actually went into where it was over modulated. And I want to show you a little trick that will help you catch this over modulation. If you right click on your audio wave forms, there's a bunch of options that you can change. And one of the things I like to add is, static peaks. And if you click on static peaks, and let me go ahead and zoom in so you can see that. It's at the very bottom. It's gonna actually leave a little bar momentarily where the loudest point is. So it's a good way to see if you're having areas that are over modulating. If you really want to get deep into it, there's also something called show valleys. And that's gonna be your lowest volume area. Let me go ahead and click on that. Zoom in just so you can see that. So there's a lot of ways you can control this. Another thing I like to change is I like to change it from this beautiful color gradient, which doesn't give me any useful information to just really green, yellow, and red, so I can see what happens. Let's go ahead with those things modified and play through our music, our music and our sound effects, and Colin speaking. (upbeat music) The beach is a beautiful place with so many opportunities to capture. So I didn't want to talk over that but you saw that I could see exactly when it got too hot, and how it got really loud. When he's speaking by himself. Capture just. He's actually pretty hot. I probably played with this in an earlier part of the class. Let me go ahead and bring my volume level down. I'm just going to go adjust this by. Any you know what I did, I set my gain to 12 dB. I really wanted to set my gain to minus 12 dB. That's why he is so wickedly loud. Let's go ahead and change that to minus 12. We'll hit okay. And I think we'll have a little more practical response here. So he's 12 dB less than he was. I don't want this to be relative. I just want it to go ahead. Let's knock this thing right to zero g. Zero, boom. Cause remember, I had made sure my levels were perfect when I brought this in. So what we want to do is, he's starting to speak I want to start bringing down the volume. And that's again where we come in to creating key frames. So if I want the music to dip and I want it to last a little bit longer. I'm going to stretch it out and probably right about here, as this comes in I want to start bringing the volume down. So I'm going to hold down my option key, or the alt key on Windows, and I can make just a couple of points. It's the command key or the control key. Those keyboard shortcuts will be as part of the pdf that I will be handing out. But you'll notice that when I do that, I can create a little key frames and at this point, if I wanted to, I can just start ducking the music down. So now the music will dip. (upbeat music) And then when he starts talking, maybe I want it to dip a little bit more. Once again, command or control. Put a couple key frames in, and once again drag that and fade it out. And let's hear how that sounds. (upbeat music) The beach is a beautiful place, so many opportunities to capture. So it still comes out a little more abrupt, I may want to stretch it. And I do want to point out that you do have the option of, you know, moving key frames left and right, moving the volume up and down. We're gonna tweak with his audio a little bit as a matter of fact. We're gonna open up and correct his audio, make it a little more present. But the idea is to bring it down. I do want to add one more thought here and that is, people always ask, well how much softer should the music or the ambient noise be compared to a person's voice. And people have come back and they say, well it's this fixed number. You have to be. Producers when I was young, and they were like, minus 20 dB difference. Well the truth is, it's very subjective and a lot of it relies upon how the voice of the person speaking is perceived the presence the way different people talk. It's not just the volume, but, you know, James Gerald Jones, a perfect example. He could whisper and you would hear him beautifully in that baritone punching through. So, you know, there's a lot of presence to that voice. And it doesn't even have to be as loud. And on the flip side, some people's voices are a lot softer. And even if you pump up the volume, it's still going to be hard to hear them. So use the gain and the volume, and your meters as a reference, but trust your ears, and when you're doing and working with audio, try to work with a pair of speakers, or headsets, like you think your audience will be using. And I say that specifically if you use really fancy speakers and they're ultimately listening to it on their laptops or their phone. The way audio plays out is completely different and you may be mixing it for these great speakers and it may sound awful coming out of the iPhone speaker. They'll never hear a lot of the base. You may be overworking for nuance. And on the flip side, if you're listening through a cheap pair of, you know, headphones, a pair of earbugs, and it's ultimately gonna play in a movie theater, well again you may not hear things that will be ultimately heard in that environment. So it is important that you have a set of speakers that will be similar to the variety of speakers that the people watching your program will be using when the watch it and the way they hear it. So, going back to levels. When you play it, sometimes people's voices get lost very quickly in the music, and you have to make sure it's lower. Sometimes they punch through and you can really turn it up. Additionally, depending on the frequency of the music. In other words, if there's a lot of highs, that punches through. High frequency punches through and we can hear it a lot easier, even at the same decibel level. So that's why ambulances and police cars use a very high frequency sound when they're passing because it's easy to hear. Whereas low frequencies, their volume can be high, but you really don't hear it. Your more, you feel it. So, when mixing audio, use your meters as a reference but trust your ears to figure out the balance between voice, ambience, and music. Very, very important key there. So one of the last things that I wanted to talk about for working with audio is something called the essential sound panel. And this is something new in the most recent release of Premiere, the Creative Cloud. It was released just a few months ago and it allows you to fix and modify audio even if you don't know anything about audio. And this is important because most of the time when people start playing with sound, they end up making their audio sound worse. So what the folks at Adobe Premiere did, is they created this panel. And if you look underneath your window here, there is something called essential sound panel. And when I click this, it's going to change the layout of my workspace. And it's going to make me look really smart and talented, and you too. So, I'll go essential sound, it opens up a panel over here. It slides everything a bit over to the left. And here I can select a clip, in this case I'm selecting Colin's interview. And I'm going to zoom in to show you what it can do. And this is actually pretty cool. So the first thing is, you assign what type of audio you want it to enhance. And look at this, this is our standard audio. We have music, we have sound effects, we have ambience and we have dialogue. So I want to fix his dialogue. His dialogue sounds okay, but I want more presence. I want to doctor it up a little bit. So I click on that, it immediately changes all of my preset options. So I can go ahead and I can say, you know what, I want it balanced for a male voice, or your know what I want it to sound like he's a lot closer. And that's what I'm gonna do. I'm going to do just one click. And what it will do, is it will add a bunch of audio effects and filters this to give it a different sound to make it have different presence. So if I zoom out, and I'm gonna play this. Then I'm gonna undo it, so you can hear the before and after. Come over the water and when the sun comes down you get these. It's a lot fuller, a lot more present, you can really hear what he is saying. I'm going to hit undo, this is without that. A dramatic difference huh? Okay so play with that and the nice thing is when I do add that, I'm going to do again dialogue. We'll go hear, I'm gonna go make close up. Adds all these elements. We looked at the effects control panel earlier on in the class. If I click over here and this is just a tease of what is going to be coming up in the next section, is it has actually applied a series of audio effects to my clip. And it knows exactly what it's trying to do. There's a Dser, so it gets rid of the sibilance in things. It adds dynamic processing to expand the range. It enhances the voice. So it picks up the frequency of the male voice, it makes that more present. So it goes through all these things. You can customize it, but the beautiful thing about this is, I can basically with a click of a button, enhance the quality of the sound. And other things it can do, just to point it out. I mean I did something my audio was already clean, but it can actually not only boost it, but it can give you the feel of say, we're talking over an intercom. You're doing a film and you want it to make a certain sound, or I want to clean things up. I want to be in a certain location, so there's a lot of presets here. It does a lot of the work and once you've applied these, you can go through and modify them. So if you don't like the way that it repaired the audio, I click on that and it toggles it off. And then I can listen to it. So that is one of your secret weapons when you're working with sound and this is in the most recent release of Premiere. Now there was a question that was asked earlier and I think there's probably a lot of people out there that have the same question, and that's either I have like Premiere elements, or I have an earlier version of Premiere before the Cloud, is this course still valuable to me? Well, hopefully if you've been watching, most of everything that I've talked about is available in some ways in those applications. But some of these newer things, you have to have the most recent version of the application. So you can still pick up gems and I hope that those people who are using Premiere elements or an earlier version of Premiere are picking up some great tricks and techniques, but for some of these things, you do have to have the latest and greatest, which is one of the advantages of subscribing to the Cloud. So let's go ahead, and that's gonna kinda wrap up audio in general, we're gonna touch back on it in a little bit when we talk about filters. We kind of lead to that. But as you can see, working with sound is a lot of fun. Can change the whole feel and vibe of your show, and get it close but we'll do one more pass before we export it to make sure everything matches. With that, are there any questions that have come in. Just to touch on what you were just speaking about, we have a timely question from Michelle, who just wanted to know specifically, these sound filters that you mention, are they not available in Elements? To my knowledge, they are not. Actually I would almost guarantee it. Never say never, but this is in the latest release. It was in the spring release of the Creative Cloud version of Premiere and that's one of the benefits of the Cloud. So you wouldn't have that. Now there are some audio filters. And basically think of Elements as an excellent editing program, but kind of a stripped down version of Premiere that doesn't give you all the flexibility. But if you're doing some basic editing, it's an excellent program and an excellent stepping stone if you ultimately want to transition to Premiere from the Creative Cloud.
Ratings and Reviews
Maude Colin
This class is exactly what I needed! I've been trying to understand Premiere Pro for a year now and I've never been able to do anything with it. I had the feeling that I would never succeed and yet... Abba Shapiro is not only a great teacher, but also the kind of person that makes everything looks so simple. I loved that class and even though I've got everything I needed from it, I really want to do the Premiere Pro bootcamp this year. I want to go further and learn Premiere in depth, just for fun cause that's what it was! With Abba Shapiro, I had fun learning this super-complexe program! It was fun, easy and super rewarding!!!
perrault095
One more amazing class from Abba! The is a fantastic teacher who would explain complicated issues and make it souds so simple. Lots of information to work with. Really great speaker and his humor is brilliant. Love his class!!! Will be rewatching it again and again.
Yevhen Byelyakov
An awesome class that makes the initial hoorays to Premiere Pro so much less intimidating and is guarantee to save you a lot of time. I've created about a hundred clips over the last year or so and after this course identified a huge amount of productivity boosters and also learned a few things to improve the quality of my produce. Looking forward to more in-depths courses. One last comment -- it is basic and gives cursory overview of the topics listed. Do not expect anything too deep or advanced but if you're self-taught, Youtube-style person who still drags the clips around or copy-pastes attributes across all clips, this course will be a great way to improve many of the routine tasks.