Not-so-obvious Automation: Smart Object Templates
Lesson 10 from: Advanced Automation in PhotoshopDave Cross
Not-so-obvious Automation: Smart Object Templates
Lesson 10 from: Advanced Automation in PhotoshopDave Cross
Lessons
Class Introduction
02:09 2Not-so-obvious Automation: Presets
10:10 3Keyboard Shortcuts
10:15 4Adjustment Layer Presets
04:17 5Brush Presets
04:42 6Recording an Action (Refresher)
14:14 7Conditional Actions
05:53 8One-step Actions
05:01Lesson Info
Not-so-obvious Automation: Smart Object Templates
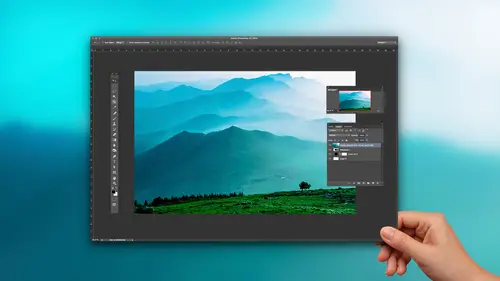
There's another interesting way that I like to think it's automation. It's it's a little different because it's not an action. It still takes, um, set up. But the amount of time you could save with this is really pretty remarkable. So I want to be able to say I'm a wedding photographer and I wanna have this beautiful album on. I want to show people This is what the album with your photo on the cover, but because it's on an angle, it's gonna take a little bit of work, so I don't want to do that once. I don't wanna have to every time, take the next person's photograph and do all this work. So what I do is I just put in a placeholder that I know is the right ratio of a typical photograph, and I'm gonna take this layer and converted to a smart object. A smart object is a very special kind of layer that is almost like it's in his own protective container and weaken do things to it. But it remembers always. I was originally this big, so no matter what I do, so now I can hit free transform. I...
can lower the opacity little bit and start to try and make this thing fit. So we'll rotate it, get kind of close and then commander Control, click on each individual corner. That is how we can really take free transform to the next level by doing something like this. Because now it's completely up to me. To put it where I want normally I won't do is today for the sake of time would. Normally I zoom in closer and make sure it was perfectly matching up. But for now, we'll just because obviously it's it isn't perfect. Put back to 100% opacity and this is up to you. Depending on the book cover, you might want to change it to multiply motives, any little shadows or anything like that. And at this point, you show that to the client say, Look, there's your wedding. No, it's not finished yet. So one of things that unique about smart, obvious, even though I took it and did all this distortion again, it remembers, I was originally this big. If I double click on this thumbnail, it shows me the contents of my photograph, which in this case of this layers at the big red box. So let's see if the place command's gonna work. Now, I don't know why it wasn't working before, but it seems like it might now see you have a success here. Okay, so I hit place. It starts in camera because it is a raw file and I can adjust it and click. OK, it happens. The reason I used the place commanders automatically scales it to fit. I didn't do that and open it. I'd have to bring it in and then scale it so I hit. Enter. So now I changed the contents of that smart object If I hit Save that tells Photoshopped update the contents in this original document. And now they're book cover is just the way I want it. Obviously, it's not perfect, but you get the idea. So now every time I have a new client that I want to show them their photograph all have to do is go back to this contents, delete that one and get the next customer in there, which in this case is probably gonna look suspiciously like the first customer because I think that's the only ones I have are the same people, different versions of them. Yes, it is. It's save and updates, so you can imagine the time saving instead of every single time you want to show. This is a mock up of what your book cover or your DVD or your whatever you invest the time up front. Do a better job than I've done here will take a bit more time to make it fit perfectly. But then it means now you've got what amounts to a template. Now I use that word cautiously because nowhere in photo shop is there a command called savers template. So don't go looking for that. When you save a Photoshopped document with a smart object like this in there, it's like it's a template, so that's a very important distinction. I've had people, so I can't find that template command because there isn't one. I just happen to call it that because I find it's a good way to refer to it. But this is a to me, a huge time saver. Think about how I would have to adjust it to fit now I do it once and just choose it to replace with the next photograph and this could be much more complicated with type players and all kinds of things. That part's up to you, but that's a quick little note on doing smart object templates that photograph a smart object. The only downside to it is gonna make your file size a little bigger, cause it's embedding that information. But that's why it works, because you can then replace that embedded information with a different photograph and have whatever effects. And by the way, if I had filters applied to it, those would also be updated. So in this case, I just happen to do one photo but could be one photo with a filter with a layer style with a mask, etcetera. And it would update all of that information. So let's say you doing like a baseball card for a team of kids, and they all have different positions and kind of with that idea. Sorry. No, it's just funny because it's like I should give you $5 right now, because that's like the best Segway ever in the history of great of live. Because I was there is a separate function police ever in that, and it happens if you'd said soccer cards. It would have been really spooky because my example is soccer player cards. So thank you for so yes, let me show you that, Oddly said. Should you have asked that this is actually a really interesting option? It's for any situation where some of the information stays the same, but others change. Look at that. So, for example, baseball cards or soccer cards where you're gonna have their name, their position, the name of their team, their number there's going to be there photograph here and their logo from their team here. So to start off, this is a nothing unusual Photoshopped document. Just has a bunch of layers. So Step one is just make a bunch of layers. But some of these I would consider placeholders. So, for example, this big purple box is where their photographs gonna go, and this is where their names going to go. And one of the lessons I learned the hard way is when you're making placeholders make them ridiculously long. Just in case you have some kid that has some crazy long names. Otherwise you'll do like, ah, 100 be perfect and two will go right off the edge of your document, so I tend to err on the side of ID. Rather everything being too big. So then over here, here's what I've got all these players. Let's just move More years in C. So imagine there were 100 not four, but it's the same process. So each one of these was a photograph taken. The photograph is named their name first name last name. J. Peg. Here's the possible logos. Each one of these is a local on a transparent background, even though doesn't show that way in in the bridge. So then now I've got this set up. So I need to tell Photoshopped. This, by the way, is a function called Variables, also known as data driven graphics. Which means you're gonna do this based on data that you provide information like text photographs, etcetera. It looks much more complicated than it is. So the first time you ever try do variables is gonna take you on our and 1/2 the second time. It will take you 40 minutes by the fourth time will take you seven because you're OK. Got it? But it's still I mean, the payoff here is immense. If you think about the difference between me manually going, copy that kid's name from Excel. Stick it in there. This is so much better. So here's how it works. We go to this command called variables. The first we have to do is define which of these layers are the variable items. Now, here's another very important tip for you. If you're one of those people that generally doesn't name your layers anything you want to hear because you're going to see a list of names layers that they're called layer seven, layer nine, layer 12. It's like That's not helping me it all. So what I have to do is just do one last little thing. Here is the check name. So 99 is a layer that's going to replace what? Whatever their number is. Simon, choose text replacement and call it number. What you call it doesn't matter. I just have to remember what you call it because you got a match up with something after that. Then I go claiming ball that never changes. Position is another text layer. I'm gonna name this variable position. This will all make better sense when you see what it does name here is to make sure it matches up. Name logo is a recognizes. That's a pixel based layer. So it's been the allow me to replace it, and it's going to tell me. How do you want this? I'm gonna just help to fit as best you can. Team name his team. Name the same with this one. And the only thing I have to be very careful here is that I spell everything the same for the next step I'm gonna do. And then photo a photo is photo. So this is the hardest part is just naming all these things. Then we hit. Okay, so then, member, over here we have all of these things for each player. You know their name Now, this could be an Excel spreadsheet that has name, team, name, position, number and from Excel. You can export as comma delimited files and it ends up looking like this. So we look at this. You see, the first line has the same variables. Name, comma, photo comma, team name, common position, common number, comma logo. So those have to match up with whatever I did in photo shop girls. It won't work. That's why is being very careful to make sure they matched. So the first line is the indicator of these are the variables I want you to match. Then, for each player one per line, I have their full name comma, the name of his photograph, the name of his team, his position number and which logo it is. So again, I did this Manly causes only four. But if this was many, many you would probably have this in a spreadsheet and say, Export these variables out that just save it as a text file. Okay, so that's the set up. Then, to make sure it works, we go back to the image menu two variables and choose data sets. We're gonna import this file that's have to go find it here. Now, when we do this, you hit preview, and then it shows you the 1st 1 and says, OK, that seems to have worked because there's his name. There's this position. There's this photograph. If I say well, did the 2nd 1 work and it says it appears as though it did, so you don't have to actually go through every single one, because if the first warm to works. You know, they all work Now here's a little tip for you that that threw me off completely because I was like, Great, This is working. I'm so excited. But this is just a preview. So when you click OK, everything goes away. You're like, Well, what happened? That was just to make sure it's gonna work. So basically we've now assembled are place holders with our data. But we have to tell a photo shop. Now put it together. I don't view some of you folks may remember the good old days of doing mail merges and like a word process, we say dear first name. This is exactly the same as that, but with text and graphics and photos, which is really cool. So to merge them together after you. One last step. So there's all these steps. The first step is make your document with your layers named. Then you define which one of these layers changes to some of these don't like the backbone never changes. The flaming soccer ball never changes etcetera. Then you make sure you have your data. Grab your text file all set the right way and merge it in, and the final step is we export data sets as files. So that's the final step that actually merged together. And what I love about this is it's make a new folder for this one. The result of this export is going to be, Ah, whole Siri's off PSD files. So at first I was like, I wish that made J pegs. I thought, No, this is actually better because this way and by the way, it's already finished. I mean, I should have mentioned that that's how fast it is. I'm not waiting. I'm not killing time. It's already done. So what it did was it created a series of files here. Find our folder so there's but each one of us. A PSD files. If I look at them and go how that kid's name didn't quite fit, I could still go in and edit because it's just another type player. But using that same go back to the original. Compared to the alternative, I'd much rather have that problem having to go in and fix one or two than copy and paste over and over and over again to do it myself. So this is wonderful for any situation where Salome some elements stay the same, but other elements change for things like name, address, phone number, position, size, whatever that's up to you. So you still create a normal Photoshopped document with layers. But you're telling Photoshopped, would you please automatically replace thes things in for me? Including, like Look, the Burke bottom corner? That little logo is there on a transparent background. It's put her number and they're now. I could still decide at the last minute on this room here. I want to add some other whole thing. It's still a Photoshopped document, but it's done this part for me automatically. Up until this point. Now what? I would last just finish this off if I did decide all of these were now done. I don't want to give people or send a PSD files to my lab. So the final thing I'll do is use a built in automated feature, a Photoshopped image processor, and the whole point of this image processor is it will say, Well, would you like you got a bunch of PSD files? I'd like to save them as J pegs and either resize them or not and so it automatically me having to go open, save as that's what this does. So instead of recording in action, this has already made for you the whole purpose of image processors. Say take this file format, save it in that form format and resize it if you wish so I would get run in no time at all. Now, in the same folder, I have a folder of JPEG files that air the flattened version of all those other files for me. So for me, the most typical scenario is to run this variables. To get a bunch of PSD files, make sure they all look okay and then take them all and export them is J. Pagan, and the JPEG files were the one that get sent to the lab or given to the kids or whatever it ISS. And it's not just for sports office for any situation I've had people uses for ads on their website where they wanna have this week's special in a lot of the things stay the same. But certain things change or business cards with people's photos on whatever, anything where some elements say the same and others a customized That's what variables for and the question are yet. So I think I missed that. Did you create that text file in photo shop under the variables? No, the text file is separate, so I actually use like a text editor to do that. But in a real world scenario, to me, that would probably be starting an excel because I have so many. And then from excel, I would just export, and it would automatically create that text file. All you have to add is that top line to match up the variables. So in the text file, you have tohave comma separated the exact same names of the variables that you had in your photo shop document. Can you create customized a customized collection of actions combining individual actions from different action sense? Is there a way to do that? I think so. I have never done that. But I mean, basically, when you start recording it records, whatever you click on, So if they're in different sets, I don't see why it wouldn't allow you to do that. OK, do presets, Shortcuts, etcetera. Go from computer to computer when using photo shop, see, see, when logged in online. You have to turn on that setting to be able to say like I think my presets. But there is a setting that through Creative Cloud will updates. If you update on one machine, your presets will move to the other. Same with libraries. If you have a library, it'll update and libraries actually really cool. If you happen to have not only photo shop but they will showing in design anything that can be shared between those three will share between applications as well.
Ratings and Reviews
Emily Bristor
Dave Cross really knows his stuff, and his knowledge is up to date. I didn't know there's a Photoshop "mail-merge" kind of capability - now I know how to use it! He gives clear instructions on how to save time in Photoshop in various ways. I highly recommend this course.