Lessons
Lesson Info
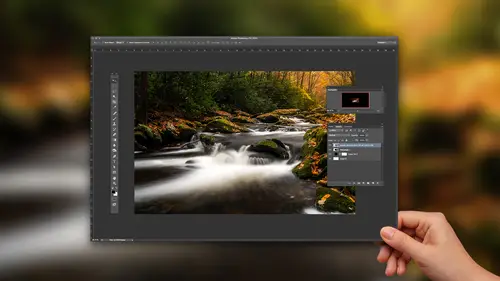
Basic Workflow Review
I guess the first question is what does advanced mean? Because I am very apprehensive when I teach an advanced class because the problem with advanced is it's usually somebody that knows the tools very well And so what happens, what I find that happens is so I teach the class so I'll show you something in channels in Photoshop, alright? And the beginner's like oh my god I never knew channels existed and wow look at what you can do with them, that's crazy. So the advanced user knows that channels exist and what happens is I might show them something different that they've never done in channels and the advanced user looks at it, looks at channels, looks at what I did and says yeah that make sense, I would have figured that out. And so because I'm not going to show you, if you're an advanced user out there I promise you I'm probably not going to show you a tool you've never ever seen before in Photoshop so my only goal is to kind of show you a different way to think of something. And the...
n the last thing I will preface is advanced does not mean a long time, alright? Advanced doesn't mean it has to take a long time it just means that sometimes we use tools that require more than just moving a slider or things like that. So I hear that one a lot, like I want to learn something advanced, I actually had somebody say to me I want you to teach me retouching techniques that will take me hours to do. I swear to god I had somebody say that to me one time. I'm like really, and it makes sense, they get paid by the hour, so perfect. So my instruction in general is for people that are not necessarily getting paid to post-process but post-processing is part of what you do. Whether it's a hobby or not it's just a part of what we do. So we are going to jump in we're going to cover all kinds of things. We're going to review some quick basics and then we'll talk luminosity masking, we'll talk replacing skies, a little bit of layering, HDR, panoramas, all kinds of fun stuff. So let's start off here just real quick review of the basics. I use Lightroom for this stuff mostly it is exactly the same if you open up your raw photo in Photoshop and use the camera interface. The sliders and the settings are exactly the same. So some basics that I do. Overall exposure, that's going to happen here. I think exposure's good on this one. I was catching a little bit of sun flare, this was off in the distance, I had a zoom lens on. It's kind of got that faded type of a look. When that happens, and you know, exposure is good, highlights and shadows I think are good. But when that happens whites and blacks are going to be the key. We can go to the histogram and you can actually see it up here. You can see those little gaps between those two sides there and a little one over here. So what I'll usually do here is rather than look at the histogram I'll just pull down the option or alt key, click on the white slider and then drag it to the right, okay? And when I start to see a couple little specs appear it means I got a white point. Option or alt click on the black slider, everything goes white. Drag it to the left and that means I've got a black point. So just by itself, if I hit the back slash key, before, after. Big change. Probably warm this one up a little bit, okay. Shadows, don't really have any shadow detail I have to worry about. Really no highlight detail. I'll probably crop this one. To me the real star of the photo is kind of in here. So I'm going to crop in on that. Little tip that I give to any landscape workshops that I teach is whenever you're outdoors and you see only one thing being lit take pictures of it. I mean it's a simple rule as you're out there shooting and the weather is changing or whatever. If you're looking out there and you see something being lit and the rest of it not being lit take pictures of it because chances are it's something pretty cool. So that's the case in this, you can see it was a cloudy day and the clouds are moving quick and the sun's just poking through to all these different parts of the trees so it's like a paradise just clicking and shooting around everywhere you can look because it's changing in every direction. Alright, so we've got a couple basic changes there vibrance and saturation, clarity. Clarity will be good for this because there's a lot of little details that are in that middle gray area so if I zoomed in to this you would see clarity really separates a lot of those details. It almost looks like sharpening. Vibrance is good for boosting colors if you've got people in the photo, saturation is good at boosting colors if you don't because it boosts everything. So I'll boost that just a hair and then let's see, as I go through the process again I'm kind of just reviewing from the basics class. HSL allows me to attack different colors and you know, I think we're pretty good on the overall saturation of everything in here so I'm not going to go... If I got to the yellows and the oranges you see how I can make them brighter? Under luminance so I might do that just a little bit but I think we're actually doing pretty good here. Detail, remember you won't see the changes really unless you zoom in to 100% so zoom in to 100%, I always crank up the sharpening especially on this, this will handle a ton of sharpening. Radius, color of our current cameras, 1.4, 1.5, leave it. And then the detail slider we'll just kind of start making things crunchy so kind of add that sparingly. We don't have any noise because we're shooting on a tripod most of the time so we don't have any noise to deal with. Lens corrections, remember from the last class I just turn on enable profile correction and that'll get rid of a lot of that thinning on the side. A little bit of distortion there. And then finally I'll go under effects and we'll finish that off with, you guessed it, vignette Right about there. If I hit the backslash key let's go take a look here so we can see that is our before photo. And that's our after. So before, after. Okay, so that's a quick review of the basics. We'll go up one more notch and that is just apply some of those basics and show some of the other tools that we're going to need access to. And this kind of sets up some of our moves to Photoshop as well. So let's go ahead, I usually hide the left panel to give me some more room. And first thing I would do when I look at this is kind of tilt it over to the left hand side a little bit so I'll come in here and I'll crop it. One of the things that I didn't really cover in the beginners class, Lens corrections. So as we start to take pictures of things especially when we're shooting wide angle there's a lot of different surfaces. Now this is an old barn too so everything is not going to be perfect. But one of the challenges we run into is as I fix one angle sometimes another angle becomes off. If that happens a good place to go would be under your lens corrections. We'll of course enable the basic ones here. But down here under upright this will start to analyze the different surfaces and edges in your photo and it will start to make adjustments from it. So it's different from cropping and rotating because cropping and rotating means this angles off then this angles a little, as I rotate I might get that straight but the other side is going to go off a little bit. What this upright stuff does is it actually works on different parts of the photo so it's kind of skewing and doing all kinds of things. So it's pretty cool and that's usually what I go to if I find my cropping and rotating isn't exactly what I need on that. Alright so I don't really have to crop it after I do that because it looks pretty straight. Basics, same thing as before you know I might crank up my exposure a little bit here. Highlights, you see the highlights working on the sky a little bit so I'll pull those back a little bit here. And this I do see it work on the sky here this is also kind of to introduce what's to come which is luminosity masking because sometimes we can't get what we want from the highlights. And the way I'm going to edit this photo is going to lead us into luminosity masking because I'm going to show you the way that you want to do it if you want to do it quick and then luminosity masking which takes a little bit longer is what sets that up. We don't have any shadows to speak of in the photo so I'm not going to worry about that. Blacks and whites, remember option or alt click. Option or alt click again. As I look at the whites it's probably a little bit too strong so I'll pull that back just a little bit. Eyeball it. If you were here in my last class you guys kind of know my thing about eyeballing things and we can teach you as many formulas and guidelines as we can at some point your style and your taste has to become involved so it's a little bit of a mix and match here. We can get away with some clarity in that one. Saturation, I mean it's looking pretty saturated. The only thing I would is go to HSL and maybe go to the saturation slider there and just see if I can push the sky a little bit. So look at our sky. I can tell you that when I was standing here, so this is Jackson Hole, Wyoming and that's the Grand Tetons behind me or behind the bar there. I'll tell you when I was standing there those things looked magnificent, you know I mean it's a sight to see. And when you look at it here they're kind of faded off in the background. So one of the things we can do is go over here, I've got my graduated filter. So I've got, you know, presets that I use one of them is darker sky so we'll go with the darker sky one and just click and drag down. That's going to be too strong because I used the strong version so I'll try the light version. That's probably a little bit more in line. So you can see what it does and I always show the nuts and bolts of my presets. So if you look at what I did here it's a little bit of negative exposure and then I bump up the shadows and if you watched the last class I bumped with the shadows because we don't want the dark parts of the clouds to become black. By moving the shadows up we're able to darken everything without making clouds become black. So I mentioned you can buy all of my bundles, I have cloud brushes, I have cloud gradients, I've got print presets. You're going to see some sky replacements later. I've got clouds you can drop in. Like $29 Mattkphoto.com. So I'll show you what's in there but if you want to take the easy way mattkphoto.com and you can buy the whole bundle. I always do 70% off for Creative Live. So that takes care of the sky. Now it's done a little bit to tame the brightness that we have here but the next part I'm going to go to is a brush. Remember under the effects panel we have de-hazing, alright. It's not going to work on this photo. The de-haze slider isn't doing the trick for this because it's just saturating everything. And honestly using just the de-haze brush, if I just go to the brush here and let's just go ahead and go to de-haze, okay. And that's a brush that comes with Lightroom. If I just do that you can see it's kind of darkening it a little bit but it still has a faded type of a look to it. So one of my brush pre-sets is, I've used it in the last class, I think Drew laughed, it's called haze killer. So it's a bunch of different things I can even put a little de-hazing in it but it's contrast, it's highlights, it's shadows, it's clarity, and it's a lot of sharpening. But let's zoom in on it and kind of... No saturation. So I'll start to brush. My Lightroom is moving as slow as possible today, has that happened to anybody else? Hopefully you can kind of see the brush go along there. And then sometimes if it's too bright, I usually don't have to do this but I might drop the exposure just a little bit, okay? I mean barely. But there is, like I said, take a screen capture or whatever, that's the combination of what I put into the haze killer brush and it does a really good job. Especially if you get into a situation where the de-haze slider isn't quite doing it for you. So obviously I'm not going to do the entire photo that close I think that's what eats up some of the memory too. Don't forget when you get near an edge turn on auto-mask and that way as I paint it'll restrict it to the edges. And then when you get done with the edges turn it off because it takes a little bit longer that way too. Again I'm not going to spend too much time in here or we'll be here forever. I'm okay if it bleeds into the barn for now. In fact, it might be the easier way to go. I'll let it bleed in to the bar and by the way if you hold down the option or alt key you can just paint it away in those spots too. Alright so that takes care of, that's before, that's after. And of course you can, you know, you can maneuver any setting that you need to after the fact as well. But I mean I think that's going to be such a key for stuff that's in the background. Alright, and we'll finish it off by throwing a vignette on the edges here. So that's before and that's after. Before, after.
Class Materials
Bonus Materials with Purchase
Ratings and Reviews
Pamela Richardson
I would absolutely recommend this class. I really liked Matt's detailed explanations of each step that he was demonstrating, and his review of alternates for each step. I have been photographing landscapes for over 40 years, including the last 10 years in digital. I really appreciated Matt's clear demonstrations of how images can be improved, and am eager to apply his examples to my own work.