Lessons
Lesson Info
Why Work Inside of Raw
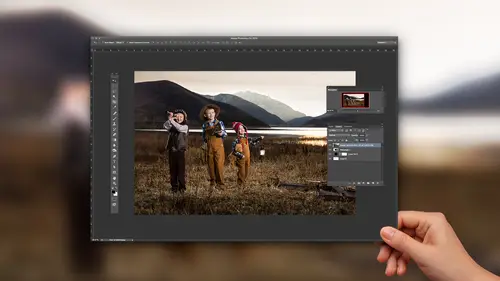
So let's go back into Lightroom, and we're gonna just go through a series of collections. Now I have collected a bunch of images to try and show you varying degrees of effort and edits inside of Lightroom. We're gonna start at the very beginning, which is the reason we want to stay, well one of the reasons we want to stay inside of Lightroom as long as we possibly can, is because it's in a Raw color space, it's in Raw. So we have the most data possible inside of Lightroom. Now you can also work in Photoshop in Camera Raw. That's fine too, it's the same thing. In fact, Camera Raw is actually powering both Lightroom and Photoshop. So if you work in Camera Raw, you're working in the same space that you would be if you were in Lightroom. So you can kind of work on either one of them, that's fine. It's just that Lightroom is more efficient because you can work on multiple things at one time, multiple images at one time, plus it stores them, it catalogs them. It's just a much more efficient ...
platform. But if you are only working on one image and you want to work inside of Camera Raw, you can do most everything that you can do in here, inside of there, so just be aware of that. But I'm going to refer to it as Lightroom, but you might also refer to it as Camera Raw. Okay, why do we want to work in that Raw? Basically, think of it this way, if you are working with your Raw image, you have exponentially more information to deal with. You have, as opposed to working in a JPEG, as opposed to working in a PSD, or a TIF. Even if you're working in a 16-bit pro-photo RGB TIF, you still have a lot more information in the Raw, than you do in that original file, or in that new file which is created from the Raw. So what happens is you go from an amazing amount of information, and then once you export that information, it's no longer Raw, once you export that information to a TIF, or a JPEG, or a PSD, suddenly it is locked in. Now we're dealing with pixel by pixel information. And as we start messing with that information it's going to start destroying the image. Every time you touch some kind of a slider, every time you work on something, it's actually destroying the image, it's breaking apart. And to illustrate that point, I'm going to show you the difference between shooting a JPEG and shooting a Raw image. So you can actually see how vastly different these two things are. I have a picture of my daughter here, and I shot it as a Raw image and a JPEG at the same time. So both images are in front of us here and you can see how both of them have been way overexposed, on purpose, just as bright as we could do it and still have something. So you can see that on the right-hand side here, this is the JPEG. And over here is the Raw image which I have actually converted to a DNG, which is a Raw file type. Now if I were to try and fix both of these images, I want you to see the difference between them. So I'm going to go into the develop module, and I'm gonna work on the Raw image first. Now this is really overexposed. You can see right over here that we are super overexposed. See how it's clipping right there? There is so much clipping going on. And if I hover over that you can see all of that clipping that's happening, but you can also see that there's some information still in her face. So if I go to the basic adjustments area and just grab onto the exposure, and just bring it down, look how much information is still there. I can actually do a pretty fair job at saving this photograph. And then of course with a little warmth, maybe playing around with the highlights and the whites, bring the blacks down just a little bit, maybe get some of that saturation out, and bring some of that magenta back into her face, I can do something decent with that. Now it's gonna be hard because it's not all there, not all the information is there. So I'm just dealing with the worst-case scenario. But I want you to see what happens when I go to the JPEG, and try and do the same thing. So if I take the exposure down on the JPEG, you can see that the entire thing just gets a wash of gray over the top of it. See that, everything is just gray. You can see how gross the skin looks, and we're gonna go back to here. Now even if I add a little warmth to it, see what happens when I add the warmth to it? Let's take a look at these side by side here, and see the difference between these two images. See how we're getting some information back? We can do something pretty decent with this. Not great, but decent. This one, there's almost no chance that I'm gonna really get a good shot out of that. Now I could probably go to black and white, because black and white saves all. That's maybe why I love black and white so much, because it can save almost anything. But you can see a mass difference between an image that's in the Raw space, and an image that is literally hard coded from the camera. Okay, so that gives you an indication of what you're facing when you deal with something that's not a Raw image. A Raw image has so much more latitude, it has the ability to be changed. So we want to do everything we possibly can before we leave the Raw space. And if I can I wanna stay in the Raw space forever. I would prefer to always be at a DNG level, digital negative level. I would prefer to be there forever. If I can do it I will not leave the Raw space, if I can do it. So let's talk about adjusting some images, and let's talk about some of the things that we would do inside of our Raw image. Now I'm just taking a normal image. So this is just a simple portrait of two kids, You can see that I've got some flair over here, which I really actually like that flair going on. Inside of the editor we're just going to bring, we're gonna kind of open up everything by grabbing the exposure. Now this is not a basic editing course, so we won't spend much time working on the basics, but I do wanna mention a few things. First off, the exposure is really that middle portion, and so that's our first knob that were gonna get, because were taking the mid tones and were bringing them up. And that's where we want to get the image as close to done as possible, in that exposure first. This was different in the older versions of Lightroom, but now exposure is that first slider to be touching. Once you've got that, then I just need to get those black points back into where they should be. You can see that the histogram is moving around up there. And by the way, did you know that you can also just hover over the histogram, and literally grab the center and just move the center up and down? So I'm just grabbing on the histogram up here. You can see if I grab the black's, I can bring them up or bring them down. You can see that the picture over on the left is actually changing, as is the histogram. So if you just wanna do this instead of trying to find a slider, you can always play around with your histogram and get it exactly where you want it without ever moving anywhere off of that. So it's kind of an interesting way to work. So once you've done that, and once you've got your basic exposure, and you also gotta get your temperature. So I want this to be a little bit warmer than it currently is, and I wanted to have a little more contrast than it currently has. So I like that, maybe just a little darker. There we go, a little bit darker. And by the way, the arrow keys, I'm using the arrow keys right now. So I'm using the arrows here. If I go up or down, it allows me to do small incremental changes to the exposure knob. If I hold the option key down, I can do even smaller increments. And if I hold the shift key down I can do larger increments. So that's fairly useful when you're just trying to nudge that thing. Especially if you're on an airplane or something like that and you don't have great control over your mouse. So once I've got my basic exposure down, that is really the science behind the image. It's just a matter of getting things correct, getting them right. And you can tell if something's too warm or too cool, or if something's definitely magenta or green. You can really see those kinds of colors. You can tell based on your black point or your highlight whether something's correct or not. And if you're having trouble figuring it out, you can also hit the option key and then grab on to, say, the black slider. And see that? It creates a little mask that tells you where your blacks are. So it's showing you, right now I have no true blacks in there, so as I go down like this, I'm gonna see the blacks are actually coming in and I can see where those super deep shadows are gonna be. So it's up here, it's down here, and that little area in the crook of his arm, right there as well. So you can do that with all of your different sliders and it will give you masks to kind of help you to figure that out. Hopefully, once you get to the point where you can see it and you feel your way to it, it's better to feel your way to it, because knowing exactly where that black point is doesn't always mean it's right. It just means that that's where the black is. But this is all the science information. This is the stuff that your assistant can do for you, that you could send off to shoot.edit, who's my post production service. They take care of that stuff, because it's just scientific information. It's just match the skin tones, do this, do that, make it brighter 'til it looks good. But after that, then what do you do with the image? That's when it comes back to me and that's when I need to really be working on the image itself, the style behind the image.
Class Materials
Bonus Materials with Purchase
Ratings and Reviews
nancy_cuppy
Jared is a very good teacher, he explains things clearly and gets to the point. He is also a very good speaker so he is easy to listen to.
Helder Cardoso
Liked and recommend.
Robin Spencer
I've used LR for years and still can't believe how much I learned in this class. Very well done and would recommend it.