Advanced Editing for an Editorial Portrait
Lesson 8 from: Advanced Photo Editing in Capture OneDavid Grover
Advanced Editing for an Editorial Portrait
Lesson 8 from: Advanced Photo Editing in Capture OneDavid Grover
Lessons
Class Introduction
04:58 2Local Adjustments Overview
05:47 3Drawing Local Adjustment: Masks with Brushes
08:59 4Drawing Local Adjustment Masks with Gradients
08:05 5Vital Techniques for Dodging and Burning
09:54 6Dodging and Burning Demos
14:49 7Local Sharpening and Local Noise Reduction
07:40 8Advanced Editing for an Editorial Portrait
05:51Simple Element Removal
06:09 10Multiple Local Adjustments: Product Photography
09:43 11Correcting Perspective for Accuracy
04:27 12Multiple Local Adjustments: Architecture Photography
15:13 13Correcting Perspective for Creativity
12:37 14Creating Dramatic B/W images
09:17 15Processing Black and White
22:08Lesson Info
Advanced Editing for an Editorial Portrait
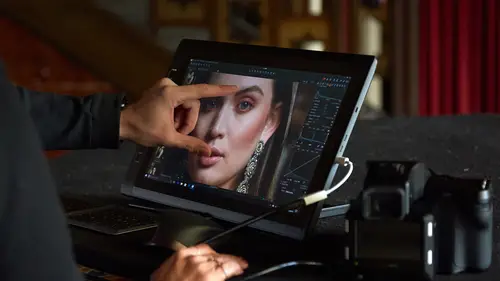
So, now we're gonna combine two things that we've just done. So, a shot here from Ryan Notmeyer, really nice editorial shot. This is how it comes out of camera. So, pretty nice out of camera. As usual, with a portrait, it's a relatively shallow depth of field. So, by the time we get to his shoulder, we're dropping off focus, and the front of his body is just about in focus, and the shirt as well. But, of course, we are looking at the face. This is the part that we want to spend, you know, looking at in the image, and so on. So, we want to sharpen this, and we don't really need or have any benefit from sharpening any of the background. But, before we do that, let's just do a quick base correction. So, if we just add a bit of contrast, and let's bring up the shadows a tiny bit. Let's throw in a vignette, and why not? Let's pump a color grade in there as well. So, now we've got, sort of, base start for this image, but look what happens if we, let's go to local adjustments. I could do with...
sharpening his face a little bit more. It's just ever so slightly soft, but the problem is, if we start to increase our sharpening, so his face is looking better, but actually it's getting over-sharp down here on the sweater. This doesn't look, you know, attractive because everything is getting a bit too crunchy in around his ear, for example. So, we want to reset that back to zero, like so. Same thing before, let's make a new layer, and we deal with the sharpening first. So, I'm gonna pre-visualize by Invert Mask. Let's pump up our sharpening, like so. A bit of halo suppressant to take away any ugliness, and let's just have a tiny, maybe a little tiny dose of clarity as well. And I'm happy with that, but I said it's over-sharpened parts of the image we don't want. So, let's invert our mask back. Gonna zoom out a little bit, grab our brush. Probably a bit too big. Again, I'm gonna turn the flow up in this case, cause I'm pretty happy with the previous visualization. So, I'm gonna be pretty happy just to brush in the sharpness, almost at the maximum, like so. So, now we've sharpened his features up really nicely. We can turn this on and off. So, if we turn it off, that's before and after. And if we need to do a bit more, I can. But now, if we look at his shoulder, this hasn't gone crunchy, and we don't see, you know, any ugliness around the highlight, for example. If we zoom out, we can see that we've got some sort of smudges on the window, so let's get rid of that. So, if I do Lighten, Lighten Smudge, how is it best to deal with that? Possibly, if we just blow it out with exposure. Whoops, I forgot to Invert Mask. So, if we do that, maybe a little bit of curve as well, just to take away the distraction of those smudges. So, now I'm gonna invert back again, take my brush, probably go a bit more low on the flow, and then I can just brighten up this area, like so. Just so they're a bit less distracting. And again, if I want to do any other dodging and burning, I might do a separate lighten layer, just a little bit, just to bring up his face a tiny bit. And that's just a guesstimate. I think that's probably gonna be about right. So, let's just make my brush a bit smaller just to lighten it up ever so slightly. Not much, but just a tiny bit. So, now we did our sharpen layer, and again, we could do the inverse once more, like if we felt we needed to do more noise reduction, but I don't think this is a noisy image. It looks pretty clean, so there's not really much benefit for doing additional noise reduction. But if we Option Click the before and after, so that's before and after all our adjustments, as such. If we zoom in again to 100 percent, and Option Click, so that's before and after our adjustments, like so. Again, didn't take me very long, and we achieved, you know, a color grade. We did some basic dodging and burning. We did some local sharpening as well, which improved our image overall without over-sharpening other areas as well. And it took us, with me instructing, you know, one or two, three minutes. If you were doing this on your own without having to tell someone how you're doing it, you'd get that wrapped up in one or two minutes easily, once you're driving everything with shortcuts as well. Remember, I wouldn't normally go into the menu. I'd just hit that with a shortcut, so it happens straight away. I don't even have to move away from my image. So, shortcuts are really powerful in this respect.
Class Materials
Bonus Materials with RSVP
Ratings and Reviews
Peter Hudson
This is fabulous - even though I use Capture One regularly I always learn something new from listening to David and this is one of his best - if David is the teacher then get the whole series is my advice - well worth the investment
user-940746
In this class David shows what editing can be done in CaptureOne and when it is time to use an external editor. There are lots of features in the program that David brings out to make the editing quicker and easier. The class also shows how much can be done in the program without going to an external editor, thus saving time and effort in editing. As usual, David presents the information in a manner that is easy to follow.