Lessons
Class Introduction
04:58 2Local Adjustments Overview
05:47 3Drawing Local Adjustment: Masks with Brushes
08:59 4Drawing Local Adjustment Masks with Gradients
08:05 5Vital Techniques for Dodging and Burning
09:54 6Dodging and Burning Demos
14:49 7Local Sharpening and Local Noise Reduction
07:40 8Advanced Editing for an Editorial Portrait
05:51Simple Element Removal
06:09 10Multiple Local Adjustments: Product Photography
09:43 11Correcting Perspective for Accuracy
04:27 12Multiple Local Adjustments: Architecture Photography
15:13 13Correcting Perspective for Creativity
12:37 14Creating Dramatic B/W images
09:17 15Processing Black and White
22:08Lesson Info
Class Introduction
I'm working directly with Phase One. I've been with then since 2012, and it's my job to teach Capture One to all of you out there and our audience here as well, of course, and our partners and so on around the world. I've been in photography since I was around 16, working in darkrooms, printing black and white, color printing, and so on in the beginning. So I think this gave me good foundation to take what we did in the darkroom to what we now do in the digital age. So this course, it's about wanting to do more at the first stage. So rather than taking your RAW file, going into Capture One and doing the minimum, we're gonna try and do as much as possible we can to the RAW file, use all that raw data, to squeeze as much out of it as possible. And maybe that sounds like a long, drawn-out process, but ultimately it's to save time, because going from one software to another software to achieve something else and then back to another software is time-consuming. If we can do as much as possi...
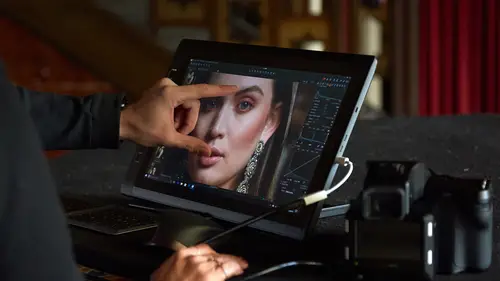
ble in one package, that's gonna save us a whole bunch of time. And we have two superheros to help you, of course, one of those superheros is Capture One, and the second one, as I've briefly touched on, is the RAW data. Cameras in the past sort of five or six years, maybe even longer, have got so good with sensor technology, that there's so much data in the RAW file, more than you would probably expect when you look at your images, even if you've fluffed an exposure or the conditions weren't exactly right or the mood of the image isn't quite what you want to express, then you have all that data to do pretty fantastic corrections. To give you an example, this is one of the images we'll work on later, so this is how it is straight out of camera, and with not much time and effort, we can do pretty dramatic corrections, like so. We have a nice editorial shot here, and then again, with not a great amount of work in Capture One, we can take, as the file comes out of camera, and do some changes to local exposure, sharpening, noise reduction to really get the picture that we first thought about when we took it. We'll also have a look at black and white, so again, here's an image straight out of camera, and then using all the great tools in Capture One, we can create really, really nice black and white images. So we've got a whole different range of subjects to cover today. Basically, we're gonna push that RAW file to the limits. The way I approach it is that I look at the RAW file and we break it up into different elements for the edit, which is pretty much, if I think back to a very long time ago when I worked in darkrooms, when we looked at the print that we were going to make, we would really kind of break it up and decide what exposures we wanted to do in different areas, the kind of grade of paper we would use for contrast, and all kinds of other techniques as well. So we're gonna break up our digital image in much the same way. We can save a bit of time with some basic retouching. I put retouching in commas because Capture One is not a retouching application, but we can do some basic time-saving things just to take out some distracting elements in an image, for example, which, again, stops you from having to process that image, go to Photoshop, for example, do some retouching, and so on. Some basic things we can do right in Capture One. We'll have a look at playing with some perspective as well for accuracy and creativity, so that's doing, if you like the perfect correction for something like an architecture shot, and then we're actually playing with perspective a little bit for a more creative aspect. And as I've touched on we're gonna look at some black and white stuff as well. So that's what we're gonna do today. Shall I talk about what we're gonna do in the first half? (Student) Perfect. Good stuff. So in the first segment, when we break up a RAW file, we're gonna rely heavily on local adjustments. And local adjustments allow you to target the RAW conversion into different areas of the image. It's one of the most powerful features of Capture One, it's one of the most fun features to use as well, I really enjoy working with local adjustments. So Dodge and Burn is a phrase, again, which you might know from darkroom days where we selectively darkened areas of the print or lighten areas of the print, and it's very easy to do that in Capture One as well. We'll also think about things that are not density related, so not changing exposure locally but maybe applying sharpening locally or noise reduction locally as well, or combination of the two. And then as I touched on earlier, we do some basic retouch, which is removing those simple distracting elements.
Class Materials
Bonus Materials with RSVP
Ratings and Reviews
Peter Hudson
This is fabulous - even though I use Capture One regularly I always learn something new from listening to David and this is one of his best - if David is the teacher then get the whole series is my advice - well worth the investment
user-940746
In this class David shows what editing can be done in CaptureOne and when it is time to use an external editor. There are lots of features in the program that David brings out to make the editing quicker and easier. The class also shows how much can be done in the program without going to an external editor, thus saving time and effort in editing. As usual, David presents the information in a manner that is easy to follow.