Drawing Local Adjustment: Masks with Brushes
Lesson 3 from: Advanced Photo Editing in Capture OneDavid Grover
Drawing Local Adjustment: Masks with Brushes
Lesson 3 from: Advanced Photo Editing in Capture OneDavid Grover
Lesson Info
3. Drawing Local Adjustment: Masks with Brushes
Lessons
Class Introduction
04:58 2Local Adjustments Overview
05:47 3Drawing Local Adjustment: Masks with Brushes
08:59 4Drawing Local Adjustment Masks with Gradients
08:05 5Vital Techniques for Dodging and Burning
09:54 6Dodging and Burning Demos
14:49 7Local Sharpening and Local Noise Reduction
07:40 8Advanced Editing for an Editorial Portrait
05:51Simple Element Removal
06:09 10Multiple Local Adjustments: Product Photography
09:43 11Correcting Perspective for Accuracy
04:27 12Multiple Local Adjustments: Architecture Photography
15:13 13Correcting Perspective for Creativity
12:37 14Creating Dramatic B/W images
09:17 15Processing Black and White
22:08Lesson Info
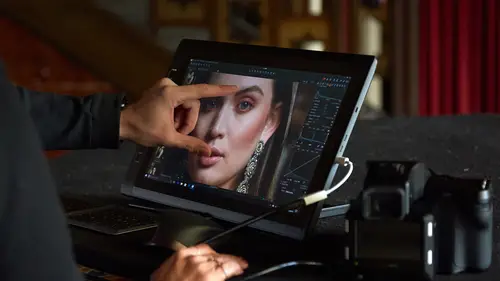
Drawing Local Adjustment: Masks with Brushes
We need to learn how to draw some local adjustments. So let's just get in an inch with a bit of space. This has no local adjustments as you can see. And we have various different ways to draw local adjustments. So, in the local adjustments tool itself you'll see a symbol here. Where we can choose to draw mask, erase mask, or make a gradient mask. Take careful note of the shortcut keys, B, E, G cause it's much easier to switch between these various tools by using the keyboard shortcuts. So B, E, G for those shortcuts. You can also access them up here as well. Up in the cursor toolbar. B, E, G again. It's exactly the same tool display that you see down here. Personally I find it much easier to press B on my keyboard see that gives me a brush. If I press E, I get erase because it has the minus in the middle. And if I press B, then you can see we have the plus in the middle. G, we just get the small cross here like so for gradient. So navigating with the shortcut keys is much, much, easier...
. So lets look first of all at drawing those masks with brushes. Now you obviously have some control of how the brush works. If you right click and tap, then you'll get the brush settings menu right up there in front of you. Which has these four various different sliders. You can also access brush control down here as well. But I always find it much easier to right click and bring up my settings cause I might need to do a quick change. So we have size, hardness, opacity, and flow. The bottom two really vital. So don't ignore the power that opacity and flow has. Cause it's vital for drawing good masks which are subtle and not obvious. And you'll see what I mean by that as we go through. So we wanna draw a mask. So let's say plus to make a new layer. Again very much like Photoshop. Lets just call this, Brush Drawing. It's a good idea to name your layers because then you know what they do. Otherwise you end up with layer one, two, three, four, five, six. And you've got no real clue what each of those layers do. So lets right click and let's make a brush which is fully hard and draw. So again if I press M on my keyboard we can turn the mask on and off. So basically the area in red that you see. That will be affected by and adjustment when I tweak it like so. If we change our hardness you can probably guess what's gonna happen. And we draw a mask like so. You can see we get some fade off from the center to the edge. And the reason why we have these two circles if you like. The center circle is gonna be at 100 percent opacity and then by the time we've reached, the outer circle we've faded to zero. So that inner circle to outer circle is your fade to zero relationship as you can see. Next one if we go up here is opacity. So that's really affects the strength of the underlying adjustment that you might do. So if I set this to 50 for example. And then we draw again. You see it looks fainter like so. So if I was to hide the mask by pressing M and changing my exposure. You see the 50 percent opacity has less effect than those that are at 100 percent opacity. So opacity can be very useful too. And last but not least, we have flow. And flow is a super critical adjustment especially if you're doing dodging and burning. Because this controls how the mask builds up as you move the brush back and forth. So it's a movement based adjustment. So if I set this down to ten. Lets go back up to a every time I move the brush. We're laying down ten percent until I get up to the opacity which is set to 100. So brushing back and forth you'll see it builds up slowly. So it's much similar to drawing. If you imaging drawing with a pencil, you're first stroke it'll be quite faint. And then as you go back and forth, back and forth, back and forth, back and forth it gets darker, darker, and darker. Or if you're painting with a paintbrush and you dip your paintbrush in the tin of paint and then you brush back and forth. Each time you lay down a stroke it gets darker and darker and darker. So flow is really your friend in building up masks in a very kind of nice slow and controlled way. So it doesn't look super obvious that you've done local adjustments, So if you do everything on 100 percent as soon as you make a pass with the brush. It's pretty obvious that you've made some kind of big ugly adjustment. And you'll see that when we go through some examples. Last few options, we've got airbrush. So if we click airbrush on and I click and hold. This is a time based adjustment. So flow is movement and airbrush is time. So if I click and hold it's like spraying a spray can or an airbrush. And flow controls the rate at which it builds up like so. So a low flow, it takes longer to spray from your spray can. I personally don't really ever use airbrush. I don't find much use for it, but if it's a control that you've been using in Photoshop for example. And you wanna use this on your RAW files then the option is there. Under that we have pen pressure. So if you're using a work on tablet. Then the pen pressure will correlate to the size of your brush. So if we make this brush super big for a second and then I draw without pressing so hard. Lets get a big more flow. So if I draw without pressing hard it's relatively small. If I then press harder, it gets bigger. And if I go lighter it gets smaller as such. Again that's not something I use so much because I find it quite easy to just right click and quickly access my brush adjustments. I'm faster at that than trying to moderate my pressure for example. But if you're tactile and you're good with getting that feedback from you work on tablet. Then that works really well. Even if you don't use a pen pressure. Then trying to do local adjustments and drawing masks with the mouse, I find really difficult. You can't move the mouse as quick as you can with a pen. Lets just clear this mess here. So if I'm drawing with a pen with sort of lower opacity and lower flow. I can really draw quite quick and nicely like so. And vary sort of the density by brushing longer and so on. So I find it really fast and nice and fluid and comfortable to draw with a pen much more than drawing with a mouse for example. You can use a mouse of course and if you're not sure if local adjustments is for you then that's a good way to start. But if you get into it and you enjoy it. I think your enjoyment will go up you know ten, a 100 fold if you're using a tablet and a pen. Set up wise I don't do anything special with a work on, I plug it in and it's pretty much good to go. So there's nothing, no kind of tricky process you have to go through to get it to work. The last thing that we see down here is auto mask. Which allows you to sort of cut round the edges of objects for example. And if you want to do that, if you just zoom in for example. Again this is not something I do a great deal. But if we start drawing. Lets press M, so we can see the mask. When I let go then it finds the edge. So if we were to mask around here. Then we could find the edge of our rocky outcrop like so. Again that's a feature that I don't use a great deal. Because I find that if you make like, really sort of super accurate sort of finicky mask like that. It becomes obvious that you've done masking and the image can look a bit over process. If we have nice soft edges, nice slow control build up of the mask. Varying opacity. It's less noticeable, your image looks better and so on. But if you wanna auto mask around stuff, that's the way to do it.
Class Materials
Bonus Materials with RSVP
Ratings and Reviews
Peter Hudson
This is fabulous - even though I use Capture One regularly I always learn something new from listening to David and this is one of his best - if David is the teacher then get the whole series is my advice - well worth the investment
user-940746
In this class David shows what editing can be done in CaptureOne and when it is time to use an external editor. There are lots of features in the program that David brings out to make the editing quicker and easier. The class also shows how much can be done in the program without going to an external editor, thus saving time and effort in editing. As usual, David presents the information in a manner that is easy to follow.