Lessons
Class Introduction
01:05 2Compositing with Tonal Range Selection
15:33 3Compositing Water Bubbles inside Bottle
16:36 4Compositing Clouds Behind a Bottle
12:29 5Textures and Layer Mask Adjustments
18:45 6Making Water Look Realistic
06:47 7Adding Realistic Bacon to Your Image
09:00 8Realistic Scaling for Compositing
06:57Lesson Info
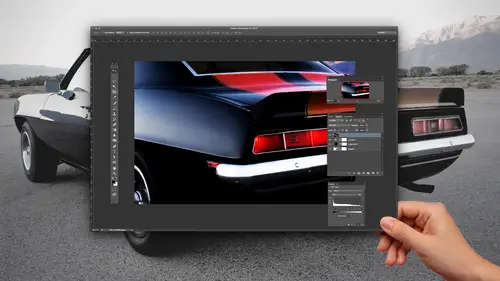
Adding Realistic Bacon to Your Image
Now, the one last thing that we need is we need a piece of bacon going through here. Because if you've ever watched any my videos, it ain't done until the bacon sings. So now how do you put it in there? But make the bacon actually look bigger inside the water bottle? Because, of course, you put anything behind the water bottle and the curve magnifies it. Right? How do you do that? Welcome to the world of bacon. OK, so there it is. There's the bacon right there. And I think the bacon needs to be parked right there. Will mask out where the water flows over the bacon. And there it iss to make this look realistic, we're gonna need to make this bigger. Where the water bottle is so very easily what Aiken Dio is go in with my lasso tool. Here, use my polygon Lhasa when I'm gonna match the edge of my water bottle and go in, Take my bacon. Fun feature. This is destructive by the way filter menu liquefy now. It's not what you think. We're not gonna go in liquefy bacon, But we are going to go ahe...
ad and use the plump and juicy tool. And this is actually the bloat tool. Okay, we make things plump and juicy. That's exactly what we dio. So I'm going to get a very large brush, and I'm gonna use the plump and juicy tool which is going to make it plump and juicy, and it just makes it bigger and bigger and bigger. I now pretty cool, huh? Yeah, Or would it go the opposite way Would have become smaller behind. I don't know. We're gonna make it bigger. So there it is. So now that it's bigger and I d select that show you how it kind of looks like it's curved Now, if we go in, of course, we would want this behind our water bottle to make it look like it Where and so let's go behind our water bottle going down behind. We have it behind our water bottle right there so we can see. And there is our bacon. But of course, we don't want that showing through where our water shows through. So I could go in. I could simply take that selection right from my reply. Could just command click right there, cause that mask started as the selection so I can concur, manned, click on any selection there to get that back. And then I could go into my bacon right here, and I could invert that and do a mask and didn't want inverted areas. And with that, I could mask that portion so that my bacon justice ever so faint behind there. And now we have the bacon showing through There it is. Now, if I wanted to see a little bit of the bacon at the very edge of the bottle, The great thing is, whenever you have a layer and it's got a transparent background on it, I can use this layer as a selection. Okay, because this bacon you can see here is just sitting on a transparent layer, right? I want to select this great tool to do this is literally just go in with your move, Tool command. Click right on that layer, and it's going to select any free pixels that are on that layer. I've got my selection. It's all good. What am I gonna do with that selection? Well, I'm going to go up to my water bottle here, and I'm gonna cut back the opacity of the water bottle toe. Let a little bit of that bacon through. So my selections active. It's on my water bottle mask right here with my brush tool. I can go win, and I can paint with a very light opacity. So that is going to begin to hide a little bit of the water bottle to let some of the bacon show through. I know. Yep. And there it is. So just in case Klein ever wants you to go ahead and do a water bottle that's pouring into itself from a rip in the middle of the clouds coming out of it in front of behind on having nice little shiny cap with a moonscape in behind and have bacon passing through, you have the perfect video for it. You can also learn other things, too. But you know, that's pretty cool in and of itself. I'm sure we have questions. I'm sure we have comments to They love the bacon. Do you have any questions here? Yeah. Can you take the top level of water out of the bottle in that, like the original level of water in that still showing up at the top you. Could I hide it with a cloud? Maybe? Sure, we certainly could with this, I think because the cloud isn't quite high enough. I've got it A little funky thing that we have to do with this. I could always go in, and I could just take my entire cloud layer right here and move it up with this. But one of the problems I have here is that when I did my mask right here the mask for my sky right there, wherever my sky is, which is way down here. That's also at the exact point where I did my clouds. So I would shut this off to begin with and then go because I'm going to get this weird overlap with this. And I could take my clouds and by mask here, and I could move that up like so. And then I could go right to my water bottle layer here and on my water bottle mask with my brush. I could go in and I could just get rid of that original line at the clouds there so that it kind of passes through a little bit right there. Now the problem with that is is that I would then come down here and I would see that my a mask for this would have to move up, which is not a problem. I could leave my sky right where it was an unlinked, the mask click just on the mask. So it moves separately. And then what I normally do is I just used my up arrow on my keyboard to just simply move it right up. And I could do that until it matches right there. And if you hold down the mouse key too long or the up arrow too long, go ahead and park it right back in position right there. This move just the mask Because I had unlinked between my image and the mask and now we have that. It does look like the clouds air just kind of mingling around the bottle right there. If you've ever tried to select clouds, there's no way because there's no amount of softness and right kind of selection to ever get clouds. Toe work just doesn't work. One more thing if that we have a pretty hard edge between our clouds and our night sky. One of the things I can do is go back to my mask, your double click on the properties and go in and actually feather that a bit. And if I feather that what that does is that feathers the mask itself. What I love about this is it's non destructive. Okay, I can always go back, and I can always unfettered that edge so I could give it very, very ethereal look. But other than going in and actually feathering the selection and then filling it the mask If I feather this right here, in fact, I can see that I'm a little bit off much better. And I go when I feather the mask here. This is nondestructive, which means I can always go back at any point and unfettered er it. In fact, I think that looks better, doesn't it? It's often to the edge. I'm glad you asked about that. Now that looks even better. And then I think what we need to do to is that on this upper portion, too. I think this bottles a little bit bold. So I need to come in here and actually use my brush tool and go in kind of do a little bit of a mask on the on the but masked at a little bit more. So we see that, and clearly the cap is too much of an issue. I'm gonna take my cap here too, and kind of knock that back, get a little bit of the blue cast around the whole thing. Okay, Now, we finally got something that we can use. Uh, that was well worth it. So one of the other things is this was a lot of fun to go through and do this kind of stuff on. One of the reasons why I like to do stuff like this from start to finish is just to show you with stuff that you can dio Um, and obviously, with this video, you can go in and you can take these basic elements and work on them. This is kind of tricky been going through. There was many specific things that are image specific that we did specifically the white clouds and being able to, you know, make them translucent. The clear glass bottles. But this at least, will give you a step
Class Materials
Bonus Materials with Purchase
Ratings and Reviews
Tomas Verver
:) Some nice ideas about how to make advanced compositions. I don't use the channels for things Jason does. I don't use often the channels for selecting though. I liked the ideas the instructior has for nice compositions. Is it a complete course? No, is it still fun and nice to view when you have an account for full acces? Yes it is!
Oscar Javier Gallardo
Awesome! i learn a few cool tricks that definitively i'm going to use on my next projects. Thank you a lot.
Kimberly DeVos
Jason Hoppe is so easy to understand and explains things so well and in an interesting way. I have several of his Photoshop and Illustrator classes. He's an awesome instructor.