Lesson Info
3. Compositing Water Bubbles inside Bottle
Lessons
Class Introduction
01:05 2Compositing with Tonal Range Selection
15:33 3Compositing Water Bubbles inside Bottle
16:36 4Compositing Clouds Behind a Bottle
12:29 5Textures and Layer Mask Adjustments
18:45 6Making Water Look Realistic
06:47 7Adding Realistic Bacon to Your Image
09:00 8Realistic Scaling for Compositing
06:57Lesson Info
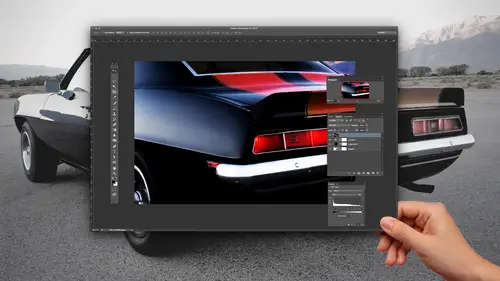
Compositing Water Bubbles inside Bottle
So next what I want to dio as I want to go in, they want to have a little bit more fun here. And the tricky part is this right here, I'm gonna introduce my water glass. Okay, I'm just gonna turn that on so we see just that water glass right there. Now, if you've ever worked with water and translucent objects here, how do you go in and get rid of you know, the white background? But leave all of these great little bubbles, the highlights, the shadows, the reflections and everything. And it's like, Okay, in order to make water look rial, you have to have it somewhat transparent, translucent. No selection tool is gonna work on this whatsoever. So I could go into my channels and I could do a whole bunch of stuff with masks. But since this is advanced compositing, we've already done that. We need to learn something new, but I touched on this. It the very end of our basic compositing just to go ahead and wet your appetite, so to speak. And I'm gonna take my water here, and I'm going to double...
click on my water layer and comes up with my layer style, which most people dismiss. But here's what I'm gonna do. I'm gonna go we in and I'm going to make the background white by using my blend. If portion right here and how this works, I'm gonna get out of this So we can actually see are transparent background years. I might turn this off. So there is my water layer. Double click on the water layer and go to my blend. If if I take my blend, if I'm starting with my highlight slider, this allows me to go in and take out and make anything that's white, completely transparent. Now, as I do that, you'll see that Mawr and more of the image begins to erode as I get rid of more and more information. Well, it kind of looks like a bit map block print, but I want this to be very realistic. Where the glass curves around, it gets a little bit more opaque. I would like it to be a little bit more opaque instead of just a very distinguished edge, and all these beautiful bubbles with the highlights and shadows need to be preserved because when they put it over something it needs to look very riel. So I'm gonna slide this just off white until I lose my background and I stop. Then I hold down my option key and I'm going to split this and I'm going to split the little divider. I always think of a little, you know, like Lentil Bean or something like that. And I'm going to move this and you can see as I move this, more of the glass will disappear. And this is kind of creating a graduated transparency so that all those nice little water bubbles are still keeping the highlights. But the clear portions off them that are nearly white just simply disappear. And now I've got my really cool water coming through here the edges of the glass where it gets a little bit thicker and refracts. The light gets a little bit heavier and there is my translucent water glass to see how this really looks. I'm going to go in and I'm gonna put a layer behind it. And I'm gonna select a color here to see if we can just throw something in there so you can actually see how this looks. And it looks pretty realistic with a color behind there. We've got more to dio. We just want to show you how this looks. But here's the tricky part you'll see in the layers panel here it still shows as a white background. So we fooled into thinking that it actually is transparent or translucent, which is great. Didn't have to use any selection tool, but in order to actually make this transparent portion truly transparent so that you can use it like you would normally expect to be transparent. You have to do something weird. And what I'm gonna do is I'm going to create a new layer with this and it doesn't matter where you create it. But this is the funny part. I want to take this seemingly transparent image which really isn't looking in the layers panel. It still has that white, and in order to make it or actually bake in the transparency, I'm gonna select both my blank, transparent layer and my seemingly transparent layer. And I'm emerged those together and, as you know, with merging things together, it usually flattens those hole things. But this does the exact opposite. If I merge them together using my command E. It actually gives me my translucent image with the translucent layer. Totally bizarre, but that's what it does. So now I have my water and I could take this and they could turn on my other layers here, and I could see that. And it's like, Okay, that's kind of cool. I got that. And now what I love to do is I'd love to be able to go in and take my water here and put it in here and do something fun with it. Well, I'd like to show this water being poured into this blue bottle, so I'm gonna go with them and transform my glass here, make it a little bit bigger. I've got my water kind of pouring in there. And if I look at this up close, you know, you look at that. You're like, Seriously, that looks like it's right in the bottle. I mean, it's really hard. Teoh differentiates like I mean, if I were looking at this, it's like you could see it right in the glass. You can always mess with the blending modes on this layer to see if it's gonna blend any better. So if I select my layer with my move tool, and I use my shift. Plus that allows me to walk through the different blending modes. And some of them, like multiply, makes it look even better. You can't tell that the water bubbles are not coming from the glass inside, but clearly we still see the edge of the glass all the way through here. So that's where we're going to go win. And we're gonna create a mask so that we can hide these portions off our water glass here. But I want to do something even more fun. I want to make it look like by ripping the metal here. I'm gonna put on top of right there, actually has the water coming out of it, and it's actually filling itself, you know? I know. Why make something? Why make something easy when you can make something very difficult, even more difficult? And not only can we think in the fourth dimension, but we and then we can introduce channels as well. Yep. So on my water, I would like to hide the things that I don't want to see. So I'm going to simply select my water layer and I'm going to apply a mask. I have nothing selected. So nothing is going to show up on the mask If I have nothing selected and it's gonna be completely white with a mask black conceals white reveals. So I'm gonna take my brush and I'm going Teoh, make it a fairly large brush with a fairly soft edge and do shift left bracket to make it softer. Shift right bracket makes it a bit harder. And on my water layer, I'm gonna go in. And I can just kind of paint away those bits of the water glass that I don't want to see. All right there. And there we go. Make sure that's not selected. I want to get rid of all that with the water glass. Right there. Need to make sure that I'm actually painting with 100% black there. Make sure I'm on all my channels. Yeah, and make sure I'm asked that out. OK, so why am I still getting that little ghosting? That as well make sure my capacity is good. The brush is good. That's the problem. Nothing like painting within opacity of 34%. No. Okay. Painting on the mask should hide that entire thing. Double click on that. Density is good. All that well, that's quite interesting. The mask is supposed to completely hide. Absolutely everything. Got that? Got me stumped on that one. That should all be masked out. Painting in black on that layer 100% black. There we go. Didn't have it completely dark. OK, I'm gonna get rid of all that. Get rid of all my extra water that I don't want here. I'm just painting with black on my mask. If I want it back, I just go back into my mask and undo what I've done. And there it is. So it's all nicely hidden. I'd love to have the water coming out of this little crack right here, so I'm ask it down to the point where I kind of see it coming out there. This doesn't look realistic here. It looks realistic here because we've got to go in and do something with this here to make it look like the water's coming over the edge. But for now, I've gone in and I've simply mask that out. So there's my layer, there's my mask, and it's hidden that right there as I get down to the bottom of my water bottle here, I want to go in and I want to mask this out as well so I can go in and they can mask this out. And I'm just using my brush tool to go over this Mask it out If I go a little bit too far, I can always go back and painted white and white's gonna reveal black is going to conceal And then I'd like to go in and match my edges of my blue water bottle Take my layer and I'm gonna cut back the opacity a bit So I can kind of see the con tour up That's the way nowhere to take my brush and mascot out So take my brush and I'm gonna want a harder edge on that one shift right, Brackets going to give me a harder edge and I'm gonna go in And what I do is I hold down my shift key and I'm going to go in course do it in black so I can hide it and I click And I hold down my shift key as I go And when I hold down my shift key that is going to draw line every place that I click kind of like a dot to dot So if I go, we end and I click here and I shift. Click over here. It's gonna draw perfectly straight line in between instead of having to try to paint manually. So I put a dot there and then I shift click, and it connects the dots with holding down the shift key. So this allows me to go in and paint. The edge is basically in a straight line to take my opacity of my layer back up again. So now I have my water being poured in here and I said this to multiply, so it looks a little bit more realistic. I can control the opacity of this. If I would like Toa do that, if I want a mask out these areas a little bit more, I can I could go in with my brush and set the opacity of the brush way down so that I could paint on my am ask ever so slightly. Just a tone down. There was a bit, and of course, whenever I do that, I want to make sure of a very soft edged brush. And then I could go in and I could simply a mask out, not paint on my layer, but mask out to kind of bring those a little bit lighter in there. OK, so there is my water inside the glass right there. Looks pretty convincing. Sure. Could you imagine trying to put bubbles in there? And you will forget it. Yeah, not at all. Not gonna happen. I mean, my mask looks kind of funny, but whatever it does the job, So now what I'd like to dio is I would like to make this water actually look like it's coming out of the crack right there. In order to do that, What I'm gonna need is I'm going to need to be able to get that kind of area of water selected that I could then put some white behind it or something to kind of bring out the depth of that water because right now it's just completely showing through to the blue bottle. So how do I go and get access to that? Well, I'm not going to do this on this layer, because that's just simply gonna hide that layer right there. What I'm gonna do is I'm going to you go to my bottle right here, and Aiken, take my bottle. And I'm actually going to mask out part of the bottle. So I don't see that blue in the bottle. So on my mask, I can take my brush. I can go in and paint with an opacity here. And I could go in and kind of paint with a soft brush my water to make it look like I've got a little bit of water coming through here as well. Clean that up a little bit. Mawr get close to the edge here and now we can make it look like I have the water coming through and kind of make it look like the water's pouring out. Now, if I've done this a little bit too much intensity, I can always go back with my brush tool, and I could paint over it and white. So if I go back in with my brush tool on a paint with white whites, gonna go ahead and knock back the amount of mask. But I'm gonna do that in a very light opacity. Here so that when I go over this, Aiken just paint us back a little bit at a time just to make it look like it's getting just enough information through there that the water begins to pour out. Now, I realize that I'm gonna need to have a little bit of the water coming through here is Well, we're gonna get to that because that looks fine coming out. But I need to have it kind of pouring out through here is Well, we're gonna get to that. So right now it's starting. Teoh look a little bit different than when we started. We're just option click there. That's what it looks like. And now we've got that one. The other things that I would need to do is create a reflection of this area right here, because I've got the reflection of the blue bottle. So I'm going to want to create a collective reflection of the bubbles because heaven forbid you should ever post this because people go crazy. Saying doesn't match simple. So what I'm gonna do is I'm going to click on this layer that I have with the mask and with my move tool, I can simply duplicate this. I can just right click and say Duplicate the layer and I get that. And there's my duplicate layer. And what I'm gonna do is I'm going Teoh, enter into my transform mode, do a command t for transform when you right click inside my transform bounding box And I'm just going to say flip this vertically I was gonna flip it upside down and I could then go and take my water and I could bring that down so that it matches right here so I could bring that down to the bottom, get that right in there where it should be and probably need to do a little bit better masking on that this portion I have not masked out because this was hidden beyond the edge of my page. So simple way to do that. I could just select that area on my mask and then fill it with white. So it complete air filled with black, so it completely hides it because it's a reflection. It's not gonna be at the same intensity. Gonna be much less intense. So I grabbed that layer with my move tool set the opacity way back so I get just that basic reflection and to make it look even more realistic, I wouldn't see the bubbles in the thicker part of the glass as much. So I'm going to take my mask here with my brush tool, and I'm gonna paint in black. But a slight opacity with this and be able to do this mouse is sticking right there and I'm going to go and I'm going to paint mawr so that I see less reflection on I do with a very light opacity so I can go over it several times. I realized it probably should do the same thing here because those bubbles, we're not gonna look realistic unless I mask out more of that area. And these were all done in the mask, so I can always undo what I've done. I haven't deleted any of the image. So now my masks are starting to look really weird. But as long as it's looking good on screen, we're all set unhappy. So there's that
Class Materials
Bonus Materials with Purchase
Ratings and Reviews
Tomas Verver
:) Some nice ideas about how to make advanced compositions. I don't use the channels for things Jason does. I don't use often the channels for selecting though. I liked the ideas the instructior has for nice compositions. Is it a complete course? No, is it still fun and nice to view when you have an account for full acces? Yes it is!
Oscar Javier Gallardo
Awesome! i learn a few cool tricks that definitively i'm going to use on my next projects. Thank you a lot.
Kimberly DeVos
Jason Hoppe is so easy to understand and explains things so well and in an interesting way. I have several of his Photoshop and Illustrator classes. He's an awesome instructor.