Lesson Info
4. Complex Selections: Using Channels
Lessons
Lesson Info
Complex Selections: Using Channels
when you take a photograph of things and you want to slide another background underneath this because this backgrounds pretty boring. And so you might come in here and use a tool such like the quick selection tool, possibly in select this object just by painting over it now, usually I'd be more precise than this in that I'd be critical of what we have. I'd zoom up and make sure it really looks exact, and I touch it up if it needed to be. But for now, I'm going to say, that's good enough. I could come in here and then add a layer mask, and if I did, everything else would disappear and we've temporarily hidden What's there, Then I want to put a different background in. I want to come in here and maybe for now, put a solid color in. And just to pick something, I'm gonna go for kind of a yellowish. Hopefully not that saturated or something more like that. That's the color I want to put this on. I'll drive this underneath, and now I can notice that I messed up on the letter A in Canada beca...
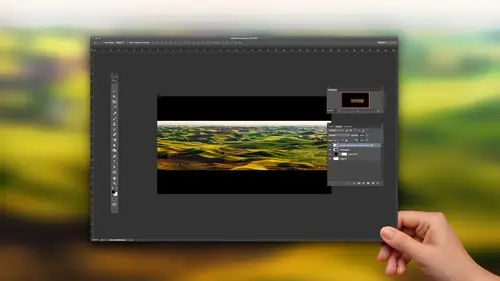
use I could see the color showing through there, but I find just click on the mask for it and grab my paintbrush tool. Penny with White would allow me to just bring anything back. But what's missing is what I often see in catalogues. They're good catalogs, and there are bad catalogues when it comes to production value. And the bad catalogs have all the products floating in mid air, and they will simplify the graphic by removing the background. And then they just let it sit there and it feels like it's floating, then a good catalog. What they'll do is they'll put a shadow under it in that shadow, grounds it to the page, and it just feels like the product is just sitting there on the catalogue page. It looks great, but most of the time those shadows are fake and you can tell they're fake because the shape just doesn't feel right. It feels too simple. Here's how we could take the shadow that was originally in this picture and use it, but we can slide any background we want underneath. Let's take a look. I'm gonna go to that layer that's above I'm gonna duplicate it, Command J. Then I'll work on that middle layer, and I'm just going to throw away the mask. Delete it. So what we have is if I turn off all my layers is on the very top. We have the image with the background removed on the very bottom Is the background like to put it on? And this could be anything. It could be a photograph of wood. It could be whatever you want. And then I have the middle layer, which is just the original sitting there. We're gonna do our work on the original layer, that middle one. And here's what we're gonna do. We're gonna try to make sure that this the background out here is solid white all the way around this solid white. And I'm gonna do that by coming over here and doing adjustment called levels in levels. There's a slider in the upper right, this one which forces areas toe white, and it will show you what's become white. If you hold on the option key, which I'm going to do right now, that's ultimate. Does I'll pull this in and I want that white that you see right there, ignore the colors. Just look at the white to go all the way around every side of the document right there. You notice it's going all the way around. Well, that area showing me exactly what part of the document has become solid white, the area that's in color or is black. It's not solid way. It's got shades of gray and stuff in it. So there I could let go and click. OK, now I can take that middle layer, and there's all sorts of things I can do to it. It all depends how fancy I want to get. If I don't want to get that fancy, I'll change my blending mode to multiply. Remember, multiply means print like ink. And if you were to print that shadow on top of the background, as if it was like ink, it would just darken it in the areas that are full of white. How much ink was used to print those areas you use none, so it wouldn't darken what's under it. So now can you see the shadow sitting there? That could be any background in the shadow will be just sitting there, but I want to get fancier than that. I want to deliver this to a client where that thing is just sitting on a layer and it just has a shadow underneath it. It looks almost as if I painted the shadow in So we're gonna get little fancier. I'm gonna hide the top layer and I'm gonna hide the bottom layer. So all we have is that middle layer That's the layer that contains the shadow. And here's what will dio There is a way to get a selection out of this layer based on its brightness. And it's a weird technique. What you do is he go to channels in in channels. You move your mouse onto the top little thumbnail right here, you hold on the command key control windows and you click on it. If you do that. What you just ended up with is it looked at the brightness of that layer. And if there is any area that was solid white, it got completely selected. Just now. If there's any area that was 10% gray, it became 10% selected. If there's an area, 40% Gray became 40% selected and so on. So we have a selection based on the brightness of this image. The only thing is, I don't want the background selected. I want the exact opposite. So to get the opposite, I'll go to the select menu and choose inverse that gives you the opposite. Now what I have is actually the selection I describe because the selection was a little bit off when I said 10% Gray is 10% selected. It was actually the opposite a second ago. Meaning if it was 10% gray, it was 90% selected. We now that we chose inverse, we have it all right. Now, what I can do is the row away that middle air. I don't need it at all. And we're just gonna create a brand new layer. We can come over here and just do a solid color layer and we can pick any color we want for our shadow. Mom, she's black. Now I know you can see the object in here, too, but that's okay. We have the very top layer the top layer contains The object itself will turn that on. That would make it so you can see through and turn on our bottom. Okay, We have the same end result But now it's done in a slightly different way in what's nice is we could then start merging things together. In fact, let's do it simplest way. Let's create a new empty layer and just merge these three together these three layers. This contains the original object. This just had the background removed. This contains are weird shadow and little pieces of the original, and I'm just going to choose merge layers. And now it's all in one layer. It has no weird things attached to it. There are no layer masks. Attash. There are no blending modes involved. There's no nothing. All it is's this object and its shadow, and you can put it on top of any new background. So I know it's a weird technique, but in the end, it's kind of weird, but we actually use the same technology that we used for the very first technique that I described. Do you remember when we had the little pirate graphic thing with the little knives in the skull thing? And we got a selection based on its brightness value? Well, it's the same technology you just used in a different way, and if you practice it enough, you can reproduce it each time. The main thing is when you photographed this object, it needs to be on a solid colored background or a background that just has very little detail. Because if that was like a tile bathroom floor, you'd still have the grout lines and there and things need to be a pretty simple image. But it can be done with things like I've done it on this particular image, this background here. The only thing is, when I was done getting this isolated, I think I needed to blur at the tiniest bit because some of these little specks were still in it. Uh, and I needed to manually remove this shadow up here because I didn't want it, but I was able to do it with that s so it doesn't have to be a solid white background. It just needs to be pretty simple.
Ratings and Reviews
Frank Lombard
Ben, THANKS, you always make your classes a pleasure and informative opportunity, Keep them coming !!!
user-1c9a21
Ben is fantastic as always. Has a way of getting directly to the point and packs a lot of information in each of his classes. He's my favorite instructor.
Terri
Watched this cass live during Photoshop week. I think I'm going to have to buy it. Amazing stuff here.