Lesson Info
5. Complex Selections: Using Refine Edge
Lessons
Lesson Info
Complex Selections: Using Refine Edge
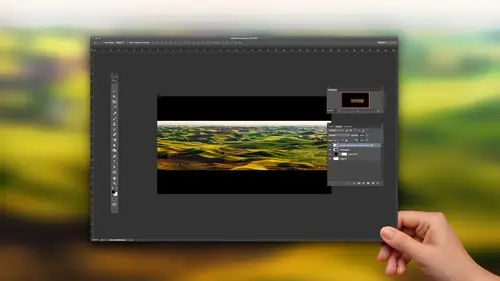
remember, this is advanced tips. So we're going into a bunch of little weird areas and just doing a bunch of combo things I don't expect it to be where you pick up every little thing we dio. I just expected to be like a few areas where you're like whatever it is you do a lot of if we get to that area of Photoshopped that you suddenly get a few little nuggets that can really change the way you work. But using all of this could take a lot of practice, and that's why you'd want to play this over and over again and then actually practice on. Now, how can I select this thing at the top in this fuzzy stuff on the sides? Now, you might be thinking, while the background looks a little bit differently, I could try the background eraser because we used that on trees and we used it on, Try to use it on smoke and all that or since That's pink and there's not much other pink in there. You could try to use something called the color range, but I don't think any of those will be ideal. What might be ...
more ideal is if I make a basic selection. And here I'm using the quick selection tool to get the general shape of what I want. And I'm going ignore the part down here. Just because we're concentrating on Furry Fuzzy and Harry things, that would be the more difficult things to select. This stuff's not difficult, so I'll ignore what's down there. And so I get this general selection and I'm gonna go to the select menu then, and there's a choice called Refine Edge and with refined edge. It first shows me what it would look like if you would have just had the selection that was there and you chose copy. Then you pasted it on a white brand new document full of white. You can change the preview up here. This is area called view, and oftentimes I like the choice called overlay because in the choice called overlay, I can still see the original background in all it does is it puts red on top of the areas that were not selected. It's a little easier to see what the edge looks like to me in that for you. Then you'll notice that in here. There's a whole bunch of sliders that you could use to adjust things. We're gonna ignore all of those sliders and we're gonna concentrate on this little tool. The tools already turned on. I didn't have to click on it. It's turned on by default. Once you choose refine edge, it's automatically there. And all I'm going to do is move my mouse out on top of the picture and you see the areas where the red stuff is on top of the stuff. I really want to keep a little fuzzy things. All I'm gonna do is move my brush over that and I'm just gonna paint wherever the red stuff is covering up what I wanted to keep and I'm not being overly ah, precise. I'm being rather general and watch what happens Then when I released the mass button, did you just see the red stuff move? Now the red stuff more precisely, matches that before it was showing just what I had in my original selection. Now Onley where I paint, I'm giving Photoshopped a chance to try harder. Teoh actually enhance what I have. So I still see some stuff over here covered with red. So I just click and I paint over those areas when I let go is when it Recalculates just that part. And what it's doing is it's comparing what was covered with red to what wasn't in it, saying, OK, let's pull this red stuff in long as we're pulling it over areas that are similar to what's covered with red and let's prevent it from going on top of stuff that is similar to what doesn't have red on it. So I'm gonna come in here, just paint over a few more of these areas to see if I can get this to be a little better. Heck of a lot better than then Let's go over here to where it's fuzzy around this edge. Let's do the exact same thing. Just paint over where the red is covering up, do the same thing over here wherever the reds covering stuff, okay, And maybe down here where I see some, here's and over here, all right. But now I'm gonna change my view of the image because having that red overlay helps for some things, but not for others. I'm gonna change the preview by going to the top of the refine edge area. And I said it toe on white again so we can see what are in the results looking like so far. And now I see areas where some of the old background is still in there, clinging this stuff up here, Do you see dark stuff in the middle? Well, all you gotta do is come in here and paint over where you see those areas where the dark stuff showing up and it should refine it. It might not make it perfect, but it should help because those areas where I might not have painted yet And that means Photoshopped does not have control over what's happening in those particular areas. So wherever I see old parts of the background clinging to what's left, I'm gonna paint over it and see if it cleans it up. Not always gonna be perfect up here. I see a bunch of it. So a paint over big area where I can see background showing through seem with over into here it's starting to clean it up. Then if there is an area where you need a deletes and stuff away, it's just blatantly sitting there and shouldn't be. There is actually a choice in the upper left. It's this thing, and that's more of an eraser. Whereas this is a this was giving Photoshopped control. This is going to take control away from photo shop, and I don't usually click on it. I usually just hold on the option key. As long as you have option held down. It's the same as temporarily clicking on that. And now I'm gonna come in here in If I see some areas where I think like right in here, that looks like a little bit of fuzz. The whole optional pain over. Take away control and see if I can get it to clean up. Some of those areas might not be completely successful in this particular image, but often times I will be Let's see if it works a little better down here, where I'm gonna tell it to blatantly delete some of this stuff and I might need to repaint it in if I screwed up Too bad. But they're, um over here. Hold on. Option is I do it. See if that thins it out a little bit too. A little fly away here. There now it. Still, though, there's an issue at the top. The top. It's just looks too dark appear compared to that background. Well, when you think you're done cleaning things up, and I could spend more time cleaning here. But right now I want to concentrate on other tips. Need to get through this. And that is there's a check box here called decontaminate Colors. Right now, it hasn't shifted the color of anything at all. It's just made things disappear. A show up. But if I turn on decontaminate colors now, the areas that are partially transparent were slightly see through things. It's gonna be able to shift the color. And as I bring up the setting called Decontaminate Colors, what it's gonna do, it is gonna look inside the area that we're keeping. It's gonna look for the first part where it's not partially transparent, and it's gonna take whatever color that is and push it out into the transparent areas, the partially transparent ones. To shift the color towards that, there's a slider here called amount in the higher I bring it up, the more aggressive it will be. And so if you watched the top of this image Look right up in here. If I bring decontaminate colors way down, you still see a lot of that dark stuff. And as I bring decontaminate colors higher, you'll find it's shifting the color more in those edges so they often match the background a little bit better. When you're done, you can click, OK, and now we can continue on this working the same way we did with the tree you remember with a tree. We ended up creating a new layer on top. We clipped it to the layer below. So whatever paint I put it on, Lee showed up where that is. And I could just paint in a little bit of light white on those edges like a lower opacity toe, lighting them up more. But for now, this is a Sfar, as I'm going to take it because we need to get on to other things, not just selections. So that is called refine Edge. You need a selection. Start with selection of the basic object. You want a paint over areas where that red overlay was overlapping. What you wanted to keep, that's what you do to start with. Then you change your views your seen it on a white background, and now you're looking for parts of the background that are still there. And you want to paint over those, um, and then you have the choice of decontaminate colors. There's a lot more you could learn about it, but in this class, I just want to make sure you were at least somewhat familiar with it. Are there Ah, general questions and comments in that area you covered? I really like this refine mask. Do you cover more this in a different class ideo? I have all sorts of classes on creativelive, and one class I have is actually a series of classes that's called Photoshopped Mastery and then Photoshopped mastery all have, like, an entire day on selections and masks that comes up. So instead of here where we have, what, 15 20 minutes, we can spend a whole day on the topic. And so that's one of the Siri's would be the photo shop mastery that I think would hit on this topic in more depth. In case you're not aware I have. I'm just guessing at the top of my head like 40 classes on creative lives. So if you look through my catalog of classes, you'll find me covering most stuff
Ratings and Reviews
Frank Lombard
Ben, THANKS, you always make your classes a pleasure and informative opportunity, Keep them coming !!!
user-1c9a21
Ben is fantastic as always. Has a way of getting directly to the point and packs a lot of information in each of his classes. He's my favorite instructor.
Terri
Watched this cass live during Photoshop week. I think I'm going to have to buy it. Amazing stuff here.