Lesson Info
7. Batch Processing in Adobe Camera Raw
Lessons
How to Master Adobe Camera Raw
20:36 2Create Better Black and White Images
07:38 3Creative Color Adjustments
15:46 4Retouch Away Distractions
09:36 5Paint in Adjustments with Adjustment Brush
10:23 6Use Radial and Graduated Filters
13:59 7Batch Processing in Adobe Camera Raw
06:32Lesson Info
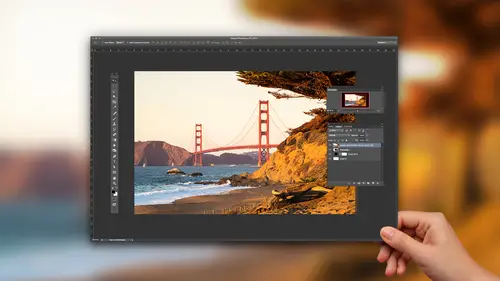
Batch Processing in Adobe Camera Raw
This is a little bit about speed workflow. These photographs were shot near the middle of the day, but near middle a day is great time for high contrast black and whites, which is what I want to dio So shift option command G because that's my shortcut to hit that gray scale thing. Windows shift all control G. And in there I know that I like to have skin tones that are bright again, just my own style. Here's yellow. So maybe I bring those up Basic panel Um, look at just trying to style whatever. The contrast is for this type of an image and actually looks like I need to bring that grass down a little bit. So this is the look that I want for this image and the ones that follow one way that you can apply that settings to multiple files is you can select a file and click on the fly out menu right here and here I'm gonna do is choose select all click on the fly out menu again, and then she's sync settings. This is going to say, Hey, what do you want to sink? I'm gonna say everything I want ...
to think anything I've done to this image to everything else. And what that will then do is it applies the settings to this to the group of images. Advantage, obviously is that it speeds up your workflow immensely, and sometimes what you'll need to do is find tuna specific image. This one. You know, maybe it's a little bit. It's too bright on the face and the overall exposures a little bit too bright. I can get there a lot quicker than having to go through my whole routine. So batch processing or processing multiple files is one of the secret weapons. I remember talking about spot healing dust in the sky with those images. I'm not gonna do it, but I could fix the dust and one apply it to all the others. And so then those dust that were on my lens didn't change positions. It then applies them or color or whatever it is. You forgot to sharpen all your images, select him and just synchronize the sharpening, right? So in that case, it might be, you know, here I'm going to go in and say, Well, I want to sharpen certain way with those settings. And then I'm going to command a this time to select all or just to select all and then sync settings. But I don't slink sink everything, right, because I changed one of the images. So the only thing that I want to do is the sharpening. And so now that's the only thing it's gonna take and applied all the images. So it's gonna fix up that thing that I forgot to dio right with you on that. So that's one way that we concert to synchronize adjustments. Another way back to my body here with the boat is sometimes we'll work on a photograph and will craft a look. Yeah, let me just create a little fake look on this image. Let's say that this this is the aesthetic that we're going for here with this photograph. And just so we can really see it, let me out of and yet to it as well again, I'm not trying to win an award with my look that I'm creating, but I just want to have something that you guys can see what it is inside of bridge. You can actually copy and paste cameras setting, So if you right, click or control click. What you can do is you can go to your develop sightings. Here you can apply any pre set you have, and you or you can choose copy settings. Move to another image and there's a faster way, of course. So just give me a second and choose paste settings that says, Hey, what do you want to paste? I want paste everything. And then this image now takes on the same look as the previous image. So these two are now have the same the same processing. Another way that you can do that is by way of shortcuts. So here I'm just pressing a keyboard command. It's command options. See, to copy, select new images, Command Option V to paste. That's Mac windows that's gonna be control. See envy and copy and paste. I'm not even actually going into, you know, any other dialogue, just a quick little shortcut in order to get the images and the same the same space and then last not least, you can also select all of them. And if you have a preset that you think, oh, I don't know might work, you could just select that from your preset pull them in you there and then apply it in this way as well. So if you have presets, you can apply it to groups of images and all that this does is it just speeds up the way that we start to process and work on our files. And with that, I hit everything, everything that I wanted it. So we got there. Do you guys have any questions on any of these topics? Yeah, I do have a question. You said you use both light room and bridge. And so which one do you organize your photos? Because you wouldn't organize them in both. Right. So majority large, large majorities, light room. But there are occasions when well, I'm on location or my laptops died, and I don't have my light room catalog with me. And I need to process files like, let's say I'm here and I need to use Drew's computer. I would just quickly jump into camera, get through it, get it to the client and be done with it. So for me, it's more of that type of a use. Um, I know they're other people. I teach you love bridge and camera workflow. And that's their thing. And that that's okay as well. So they're both valid, I think light rooms better, but they're both Fallon. Cool. We haven't question from online. Not sure if the question oppose it. How do you delete? Only one of the adjustment brush is and not all of them, Like a clear all Don't know Chris are? Yeah. Let's see. Um, so great questions. So with these little pins, which I didn't hit, so thanks. Whoever gave that questions a great one with the pins. It's a matter of just clicking on it. So I'm clicking on the globe, and then I hit the delete or backspace and then it will take care of that one. If I hit on, click on that when it deletes that one there as well. Okay, it's a matter of targeting the pin and then deleting it. Same thing can be said with our other adjustments. Selective adjustment tools as well off the radio ingredient, too. It's a great question. Great one. Yeah,
Class Materials
Bonus Materials with Purchase
Ratings and Reviews
MikeD
This course is a follow-on to Chris Orwig's "Beginner RAW Processing" and you should watch them both, in order, the get the best value in using ACR CC (Adobe Camera RAW Creative Cloud) for it's full effect. I would also say it borders on the criminal that after all this time Adobe keeps ACR, Bridge and Lightroom alive simultaneously.. While there was a time when they made money selling multiple apps, recent subscription models make this a waste of time and money, both for Adobe and we users because they have to keep programming teams alive to keep them separate and there's very little return on that investment when not selling these apps separately. While it is true, these apps are not equivalent, the little differences they bring to the table could easily be combined into one app and drop the other two. However, I'll get off my soapbox and talk about this class. Chris has a terrific presentation style and provides some great personal insight into how and why you would use certain elements of the tool. It's that insight that makes this training better than just reading a book on how to use ACR. I honestly seldom used ACR. I would look for my files in LR and use that tool for all my touch up work. On iamges where I knew I would be performing a great deal of touch-up, compositing or the like in PS, I's browse for the image in Bridge, make some broad touch-ups on the folder and then just go straight into PS. Having watched this class, I am changing my thinking and running ACR as a separate app and doing most of my touch-up, even on JPGs using ACR. It has much finer control and still allows you to enter LR or PS if you want to get into more specialized touch-ups. This class will help you get the confidence where on many shoots you can go from camera to ACR to customer. The two classes are fairly inexpensive, although I would question they could be rolled into one 2 hour class instead of two 1-1/2 hour classes due to overlap, but they are worth watching to gain some great insight into how to use ACR and why.
Denise
LOVED this class! Lots of quick and easy-to-understand tips that are presented in a very clear, intentional and organized way. I found my jaw dropping open a lot because I couldn't believe how easy it is to make adjustments in ACR after I've been doing things the long and hard way for too long. This is worth its weight in gold. Really great tips.
Pamela Richardson
Highly recommended! Chris Orwig is an excellent teacher, and very generous in sharing his knowledge. For more details, please see my review on Mr Orwig's class on Beginner RAW Processing.