Lessons
Define Your Folder Strategy
15:36 2Tips for Identifying Favorite Photos & Using Keywords
21:15 3Add Location Information to Photos
11:57 4Efficient Approach to Optimization & Basic Adjustments
04:26 5Optimize Individual Colors
05:33 6Understand Noise Reduction & Correct for Distortion
13:07 7Sophisticated Targeted Adjustments
06:00 8Maximize Template-Based Sharing
12:19Lesson Info
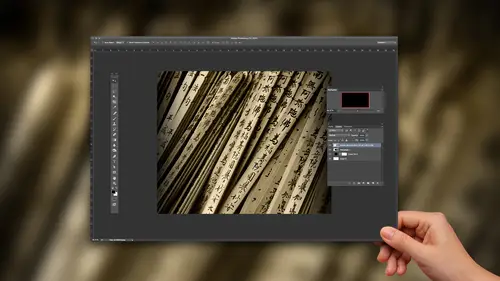
Sophisticated Targeted Adjustments
I want to show you this really, really cool capability. Now let's take a look at this image. I want to apply an adjustment to the sky. So we've seen an ability, for example, to apply some basic tonal adjustments that could have a big impact on the image. We've also seen how we can take individual colors and fine tune them, even lightening and darkening. But that's based on color in the photo here, if I want to adjust the sky, I mean, we've got some blue, some yellow Samora. I mean, there's a whole lot of stuff going on here. So how can I apply an adjustment to the sky and I'd actually like to have it be ingredient fashions. I'm going to switch to the develop module, and I'm going to switch to the Grady Int filter now. We've got a variety of options here in terms of our targeted adjustments in terms of actual adjustments for the image, though, there's really three so we can work in a Grady Int fashion with the graduated filter with an elliptical shape so we can focus on just the center ...
in an ellipse or the outside of the image in an ellipse sort of like a vignette type of in effect. And I can use the adjustment brush I can paint into specific areas of the photo. But in this case, I want to use the Grady in because I'd like tohave adjustment for the sky. That sort of tapers off. As we get closer to the horizon, I think it'll make it look a little bit more natural. So when I choose that graduated filter, I can apply any number of adjustments. I'm gonna start off with a wildly exaggerated adjustments that I can see exactly where I'm working in the image. So, you know, maybe something like that will work pretty well. So I've defined my Grady int. I'm starting at the top of the image somewhere in the middle of the sky and working my way down with that adjustment tapering off as we move down through the rest of the photo because again, I'm focusing on the sky and I want this sort of natural tapering off of the effect I don't want to under exposed to reduce the exposure for the sky by four stops, someone bring that back up. In fact, I'll just reset it to nothing. I think maybe I kick up the clarity for the sky. May God increase the saturation for the sky, you know, shifted toward maybe a little bit more bluish value just a little bit and kick up some contrast and darkened down the highlights and whatever it is that I would like to do for the sky. But for our purposes, I'm gonna make these adjustments a bit extra exaggerated so that we can better see what's going on for the next step. In fact, I'm going to bring back some of that darkening adjustment because if I hide the markers for the Grady Int, you might notice that my adjustment is flowing down into the actual image itself, the foreground area. So I've got the sky that I'm trying to adjust. The top of this guy's going to be fully affected by my adjustments that adjust. It will taper off. The problem is, I chose an area to photograph that had these large rock formations in the foreground. I should have found a nice flat area of desert so I could apply a great aunt adjustment more effectively except not as interesting without the mittens there. So now what am I going to do? Well, fortunately, we have a new relatively new all things considered feature inside of light room with the graduated filter and with our ability to apply an elliptical adjustment as well, we can use essentially the brush, the adjustment brush inside of the graduated adjustment, for example. So I'm going to choose, not the adjustment brush itself, but just the brush option associated with our graduated filter soled shoes Brush. Gonna scroll down here will take a look at our brush settings I want to erase. I've defined a graduated adjustment and I want to then erase certain areas of that adjustment. I do not want certain areas of the image to be affected by that Grady int. And because I'm not very good at drawing, I'm going to use the auto mask feature. So I'm going to work in a semi automatic way within the image when I'm erasing, letting light room find the edges of the areas that I want to erase otherwise at the trace. Very, very precisely. Especially with a live studio audience. I'm far too nervous. I would never be able to trace accurately. Plus, I can't draw to save my life. I'm gonna turn on that auto mask feature, move out into the image, All increase that brush size just a little bit. And what I need to do now is to keep the center of that brush inside the butte inside the mitten. But I need to let the circle of the brush overlap with the boundary with the edge of that view. So we'll start off here. Once again, I'm erasing the adjustment effects. I'm gonna click and keep that mouse button held down. Notice that the center of the brushes inside the beauty but my brush circle is extending outside of the Butte ago. Let's make this much bigger so I can work more easily because it's very high pressure situation. But it can keeping the center of that brush inside of the Butte, and we're automatically removing the adjustment from the Butte buttes but without erasing the adjustment in the sky itself. Is that the most amazing thing you've seen all day, or what it is for me? So now let's go and look at our adjustment Now if I alter the adjustment, hopefully if I did a good job painting This is always the test. You can see that I'm affecting the sky in a Grady in fashion, a stronger adjustment up top and down below. But I'm not messing with the foreground. That is remarkable. Now. Obviously, I've made some extremely exaggerated adjustments here, so I might want to find Tune that just a little bit will turn off the adjustment of back on. Still, obviously a little bit strongest to make a little bit easier for us to see here, but again, a graduated adjustment that is not affecting the sky.
Class Materials
Bonus Materials with Purchase
Ratings and Reviews
skip22037
The Advanced Workflow class was very helpful. I appreciate the extra material that come with the class, i.e. Tim's presets and the 8 lessons I have downloaded. However, I needed help with the downloading of the presets and there were no directions. I figured out how to download them to Dropbox and/or to a folder on my desktop, but I don't know how to install them in my current version of LR, which is Adobe Lightroom CC. I needed a help button, and there is none.
user 0d6f29
I found this class to be helpful with workflow techniques but it's almost identical in content to Tim Grey's Beginner Workflows and his other Lightroom courses. I would recommend the course but not to watch all of the courses as there's lots of overlap.