Lessons
Day 1
1Class Introduction
05:10 2Direction of Light: Setting The Mood
07:57 3Metering
34:21 4Understanding Dynamic Range
13:46 5Understanding Histograms
22:37 6Effective Size: Hard vs Soft Light
09:29 7Understanding the Inverse Square Law
19:41Light Modifiers and the Shape of Light
34:14 9Controlling Light with Grids
22:28 10Watt Seconds and Other Important things
14:15 11Color Theory Part 1
19:55 12Color Theory Part 2
35:23 13Calibrating your Monitor and Printer
27:38 14Mark's Lightroom Workflow
22:07 15Exercise: Purpose Worksheet
34:03 16Failing with Purpose
13:22 17Example: Prep Shoot for Testing
40:37 18Special Request: Pricing
58:05 19Creativity: from Idea to Product
41:26 20Sharing your Ideas: Making the Plan
05:58 21Working with a Team (Snapfactory)
28:40 22Working with Models
27:30 23Commercial Shoot Workflow
10:36 24Q&A
07:12 25Set Up Studio Environment
13:46 26Planning The Live Shoot
21:29 27Dialing In The Lighting
18:13 28Q&A
15:49 29QuickTestShot
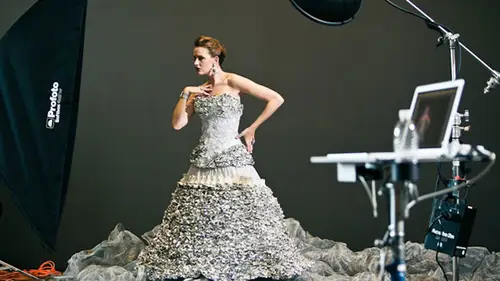
08:52 30Photoshoot Foil Dress With Carly
34:17 31Lightroom Workflow
26:23 32Q&A
14:21 33Preparing for the Second Shoot
16:30 34Photoshoot: Deep V Dress With Michelle
40:12 35Photoshoot: Closeup With Michelle
14:24 36Photoshoot: Tether Tools Table
09:29 37BONUS VIDEO: Lunchtime Q&A
11:21 38BONUS VIDEO: Quick Ad Mockup
01:18Day 2
Day 3
Lesson Info
Calibrating your Monitor and Printer
We're gonna talk about calibrating monitor calibrating printer and there are are several different solutions for this when I have is called the color monkey so the best product name ever okay um first though we need talk about this thing because we said earlier that we have to be ableto have a solution calibrates from capture to screen toe output we have to be able to do all of those things so this, uh, normally I recommend getting a system like this where you have this which is the color check her passport from x ray and this is the color monkey and these two things work hand in hand um I got these about two years, right when this came out I grabbed one and I've been addicted to it ever since. So I love these things so I know what this does is it allows you to calibrate your cameras with the cameras capturing. So what will happen is this and I'm going to tell me when I'm so close that you can't see it anymore because I get there okay uh what's happening is you have a color check her p...
alate on the bottom was recalibrated colors then you have a post production tool on the top work back a bit so what happens is when you take a photo you can put this on a table like that let's get this little thing or uh for model portfolio or shooting product you put it right next to where you're shooting so I've got don't know how many models doing this on what this does is when you have that first you have to make sure that your your exposure set correctly after it's set correctly you just take a picture of this what it's looking for is we have this purple and we have this red and we have this yellow we have this teal and all these different colors and their software that you can install in light room and there's another software install that works outside of light room but it's much easier to use light room and what that software does is when you bring in that set of photos the first photo you have is a calibration target and it looks at that and you can say okay we need to make sure that all of her color is right and you take that photo and the software looks at this part of the color checker and it looks and says ok this was supposed to be blue but it's actually a little bit not blue aqua aqua and this is supposed to be black but it's not this is supposed to be teal but it's not and it knows what it should be and what it is and then it figures out what the differences and it creates a color profile for that specific lighting setup so I only get thes anytime the light changes I'll get a new calibration and so what I do is when I bring that into light room uh run that little software it makes this little calibration thing you have to close light room, you open it back up and then there's the panel that I'll show you and you can say here's what calibration I want to use and it will fix your colors just like that so what it's saying is what you captured is what you're seeing as long as your screen is also calibrated screen has to be calibrated as well so that's where this thing comes in so what this thing does it's called a color monkey it's got a little thing in its open this up there's a little hole right there and that actually looks at the screen itself and the screen is going to go through a bunch of different cycle's is going to show different colors and it's going to show different kinds of uh, brightness levels, et cetera and then what that will do is this is going to do the same thing that this did it's going to say we think we're showing red but we're getting us a little bit off and it will figure out what the difference is then it'll fix your screen they'll calibrate that and then what you can do it is you can make some prints and I'll show you that in a second, but first we're actually gonna do some of this stuff they're saying a calibrated monitor just to show you how easy this is on there are different brands of calibration tools that you can use the color monkey is the one that I highly recommend okay, so I'm going to spin this around so you can see exactly what's happening and what I'm going to do here is the very top of the screen here and go back to my finder very top of the screen um there is a little monkey I click on the monkey I'm going to launch color monkey photo is gonna launch this is giving me all kinds of tools um, so a lot of the tools that were going to be talking about ah, a lot of this stuff that we talked about with color theory the color monkey does it allows you to build color palettes you can like sample colors and he'll do complimentary split complimentary zittel do little analyze photos to tell you what kind of stuff is in there and it directly correlates with all of the stuff that we just talked about, so one of the things this is gonna ask us is should I profiled my desperate display or match my printer to my display? And so we're going to do the display to start with so I wanna say, I wanna profile my display and it says which one? Because it wants to know this one or this one because it senses both we're gonna do this one so we don't miss that one up. So, um, I'm going to say next when I go in here is gonna ask me what kind of screen is this that's important wants to know if it's a laptop or a projector and lcd screen, and it wants to know if I want to do the easier advanced so advanced it allows you to do some things, like set the white point for this place or some of the gamma stuff that we talked about earlier is going to ask you for that. It allows you to manually adjust the contrast of the screen and allows you to do some things that you may or may not want to do. But it's there I'm gonna go with easy because it works very, very well all ls it next? The next thing is going to do is it's going to ask me? It has a little diagram here. It says, hey, I need you to calibrate this thing, so I'm gonna rotate this and inside here, that sensor there's a little protected area in there and it's actually going in there and it's looking at that and it's calibrating it so I'm going to say calibrate there's a button on the side here and pushing to make this do that it's calibrating this device because this has to know that what it's seeing is right so as to make sure that it knows its own stuff um once it's done it's saying calibrated this is ok I'm ready to roll so it says justice so now it's looking at the bottom little holder I say okay, I'm ready to rock and roll it says okay place the color monkey here that's where this whole strap is on there so I can take this whole strap put this there it holds it so it'll counterweight so once we have that then I hit next it's going to go through a cycle of reds and greens and blues and different brightness levels and it's going to figure out is this displaying the color that is accurate and if not, what do I need to do to change it? So this doesn't take very long, so we'll let it go through the whole cycle. But one thing I'm not going to do I'm not going to accept the change is the reason I'm not going to accept the change is this because I actually have calibrated this for my home studio on and I've taken into account the ambient light that's one of the things that the advanced section allows you to do is to this can also monitor the ambient light because when you have a screen like this ambient light effects how you see the screen and so a truly calibrated monitor is gonna have a big hood on there and not only are you gonna calibrate your monitor but you have to calibrate your room as well need to make sure that your room is a specific a consistent color temperature so if you have big windows like this studio has were lights coming in and going out and it's getting dark and getting bright your screen is not going to be calibrated because the ambient light is constantly changing and so the best way to calibrate a monitor has to do this but you also have to make sure that you control the light in your room very very important so I'm not save this I'm going to say cancel I normally say this and then that would actually apply it actually I'll save it we're saving it okay complete I go the next time you see before after before after now the after uh if you look enough you can see this in and it looks decent traded in them doesn't it like my colors just went away because it's calibrating it so that you're actually going to see what's gonna print because you can't show the same stuff that you can print so now that's there um it isn't going to do here next is I want to say I want teo uh profile my printer normally creating a new printer profile takes about an hour sometimes longer sometimes less it depends on the size of the paper we have to do is you're not profiling the printer you are profiling paper and printer so this here this is uh epson french or that we profiled before we got here and this was a photo luster very, very high in paper um and uh that paper is going to have different characteristics then a glossy and that's going to have a different characteristics from the bulk uh photo paper that you can get that's very inexpensive and that's gonna have different characteristics in a mat print and so you have to make a profile for every paper stock that you print on to be accurate so every single one so what happens is when I go in here it's going to create a new profile I'll choose a printer and so I'll say it's the absence stylists photo are three thousand which is not hooked up I'll say it's the creative life printer that's here and I'll say the paper name is marks paper so I do this really quick and the thing that's very important associates marks paper next all right? I'm not gonna print this because printer's not here the the thing that's very, very important is to make sure that when you name the paper you name it exactly the name of the paper because you're going to build profiles for probably six or seven or eight different paper stocks and then if you have a different printer or you go to a different bureau you're going to start getting profiles might have fifteen or twenty or thirty of these things and it's really easy to get confused as to which is which so I normally naming exactly so it's epson photo looks whatever paper deluxe appealed to dash five xtreme whatever it is um and then I would say print okay, I'm going to save already printed this because they already have so it's already printed I'm going to say next and now what happens is when I print this the first time this is the first one if I would have actually printed this after it came out of the printer is printing a bunch of different colors it will tell you to wait for the ink to dry so you actually have to wait for usually fifteen to twenty minutes there's old timer because if the ink doesn't dry, the color isn't displayed as it properly would be so you have to just sit there and wait for a while so you go get coffee or do something else so once it is printed what you do is it says, ok, I'm ready to scan so you take your little column color monkey device whatever device you have and this has thes little tracks right here I can actually stick it on the first little strip I'm just going to scan across that I'm gonna do this push the button and is gonna check that out and says okay you didn't do something right like okay it probably started in the wrong place or maybe this got scratched in the actual um you know transportation but normally this would work just fine I think I've scratched it all up beyond recognition right no it worked okay so I just go through and I'd scan all of these little things here saying okay got it it's pretty cool how it knows which one you're on rio scan scan scan scan those in okay now after you scan those in what it says is just like we did with the camera that's saying okay we expected red we got violet we expected brown we got whatever beige and so I need to make some adjustments and make sure that I have calibrated this correctly and then the next thing that will happen is this going to seo generating the next chest okay sorry guys I'm printing something on your printer gently but it's going to print a second uh second patch of of diagrams like this second patch of colors and once that comes out then you repeat the process and you scan those right after I didn't actually print but I would have had to print again you're gonna have to wait about twenty or thirty minutes for this to dry you scan those and it's checking it saying okay here's for the differences were a little vague let's make sure this is really dial then then you scan this and then at the end you have a printer profile called marks paper dot icy sea that you can now use and so when you see something on the screen and when you print it it should be consistent because you made sure that the color coming in was accurate using this guy you made sure that after you adjusted everything, you adjusted it correctly where you could see the actual colors correctly because your monitor was calibrated when you printed it should print out right because you calibrated your printer. Okay, so it's just it's an entire process from start to finish gonna quit this really fast when you're this out. Now that, um another thing that's very, very, very important to understand it's extremely important understand is that you will never ever, ever, ever have a print that absolutely matches your monitor this will never ever, ever, ever happen. The reason is this your monitor is emitting light it's bright it's emitting light your paper is reflecting light and so the reflected light is never going to be his bright as the emitting light it's gonna be a little bit dimmer and it's going to depend on the light in the environment so when you go to galleries uh they're very picky about the light that's on the paintings or the prince or whatever and the reason for that is normally when you print you would actually have a calibrated space with a color corrected space and you could actually snap in those photos and look at them under controlled lighting conditions and that space is actually calibrated so that the light that's reflecting is the correct light so you've probably seen it some behind the scenes stuff we don't have one here but where people are clicking in prince and looking those in this big white area well that's a calibrated area and you can do this take any photo that you have just take anyone and then walk outside and look at the colors and then walk inside underneath fluorescent light look at the colors in the saturation then walk underneath the tungsten light look at it the entire image is going to change and the tones and the luminosity everything's gonna change based on what light is hitting that and so fluorescent light doesn't have the same characters just just tungsten it doesn't have same characters as the sun and so all of that leads me to the conclusion and your experience will too that you'll never have a print that matches exactly your screen it will not happen you're gonna get close get very very close don't want to discourage you but it will very very get close okay now before we go in the light because we need to tile this stuff together with how this functions in an actual application um let's go to questions it is a little frustrating isn't it? I think this is the most in depth color management um conversation I've ever heard so I appreciate it okay mark thank you don't like you susan personally speaking yeah there's a ton of so um so red hills rock had asked how do you get a proper calibration while showing a true before and after when you're done without resetting the monitor defaults uhm so if you're trying to do a true before and after on the monitor I think you uh color monkey will show you what the previous calibration was to the calibrated that's he see that but other than that I don't I don't know how you would do that um uh you know without just resetting everything and doing that so um if before and after is that important to you then maybe that's what you would have to do but um I don't know so sam cocks and there are a couple more questions about this so do you have to recalibrate the monitor when the ambient light changes and kingsley had also said there's a rumor that as best to calibrate a monitor in a dark room is that true? Okay, so um both of those things are sort of true or not true so uh you're definitely if you have inconsistent uh, levels of light in the place where you're using your monitor then it's never going to be truly calibrated now you can have for example, the color monkey which I just put somewhere or eaten it has an actual um you took it bring that back um so on this what it has, it has an actual, um a little like a loomis fear right here. What that loomis fear does is you can take this guy and not just a color monkey but like there's a bunch of different devices that do this what's doing is this monitoring the ambient light of the room so some of these air intelligent you can actually have an ambient light monitor and it will adjust your screen based on the ambient light. And so there are ways to get around that, but the best way to do that is to make sure that your monitor is calibrated in an environment where the ambient light doesn't change. The other thing is when you monitor you're you're calibrate your monitor you need to make sure that your monitor's been on for a little while because it warms up you need to wait a half an hour or so before you do that a ce faras the dark room is considered uh no, I don't think so I think what they're saying is maybe what their understanding is that because the ambient light affects that that's the dark room theory but as soon as you turn the lights on that's gonna change how you perceive that light and so no, you need to calibrate your monitor with the light on the light around that you're actually looking at working on. So if the light changes in the room yeah, you need to re calibrate your monitor so if you're traveling and working in a hotel you probably to re calibrate in the hotel room if you're back in the studio, you need to recalibrate and just sort of do those things snapped her lit asked if it's necessary to calibrate your model monitor if you don't do your own printing well, um I think it is because when you if you don't calibrate your monitor and you send it off to a place to be printed, how do you know that what you adjusted those prints to be it's going to actually match? So what you can do is you khun like, if you if you don't know that those air reds, maybe you're adjusting violets and greens and you don't mean to be you'll never know until that print comes back it's not gonna match so what you need to do is calibrate that make sure it's as close as possible to to how it is and then you can actually get a cc profile of the place that you're singing it so they're going to have a nice profile you can download and install and then when you send it out you can sort of see how it's gonna look on that printed device and so most, um places that allow you to print uh we'll give you those to download all right? I have a question from jeremy in the chat room where you so smart you know that I don't sleep this's true not for real w r lee that was for real but so how do you s rgb an adobe rgb camera settings play into all of this um how do all those things planted? This is very good. So um I grew up in montana and in montana what we learned is it can get cold fast and so you should walk outside with your coat and if it's too hot you can always take that coat off and if it's cold you can put that back on and you're gonna be fine but if you walk outside without the coat and it gets too cold you're gonna freeze to death color is the same way so adobe rgb and different color spaces some can can capture more colors than others so srg b which is a phenomenal color space there's nothing wrong with it and you should work in it uh s rgb space has fewer colors than adobe rgb so adobe rgb is like the winter coat and so you can go out you can capture colors you can get all that stuff on dh then when you come back into the light room or photo shop or apple sure, whatever you're working in if you need teo to take that photo and displayed on the web were printed in a place that only princess rgb which is most of them most only prince rgb you can choose how to take those colors and map them to essere jimmy so you have the ability to take all of this color and then change it in the way that you want on dh then and give it to somewhere to print but if you on lee shooting esther g b you don't you're losing some of those colors and so when they print you don't have many options now. The reality is this rgb is an amazing space and for most purposes of specifically web in home printing, you're going to be absolutely fine and I don't have any issues and the opposite could be true if you shoot in adobe rgb a lot if you forget to convert to esther gb well, what will happen is you can run into problems colors aren't gonna display correctly on the web and so if you choose one of the other just make sure that you're aware that there's going to be some cow inversions that are required the other thing that is uh uh important to note is if you shoot in raw fish raw um you know have to choose your color space because you're getting this much data as you possibly can and you can just choose later uh when you do postproduction howyou want output that color space so rah is the way to go uh for commercial work because you're you're getting as much data as you possibly can mark I've personally heard that, um if you're going to spend money on a computer, the actual computer is a lot less important for a photographer than the monitor that the money should be put in the monitor and a cool had asked how's the different monitor panel er panels in regard to colors like t n I p s et cetera so what's your thoughts on well uh I'll give you my personal view and wonders most monitors air only capable of s rgb that's that's the way it is definitely there's some monitors that are nicer than others the ones that khun b truly calibrated our monitors lychees oh monitors their very expensive um so uh yeah, they're going to come with hoods and they're going when you do your calibration stuff you're going to get into the advanced to ever gonna be able to do gamma corrections and all kinds of stuff that you need as a person that's doing output to a final print that's why when we do commercial where we have add departments art department doing all that stuff because there's a really, really high end expensive pieces of gear so unless you're actually doing all the pre press work it's probably not worth it for you to have that that monitor um as far as the computer versus the monitors, consider concerned most new or monitors that I've seen unless you get like the budget no name, you know, big store kind of monitors most of them have pretty good color display and have the ability to be corrected definitely don't get a monitor that's just sort of, you know, low dollar you want to do that, you're going to shoot yourself in the foot personally apple I think as faras the computers and the packages and I want to be an apple snob, but I'm one of those guys that I used to do test where you know is a pc person I worked at intel for nine years and I had all that stuff and when we made the transition to our apple computers in the workflow it is worth every every single penny that we've spent on that in time savings in the computer's just don't ever go down there just so solid and so from a business perspective time is worth a lot of money to you as your business grows time is very, very very important and if you consider how much time it takes to do the work on a computer that has you know pc that has virus attack capabilities or device driver problems etcetera um it really adds up and honestly so the thing that did it for me that said okay, I'm going to finally buy an apple because my brother has been using them since they came out and drove me bonkers with drink the kool aid it's awesome having apple you'll love it like no pc telling the death the death I'll have a pc um and so the thing that did it for me actually is one of my jobs that until I was a tech person I wrote software but then I managed a group of people that did all of the hardware configuration compatibility testing and so when you walk into these labs there are thousands thousands of motherboards video drivers hard drives, memory sticks I mean it's just like racks and racks and racks and there are people at dell and intel and gateway and all these companies that manufacture pieces only thing they do is they do test in protesting test after test after test to try to figure out what things were compatible with what? Because there's so many different combinations with ah, an apple, they they have here's here's what you get it's been tested, it works, it won't crash, and it doesn't. And so I don't have any hour you saved, but I guess it's probably in the range of, I don't know a month. I'm not kidding, probably a month out of the year of time that we don't have to spend worrying about computers anymore, so I don't stock in apple, but if you want my opinion, you just got it, all right, so one more question, and we'll go to the light room stuff, okay? I have a question from c l k upstairs. I've heard that you should turn the brightness down on your monitor, as your prince can often come out darker than you anticipate. Is that accurate? Yes, that's accurate, but what will happen is when you do your calibration on your monitor, uh, I'm using color, monkey or any other device it's going to do that for you? So there's actual hardware that allows the calibration tool to overtake it's, going to overtake your brightness and contrast and all that kind of stuff, and once it does the first past it's going to change all of that for you, so you don't have to do that. When you calibrate. It will do that for you. If you don't have a calibration tool, then that's a good thing and that's, when we showed you can't see it on the video. But all of us here experience. When I did that before and after the after, the colors were muted and lower, so it's more accurately showing exactly what what we're getting. Now. What I do is, I just come in here and override it and brighten it up. When I need to know, as soon as I do that, I get a little warning that says you need to recalibrate your monitor because you just messed it up.
Class Materials
bonus material with purchase
bonus material with enrollment
Ratings and Reviews
Brian Geoghegan
Mark Wallace, Brilliant at what he does, so clear to understand, he is amazing, well done Mark great workshop, I learned so much. Thank you, kind Regards, Brian from Ireland
Sean
Mark really knows his stuff. He was very well prepared and Mark did a great job teaching this course. Mark went through all the steps from beginning to end in great detail. He also answered questions from the audience an online viewers which helped fill in any blanks. Great course.
a Creativelive Student
I loved this workshop! Many things I struggled to understand about exposure and many other things became so clear! Just wow!
Student Work
Related Classes
Portrait Photography