Lessons
Day 1
1Class Introduction
05:10 2Direction of Light: Setting The Mood
07:57 3Metering
34:21 4Understanding Dynamic Range
13:46 5Understanding Histograms
22:37 6Effective Size: Hard vs Soft Light
09:29 7Understanding the Inverse Square Law
19:41Light Modifiers and the Shape of Light
34:14 9Controlling Light with Grids
22:28 10Watt Seconds and Other Important things
14:15 11Color Theory Part 1
19:55 12Color Theory Part 2
35:23 13Calibrating your Monitor and Printer
27:38 14Mark's Lightroom Workflow
22:07 15Exercise: Purpose Worksheet
34:03 16Failing with Purpose
13:22 17Example: Prep Shoot for Testing
40:37 18Special Request: Pricing
58:05 19Creativity: from Idea to Product
41:26 20Sharing your Ideas: Making the Plan
05:58 21Working with a Team (Snapfactory)
28:40 22Working with Models
27:30 23Commercial Shoot Workflow
10:36 24Q&A
07:12 25Set Up Studio Environment
13:46 26Planning The Live Shoot
21:29 27Dialing In The Lighting
18:13 28Q&A
15:49 29QuickTestShot
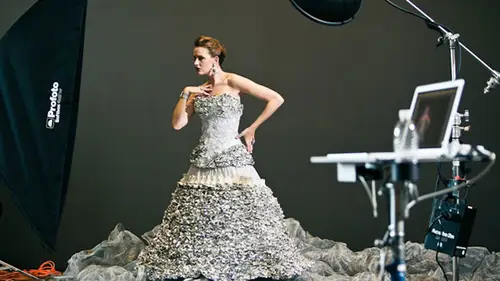
08:52 30Photoshoot Foil Dress With Carly
34:17 31Lightroom Workflow
26:23 32Q&A
14:21 33Preparing for the Second Shoot
16:30 34Photoshoot: Deep V Dress With Michelle
40:12 35Photoshoot: Closeup With Michelle
14:24 36Photoshoot: Tether Tools Table
09:29 37BONUS VIDEO: Lunchtime Q&A
11:21 38BONUS VIDEO: Quick Ad Mockup
01:18Day 2
Day 3
Lesson Info
Preparing for the Second Shoot
We took some low reds images I sent him over to michael and he's done some work, so I'm gonna go check in with michael to see how things are going and let's take a look here, my sure. So let's, bring this up full screen, take a look. S o I think what we're going teo actually need to do is do some compositing just because obviously we're shooting for tether tools. We really need that beautiful product shot. Yeah, so basically, I think we talked about this at lunch a little bit. So to get this product shot here where we really want it and to have her out of focus it's gonna be much easier to do that in post plus we have the ability to do verticals and horizontal tze and all kinds of stuff. So, um I think what's best you tell me but I think what's best is let's shoot the table itself ill suited on black. You can use a quick selection tool to knock that out on dh then what that allows us to do is if we need teo in a different studio situation. We conduce um, different blighting and stuff o...
n that, but then we have the shot and we have the table and everything and plus, we're going to do some compositing of the screen, right, so, um all right, so we'll change your plan a little bit because we have everything set up I think it makes sense for us to continue finishing the model shots they're gonna be composited onto the screen onto the table I think it makes sense first to finish that since we have it pretty close when we can have consistent light and then we'll uh we'll shoot the table separately and then we'll have you composited on and really you know sort of really perfect but we can do that do you have a vertical that we can take a look at what we do so we could take a look at this? Okay, awesome. Yeah, the same thing is true it's gonna have to be you know, composited in there probably in on top of the model to make sure that we can see that and then if we need to do some goshen blur something teo pop that out then we can so okay, so what we'll do next is I'm going to chat with the team so team let's have a quick meeting um so kelsi I'm sure you heard what we just talked here. Um and diane and aaron um where's erin she is helping the model change she's helping the model change models changing on dh so what we'll do is we're gonna do the devi shot okay, so remember the diagram this morning so our students are going to help us set up the back ground screen. Jon, I told him this morning, we know about the five degrees and the ten degrees opposite one another make sure there's going to be channel so we can lower the power and we'll shoot that next we're gonna keep this beauty dish out since we're going to need it and let's, get that set will shoot michelle, and then once we have that finished, then we need to do a quick change again and get the table. So we'll get the shot of michelle and we'll get a table, and then if we can't really want to get those tight shots on the face, uh, but that's the game plan right there. So I have just a quick question are you shooting in black for black and white at all? Or is it all color its color? So, you know, we're gonna leave the nationally de saturated, but I think at this point, we've seen its color like difference might be what we do really tight headshot on that face mask. Um, I think that may need to be highly, highly, uh, you know, de saturated, totally black and white, almost absolute black, okay? And then we still need the four by six or just the beauty dish uh just to be destructive ones for the grids were gonna use their cues because we need to into so kelsey's gonna help you john on that so let's pull this out all how the students start setting stuff up okay, so you're gonna work the students yeah, the only thing I do need is, um our two stands to large things so take this guy off alright, so students we're going to do here is uh very very simple kelsey is going to bring out some stands and we are going to take these yeah, awesome and we're gonna use some clamps to clamp please up on the stands we're going to make some uh you know, a background out of that so um come on over here I'll get this kelsey thank you. And if I can have a student maybe josh come on over here. Help me on this way little islands so if you can help me just pull these legs out here watch your hands watch your hands. There you go. Yeah, they uh well bite on there alright saving set up one more stand like this on this side way wanted out from the wall about like that and then what we'll do is you khun take this put it right in this big clamp right here claims that down okay it's gonna have to make sure it clamps well yeah there's a little hole there goes in but uh get that in there ariel is being swag crisscross yeah, I just sort of make them so they missed it yeah, so they way you want them to just be, uh some from high to low some street across but the texture we want him to be flat ok, so we don't want to even twisted wanting to be flat clamps yes, so john, can you get some eight clamps and healthy now we've got a couple so they're going to start setting that stuff up it'll take just a little while and I'm going to come back to this right here um so I'm gonna cut over here I'm going to check out wardrobe and see how michelle is doing so aaron tell us about this outfit hello? How are you? Um well, I made it in like, two hours this's an aaron market special. So what are we doing here? Because it's a deep be um it's nice to leave the collar bone and everything open so more than likely, we don't usually like to put any necklaces on, but if we do definitely a v neck you did want a pop of color, so I was questioning whether to add in you know something like that or not let's shoot you with it without it but yeah, I do like it without and then just clean look okay, so she can take us a little while for us to get the screen style then you're ready to go pretty much. Yeah, I make up for some touch up and then we're gonna come back over here and do this. All right? So, kelsey, I'll tell you what? Yeah, you help with the screens, okay? The screens and I'll do this with johnny, all right? Since our students have never done the screens, I had kelsey over there and help with those and john and I will do this. Yes. So to these we want to be low and so to make these low what we'll do is these little arms here take those damn things like that we could make those really low like that. Something like that that was gonna shoot up that's a five who need the opposite? Just a five degree. Okay, wait. Okay, here we go. Is this the high one here? We put the end over here way better uniforms, hobby or can you live with this one around that side, okay, just be more chance for me, okay, so this is the pact for this side, um, is that right? So I'm gonna let you check these, um because they're almost done here and then I need to go answer questions so you do this you do that we'll do what lock the wheels are locked the wheels I'll get one high one I thought you you lost them alright total chaos it's awesome. So they're almost done er and so while they're doing that let's not waste the time. Let's get some questions in. So ken and susan, I feel like I'm in a telephone a little bit there's a guard in front of the kenny denmark had asked what kind of material is that? I don't know if we covered that before. What material is that you kind of just described that are where you buy? Sure that material this is this is window screens. This is what you keep on your windows to keep the bugs from flying into your windows and you get it home depot and it comes in rolls and we've got ten foot rolls, I think. Erin, do we get ten foot roll since that what these are, um well, he couldn't find that it is the ten foot rolls were supposed to have the forty eight wide, but he couldn't find those so thirty six that it works perfectly still, so yeah, so I use this a lot in our studio because it's just a really awesome texture yeah all right another question this goes back to a little bit before christian from philip rawson why does mark prefer gazi and blur over photo shops lens blur um I don't I was just tryingto be quick so it just depends on what we're doing but I like the lens blur better but it's easier for me to say use a god schindler no more questions about white balance and such j g t j g tank asked what's your thoughts on expo desk for white balance okay, let me do this first hey guys, they can't hear me talk you need to be quite so do that in silence please help ok? They don't realize it's a live show it's okay could you tell me the question wartime I can um j g tank asked what your thoughts on the expo disk for white white balance oh the expletives for white balance I haven't used it in the studio I've used it on location and like outdoing scenic work and it's it's awesome! I love it in the studio I haven't had much success just don't own one so I haven't had any experience with it but shooting outside with friends I've borrowed theirs and just get great results question from sam cox when shooting in the studio does mark use uv or other filters on his lenses? I don't use filters um I I usually put a uv filter on the end of my lens specifically so that if thea lens falls gets bumped something like that it breaks the filter and doesn't bother the lens but I don't use filters um usually ever I do everything in post even seeing photography I get in trouble don't use filters question from am barreiro can you tell us why you changed your mind on doing a darker shoot with carly why I changed my mind on doing a darker shoot with carly yeah why we didn't know why we added the fill light I guess I'm not really sure I'm not sure something about having a darker look and then yeah so originally we had a really high contrast look with lots of shadows and we added more light I think that was just serendipitous it was you know we wanted to have really high contrast look I'm not so much that we needed high contrast on her face but I wanted to make sure that the back was black on dh when I saw what it was looking like not enough fill on the other side of her face just didn't look good and so in my mind it looked one way in reality it looked a different way when we added that beauty dish I really liked how that looked and so we went with it so um you know normally we would have spent a lot of time doing pretest shoots for set up like this. If this was, you know, high dollar commercial shoot, we would have had somebody come in with that dress, and we would have done a lot of lighting to figure out exactly which one worked best on dh use. Those is sort of a guide to get us there. We didn't have that time for the luxury of that time, so when I saw it was better with the beauty dish, uh, just made the decision. It looked better, and we went with it. Somebody had asked earlier about the bt dishes well, and how high you know where to put it in, how far that okay, so how high, how far, how wide and how deep all that kind of stuff. The reminds me of the old song used to sing in sunday school, but, um, the the reason that we put it as faras we did away was we wanted to illuminate the top of carly, and we wanted to let the light fall off and so that's the distance, because we had a specific spread on that light, and also we're trying to get that light to meet her less originally wanted to meet her less than the key light, we couldn't get that because we had too much juice, too much power, so when we did the test shot it looks good is the key way decided to let that be as it is but then I just had the height because it was too high it first and we're getting a shadow underneath carly's I so a lot of people like me are eyes are deep set so we have serial killer eyes and sew it to fix that someway by either lowering the light for adding a reflector or else you just look a little scary so that's that's what we did we just lowered it teo get really dies this shadow in the ice have a question from holding pattern who'd like to know given the setup time why not shoot the screen and saves a layer to add in photo shop um it just will not look is good that's why it just looks a little artificial way just you don't get the same effect if you add it in photo shop I mean, I'm sure we could but uh it just looks much better if you do it real time with the model in front um yeah, because it just there's so many small tiny little details in that screen to get that cut out to look good it just it's not gonna look the same plus you're not gonna be oh mimic the shadow if there is one there's all kinds of things that would be really difficult to do I mean sure you could do it but I was good joey joyner had asked as your beauty dish have a great on it yes joey joyner joey joyner I'm trying to say your name better was a twenty five degree grid on there by the way joy I did get your direct message and the answer is I'm sure we can okay uh roger would like to know if you can talk about the difference between a beauty dish in a soft books the difference in the beauty edition of soft box a beauty dishes harder light and it's round and uh so you're speculate highlights or different and the quality of light is different your shadow's going to be a little bit harder and it's going to be a little bit more contrast and um at the soft box is going to be softer light the specter highlights are going to be square and it's going to be less contrast hey question from mark be ah what are your thoughts about continuous lighting system instead of strobes thanks we use continuous lighting occasionally in fact there's quite a few shots in my portfolio the light that I use for continue sliding is area six fifty for nails I love the for analysis and even perfect um light and so by the way if you don't know if for now lenses it's pronounced it's spelled f r e s n e l fresnel but it's pronounced fra nell it's, french and it's, the exact same kind of lens that's used in the lighthouse. It takes a big convex lens and slices it and smashes it down, and so you've got these little ridges, and so google it. But for now, lens, what it does is it gives you perfectly hard, consistent, no highlight, no hot spot light so it's perfectly even from side to side on get really focuses that light. It's, it's, it's, amazing like that, that's that's. What I normally use is, uh, six fifty reason I don't use those a lot. If you don't get the benefit of a short flash duration to freeze action, it heats up the studio and make just a lot. So you know, whatever you beast sweating and melts, makeup, there's, all kinds of reasons that hot lights air no good, but how we doing on it? Start all right, we're ready to start testing.
Class Materials
bonus material with purchase
bonus material with enrollment
Ratings and Reviews
Brian Geoghegan
Mark Wallace, Brilliant at what he does, so clear to understand, he is amazing, well done Mark great workshop, I learned so much. Thank you, kind Regards, Brian from Ireland
Sean
Mark really knows his stuff. He was very well prepared and Mark did a great job teaching this course. Mark went through all the steps from beginning to end in great detail. He also answered questions from the audience an online viewers which helped fill in any blanks. Great course.
a Creativelive Student
I loved this workshop! Many things I struggled to understand about exposure and many other things became so clear! Just wow!
Student Work
Related Classes
Portrait Photography