Lessons
Day 1
1Course Overview and Rachael's Bio
37:43 2Inspiration
22:41 3Q&A - Meet the Kittens
18:51 4Shoot: Kittens
26:27 5Shoot: Kittens Continued
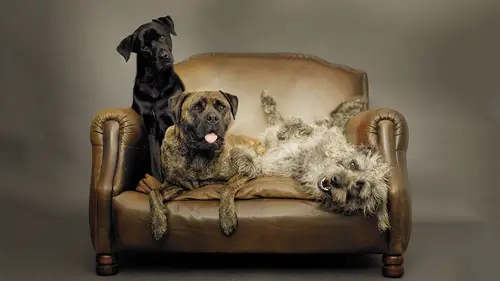
38:44 6Shoot: Puppy Portraits
42:53 7Shoot: Puppies in Groups
31:53Shoot: Cookie Bryce Black on Black Portrait
28:56 9Shoot: Wayne Black on Black Portrait
17:11 10Shoot: Cookie Bryce Part 2
28:11 11Shooting for Licensing
15:09 12Shooting for Books and Addendums
39:24 13Publishing Tips
28:48 14Shoot: George the Rabbit Part 1
37:35 15Shoot: George the Rabbit Part 2
27:08 16Shoot: Adult Cat Hammock
39:49 17Shoot: Adult Cats
22:28 18Post: Basic Post Process
36:25 19Post: Black on Black Post Process
16:38 20Post Process Q and A
37:47 21Shoot: Shooting Farm Animals
36:07 22Shoot: Penelope Continued
35:26 23On Location: Stories from The French Cat and Dog
33:27 24On Location: Dos and Don'ts
42:42 25Shoot: Large Scale Sets - Multiple Animals
39:26 26Shoot: Jenny in the Tub
37:50 27Tips for Your Pets - Getting Started
40:07Day 2
Day 3
Lesson Info
Post: Basic Post Process
Now before us, I'm going to be completely honest, I am self taught in a photo shop I m s so what I do works for me, I'm sure there's probably a better way of doing it, but I haven't learned that yet, so I definitely probably will get one of the creative life photo shop courses and try and teach myself a little bit a little bit more about about photo shop so I could learn a little bit about the things I could do to my images so what I'm gonna talk tio I'm walking through is basically what I would do to my images too get them to a stage where I'm happy too teo, hand them over to my publishers or to the companies for licensing them or and especially to my private commission clients it's really important than I I don't even hand out my images raw, not comfortable about it. I like to be able tio even to my publishers who have worked with for years, they know that they're not going to get raw images from me, so I'm always making sure that I finished the post production before I hand them ove...
r and I'm perfectly happy for everybody toe asked questions as I go I'm used to doing this with a four year old sitting on my left trying to help me so it is not a problem, tio to have you guys asking me questions as I'm doing this so what I've done so far as I have process some of the images we've done over the last couple of days in my little box here at the top right called rachel's images we'll have to reach far over toe to get there but they are in a stage now we're their inter form in what will be ready to open in a photo shop so I just need to see which one's we've got we have got a little bobby let's have a look at that one going to go and that's not my laptop so I wanna make sure make sure I do everything right and it's also not my way come it's a bit more sensitive than my way come so be with me as I get used to the the tools so this is one of the little puppy shots which we did the other day so we're looking at this image for me initially looking at this I need to light in the eyes I need to smooth it out the background we have got bubbles in the background which I'm not happy with that needs to be completely smooth I will do my initial I always add a little bit of contrast light in areas which I want to s so I'll just take you through the whole process of how I would get this image to look exactly how I would be comfortable with so the first thing I would probably do would be to take the background and do a copy layer by dragging it down unto hey, I don't even see look may self taught friendship I have no idea what even that little icons called down there but it's the one next to the trash can, so I drink greg the background down into the and you'll get a copy I reek amine don't even do any retouching on the background copy because you can't even you probably already all know that, but just telling you those who are new to photo shop I was like the beginning, I didn't know that I had to have a copy and sometimes made changes to the actual background copy and then the thought we'll have to start from scratch because the only way to get rid of that is to actually close the image don't save it and starting completely over again, so and then I'm going to have always my husband's always saying used the hot keys used the keys, but I can you can I go to view to zoom in all you can use the hot keys, which I'm used to working on a french let top, so I'm going to figure out where they are, so you've got command negative to go down again and command plus to bring it up and then we have a cute little puppy, which I like I love the expression the summer just got actually even though you've got a little bit this way the lift I will airlift either puppies right eye is not perfectly looking at camera, but it probably is, but it doesn't look that way but in the side here, which I'm going to need to lighten up and actually get this isn't much more the focal point we've got a really gorgeous connection with the camera there, which is great so I am going to go layer no it's quite funny doing this happen even ever had anybody sit and watch me do my produce shop other than as the same my husband or my four year old curves and then what I would do normally often I don't bother naming my files because I don't so quickly I'm just rattling through and I don't bother no mia but here what I'm gonna do here is ed a little bit off and she was goingto the first thing I'm going to do is light and the dogs I said light and right eye is what I'm going to name it so that's what I know would have done here and then we go in and I'm gonna watch is we'll see what you got to make sure in these areas is that you're not goingto get what's called noise khun start looking really grainy um if you light in an area too much so that is not looking too bad, so we'll leave it there and then they want to do because I've obviously lightened the entire image in this too much. So now when I do, I'm going to go to in it and go phil, which then and you're gonna need to have full ground use I normally have it also that from a black mode norm I think mode normal was right I think it's a sign my photo shops all set up how I know we do it so if I go okay? Yep. So what's happened there it's taken up back to what I originally head so now I get my brush tool from the side panel get whatever size are wanting and we see the size for the little bit smaller than that probably opacity it that is sitting at that on the top bye here I'm probably gonna do it a hundred percent capacity so that it can't take takes it back to what I actually did it's going to get it out of the way for a minute on dh then I come in actually, no, we're on the wrong kind of what I did then I clicked on the little the box icons at the bottom here where you've got you're black and you're white those uh, because I filled it, I filled it with black, so to take it back out again, I need to be on the white, um, layers so that I can then bring back well, we're going I'm going to have to have just noticed this is on a vory hash brush to well, see how I'm getting really hash lines here, the witches, which is not good, I'm going to need teo I spent hours getting my brush the perfect thing, so this hasn't been set up for my one. So what I'm going to have to do hardness zero I think I think that's what I need to do, um, so just let me get my brush till right first to make sure that I'm happy with it, but what I'm doing, the rhesus bringing, but I'm just gonna get going even closer let's see how we've gotten a little bit more detail and that I now but they're still gonna be more work which needs to be done to it to make it make it perfect. So I'm gonna try and work a bit faster otherwise otherwise we're gonna be here for hours during one image sorry out. So even now the you can see that I a lot more clearer than what if I take that off you will ever see the difference there but we're still going to do more so what I'm going to do now is go back to my background copy I am going to get my clone tool, which is teeny tiny at the moment, so I'm going to bring the size up and the hardness is on zero I'm going to make sure then come on er yeah capacity it probably ran about fifty percent to then bring in so then toe I don't know most of you worked with wake on tablets no, you don't I find out why now that I've seen since using away come on, I'll never go back to using a mouse it's so much easier to control your movement whether you think using a pin cannot retouch with a mouse I've got I've got a friend we're not for she is a friend because she's being working with me for so many years but a gorgeous girl rabin, who has been working for me for many years helping me with bring touching when I need it when they do it to help me out and she still uses a mouse and I cast I just still don't understand how you doing rabin with a mouse that's impossible, but she does everything I do she doesn't with a mouse, so what I'm doing here, I just got a clone toll and I'm just going to smooth out this background I'm normally working on a much bigger screen as well, so I'm not sure whether I'm going to do the absolute perfect job today, but I probably could but she zoom in a little bit and take my sighs and my thing down but too much is this the how everyone else would do do this stuff pretty back here, asshole noises I am self taught, so I'm not sure this is I'm still differently on the harder now working and when I'm working around the, this could get quite tricky when you during cloning of a background nixed the animal because it's very easy to accidentally clone the animal and start cloning it into the background as well. So I tend to work from the outside in, which helps that where you're taking the background in as opposed to taking the puppy out on to the background so therefore I'm not going to be cloning for across the background, but it still happens and every star every now and then you start, you've gotta go backwards, teo really we are getting it right for top of where I'm trying to do it at the boat that's all I can work with this, okay? We can do anything else girls can't wait, so we just if you see what I'm doing so far, I haven't managed to grab any puppy in clone a puppy which is good. So you get it and I'm not gonna do it absolutely perfectly, but you're gonna get the general idea that that's what I'll do to you, how I see the you can see how that's possibly going to come over, but I haven't clicked on it, so I shouldn't get it if I make sure I click over here and we won't get a little head coming in, but I'm normally something like this. I would probably spend a little bit more time on to make sure it's perfect yet see how I've got a little bit of puppy there, so what I do is it was a few steps back, so I need to just pull those last steps in the history that shows your clone stamp and you could just pull them back into the trash him can the and you get rid of what you accidentally did, so pretty easy in that regard, so I'm just coming, tio tio back into there, right? Let's do a little bit more down here, and then we can show you more of what I'm gonna do it happening. I'll just do this as quick as I can because I don't want to see me doing. This for hours but I do want you to see what it should look like in the end so I don't want to not do it if you know me I'm just gonna do it this is normally I would not be this bring bunches with my my background cloning and normally would be a little bit more I'm saying I was very, very messily done at the top there but we'll just pretend that's beautiful and smooth yeah okay already perfect god yeah because we don't want um I can go in later and fix it up and make it all all perfect. Cole all right, so now we just go back out again so now I'm going to do um I've gotto then click on the next one so I'm going to end my brightness on my count contrast, I should do my contrast through the curve slayer I don't mean to go into occasionally my head a little bit more contrast by using the brightness contrast area the what would you call it? The sitting it's the one so I go into curves and so I'm going to say contrast oops I'm saying I told you I'm not used to using a french keyboard q's and a's are in different places there you go, it's not that I can't spell all right and what I do is I tend to come from the bottom left hand corner and drag across probably oh it's not showing me my percentages who that's different as well normally I go where's my percentages why's it not show me that juicy that's right? I'm just gonna do it by sight income normally normally I have a little box that shows my percentage and I normally go cross about tears till where it's reading toe eight two teen at the bottom and at the top and then it comes back but I'm not quite sure why I don't have my little box there that's what does it show more e just have to move down I'm such a ditzy blonde when it comes to this sort of thing uh why am I teaching a post production sections of escorting you to see how I do what I say boys but lydia cracking house so here we go see how this input is coming up to about teen that's where I would sit on nineteen and then this one here comes back down. I normally do around about two for three to four to sort of thing right about there now I don't like how the hit and that has actually bleached out just a little bit too much so I want to bring the the contrast contrast back down in that area so what I do is I go layer victim asked, reveal all and this basically I can then bring the brush tall beckon on the black stage how we have it before bring up my brush size, but yeah, and then I can actually bring see how that's bringing about more toned back into that area because that's basically taking it back to what it was before I entered the contrast, so if I show you there was added contrast, but we've still actually kept tone in that area it's a bit tricky to see, but but that's pretty much so it's adding a victim ask, um, reveal all is how you be able to do that now I'm going to I'm actually gonna, um, have a look at my cropping on this as well, I'm going to bring it down and I like the animals face to be pretty much in the middle, so what I profitably would do would beat it, I might yes, it doesn't at the moment I find that this sitting a bit too far to the right hand side of the image, so what I might do is actually add a little bit background and you can easily do that when you're working on simple colors it's very easy to add that piece of background teo image crop, and then I'm just gonna hopefully I can do it I might have to redo might have to redo my contrast layer if it won't let me do it because this is this is probably what I should have done this before I did anything else all right alan you see how it's knee out because I've done the contrast already it does I don't know why it does this is really weird but it won't let me do that but if I dumped that contrast later on we can do that again we should be fine toe back into the no it's not letting me do it and I know I'm on fifty percent capacity as well which is why as well but that not still not gonna let me do it maybe that oh yes there we go that is doing it now oh without that her that's interesting I can't do you can't have any if you wantto bet a good thing I taught myself that you can't have any layers on top of you gotta have the background there visitors before you could extend the background so we're going to even go back and light on their like which tony took a minute anyway so see how now that's gonna get me through that there might be somebody might be ableto she's seen the message in and tell me teach me how I can do that shukan you could all your layers and if you add a layer on top and select your clone source to clone that layer and below you can it all respect the layers that you already did? The contrast and it'll just clone right on top and you don't have to delete the layers okay oh many roads to rome or france yeah exactly I well I've now deleted my legs but this right? But next time I know that I can do that which is good now see here at the down the bottom here have been a little bit more of a tricky um, tricky area because I've got a bit of shadowing in here so I'm gonna need to bring that up and just watch how I'm going to clone um make sure that I don't make it look on dh unreal but that's really interesting tow that I could do that see look, hey, I'm supposed to be supposed to be teaching you and you guys take me this's really? We love it when our instructors every instructor walks away having learned something let's go so in this student and this situation, I've got a sort of gifts we're that shadow might be so to make it look realistic so I'm just going to add a little bit and I might I'm just going to go and then take the capacity to say fifty percent which will then make a little bit more subtle the actual great joe edges of the um, of the shadowing, I'm going to take it off the edge because the puppy's really tall so it would be a longer shadow, but now that doesn't look unrealistic. Um, I possibly would not be spending more time time on that. So there we go, it's somewhat I'm going to do now is just quickly light in their eye again, how we did it before so it just with that kerb slap coming in, then it phil taking it back to what it was before and then get my brush tall and get it on the wife's clicked on the white cause I already filled with black, so it needs to be the white to be able to take it back out there. I'm just gonna go and you see what I possibly done here is actually I might have lightened it much see how it's looking a little butt, and really, because that probably lighting that just a little bit too much it's going to do this because the whites of the eyes are actually looking up, but to to hash, so I'm gonna be in, go back and change my opacity back to fifty percent put it back to black, so I'm now drawing bet in the color, the tone and the density of that area, but only at fifty percent capacity. And then I'm just gonna darken it the whites of the eye just young reverie hash it's too much of a very, very harsh brush again make sure I'm on that one I don't like hash brush is not so good at harsh brushes I ask you a question rachel and especially when I see all those hairs around the eye yeah psycho pups mom said one of cloning how do you keep the whiskers and fine hair still in the photo while smoothing? Well? She says while smoothing the background but I'm just wondering with all animals and all the little whiskers and little hairs, how do you keep how do you keep them in the photo and smooth it? It can be incredibly challenging with animal for way that's what it's saying toe work from the outside and when you clone in the background because you are going to avoid working within the the the areas of the here but you're gonna possibly have parts of the background which need climbing, which is right next to the fir and that's when you just you seriously that's when it possibly could take me an hour to do one tiny little area within a background because you're gonna be very, very careful you might have tio like captain paste an area of the food from somewhere else to actually place into that area to get it looking more realistic but it just have to make sure that the license the same within the area and the food the focus on the food's the same so it's all possible to do but you just have to take your time and don't don't rush it make sure that you get it get it right now their eyes not looking too bad see the difference there could now see the I um now I'm going to do that can you guys see all right what I'm doing with them? Yep. Coat so now I'm gonna go back in and do my curves layer with the contrast again what we did before before I kindly told to end black ops we've done it again is okay so back up to ten but keeps jumping to nine ten and across to say forty two then layer the victim mask again reveal all to bring in the tone back into the head. The contrast time till I say begin to there I take it the yep let's call now I'm going tio get rid of that and I'm going to lighten the image. So coombs again hopes different place for the lighten image already so here it's just a very basic come pull the the image up and I'm gonna lighten it to what I like is that looking ok on the bed it's probably a slightly lighter on the monitor than what I'm actually actually doing, and then let's see, we've got in here, we've got bleaching out too much on dh, probably a little bit down the side. This is because of the harshness of the natural light, which I was using, so, um, if we go lay a victim, ask again and get at fifty percent, which you're already on, get the brush toll a little bit larger, and then we can victor masse were going on black, so I'm just going to bring back in a little bit more tone into some of these areas. Go now, that's for it's quite difficult for me, teo, tell what the kellers doing on this, but I finally to adjust colors like a species I'm working out on location often when you're working with natural light, you do get quite a blue tone that these images were all quite yellow purely because I think it's, because we've had the studio lights on with this so I would go into a new adjustment layer and down to the bottom to selective color if I'm going to adjust any any color's within the image, just color pops hey, look at me, ama english spelling we got will do it to american spelling, please, okay, and then here priest is default is fine colors you've got if you click on the arrow, he got all sorts of different ranges within the color you can adjust, I tend to go into neutrals, which teams did cover everything and I'm just going to have a look at what the yellow is doing in this image, but see adjusting that if I don't really severely, you're going to see that it's gone really muted in probably a little bit muddy looking within, but too much magenta is coming through, so that was too much, but taking it out maybe say minus five or six could be a right I'm just going to do I often just off click on a layer just to see what I've done to make sure that it's see how that was very, very yellow plane you can see in the in the monitor, but now the yellow it's very subtle, but the yellow has gone a bit more within their image and I'm also just going to check just video I just do this all visually, whatever looks I've got all my my computers well calibrated. So what I see on my computer should be how it is printed, so if you're not working, I'm not sure what this computer's been calibrated to sort, but it had no exactly, but I'm just doing so I'm just doing it by visual so I'm just gonna doing quite a severe c when you remove blow it goes much more read but I often do remove some blue and then if I take say minus eight out of the science I would always pretty much take half of that out of the magenta just purely because whenever you remove blue you gotta get rid so so therefore the minus eight and sigh in and minus four and the magenta and they're actually yeah and that's got its light on that side even mohr and has made it warmer and it's got it's actually gotten rid of a little bit of a green tinge which was sitting in there and that must have been coming through by having the sigh in layer and they would have just told that doll down a little bit so now I'm pretty this probably little things I might do to that but I'm my final stage of what I would do is what I was talking about before where dark and ages and an image like this I would just do it very, very subtly so I'm just going to show you what I do I think create a new layer darken ages and I hate this and this this is where I really do need a very, very soft brush too, because I get a really big some hoping that it's gonna be really breasts probably ran about two thousand five hundred and sighs yeah, that's a good size to go around them when I don't, I get the eye, drop it all and I'm going to choose a color from within the puppy, which I like to work with, to darken the edges with don't want to go for yellow tone that's not gonna work. So what I'm probably gonna do is just go for more of a creamy sort of time, which is at sea it's not too good, that sort of thing, and then I clicked that's chosen the color down here tonight, actually click on that color and it brings me up a box with the colors and then because I've got my tonal range basically found move in a straight line down from there, I'm staying within the same time, but I'm just getting a slightly darker version off that time, so that might be but two ducks that with my team to stop with the lighter color, and then I'll do probably maybe two, maybe three layers of darkening edge. It itches, and I just don't really, really, greatly at low percentages, and each time I do it, I'll just darken the color even further as I go, so let's do one with that level, and then we've got brushed, oh, and I always do it at fifty percent capacity as well, because if you do it harder than that, then you're going to risk it getting the like, the more I sort of lines what you actually see where you can actually see the I might do one like that so you can see what happens when I do it wrong. Yes, so what I'm doing now is this you just keep a steady a hand and go around you can't really see much happening until I show you the next each step to do this, but all I've done is gone round with that color around the edges. Then we come over here to this box and where it's his normal if you click on the arrows down, you'll see multipart multiply like on multiply and that's very, very subtle because this I'm saying darkening the ages needs to be settled, otherwise you will be really, really obvious sometimes it works being doing it a bit more harshly, but if I click off there it's lighter background into them, see what if it shows up? Yeah, you can certainly see that that has, but anyway, I'm not even gonna leave it there, so that's a one hundred percent capacity, so I'm probably gonna drop that down to maybe thirty or forty is that you quite like color, so I can probably even go probably forty would be fine with that one should still got up, and now we're going to do another layer, same again talking itches too, and now we're going to click on that color and come down wrong. But doctor again, sometimes I do go on a slight angle that way, but this is too yellow from while liking, so I'm going to stay away from the yellows and just stick with the the thieves colors, and then we go each time I probably see how I'm not going quite so far into the image each time I move my brush tool out a little bit further, so that's like a great joel steeping stay stepping is it's almost like creating a very, very subtle vernie it, I suppose, just very eighties, but this is not like this. This is not not avignon, knight said to send you could often gets in the eighties, but yeah, so and then sometimes if I look at multiply, there might be an area which I actually haven't properly it's a really absorb it of clone background down there, which is it's getting it's, getting more obvious as we do it this little was a spot on the background there, what you khun if you can see which I haven't cloned out properly and because I'm darkening the ages it's becoming more obvious so it's annoying me at the moment but that's right? I'll fix it up later we know what we're doing with the background so I might even while I'm in this multiply it stage I might even go around again and this created to be a little bit darker and then going to drop the opacity on their butt probably to say fifty this time because I'm doing it at fifty percent to start with it's still quite subtle anyway so that we might just do one more one more outburst I quit talkin it true's three on and then we're gonna get a even dr keller I'm gonna jump right on down to a doctor one now but there is not too bad it's like a very subtle but sometimes I will do a much more hot, harsher faked with my darkening ages but I'm just going to show you this, but I might not keep this on I'll say it is going to do another age and multiply and see with the way we do like this so no drop that down to say about purity for that final one there's very subtle, but yeah so it's cool so what? I'm just gonna show you now because I'm going to drop off oh everything we've done so that's where we started I did background cloning which still needs to be worked on a little but I haven't done it perfectly well liked in the eye editor but a contrast light in the image adjusted the color which is always an interesting wonders to make of it warm attack in ages the first second and third so there we have something which is very very sattler but it's has made a huge difference in the original image yeah so these number one now can we worry about that what was that little puppy cool that was daisy wasn't it the first one I'm pretty sure that was pink college days pink college days do you know all seven of their names I possibly would remember the names here wow yeah but I'm telling I'm amazing I can remember animals mating but that doesn't make it I don't know how you do it but I don't think people are like yeah so then off course what I do is go file savors I'm gonna keep that for capture number I'm gonna call it daisy and then I'm gonna I'm just gonna put that you know just put that back into rachel's images is a pdf so I photoshopped form it pdf psst not pdf crikey I am having blonde moment sorry to apology now hey now I know I'm sure I was born I've always been a raid here but I'm sure I was born blond yeah, so that's saving is there and also when I say it often save in a tiff format and also in a j pig because j pigs a great for getting prints done I always keep the psd the photoshopped file so that I can go back to what if I need to and then the of course you need the large format high risk to file too then just convert to seem like a calorie so this is all being done analogy being coloring what you can see on the top here this is a gp always at the top so you know the images I originally always going to be in a gp so to change I'll just quickly show you now tio change it to a scene why k for printing or publishing licensing it's so easy image mode seemed like a so there you go it's gonna flatten your layers, which is fine so you just go okay? He's in the this is different. This is a new one because this has got a different profile from what I'm used to working and so I don't know, but I get that, but yeah, well, I'm just gonna cancel because we don't need to do that anyway, but that's how you would change your seem okay, so this has got different color profile sit up in this computer so that's so good, so there's that one. So how much we have a look at now? Maybe we can have one of the cookie images now. Can we ask you a question? Yeah, move on amc, this is a composition question, but amc had said, I've been taught not to put my main subject in the middle, since it tends to lead tow a boring image. Should I take more pictures with the animals face in the center of the image? Or keep the rule of thirds in mind? What do your tips on that that seriously is perfect personal preference? Yeah, like I do often like for greeting cards and things, which I have obviously been very much trained to do. I find that centering my subjects, his works really well, but this kid behind me he's just off center is not exactly centred on dh, he probably wouldn't wouldn't look that's good because the cat's on a lean and the image it works really well, being slightly off center. But I suppose that all depends on what you're what you're working with see with the elephant god that comes from the left hand side of the image and coming in into the shot, so there's no, I don't think that's any rules as such, I know they say food through the food, but I think just do whatever you feel, right. What looks better. But with that image in particular, because I added a little bit on the background purely because the puppy didn't look balanced within the image.
Class Materials
bonus material with purchase
Ratings and Reviews
a Creativelive Student
This course was definitely worth the investment - both time and money. With about 15 hours worth of video sessions and amazing bonus handouts - Rachael provides some really useful, practical tips that you can apply straight away regardless whether you're just beginning your photography journey or are a seasoned professional. It was great to see Rachael at work in session - especially her techniques used to calm and quieten her models if needed. She had a potpourri of helpful suggestions such as remember to take both landscape and portrait shots (if possible), know your rights to take and use images - don't assume, be extra vigilant with cleanliness especially around kittens and puppies who may not have been fully vaccinated, keep kittens and puppies isolated in pens or cages if not in their own environment as they're escape artists etc. Her extensive experience with licensing agents and publishing houses was insightful ... and not for the faint-hearted, so it seems! Thanks Rachael for taking the time to share your know-how, tips and techniques and giving us a peek into your world and workflow you follow to produce awesome animal shots.
Shawna
I loved this class! I don't I tend to be a "pet photographer" but I do want to be a "Pet friendly" photographer! I have gotten lots of tricks and tools to use while photographing occasional clients pets and my own! ( I have a horse, a pony, bunnies, cats, dogs and ducks) I'm super glad I watched the class live and I'm even more glad I bought it so I can re- watch it whenever I want :) (The shoot with the mini horse, dogs, chicken, duck and people was awesome! It loomed like my family picture would look if my husband didn't say "no" on occassion! lol)
Rebecca Potter
Love, Love, Love this course... Rachael is so down to earth and inspiring and I enjoyed all the hands-on shooting which shows you how patient you need to be for this type of photography. Truly an amazing course... Thank you.