Image Preparation in Lightroom
Lesson 2 from: Where Art Meets Architecture: Post-Processing using Lightroom and PhotoshopMike Kelley
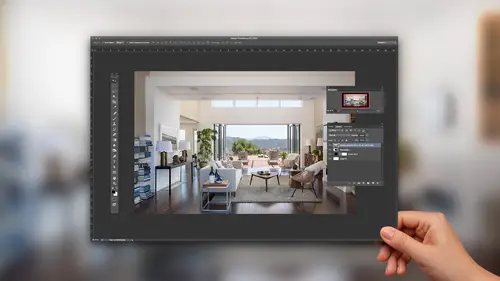
Image Preparation in Lightroom
Lesson 2 from: Where Art Meets Architecture: Post-Processing using Lightroom and PhotoshopMike Kelley
Lesson Info
2. Image Preparation in Lightroom
Lessons
Class Introduction
02:32 2Image Preparation in Lightroom
07:52 3Overview of Tools for Architecture in Photoshop
12:52 4Combine & Merge Images Simply
10:50 5Handling Common Problems in Architecture Photography
12:44 6Common Global Adjustments
07:57 7Advanced Architectural Processing in Photoshop
21:52Lesson Info
Image Preparation in Lightroom
I wanna talk about my Lightroom setup, just for a quick minute here, and how I kind of navigate Lightroom. So, I don't know if this is the proper way to do it or if there is a perfect way to do it. This is kind of a way that I've discovered over the years. And I like to just, line up my photos; I'll get in here and look at what I've got. And before I even start editing, I have a sort of finished picture in my head. And what I'm looking for is the picture's that are gonna help me arrive at that final finished image. In this case I knew I wanted to have some people in the shot and I wanted to give it some life; I wanted to feel like it was alive, had some motion to it. It wasn't just a sterile empty hospital. So I knew I wanted people. So I shot a bunch of people. I was like, alright, I don't know how I'm gonna do this. I'll figure out when I get to the computer. But I wanna add life to it. And then again, I obviously had to deal with the problem of this extremely blown out window; that ...
can't deliver the size it is, if you look out here, there's nothing visible in the highlights or the shadows or anything for that matter. So, I knew I had to tame that. And then again, like I mentioned a second ago, I knew that exposing for the interior, exterior, I got this extremely dark black hall for the inside. Now that I kinda know where I wanna go, I'm gonna go through Lightroom and I'm gonna select the pictures that I think are going to help me get to my final image. Again, in this case, like I said, I wanna keep it simple. I'm not gonna use any lights, I'm just gonna use ambient exposures. So, whenever I'm done, I've got my composition and I've kinda put my people where I want them. I'm gonna, on location, bracket from very, very under-exposed, in this case, our totally dark interior. Exposing for the exterior out here. And then I'm gonna bracket in one stop increments all the way up, so this is, like I said, our dark exterior, a little brighter, a little bit brighter. A little bit brighter. All the way up, until we're pretty well over-exposed on the interior. And I'm gonna use this range of exposures, blended manually and photoshopped to create my final image. The first thing I wanna do is, like I said, pick out my, sorry... First thing I'm gonna do is find my exposure, which I call the base exposure. This is the exposure from which I'm gonna build everything upon. In this case, I want something that is not super dark, like this. This is far too hard to work with. If I try to bring up the interior here, and I just pull up the exposure a bit. Pull up the shadows, it's still not bright enough. And if I even go further on the exposure, what's gonna happen is when I blow out that exterior, and look at the noise, right. This is out of control, we can't have that. So, I'm gonna undo my edits on that and I'm gonna start looking for a base exposure, which generally, if I look at my Histogram over here, we'll have good shadow detail, some highlight detail. We can fix the blown out exterior and dark interior. But I think my base exposure is probably gonna be this guy here. So I'm gonna mark, I'm gonna rate that one star. That's kinda me setting it aside. You can use color labels, you can use your seven, eight, nine keys in Lightroom to label as colors. And you can use, obviously right-click and you get your ratings going, your color labels going. So I'm just gonna use purple and one star, just to show you guys some options here. So I'm gonna right-click and I'm going to edit this in Adobe Photoshop. You can use CC or CS6. One thing I love about Lightroom, and people are always like, why don't you Capture One or Aperture, as an integration between Photoshop and Lightroom is just seamless. And by all accounts amazing. I have my base exposure here and before we get started really blending things together I kinda wanna give you guys a quick tour of the tools I use in Photoshop, and how my Photoshop is setup for editing architectural photography. Well, in my method, at least. The first thing that I wanna make sure that you have is in your Photoshop, that you go to your preferences and you open that tab up, and I want you to go to the workspace menu here. And I want you to uncheck, open documents as tabs and I want you to uncheck, enable floating document window docking. What this does is, Photoshop will sometimes try to group tabs together, group images together, and it makes it a very confusing workspace, for me at least. It might work for you. But I always uncheck that, I don't like Photoshop thinking for me and trying to group things together. So in order to make my work experience a lot less confusing, I will uncheck those guys. So I have my base exposure here, and like I said, I wanna give you a quick rundown of the tools I'm gonna be using. Number one is of course, the move tool. And this is just... This is just their basic mouse pointer tool in Photoshop. And you can get there by hitting V. And obviously if I unlock my background, I can double-click on that; what will happen is, I will be able to move my layout around just by clicking and dragging on it. The second tool that I wanna use is the Lasso Tool. And if you hold down on this menu button right here or Lasso will come up, if you keep holding your mouse down, I generally use the Polygonal Lasso Tool most of all. And what this allows me to do is select an area, using straight lines and I can turn those into a selection. Now I don't generally use the regular Lasso or the Magnetic Lasso. The Magnetic Lasso likes to think for me; like I said, I hate when Photoshop thinks for me, so I kind of avoid using it and the regular Lasso Tool, since we're shooting architecture and dealing with straight lines most of the time, it's more or less impossible to use this to accurately select something. So you can already see what a mess I'm making of this whole scene. I can zoom in, there's no way I'm gonna get an accurate selection there. So moving right along, the next tool that I use on every picture is the brush. The shortcut for that is B or it's this brush looking tool right here. So I use the brush tool and what I'll do with that is I will generally use a large soft brush and I can change my brush size, by using the left and right brackets, to go smaller or larger. And this will all make sense once you start putting the photo together. And then next up I use the Clone Stamp Tool, which is S. And I just use the regular Clone Stamp Tool. I bet most of you guys are familiar with it. But I'm gonna show you why it's not the greatest and what we can do to make it better. So I will show you the limitations and how you work around them. Next tool that I use are the adjustment Layers Tool. This is that full circle with the line through it, down here. And rather than going to image adjustments and using these guys, I like to use the adjustment Layers button in the Layers palette. Because those will allow me to edit the document non-destructively. If I start using Photoshop's default method up here the edits are destructive, I can't undo them after a certain point. It becomes a giant mess, so I like to use the adjustment Layers, which is located down here, in your Layers palette. Next up is the Pen Tool, which is P. And I'll use again, just the top option for the Pen Tool. And this allows me to drag out a combination of straight lines and curve lines to make selections.
Class Materials
Bonus Materials with Purchase
Ratings and Reviews
user-748e5c
First, note to CreativeLive: Please include experience levels (beginner, intermediate, advanced). I think the bad reviews were because people expected a more advanced class than this. That, and that some people expect mind-blowing revelations in merely 70+/- minutes. This class was jammed pack with great information. I was looking for this exact information so it was perfect for me. Plus, Mike Kelley's teaching style is easy to understand. Any class taught by MK is worth watching, he always has useful insight and nifty shortcuts.
Chris Murray
not only is Mike Kelley a genius, he is the Bob Ross of architectural photography. It's got a real "Lets just add some happy cars here and some happy people there" kind of a vibe. What a killer tutorial. Thanks Creative Live and Mike Kelley.
user-fd7ce6
I really enjoyed the video as I do with all Mike Kelley videos. The different way to use the clone stamp as well a lot of little trick he did were great to hear. However, I completely agree with Nicholas, it would have been nice to see the image that they showed on the cover, as that is a scene that I'm far more likely to encounter.