Realistic Toning with Gradient Maps
Lesson 8 from: Beginner Color Toning in PhotoshopKhara Plicanic
Realistic Toning with Gradient Maps
Lesson 8 from: Beginner Color Toning in PhotoshopKhara Plicanic
Lessons
Understanding White Balance, Color Balance, Hue & Saturation
10:31 2Manipulating Color Balance
02:28 3Working with Hue & Saturation
12:44 4Black & White Adjustment Layer with Tint
03:43 5Simple Color Correction
03:37 6Toning with Color Fills
05:56 7Split Toning with Gradient Maps
18:56 8Realistic Toning with Gradient Maps
05:58Lesson Info
Realistic Toning with Gradient Maps
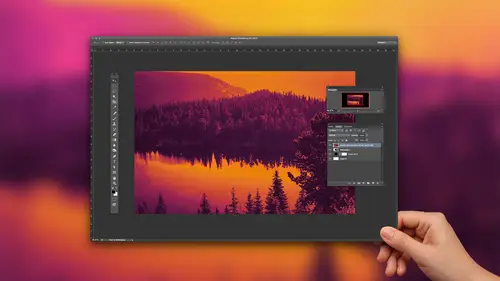
Let's take a look at a really, really world example. Okay, So those of you that may be photographed people and you're like my clients probably don't want to be purple and look like avatar cast members and be blue and alien. Whatever movie. Um, so here's a little more realistic thing that you might do with a Grady. A map we can click to add that again from the adjustment menu, the ingredient map. And this time I'm gonna click the drop down, clicked the gear, and I'm going to go to medals. I think is what I want. And I'm not now is asking me, Do I want to save the changes? And I'm just going to say no, but you can on gonna click this metal one right here and wow, when you look at that, it's like, uh, is that totally crazy on def we reverse it. It's still it's actually the same peak of if a mirror Grady in So you can do this all day. Nothing's gonna happen. So it still looks crazy. But if we simply take the blend mode and we just dial it way the heck down like I mean 10%. So here's before...
and after. You know what it looks like to me? I love this effect. It reminds me of my dark room days, um, of doing solo rising prints. Polarized Prince. So any of you that have I worked in the dark room you might have done this where you make your print and then your run outside into the light that you leave your safe little cocoon of the dark room and you just flash explosive your print to the light, and then you run back in and develop it quickly. Um, but it was thought that crops you because you never knew how much light in two months. I mean, it was really, um, uncalculated. I mean, you could, if you had a good result, would be really hard to exactly duplicate that because you made it by hand. And it's really trial and error and stuff. So the nice thing isn't Photoshopped. If you get a little recipe for ingredient map or any of you color effects that you really like, you can write it into an action or something and then replicated all the time. So that's pretty awesome. So I really like the look of this, and I would probably go with, you know, something like that, and it's really subtle. We turn that on and off, but and it's It's kind of just flattening the highlights a little bit and give her a giving it a bit of a metallic look. But just I don't know, I really am a huge fan of that. Um, let me talk any questions before we touch on curves. Ever so briefly. Briefly. Do we have any questions about Grady A map? Besides what dither is, who knows what did there is. I don't know, But let me just say that, um, awesome thing about being asked about dither is you don't have to know. You don't have to know every nuance to be able to take advantage of this. And I think that is a lesson worth knowing. So thank you for helping. So case that yeah, so were there. Any other questions on ingredient Rabbit are from the Internet. There's one question Can you delete a stop if you decide one is too much or not nice without deleting the whole adjust? Yes. Thank you to that person. Thank you, Catherine. Catherine. Thank you? Yeah. Let me find one of the ones that have, like, so many stops on. Look how pretty this is at 12%. It's kind of weird. I got on a portrait. Okay, But you never know. So let's crank this up. Yes, if we're looking at this and look how many stops this one has, it's so easy to delete a stop. All you dio let's see, it will just take like the one you just click it and pull it away from the, um, spectrum from ingredient. And then it's gone. Soto add stops. You just click where you want them toe to delete them. Then you just pull them away. So you might maybe you really like, you know, like this. Maybe you really like the colors. Maybe not on a portrait, but maybe you really like these colors, But, you know, you don't want this many or whatever, and you're like, I don't want this one in here. And I don't like this green. I just want, you know, maybe one brown is enough. So, like, maybe this or whatever. Um, you it's really easy to just at them. So don't be afraid to mess around in here like crazy. You're not gonna hurt anything. Um, no one's watching at home. Probably. They only want you when you're here on camera and you don't know what dither is. But when your home and you make a really ugly great and you get some weird result like no one's no one's laughing at you, you can just, you know, roll with it and keep pushing because maybe you maybe you pushed for you say okay. And then maybe you change the blend. Moan Now that's still not good, but maybe change the blend mode. And suddenly it's spectacular. So you never know Blend modes have the power to take something that makes you just like scratch your head and look at it weird. And it has the power to make it amazing. Um, so really push and make yourself keep experimenting
Class Materials
Bonus Materials with Purchase
Ratings and Reviews
Sara C. Madsen
Nice little class. Very basic. Perfect for beginners.
a Creativelive Student
Very, very basic. Strictly for beginners.
user-9f5c01
Khara is very personable and engaging. But I do think people should know this is NOT a color CORRECTION workshop. This is a basic course in that it provides a very brief overview of the pshop functions that can contribute to color manipulation. She does go most into gradient maps.