Overview of Cleanup Tools in Photoshop
Lesson 2 from: Beginner Content Aware and Clone Techniques in PhotoshopTim Grey
Overview of Cleanup Tools in Photoshop
Lesson 2 from: Beginner Content Aware and Clone Techniques in PhotoshopTim Grey
Lesson Info
2. Overview of Cleanup Tools in Photoshop
Lessons
Class Introduction
01:56 2Overview of Cleanup Tools in Photoshop
11:29 3Tips for Non-Destructive Workflow
08:48 4Using the Clone Stamp Tool
18:16 5Brush Shape for Cleanup
03:24 6Using the Healing Brush Tool
06:56 7Speedy Cleanup with the Spot Healing Brush Tool
04:29 8Cleaning on a Path
04:21Lesson Info
Overview of Cleanup Tools in Photoshop
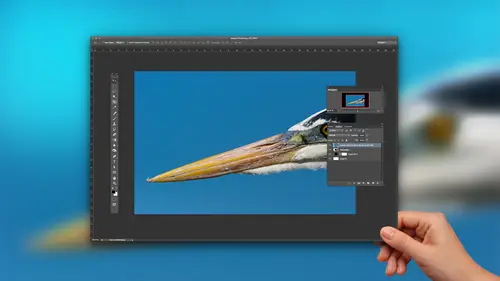
The first thing, of course, is to recognize the blemishes when they occur. And so, for example, have a couple of images here. These were captured at the Albuquerque Balloon Fiesta. A wonderful experience. If you ever have the opportunity, I highly recommend it. But the biggest challenge. It's an amazing experience of it. All these balloons going up, the biggest challenges, framing up those photos in a way that makes sense where you've got, you know, the right number of balloons and they're in a good position and their balanced and, you know, etcetera, etcetera. You're going to make some mistakes. It's inevitable because while they don't move all that fast, those hot air balloons, they are moving and they're all moving. It seems in slightly different directions, and so it can be challenging. So we look at this photo seems okay to me. I don't see any major problems with this image, an image captured just a couple of seconds later. I'm going to switch between these two images relatively q...
uickly, and you'll see most of the balloons. Of course, they're rising upward summit a faster rate than others. Some are drifting left or right, and you notice a major blemish. A major problem with this photo. You might not catch it right away, but down at the bottom center, take a look at that. We have another balloon daring to rise up into my frame. Now, sometimes you condone. Will the balloon do not ride so fast into your frame? The real question is, are you even going to notice it when you're out there? Probably not. Let's not forget. Most cameras do not have a 100% viewfinder if we're talking about a digital SLR, for example, and so you're not even gonna see this balloon in the viewfinder at this very moment because it's taking up too few pixels in the frame. But that is exactly the kind of distraction or blemish that drives me absolutely crazy because it's one of those things that you might not catch. But as soon as you do, you can't take your eye off it, and it just doesn't look professional. It looks like you made a mistake. In this case. The balloon could have been bird flying through. Could have been a dust spot on your sensor. Could be all sorts of different things, but the ideas I don't want something that's gonna catch your attention that I don't want you to see. And this little balloon, this liver of a balloon coming into the frame. I don't want you to see that. I wish it wasn't there in the first place. All these other balloons, I definitely want you to see every last one of them. The blue sky. I want you to see that clear blue sky with no dust spots miraculously on my image sensor. I want you to notice that I don't want you to see that tiny little balloon down there. So whatever the distraction is, it's very likely toe pull the viewers attention away from the key subject or the key details that you do want to emphasize. It takes away from the reason you took the picture in the first place, and so we want to clean those things up. First we have to catch him first we've got to find them, and then we want to clean them up. So then the question is, you know, what exactly is image cleanup and how are we gonna go about cleaning up our photos to make them look their best? Well, in this case, it could be so very simple. Just cropped the photo and get rid of the offending balloon. Sometimes that'll work. Sometimes it won't. Over here on the left side, for example, got a couple of other balloons down toward the bottom left. And if I cropped too closely now I'm getting really close to those other balloons. They might feel like they're a little too close to the edge of the frame. In this case, I could probably get away with it, but it is one of those issues I need to be very careful about. And so we want to look at other ways that we can clean up blemishes in our images. And so the way we're actually going to accomplish that in basic concept. This is so simple. I'm just covering up pixels with other pixels. So let's look at this conceptual E with a really poorly executed example of image cleanup. So intentionally bad cleanup. Let me emphasize again, I am not trying to impress you with my Photoshopped skills at the moment, but just helping you understand the general concepts related to image clean up because I'm going to in this case use the brush tool, which is not an image cleanup tool. And I'm going to sample a color from the photo in this case, a shade of sky blue, and I'm going to come down to this bottom area. The image. In fact, when you zoom in a little bit so you can see that mawr clearly and I'm going to simply paint over the problem and there goes the problem disappearing before your very eyes. And then we zoom out. And now we have an even bigger problem with the image because we've taken hot air balloon pixels and replace them with sky pixels but not good sky pixels, sky pixels that don't even remotely match the area that we painted those pixels into. But this is the concept of clean up. We're taking pixels ideally from one area of the image, because if the pixels are taken from the image, there's pretty good bet. Those pixels are appropriate for that image for other areas of the photo. So we're going to sample pixels from inside the image and paint them somewhere else. That's image clean up. In a nutshell. We're just covering up our blemish with other pixels Well, obviously, as you can see in this example, it's not necessarily super easy. You need to use a good tool. You need to use good technique, and that's exactly what we're gonna get you introduced to today. So here the two major problems that we have with this specific correction and there are two you might think there's just one. But there's actually two major issues that I have with what I've just done to this photo number one, the pixels that I copied from one area of the photo to another area of the photo. Obviously not a good match. So I need to do something about that either based on my technique or based on the power of Photoshopped, I need to do a better job there. Number two. I have worked in a way that I refer to that many photographers refer to as destructive, a destructive workflow. And what I mean by that is that I have actually essentially permanently replaced pixels. So when I save this image and close this image, and next week I find out that one of the hot air balloons at this event was being flown by somebody super extra famous, and nobody got a picture of that balloon. And so my picture with like seven pixels, all total of that balloon is the Onley evidence of that person flying that balloon. I don't even know what I'm talking about. I'm just making up some excuses to why I would care about those pixels that I obliterated, and I'm stuck because I've obliterated the pixels altogether. So I always want to use a nondestructive work. I want to be really careful about the approach that I'm taking with the cleanup tools inside a photo shop. So let's go ahead will close without saving in this case. And let's take a look at the overall tools that we might use in terms of clean up inside of photo shopping in just a second will take a look also at the nondestructive workflow. But first I want to just give you a basic sense of the tools. We're not going to get into great detail in terms of how they work, because we'll go through each of those tools individually. But we will take a look at the individual tools so you might already be familiar with the spot healing brush tool for example, or the good old standby in Photoshopped, the clone stamp tool that's been around since version one. It's changed a little bit over the years. It's gotten more advanced, but it's still the same basic clone stamp tool. So let's just explore some of the differences between these individual tools just to give us a better sense. Give ourselves a better sense of what the possibilities are and will sort of go from the most basic to the most advanced, you might say in terms of these tools. But along the way, you'll start to get a feel for why you would use certain tools in certain situations, and we'll go into that in more detail a little bit later. So I'm still working destructively. We'll talk about nondestructive in just a moment if I take the top, gonna turn off my clone source here just so that it doesn't distract us. If we least I thought I was turning that turn off the overlay. If I select a source for the top of this obelisk and come out and paint over here is gonna paint right there, we get exactly monopolise. Well, that was easy. So this is just like what we did with the hot air balloon. I'm taking sky pixels and painting when somewhere else here. I'm for whatever silly reason, adding another obelisk into the sky. But I've copied pixels exactly as they were. And that's the general task that the clone stamp tool is focused on copying pixels exactly as they appear, which could be a good thing or not. So good thing, as we saw with the hot air balloon image. If we take dark sky pixels and put him into a light sky area, that's a bit of a problem. Well, then we might take a look at the healing brush tool where I can take a texture. Let's go ahead and take that obelisk one more time, and we'll paint it into a different area of the photo. Hey, wait a minute. This looks to be the exact same behavior as the clone stamp tool. I am copying obelisk pickle pixels into the sky. That is, until I release the mouse and I start to see a little bit of a blending change that I'm actually copying textures into specific areas of the photo so you can see a little bit of blending on the edges here, for example, you see how we get the sky transitioning. We get a little bit of sky texture over here, etcetera. Well, then we come to the spot healing brush tool, and this adds content aware technology, which will take a look at a little bit later and hear things start to get a little bit more magical because now I don't have to choose the source of pixels. So when I'm looking at the obelisk, for example, I'm taking the obelisk and copying it into the sky. Or I'm taking the obelisk and blending it into the sky. Or I'm just saying, Hey, Photoshop, see this thing? Would you do me a favor and get rid of it Now? You don't have to actually use those words when you're talking to photo shop and using the spot healing brush tool. But where did that obelisk go? That little portion of an obelisk? I'm just saying, Hey, get rid of that. Would you, please? Wonderful. How amazingly magical is that? As long as you don't zoom in too far and see that it might not have done a perfect job in every single situation. But let's also remember that we're taking an obelisk and painting it into this guy and then telling Photoshopped to get rid of that obelisk and somehow magically replace it with other pixels. But again, the idea is that were choosing a source in the case of the clone stamp tool or the healing brush tool. And then we're choosing whether or not to blend by. Choosing one of those tools of the clone stamp tool does not blend. There's some additional advanced settings available where that behavior changes a little bit, but we don't have that blend into the surrounding area behavior with the clone stamp tool We do with the healing brush tool, where we're choosing a source, painting into a destination and telling Photoshopped, Please blend this in so it looks a little more natural, so that floating piece of an obelisk in the sky looks like it belongs in the sky. Some now and then, we have the sort of fully automatic mode, which is that spot healing brush tool where it's blending. But it's also choosing the source of pixels on our behalf, and those three tools sort of give us an overview of the basic capabilities. All the other tools that are available for image cleanup are variations on that theme has we'll see as we move forward so there would magically added obelisk pieces and then removed them just for fun.
Class Materials
Bonus Materials with Purchase
Ratings and Reviews
Linda Cook
Tim is terrific. He is so clear & helpful
Dyan Bone
Tim was an excellent presenter and spoke very clearly with precision about exactly what he was doing and where he was going with the work. He covered a lot of information but did not go too fast so people like me at home could keep up with it while I was doing the same thing in my lightroom, etc... Also, he made it very clear almost every time where the tools were at in the menu bar and shortcut keys in MAC and the PC as he was moving along in his presentation. He did this without losing time and was able to cover everything that was necessary. I hope you all can have him present more topics as he made learning a lot easier to follow than some of the other presenters.