Using the Clone Stamp Tool
Lesson 4 from: Beginner Content Aware and Clone Techniques in PhotoshopTim Grey
Using the Clone Stamp Tool
Lesson 4 from: Beginner Content Aware and Clone Techniques in PhotoshopTim Grey
Lessons
Class Introduction
01:56 2Overview of Cleanup Tools in Photoshop
11:29 3Tips for Non-Destructive Workflow
08:48 4Using the Clone Stamp Tool
18:16 5Brush Shape for Cleanup
03:24 6Using the Healing Brush Tool
06:56 7Speedy Cleanup with the Spot Healing Brush Tool
04:29 8Cleaning on a Path
04:21Lesson Info
Using the Clone Stamp Tool
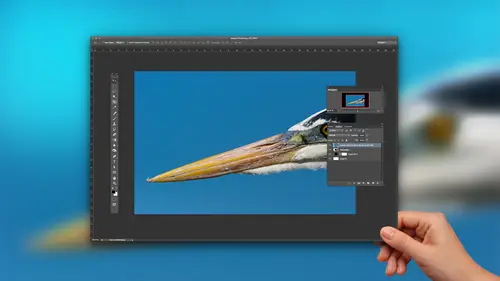
So for this image, I might want to get rid of. For example, some of these kind of odd, bright areas looks like we've got some dense or maybe some rivets that are a little bit distracting. And I want to get rid of those. Maybe some of these other spots. Essentially, I'm looking for the things that should not be there. That I'm concerned might distract you the existing rivets or whatever these fasteners are. I'm not worried about that because that's part of the overall structure. I just want to get rid of things that I find to be distracting. More importantly, for our purposes. We just need something to focus our attention on so we can learn how to use these tools. So in this case, once again, the clone stamp tool. So first, let me go grab the clone stamp tool from the toolbox, and there are three basic areas when you're working with a tool inside a photo shop. There, three areas of the interface that you need to take a look at one of those is the toolbox. That's where we are right now, ...
and I can choose the clone stamp tool from the toolbox. I can also press the letter s as in stamp on the keyboard. That's the keyboard shortcut for the clone stamp tool. So I've established that as the tool I want to use right now, The second area that I need to take a look at is the layers panel, and what's the most important thing there? We already know the answer. We wanna work non destructively, so we'll make a brand new layer. I'll click me, create new layer button and then double click on the layer name called This Cleanup and press Enter or Return. And now I've both created a cleanup layer, and it's also the active layer, meaning this is the layer that I'm actually painting on. If I'm not sure about that, I can click on the thumbnail for that clean up later, just to make sure. Then the third area that I need to take a look at is the options bar. So up across the top, down below the menu bar inside of photo shop, we have the options bar where we can look at a variety of settings related to the current tool. So the options bar is context sensitive, meaning the options, the settings that we see their relate to the currently active tool. If I switch to the move toe, I get completely different options. But when I'm back on the clone stamp tool, I have the options that relate to the clone stamp Boy. There are a lot of options here, but fortunately we don't have to worry too much about most of them. And once we've established settings that work for this tool, they're probably gonna work most of the time, at least based on the typical scenarios, we'll see some exceptions to that. But generally speaking, for example, if I click the brush pop up, I would just choose a simple round brush. But then, do I want a hard brush or a soft brush, a brush with a crisp edge or a brush with a fuzzy edge? Which means, essentially, what is my hardness setting? Is it completely hard? 100% hardness? So I have no transition between my brush stroke and the rest of the image. Or is it a 0% hardness? Very fuzzy where my pixels that I'm cleaning up with our blending into the surrounding area? Well, neither of those is a very good thing, actually, because if we have a hard edge to the brush, the transition between the cleanup pixels and the rest of the image is going to be obvious. And if it's too soft, will start to get some odd ghosting in the image, especially when there's fine texture will start to see ghosting of that texture, and it basically looks a little bit blurry, sort of out of focus. So what do we dio besides panic? Well, I usually start with a 50% hardness, setting a nice balance between those two, but I maintain an awareness of this issue. If I start to see ghosting, I know that I need a brush with a harder setting, a higher setting for the hardness value if I'm seeing too much of that crisp edge than I need a softer setting or a lower value for the hardness. But I'll start off with 50% and that generally works pretty well. I'm gonna leave these other two options. He just bring up panels. The brushes panel, where we can adjust additional details about the clone stamp brush as well as the clone source panel, will take a look at that shortly, the mod normal. I'm just copying pixels from one area of the image to another area. The image. I don't want any funny business. I just want the pixels. Are there situations where you would want to use the multiply or the screen blend motor, even the overlay blend mode? Yes, of course, but we're just getting started, so we'll keep it kind of simple in this case and generally speaking with the clone stamp tool, all I'm doing is copying pixels from one area of the image to another, and so normal works great opacity. The default value is 100%. When I'm getting rid of blemishes, I usually want to get rid of the blood mission. So I'm usually working at a 100% opacity setting. But you might find a situation where you're just trying to tone something down a little bit. You've got some bright speculum highlights, and you want it. You don't want to get rid of them all together, but you want to tone them down just a little bit, so you might clone at a reduced capacity. The flow. I don't use it. This relates to the airbrush feature the airbrushed feature I call the unpredictability feature because it's an airbrush. How fast you move the mouse determines how much coverage you're getting with the brush if you hold it. No, I don't like unpredictability. I just want to brush in a normal way, at least when it comes to using the clone stamp tool aligned. In theory, this matters. In reality, it doesn't at least in terms of the way I recommend working with the clone stamp tool. Well, first, what does it mean? Let's just use an example. I'm gonna use this intersection of the sheet metal panels here. I'm gonna turn on the Aligned Option. I'm going to set my sores. Don't worry about how I'm doing it. I'll tell you about that in just a moment when we start using this tool for real. But I've set that intersection that cross, if you will as my source of pixels. So now if I come out over here and paint, then you'll see that I get that cross intersection. Well, of course I do, because I said a source and I start painting somewhere and so source gets painted onto the destination. Simple enough well, the Aligned Check box on Lee really has any impact on our work with the clone stamp tool after we've started painting. So now let's describe the relationship between source and destination. Well, the destination is over to the right, and the source is to the left. How far? I don't know. Let's call it three inches, the sources three inches to the left of the destination. So now when I move my mouse way up here, what happens? Let's pan down just a little bit and I come and I start painting right here. Where is the source? Relative to the destination. It depends. It depends on whether or not we've turned on that aligned check box with aligned turned on when we set a source and start painting in a destination. We've essentially for the moment, anyway, locked in that relationship in this case, the sources three inches to the left of the destination. So now, as I start painting, where are those source pixels coming from directly over toward the left? If I come down here, for example, here's a nice dark spot that we can focus our attention on. I'm creating pixels based on whatever is three inches to the left. Because I locked in that alignment, I turned on the aligns check box. I'm walking in that relationship. How do I change that definition just by sampling something else? So I go sample this dark spot right over here, and then I move straight down. Now my destination is, you know, inch below the source. So I'm defining a relationship. Choose my source, painted my destination, and the line check box determines. Is that locked in? Well, let's look at the opposite behavior. Let's come back to that intersection. And in fact, let's undo all of that mess I've been creating in the image and just goes back to their and I'll set that source again. But this time I'm going to turn off the aligned Check box. So once again, setting my source and I come over here to the right and there's my intersections will call that approximately three inches to the left once again and then we come back up here and we're gonna paint again. X. I do not have the align the check box turned on. Therefore, my source goes right back to that interception. And when I come up here and I paint. Samora goes right back to that interception. I come over here and I paint again. That's right back at that intersection and back over here and over here and over here before you know, you've made a complete mess of your image. And, more importantly, you've created the same object over and over and over again in the photo in the human visual system is surprisingly adept at finding repetition in photo. And so if something's wrong, if you've got the same object duplicated multiple times, you might not know what is wrong with the image. But something's going to seem not quite right, and so we generally in theory, would not want to have the Aligned check box turned off. But remember, I said, it doesn't really matter. The reason I say it doesn't matter is because as far as I'm concerned, let's undo all of that repetitive creating of the crosses, the excess in the image, every single time, painting over a blemish. Every time I'm trying to get rid of a blemish in the image, I want to choose a new source of pixels that's appropriate to that area, and this is especially important for the clone stamp tool. Because, remember, the clone stamp tool is not blending those pixels. The clone stamp is copying the pixels exactly as they were. So if let's just assume toe make a little more visually obvious, I want to get rid of these dark fasteners. Well, when I come over here, I might say, OK, maybe this over to the right represents a good source, will use that as my source and painted over there. And then here I say, Well, maybe up above his goods, all paint from up there and here. Yeah, that's good to maybe not. And from here, maybe this is good. You'll notice a major problem here, but that's OK, because we're gonna fix that later. But again, the idea is that I'm choosing a specific source for each and every blemish that I'm getting rid of. I know it seems like so much extra work, but it's a good practice because noticed doesn't make a really big difference when it's not a good match. You can see some evidence of that right here, because I wasn't being especially careful in choosing my source so it doesn't blend in very well, it's not necessarily the right match of tone or color. What have you? Maybe texture even. And so it's very important to choose the right source, but it doesn't really take that much time, because how we're doing that is simply by holding the all turkey on Windows or the option key on Macintosh and choosing the source. So to me, it's choose a source. Paint the blemish, choose a source, paint the blemish alter option key down paint with the mouse alter option key down, click on the source of pixels. Paint over the blemish. This becomes almost automatic. You almost don't even realize that you're switching between fingers. Alter option key painting with amounts Alter option key to set that source paint. To get rid of that blemish, it becomes really automatic. But again, now we see another challenge with the clone stamp tool, and that is that We need to make sure that we're setting a source appropriately, so let's get rid of some of that clearly inferior work. Cleaning up those blemishes will revisit that in just a moment. First, let's wrap up the settings here. I'm sampling across all layers. The default is actually current layer only that doesn't work with my nondestructive workflow, because I'm working on an empty image layer. And so I need to let Photoshopped look down to the other layers, sample pixels from those other layers and paint them onto my clean a player, and you could use the current and below option. Sometimes I need other layers. Sometimes it gets messy, Soon said. I just always used almost always used the all layers option. There certainly were close situations where you might need the current layer only option if you're doing some cleanup work on the cleanup layer. But that's not typically going to be the case. So, generally speaking, I just use all layers, but very important over to the right of that all layers option of the sample. Papa, you'll see this innocuous little button, and that is our. It doesn't even have a real name. It's sort of like a check box control, but it doesn't have a name the way a check box does. But this is the option to ignore the effect of adjustment layers. Very important, this be turned upon because with this option turned off, remember, I'm working across all layers that could include adjustment layers. So if I have dramatically altered the appearance of the image with an adjustment layer, and now I'm doing some cloning if I don't turn this option on now, when I copy the pixels, those pixels are being adjusted. And when I paint those pixels, they're being adjusted again to adjustments for those pixels, whereas the underlying pixels are only being affected once. So it's very, very important when you're working with the all layers option for sample that this option to ignore the effective adjustment layers is also turned on. Now again, there's a lot of settings here. There's a lot of things to remember, at least in theory. But once again, keep in mind that the options bar settings for each tool are sticky, meaning that as long as you don't change them, they're going to stay exactly as they are. So I can set these options the way I like them and basically leave them alone for most of my work with, in this case, the clone stamp tool. Every time I come back to that tool, it'll have these exact same settings. Obviously, I can still find Tune is needed, but the basic settings will be exactly as I need them now. One other cool thing with the clone stamp tool. We sort of skipped over these two panel buttons. We have the brush panel so we could alter the shape of the tool, for example. But we also have the clone source panels. We bring that out over the image so you can see it a little bit better. And there's a bunch of stuff in here, most of which I never need to worry about, especially when you're just getting started with the clone stamp tool being able to change the shape of the destination relative to the source or all through the position that's getting to be a little bit more advanced. And usually it's not going to be necessary for typical image cleanup work. I use the clone source handle for a few things. But for a typical workflow, and especially for those just getting started with a clone stamp tool, the only one that I think is really super important is the show overlay options. I'm gonna turn on the show overlay check box and I'll move the clones source panel out of the way, just for a moment, and I'm going to set a source. And just to make it a little bit easier for us to see the effect here, I'm gonna set my source to that cross area the intersection that we were looking at And now notice that everywhere my mouse goes, I can see the source pixels. Now, this could be terribly distracting, but it could be incredibly helpful as well, because it can be distracting. I leave that option turned off the show overlay check box in the clone source panel. I leave it turned off most of the time until I need it. When do I need it? When alignment matters, you might have noticed. And thank you for not calling me out on it. That when I was cleaning up these fasteners on the sheet metal that I wasn't really doing a very good job of getting things lined up in here with this sheet metal. With this ripple pattern, alignment is rather important. And so if I'm going to clean up an area, I want to make sure that I maligning my source and destination areas properly. So let's just go ahead and select a source so again, and I'll review this in a moment. We're holding the altar option key on the keyboard and setting the source by clicking in the image. And then I consent my destination. But again, as I hover over various areas, you can see that my mouse now shows me a preview of the source area. So now when I go to get rid of one of those fasteners, I can choose exactly where I need to align that area. So right about their looks. Perfect. Now and come back out over here. In this case, I'm gonna choose a different source a little further down and write about their looks to be a perfect alignments so incredibly helpful in terms of being able to get things align, textures, aligned any lines that appear in the image in the area that you're trying to clean up. First off, make sure that you're choosing a good source and then make sure that you're aligning that source appropriately into the image and you'll notice most of the time I'm going straight up and down and in terms of choosing a source, But I don't have to. I'm not just looking for vertical alignment or horizontal alignment. I'm looking for the source of pixels that will blend in the best here, for example, it might be best units. We've got some darkening up above here. Maybe I'll come over to the left right about their sample bat and bring that in and paint down. We're just a little bit etcetera. But you get the idea with that clone source overlay displayed, I'm now able to better line things up as I'm painting to clean up areas of the image. So again, just by way of quick review with that clone stamp that we'd configured a bunch of stuff here. But how do we actually put it to use? We Obviously, we're gonna work non destructively. So we make that new cleanup layer. We make sure that we've got our clone stamp tool selected. We adjust our settings on the options bar as needed. But remember those air sticky? So next time I start using the clone stamp tool, the settings will be established. Justus they are. And then I can just come into the image, hold the Alte on Windows option key on Macintosh, and click on the area that I want to set as my source of pixels. Then release the altar option key and move over the area that needs to be cleaned up. I can adjust my brush size as needed. Generally, I want to brush size. That's just big enough to cover up the blemish, sometimes even a little bit smaller, and I'll paint in the nooks and crannies and whatnot. But I want to brush size. That's not too big because I'm painting in more areas than I need. And then once I'm properly aligned, I can click and paint a little bit as needed to clean up that area. So again, ault or option on the keyboard and click to set your source and then just paint to paint those pixels into the destination. And now we've magically gotten rid of us fasteners. In the case of this sheet metal wall here but again, point being is to understand the behavior of that clone stamp tool to keep in mind that while it seems like a lot more work, especially compared to the other cleanup tools inside a Photoshopped, it actually could be tremendously helpful for a variety of situations, especially where texture is super important. We might get things lined up perfectly with the clone stamp tool and then you some of the other tools to just clean up the edges, blend things in a little bit better.
Class Materials
Bonus Materials with Purchase
Ratings and Reviews
Linda Cook
Tim is terrific. He is so clear & helpful
Dyan Bone
Tim was an excellent presenter and spoke very clearly with precision about exactly what he was doing and where he was going with the work. He covered a lot of information but did not go too fast so people like me at home could keep up with it while I was doing the same thing in my lightroom, etc... Also, he made it very clear almost every time where the tools were at in the menu bar and shortcut keys in MAC and the PC as he was moving along in his presentation. He did this without losing time and was able to cover everything that was necessary. I hope you all can have him present more topics as he made learning a lot easier to follow than some of the other presenters.