Troubleshooting Adjustments in Photoshop
Lesson 3 from: Beginner Photoshop TroubleshootingBen Willmore
Troubleshooting Adjustments in Photoshop
Lesson 3 from: Beginner Photoshop TroubleshootingBen Willmore
Lesson Info
3. Troubleshooting Adjustments in Photoshop
Lessons
Lesson Info
Troubleshooting Adjustments in Photoshop
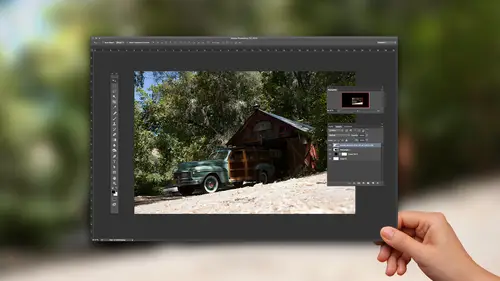
Alright, now let's start talking about another area of Photoshop, which would be adjustments. They're very common things that can mess you up when you're trying to adjust images. And the first thing is when you come up here and do an adjustment of any kind, it doesn't really matter which one, just to keep it simple I'll go to brightness and contrast 'cause most people can understand what it does. Sometimes you end up making a change, you brighten or darken your image, and lower the contrast a little bit, and there's a check box in the lower right called preview. And often times turn it off to see what the image used to look like, turn it back on to see what it looked like afterwards, and then on occasion, you just end up clicking okay and you don't think about it again for a week 'cause you don't use brightness and contrast very much. Then the next time you come over here and you use the exact same adjustment you try to move the brightness adjustment to darken up the image and nothin's...
happening. Try to use contrast, nothing is happening. And that's for one simple reason. The last time you used this, when you clicked okay, you had preview turned off. And the same can be true in a lot of other features of Photoshop. Not just adjustments, but there is often a preview check box and if it's turned off when you click okay, that setting is what's known as sticky meaning it will stay the same the next time you come in there. And so any time you're using an adjustment if it's completely non responsive first thing I'd do is double check that preview is turned on. The second thing I do if it's still not responsive is see if you have a selection active. You might have a tiny area of your image selected, especially if you're zoomed up onto an isolated area of your image, you might actually be adjusting your picture. It just might be way off to the edge of your screen where you can't even see where it's affecting it. Then, that's not the only way you can adjust your images. When you adjust your images you can go to the image menu and choose adjustments. When you do that, you affect a single layer at a time, and the change that you're making is generally permanent meaning that if you save and close your image and open it next week there's no way to figure out what adjustment was applied or to undo that adjustment afterwards. If you wanna be able to undo our adjustments later on and figure out which adjustments we've applied in the past, then what I'd end up doing is using an adjustment layer. There are many different ways of creating and adjustment layer, I usually do it at the bottom of my layer's panel. There's a half black and half white circle, I click there, and that's where I can make my adjustment. Can brighten, darken, whatever. But you gotta be careful when you use adjustment layers especially when you come back and revisit a document. Whenever you have an adjustment layer there are two things that can kind of mess it up. The first is when you create your adjustment it will show up as its own layer here. And then it's as if you're standing at the top of your layers panel looking down, and in order to see the actual image which is down here you're looking through the adjustment layer, and it's blocking your view of what's under there, so it's like looking through a pair of sunglasses which is darkening your view of what's under it. Well, at the top of your layers panel we have choices up here of what's known as a blending mode. And we have also an opacity setting, and if either one of those is changed the next time you revisit the document to make further changes you might find that you're getting unexpected results. So if you click on an adjustment layer, then you get the settings here and I try to move it around, instead of right now changing my brightness by moving the brightness slider, it's gonna do something weird. I see the colors shifting a little bit, but I don't see the brightness changing. And that's because this menu at the top of my layers panel determines how this layer I'm working on will interact with what's underneath it. And there are many different things that can limit what this adjustment layer can do to what's underneath, and so check that blend mode menu to see if that's anything other than normal. And if you need to get it to act normal, doing what you expect, that's what we need to change. Also double check both the opacity and the fill settings. Make sure they're at 100. If they're ever at a really low number like 20, or something like that, you'll find that your adjustments won't be doing much, and that can be an issue especially when revisiting a document where you don't remember exactly why you have those things set that way. Okay, then let's take a look at a few other ideas, when it relates to adjustments. If you ever open an image, and you decide you'd like to darken it, it doesn't matter which adjustment you use, if you decide to darken an image you're gonna find that regardless of which adjustment you choose, your image will become more colorful as you do. And here I'll increase contrast, there you might notice it more, and darken, you see the dried out grass at the bottom? If I turn preview off, before and after, it's becoming more colorful. And it doesn't matter which adjustment you use. It could be brightness and contrast, it could be levels, it could be curves, it could be anything that darkens. If you do that and you don't like that change where it becomes more colorful, let's say you're working on somebody's face and as you darken it, they look sun burnt, you did need their face to be a little bit darker but you don't like that it's starting to look sun burnt. There are two ways to prevent that from happening. It all depends on how you apply the adjustment. If you went to the image menu, and you went to here to get to your adjustment, immediately after applying the adjustment you would wanna come over here to the edit menu where you're gonna find a choice called fade. And right after the word fade will be the name of whatever adjustment you last applied. If I choose fade, it'll give me a few options. And what I'd like to do to prevent color shifts like that is I'm gonna change this little mode menu to a choice that's called luminosity. Luminosity is just a fancy word for brightness, and what this menu does is it limits how the last adjustment you applied can affect your image. And if you set it to luminosity it means only affect the brightness, don't affect the color in any way, so if the color ever shifted on you by choosing that you'll see the color comes back to its more normal state. I'm gonna choose undo there, and I said there is two different ways you can apply that adjustment. The first being going to the image menu and choosing adjustments, the second way would be to use an adjustment layer. And the technique's slightly different if you did it there. I'll go to brightness and contrast again, I'll pump up my contrast, darken the image a little bit, you see the grass becoming more colorful. When it comes to an adjustment layer, you don't need to go to the edit menu and choose fade. Because all the fade command does is it acts as if you used an adjustment layer. And it's presenting you with these two settings up here, even though you didn't use an adjustment layer. So all you need to do is change this menu to the choice called luminosity, then any color change that happens will be prevented from happening and you'll only get the brightness change. Lot of other ways adjustments can mess us up, and so let's take a look at a few more. (man laughs) If I ever go to the image menu, I choose adjustments, and I notice that a lot of the choices that are in there are simply not available, I'm gonna then go to the image menu and choose mode, to see what mode my picture's in. Every picture you open is in a particular mode. And there are certain features that only work in certain modes. The mode that will allow you to do just about everything in Photoshop is RGB mode. That's the mode your images will be in when they just come out of your digital camera. But if you've ever gone to the image menu and chose mode before, you might've changed it to something else. In this case, being in grayscale mode of course prevents me from applying any adjustment that would affect the color. Because in grayscale we can't have any colors. If I change the mode, though, to RGB mode, which is the one that's the most compatible with every feature, now if I go back to the image menu, I choose adjustments, you can see everything's available now. Let's look at another example where it's not just grayscale mode that can mess you up. Here if I choose image, adjustments, you'll also notice that certain adjustments are grayed out, and that's because if I go up here to the mode menu I'm now in a mode called CMYK. If you're not familiar with modes in general, get back over there, RGB mode is how, how should I say it, how digital devices that use light capture and display images. So your camera captures the light coming in, measures it, and it comes in an RGB mode. Your computer screen is lighting up to display your image, and any time it's using light like that, it uses red, green, and blue light. That's what RGB mode is. CMYK mode is what's used when you print out of a printing press. On a printing press, you're printing with ink on paper, you're not using light to print, you're not using light to display your image, you're using ink to absorb the light, and it's the exact opposite, and so here this stands for cyan, magenta, yellow, and black. And so sometimes you need to be in that mode if you're gonna send something off to be printed on a printing press, but when you do there's an issue and that is, you could print all the colors that are in your image using only cyan, magenta, and yellow ink, and things could look fine. But that would be a lot of ink to use and if you ever anything like black text it wouldn't be made out of just black ink, it'd be made out of three different colors, cyan, magenta, and yellow, overlapping and if they don't line up perfectly you'd see little colored fringing around the edges of your text. So we use black ink to kind of save ink, because if we want a dark area we can use one color of ink there, instead of piling up three colors, and if we ever have black text we can make it out of just black and you never get any misalignment around the edges, but that black being mixed in there makes it so it's a much more complicated way of working, and so therefore there's certain adjustments that just don't work there. You'll find the same thing with filters. So I can just take this image and convert it to RGB mode and now if I come back to my adjustments they're all available. So even if I'm gonna print on a printing press I usually work in RBG mode until I'm done with the vast majority of things I need to do and only when there's something that can't be done in RGB mode, it has to be done in CMYK, would I necessarily go there. Or if I need to supply somebody, they've asked me for an image in that mode, I'll wait 'til I'm completely done with the file, I'll convert it to CMYK mode, save it to give it to them, 'cause that's what they requested. But if you ever find a lot of things are grayed out, I would come up here to the mode menu to figure it out. One final thing relating to the mode menu is I'm gonna open an image, this happens to be a raw file. So when I double click on it it brings me to camera raw. I'm gonna ignore camera raw, though, and just click the button near the lower right called open image. And with this image if I just go to the filter menu and I try to use certain filters, like here's one called filter gallery, it's grayed out. Or if I come down here and try to stylize and use extrude, or tiles, or wind, it's grayed out. You'll find a bunch of things are grayed out for this image, and you might not know why, 'cause you just opened a picture. Well, again, it has to do with the mode. This time if I go to the mode menu you'll see it's in RGB mode. RGB mode is the most compatible mode with all the features in Photoshop, so you'd expect things to work there. But there's more to the mode menu. And that is down here, there are settings for how many bits per channel, which is a really technical aspect of Photoshop, but the main thing is, JPG files, if you've ever opened one, it's the most common file format, they're all what's known as eight bits. And if you ever have a 16 bit image, which you can easily get if you open a raw file, then you'll find that certain features just aren't available. So if there's a feature you really need to use and it seems to be grayed out, again, go to your mode menu. See, first, are you in RGB mode? If you're not, go to it. Secondly, see down here, how many bits per channel is your image? And if it's not at eight bits, switch it to there. I'm not saying you should do that for every image, I'm saying you should do it when a feature you need to use is not available. If you wanna know the technical difference between the two, this one means you have about 250 brightness levels in your picture, this one means you have thousands of brightness levels that make up your image, and so it's more information, and you can get, sometimes, finer adjustments and things with it, but it also makes it so certain features just don't work, so if I go to eight bits per channel, now I go to the filter menu, you see the filter gallery is available. You see if I go down to stylize, everything's available. In fact, every filter should be available. So, that is a big thing, and it's another very common thing when I'm teaching, like, hands on classes. I'll walk up behind somebody, and they're just so frustrated that whatever it is, they've used it dozens of times in the past, is not working, and they have no idea why, 'cause all they did was open another file. Well, you just might not realize that it's in a particular mode. When it comes to that raw file there is a setting involved that determines what is used, I just wanna show you where the setting is. If I double click on a raw file, and I can tell this is a raw file, because the file extension on the end is not normal. It's not like TIF or JPG, or Photoshop, it's some weird letters, and that will usually indicate it's a raw file. If you double click on it, it brings you into camera raw. I ignored camera raw and I just hit a button near the lower right called open image, and when I did it just opened the image, but there are some settings that are in the bottom center of my screen, these settings right here. And right there is where it's going to determine if we end up in eight or 16 bit mode. You can change this setting by clicking on this text, and right up here you'll find the setting and whatever you set here will be sticky meaning the next time you open another raw file it will use whatever setting you choose there. So if you happen to use a feature in Photoshop that is grayed out for 16 bit images and it's something you use all the time you might wanna change this, but if you don't run into the problem with things being grayed out, then don't worry about that setting. I'm gonna close some of these images. Alright so you gettin' a feel for some of the things where Photoshop can really get in your way. And it's because some of these features the engineers at Adobe, they have to put in more and more time to make these features work with more complicated images like a 16 bit image or a CMYK image or a grayscale image or whatever it is, and it's a matter of should they devote that time to really improving that particular feature for those few people that would need to use it on a 16 bit image, or should they instead spend their time inventing new features that everybody would use, and sometimes they just decide it's not worth the time, and other times there's just a technical roadblock that doesn't allow them to make it available, so. Alright, any general questions about what we've been heading through there? We have a question about how do you know what is sticky and what is not? You turn it on, and then you use the feature again, and see if it's still turned on. I mean there's not an indicator in Photoshop that something's sticky. It'd be nice if there was, if like a check box would have a different border or something to indicate it's sticky but it's more or less just from use, you get used to what's sticky and what's not. Okay. Wish I had a better answer. (laughs) it's all good. Alright. Let's see, just lookin' at my notes here, 'cause there's so many things we could discuss and I'm just trying to get a sense for what things could really mess you up. Let's talk just a little bit more about adjustments. This one happens the most when people read magazine articles. They try an interesting technique, and then they forget about that technique and come back a few days later and try to use the same feature again and it just doesn't seem to work. So I'm gonna mess up a feature without tellin' you how I did it. Okay, then I'm gonna try to use that feature again. Usually I would've just finished reading a magazine article that tells me how to do something I don't really understand and I'm just following the steps, and going, oh cool, end result, and then later on I come back and I'm like man, I broke whatever it was I was using the next time I try. So the feature I was using was curves, which is actually my favorite adjustment. But curves is not something that is easy to learn on your own, so you need some help to do that. But in curves there's usually a hand icon down here that you can click on, and if you were to click on it then you'd be able to click on your picture and drag up and down to brighten and darken various areas. But when I go on top of that hand icon, I don't know if you can see it or not, but it gives me a no symbol. And if I try to click, it's just not gonna let me turn it on. Also in curves you can usually click on this particular line and it'll add a little dot that you can drag up or down to change this appearance but right now if I click on the line it's not adding any dots. And that's because when you're in curves there are two ways you can make a curve, and you determine what method you're gonna use, based on these two little icons. Most people never touch these two icons. The only time they do is when they're reading a weird magazine article, and it tells you to do somethin', you know, funky, but this is one of those settings that is sticky. Meaning if you changed it, it will remember it next time. So let's look at the difference. If you're in the icon on the left, which is more of the default, then that little hand icon is available. I just clicked on it, and then you can click on your picture and drag up and down like this to change the look of your image, how bright a particular area is. And if you look at the curve that you're creating you see little dots on it, and you can grab these dots and move 'em around. But the other way you can create a curve is to use a pencil. And to just draw it. And so if you ever want a really weird lookin' image, just draw a big M or a W. And you'll get a weird lookin' image, that's what the magazine article will tell you to do. And, do it again, there's an M, let's try a W. Okay, so if you ever see a article, what it's gonna do is it's gonna tell you how to make chrome text, and then you'll make normal kinda 3Dish text and then you'll do this to it and it'll make it look like it's chrome. There's also some other setting in here related to it but so if you've ever done that, and you get back to curves and it's just not working, mainly you notice that the hand symbol's not available you'll need to simply come over here, and click on that icon, and that'll get you back to the normal kind of curve where you add points and drag on them. Also there's a setting near the upper right, right here, called light versus ink. And that can mess you up because usually in curves if you add a dot, and you push it up, I'm used to things getting brighter, and right now when I move something up it's getting darker and that's this setting. When you have it set here, if you move things up it's thinking about adding light to your image, you know like my flashlight's kinda light, it's gonna get brighter. But if it's set here, you're instead adding ink to the image as you push this up, and more and more ink is gonna make it darker. So you should know that this is a setting that is sticky. So if you ever change it, and this setting will change on you without you knowing if you're in certain modes. Usually, I believe, if you're in grayscale mode or CMYK mode, it will default to ink. And so if you're used to using curves by chance, then you find it's doing the exact opposite of what you expect, look at that setting and you probably need it set to light. Let's talk a little bit about adjusting color. If you ever adjust color and you try to make an image that's already colorful even more colorful, 'cause you love really colorful stuff, you have a couple of choices on how to do that. One of which is to go to the adjustments menu and you have a choice here of either vibrance or hue and saturation. It seems like people use hue and saturation more commonly so I'll go in there, and when I do, you'll find one of the sliders is called saturation. If you move it to the left, the image will become less colorful, move it all the way to the left, it'll have no color at all, you move it towards the right, and it will become more and more colorful. But what you'll find is if you're using saturation that at a certain point if you have something that's already colorful, like a red flower, or yellow flower, whatever, really vivid example, you're gonna find if you crank it up too high that suddenly you're gonna start losing detail in the really colorful areas. And in fact here I'm not able to push it far enough. Let me try, there's another spot where I can do it here under vibrance. There's also a saturation slider that I think will let me move it even farther. Do you see what's happening where the little highlight is on this? If I zoom up on that? The transition between this highlight and the color, do you see how it's starting to look weird, it's getting like a unsmooth transition? And if there was any detail in the red areas it's starting to go away and become just solid red. That's something that's known as saturation clipping. It's a technical thing that happens that is easy to have happen if you have something that's already colorful, and you're trying to make it much more colorful using saturation. To prevent that from happening, you want to not use saturation, you wanna instead use something called vibrance. And so with vibrance, it works a little differently. Saturation treats all colors equally, and so it doesn't care if this area we're adjusting is already really colorful, it's gonna make it even more colorful, and there's a certain limit, and the only way that it can make something that's already at it's maximum colorfulness even further, is to throw the detail away. But vibrance is not going to affect those areas that are overly colorful as much. And you'll find that you will be able to crank vibrance up so high without that happening, so if you ever have colorful images, 'specially flowers and cars and things that are really vivid, and you ever notice that suddenly all the detail goes away, get away from the slider called saturation. Find the slider called vibrance. You'll find it in two places, one is right here, in an adjustment called vibrance, and the second is if you're in camera raw, which is what you get when you double click on a raw file.
Ratings and Reviews
Carol Haggerty
Thank you Ben! So much great information. How much time have I wasted trying to figure out why so many of these quirky things are happening?? I'm so happy to have the reasons now! I've been using ps for a few years now and would recommend this class to beginners or any self-taught individuals (like myself). Thank you again!
Judy Mitschelen
Another excellent course from Ben. As always, he is well-organized and explains clearly with mini summaries for each section that reinforce rather than feel redundant. Love his teaching style and even though this is in the Beginner track, I picked up some new tips and locked in some good triage ideas for when things don't seem to be working right.
Vu Phan
Fantastic. These lessons are very useful to me. I appreciate for what you have done. Thank you so much