Lesson Info
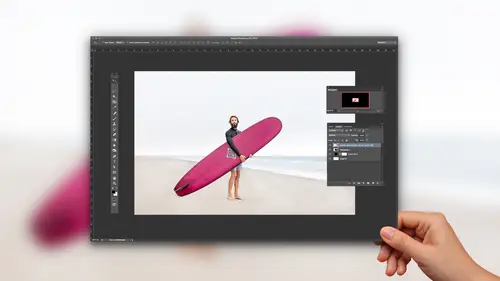
2. Adobe Camera Raw: Tool & Filter in Photoshop
Lessons
The Importance of Adobe Camera Raw (ACR)
03:03 2Adobe Camera Raw: Tool & Filter in Photoshop
13:50 3Crop and Compose Your Images in Adobe Camera Raw
07:34 4Improve Exposure in Adobe Camera Raw
20:19 5Enhance Color in Adobe Camera Raw
19:04 6Sharpen and Reduce Noise
07:07 7Output and Save Your Work
10:38Lesson Info
Adobe Camera Raw: Tool & Filter in Photoshop
a couple things to think about With Dobie cameras, you can use it as a standalone app. You'll see that just a second or inside a photo shop. So there's two different places we can use. Camera. How does it work? We have a big file, Rob. This is a raw, um, image unedited. And what happens is when Adobe Rock comes in and works on that file, it actually just modifying it with a set of instructions. So it isn't actually modifying the pixels. It's just displaying those pixels in a different way. The reason why that matters, and the reason why I'm talking about this is it just allows us to say, Make a change to the image in a nondestructive way. We can say I want a black and white or maybe I want it blue. Or maybe I want it back in black and white whatever it ISS. So we have this really a lot of flexibility, and that's one of the reasons why cameras so, so cool and so, so helpful. So kind of the things I have here cameras, nondestructive, meaning you can always change your mind. So flats flex...
ibility. It's fast and fun Once you start using it, you realize that my gosh, I can powerful toe. I can achieve professional results without being a rocket Science photo shops, different animal cameras much friendlier, much, much easier. And so that's kind of the set up for what it is. Let me go into how we start to work with this tooled access it. So Bridge is a great way to obviously actress and viewer files. And the bridge camera combo is is kind of key. So I'm in Adobe Bridge right now. My first folder, which is Owen Open and View. I have a raw file and I'm gonna double click that. And what that will do is that will then launch it in camera. And I'll talk a little bit about the interface here and just get us familiar with that. Now, I know some of you know a little bit about this, but not everyone watching, Maybe does. So I'm gonna I'm gonna kind of go back to some of the basics. The first thing and perhaps most important thing is this little button. It's the full screen button. You can press the F key to do it or just click on that button. But if you have camera on this little teeny window, it's gonna be awkward and hard to work with it. And I don't even know why that buttons there. I just think default. It should go full screen, right? Because when you're working on images, you want as much screen space devoted to the sliders and tools and to see the photograph. So first things first, knock it out to full screen the next kind of say, Well, what's here? What's the landscape? So we have tools up top. These allows two different things, like zooming or cropping or making selective adjustments. I'll talk about that later. One of my more advanced courses. Then on the right. We have all of our sliders and controls, and they're they're grouped into these different panels that you can see here. And this is funny that I have. And if you notice this little interface glitch, so what I'm gonna do is I had this bug just show up yesterday, so I just relaunch camera really quickly. But going back to this, you can see that I have these different panels and sets of controls. We can do things like sharpen where it can do things like modify our exposure by dragging a slider. So we have tools up top controls on the right, then down below some options for perhaps opening images, changing the file size or saving a file out. So that's kind of our landscape of what we have once we're in to view the image. One of the important things here is to look at how we can get close to the file and see the kind of detail we have so zooming you have a few options. We have a zoom tool by default. Select that we can click on an image to zoom in. We can hit a little plus or minus icon, or go to this pull down menu and choose an option here. So I consumed to a certain area. Now, once I'm zoomed in, I need to move the image around. So, just like in photo shop, we have a hand tool, and I can access that pan around so I can see the important part of the photograph. Now what you can do is if you have the zoom tool and let's say you click to zoom in and you don't want to go to the hand tool. You can temporarily access it by pressing the Space Marquis. So the Space Marquis just gets that so I don't have to go up here. Click. Do this. Go up here and change my zoom. It just is right kind of hidden underneath that tool when I press the space bar space Barkey. All right, so a little bit about manual zooming, we'd zoomed in. We zoomed out. Now, one thing you always want to do as well a zoom out so you can see the whole image right, which is called Fit in view. One way to do that is to go to this pull down menu and select fit in view. So it takes me back. Okay, Great. I can see all of the edges of my image. There are a few little shortcuts which I want to sneak in. These aren't beginning there more advanced, but they're worth knowing. Double clicking zoom tool goes to 100%. So it's takes me to a 1 to 1 100% view. Double clicking the hand tool takes me to a fit in view. So if you're feeling like you want. Oh, you know, kind of up your game might be worthwhile to jot down those those ah, those few things. All right, well, anyhow, what I'll do is go ahead, and I'm just gonna Let's say I modify the image. I brighten my exposure. When you're done, you'll notice there's no real saving like it's automatically saved. You just click done, and that brings me back to here. I am in bridge, and that change has been applied, and that gets back in the way of raw processing. Actually works in the sense that you know you open up this application and you're making all these adjustments, But you may. You'll notice when photo shop, you know, you make an adjustment, you have it. It's like saving it or rendering it. There's none of that on camera. It's really lightweight really fast. You can open up other files as well. Here we have a JPEG, and I'll go to the file, pull down menu and choose open and camera. There's a shortcut there if you want to use that, and when you select open and camera that J pegs come into camera. If I just double click my J peg by default that's going over to photo shop. So here I am in photo shop. Now we just go to a view so you can see that, um, so double clicking those non raw files goes to photo shop. But if you want to get him in, Ron, you want to process these images, we go file open and raw, and that gets them there. Which leads me O kind of an essential shortcut, whether it's ah um, non ra or raw. What I prefer to do is press command are on a Mac or control R on windows. Easy shortcut to remember. The command key is the big one. Like I want to do something I'm controlling, right boom and then are for raw. So I want to get this image up there. So I had a command are on a map control or windows that gets the file, whatever the format, you know, that's that's allowed to come in a camera in there, and then I can start to work on it. All right, couple other things. Um, another way to access it so I've been accessing is a standalone app. It's just it's own thing. You notice I had an image that I hit done, and then I'm back to bridge. I can also work on it inside a photo shop. So here I have, ah, psd file and I'm in photo shop and I've already created a second layer. If that wasn't there, I could just go in and, um, dragged us to the earlier icon. And on this new layer, what I may want to do with this one to say, modify or use camera inside a photo shop. And this is why learning cameras helpful even if use light room because you're also gonna access it here inside of Photoshop. And what this is is just going to this filter pull down menu. And in this menu, you can see you have camera raw as a filter. And when I select this, it's gonna launch camera. But you noticed the interface looks a little different. You see some of these buttons down here and stuff those air gone because it isn't a standalone app. It's just a filter. And what I could then do is modify sliders and then to apply any adjustments here using these controls, I click. OK, now, a quick word on this memory, said cameras nondestructive. That's when it's a standalone app as a filter, at least in the way that I would have just used it, it would have applied. It kind of baked it into that image. I couldn't go back and change the slider after the fact, I could go back and keep adding more adjustments. But once I'm using it, at least in this way as a normal filter is just making the adjustment there. That kind of makes sense so far. All right, Well, for years I taught college kids, and with college students you always have to keep him interested, you know? And so you one of the ways you do that is you get him toe. You just break every once in a while and get him to say, OK, have I learned anything because important to do that? So I want you to take just five seconds or maybe 10 seconds and turn to your neighbor. If you're watching this, just look at your notes and say, Have I learned anything? And if so, what is it? So go ahead, ask your neighbor that quick question. Everyone's whispering on hopefully and that you guys keep talking when I'm trying to do here is the rest of us watching. This is the way you learn tools. Best is in small chunks. And if you just steamroll through any tool, whatever it is, you think you know it. But then you go back later and you're like, Wait, what was that full screen button? And so, as you're watching this, um, again, just little breath, fresh air and and do OK, let's go toe another topic. This farce, my speed for you guys. Is it going okay? Is this a good pace? Um, we can obviously open and work with one file which I was showing you. But usually when we shoot photographs, we shoot a lot of, you know, we shoot 10 that are similar, or maybe 100 or or thousands or whatever. So there's ways to process multiple files and inside of bridge when we have multiple files like this. This was from this photography challenge. I did was a five day photo challenge and, um, some photos of my body Owen, and have these images which I'm scrolling through here and often Enbridge. What we'll do is we'll say Hey, you know this particular image? I'm just pressing space bar to go to full screen. This this one I like. I want to add some sort of label to it. So add it may be a star rating of a one star or perhaps a label. I'll go ahead and add a color label to it there. Shortcuts to do that, which are really, really good to know. Um, it's command one through nine, and really, it's command. It's a big key, you know, or control on Windows and say, I'm gonna do something this important. I'm going to say this is this level of a photograph and the reason why we do that is so that later we can say, Well, hey, show me my images that air four stars or two stars or whatever it is and you can filter and bridge to do that. Anyhow, the reason this is important question. Does the star rating carry through into other applications, like into light room or photo shopper? Does it just Is it just in camera? Yeah, it will carry through in other situations, depending on file type and stuff, but usually if you let's say you're using a tool like light room. You wouldn't want to do this here. You'd want to do it there, if that makes sense. Um so my mean, for this course, the sake of it, you know, had this to little circles is really a kind of a camera photo shop, workflow or bridge. Cameron and Photoshopped workflow, perhaps toe extend it out more. And the reason why I wanted to go into this This idea of showing these these things filtering is that when it gets toe opening or working with multiple files, we can continue to do that in camera raw. So let me show you what that looks like. So I have all these files from a shoot click on one shift key. Click on another, selects a set of images that are near each other here. I'm gonna open them in camera raw. You guys remember the shortcut, which is commander control. That big key that says I want to do something significant and then raw are so commander control are that brings these images into camera. I wanna make sure mitt full screen, right? So f is a shortcut key to go to full screen. I have all these files. And now you can see there in this film strip over here on the left, which I can either click on or I can use my arrow keys to scroll through. And the nice thing about this is that I can start to process a set of images versus one image to camera. Close it. One you give you give this sort of back and forth. And this I'm just here and I'm doing my work. And it's a nice little workflow, right? Including, Let's say, I work on an image, will talk about our sliders in a second. But I decide I want to add maybe some contrast or change the look of the image or whatever. And then once I do that, I realized, Oh, I also now need to change its rating or its label. So the shortcuts remembers Commander Control one through nine. So I'm gonna press command five. I'm going to give it a five star or demoted a little bit command three. It's only a three star. Maybe I don't even, you know, like it. I'll just say command wanted or whatever it ISS and then same thing with labels So it's one through five for stars than six through nine for your labels. And the great thing about this kind of a workflow is you can go through and make your changes to the images. Then, once you've done that to apply those again, it's just a matter of saying done. I've applied those, and then it will update what we're seeing here in bridge. So know that it's a tool not just kind of for the one off, but it is, has some workflow features in their 1 more thing to think about With this, you can also select images by clicking, holding on command. Can Matt control of windows and then single clicking on other images so you don't always have to have the whole set? You know, sometimes you're like, Ooh, these were the ones I really like command are Matt control our windows gets us there, and then we can start to work on them if the filmstrips distracting you and you need more space for an image. So let's say have an image here. It's kind of cutting into that side of the image. You can close this, so if you double click that little slider. You can see how you can open and close the filmstrip over there on the left, which sometimes is nice. If you're maybe on a smaller laptop monitor or something like that, you need a little bit more space.
Class Materials
Bonus Materials with Purchase
Ratings and Reviews
Pamela Richardson
Highly recommended!! I have watched some classes taught by Chris Orwig before, and really appreciate his excellent teaching style. He truly is a master of his craft in both photography and in teaching. He taught at a pace that allowed me to take notes and absorb what he was saying, which I really appreciated. He was well organized, and thoroughly explained each step that he was taking. I have been editing photos since early 2002, but always worked with jpeg files. Even just nine months ago, I had no idea what to do with raw files. However, with the classes on raw processing taught by Chris Orwig, I have realized that shooting in raw and then processing in raw is vastly superior to working just with jpegs. I have even been strongly advising my friends to shoot in raw!!
Camerosity
I watched several of Chris’ tutorials elsewhere, before I discovered CreativeLive. Chris is a very student-friendly teacher, and he always seems to teach more than he intends to. For example, when he’s talking about software and retouching, you can get new ideas from his creative eye and unique view of the world and just seeing some of the creative concepts in the photos that he uses. That’s the main reason why I watched this video. However, although I’ve been using Adobe Camera Raw for about six years, I learned several “new” (to me) things about the software. As an introduction to ACR, this video will teach you more, in less than an hour and a half, than I learned in the first 6-7 weeks, when I first began using the software. It’s a very simple, logical and orderly presentation that’s easy to follow.
user-9f5c01
Chris Orwig is a great teacher for Photoshop. He is very engaging, very well-paced and gives you the information you need without being boring. :)