Lesson Info
3. Crop and Compose Your Images in Adobe Camera Raw
Lessons
The Importance of Adobe Camera Raw (ACR)
03:03 2Adobe Camera Raw: Tool & Filter in Photoshop
13:50 3Crop and Compose Your Images in Adobe Camera Raw
07:34 4Improve Exposure in Adobe Camera Raw
20:19 5Enhance Color in Adobe Camera Raw
19:04 6Sharpen and Reduce Noise
07:07 7Output and Save Your Work
10:38Lesson Info
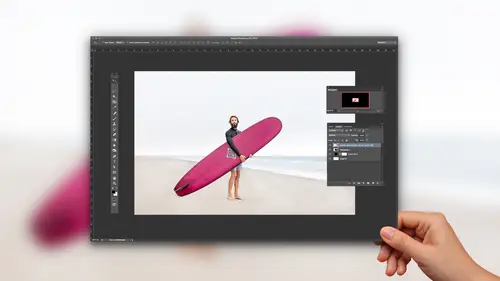
Crop and Compose Your Images in Adobe Camera Raw
what I want to talk about here is this idea of cropping and composing images in camera, because what happens with digital capture a lot and I'm up for you guys. But for me is we shoot lot. We should shoot a lot of images, and often we don't nail it. Are composition perfectly so cropping and composure and cameras amazing because it's non destructive? In other words, I can crop in and realize you know what? That isn't very good. Change my crop later, and at any point, I'm never losing or deleting pixels. So I'll select a few images toe work on click and then shift click short cut to open it up in raw, which you guys will always know. It's coming under control that big one and then are fit raw and it gets us there and we're here with these files. This 1st 1 was this set up? I did. This friend of mine has this vintage warehouse of all these amazing things, and I wanted to create this image with the suitcases and stuff, and obviously we can see the backdrop in all these other things. I want...
to crop that out a lot of times. We need to crop out distractions, right? So to do that, you can hit the crop tool by pressing sea or by clicking on the icon here. If you just click and drag out over the image, it creates an overlay graphic on top of it. And if you hold down the shift key and click and drag, it will constrain proportions. Let go of shift and you can do a bit more of a free form type of a crop. In this case, maybe I'm just gonna go free form and bring it in. And now I have the image within the image, and there's a really art to that is finding the image within your images. So this is not just tools. This is really vision. And this is where I think magic and photography happens. And so anyway, so I have that here to apply that you can one way to you conducive. Just double click inside of the crop area, and then it applies the crop. Same thing you can do inside a photo shop to react us the crop tool. Just press the Seiki or click on the icon again and say you know what I wish it was a little bit more like this. And then you can also press, enter or return. That's return on a Mac. Enter on windows, so it's either double clicking inside or enter or return. Let's look at a couple others with this image. I want Teoh. I had this this foam core in front of her, and so it's brown seen light back up, and I wanted to take a picture of that to kind of show that. But then I realised, actually, kind of like the expression, you know, I want to get rid of it. I want to find the photograph within the photograph, but I want it Teoh post on instagram or something. So I want to have a square crop. If you click on the Crumpton pulled down, you see that you have these different options here. I'll goto oneto one in. Just click and drag out. What that's giving me is this square, which I can then try to find the right spot. You guys know how to apply the crop DoubleClick, and then that gives me the crop of the image. Let's do just a couple more just to kind of reiterate a few things and show you a couple other other things with this. Another thing that we can do is we can grab our crop tool, and I'm just going to say Normal crop. And I can say, Well, I'm just clicking a dragon sort of a free form shape. You know, these are my kids and their friends at the beach. Dad's in the background. I want that out and I'm just kind of moving this around. And then I think, Well, maybe rather horizontal. I want vertical. There's a shortcut for that. It's the X key, so the X key allows us to toggle the crop in a different way. If you don't like short cuts, by the way, just ignore, um, sometimes their overwhelming for people. But I like to just Adam in, and sometimes it's nice. Just have those on notes next to you and eventually, you know, maybe refer to him. All right, so let's say double click to apply this. I realize Oh, you know, I kind of lost. I lost their feet, their legs and I want the beach. I want to get rid of the crop. Seiki, for the crop tool. Right? And what I'm gonna do here is press delete. And if I pressed, delete or backspace when the crops active, it gets rid of it again. If you forget that you have the crop, you have crop applied to it. You can always go in here, and there's a menu item for that as well, which is clear crop and that will get rid of it, too. All right, One more example. With this image, one things I'm gonna do is just click and drag out over and then look at my overlay. Graphic in the overlay graphics. The rule of thirds. Obviously, it's always talked about in photography in different ways, but sometimes that can help you realize something that you couldn't quite figure out. Like what? This image there's just too much headroom. There's there's so much space above the subject, and so using that is kind of a guy can help you say, Well, yeah, I wanted to. I want to kind of lead up to the subject versus have them low in the frame or could be the opposite. Doesn't matter. But for this image for me, I want her a little bit more prominent up there and then I could I could keep, you know, modifying that. So I'm pressing C and I'm changing this a little bit and just experimenting with the way the crop in the in. The fun thing with this is with all of these type of adjustments, you could say Okay, well, this is my crop. As with those other images, I'm done. I'm I'm heading out of here. I hit done. I go back and then it any points later, After I've maybe printed the file or delivered decline or whatever it is, I can always say, You know what? I don't like that crop. I'm gonna change it. You know, I have the flexibility to do that. And it's just so fast and so free, so nimble. So the reason to I want to start off with this whole idea of cropping is that what contend toe happen when we learn new tools is that we get all excited about color and all these kind of things and what my students would do. So I taught beginning students for 12 years really amazing aspiring photographers. They would have all this great work and processing on the file, but the composition was off, so I'd say, Let's get your composition going. Then let's let's let's build up that image. Can you do it the other way? Sure, but it just kind of an interesting way to think about it. Let me show you a folder of the rial deals faras my images, these air, some photos of family friends down at a local beach. And here I'm just gonna press the Seiki toe access the crop tool to kind of show you what cropping looks like in my workflow. In this case, I'm shooting with the 50 millimeter lens, which is a really natural view of the world. And what what's interesting about that is it's not super dramatic and exciting, like a zoom lens or super wide and expansive like a wide angle lens. It's a little bit normal, and so in this case, if I go through these images, you can see the grayed out areas where I crop you can see almost all of them. There's kind of this pattern right, and what the pattern is is that it's like I just want to get a little bit closer and the reason I'm saying this is that this kind of crop tool can teach you a lot about the way that you shoot if you find, like, I'm finding here with the 50 When I was photographing a family at the beach, every image need to be cropped in about 10% or so. Some of them may be a little bit more. I need to move closer. And so it's a great feedback loop, a great way to learn about composition, not just fix problems. And so you want to start to think about that also, whenever you watch a photographer give critique, which I'm gonna be doing later today with Matt Laskowski, which will be a lot of fun. Ah, lot of times they talk about composition and cropping because that's that's one of these missing elements, right? Cameras, air so good and their capture, but that art of framing and so really using a tool to try to develop that were sit down with a friend, say, how would you crop this image? You can learn a lot about your own photos
Class Materials
Bonus Materials with Purchase
Ratings and Reviews
Pamela Richardson
Highly recommended!! I have watched some classes taught by Chris Orwig before, and really appreciate his excellent teaching style. He truly is a master of his craft in both photography and in teaching. He taught at a pace that allowed me to take notes and absorb what he was saying, which I really appreciated. He was well organized, and thoroughly explained each step that he was taking. I have been editing photos since early 2002, but always worked with jpeg files. Even just nine months ago, I had no idea what to do with raw files. However, with the classes on raw processing taught by Chris Orwig, I have realized that shooting in raw and then processing in raw is vastly superior to working just with jpegs. I have even been strongly advising my friends to shoot in raw!!
Camerosity
I watched several of Chris’ tutorials elsewhere, before I discovered CreativeLive. Chris is a very student-friendly teacher, and he always seems to teach more than he intends to. For example, when he’s talking about software and retouching, you can get new ideas from his creative eye and unique view of the world and just seeing some of the creative concepts in the photos that he uses. That’s the main reason why I watched this video. However, although I’ve been using Adobe Camera Raw for about six years, I learned several “new” (to me) things about the software. As an introduction to ACR, this video will teach you more, in less than an hour and a half, than I learned in the first 6-7 weeks, when I first began using the software. It’s a very simple, logical and orderly presentation that’s easy to follow.
user-9f5c01
Chris Orwig is a great teacher for Photoshop. He is very engaging, very well-paced and gives you the information you need without being boring. :)