Post-Processing - Light Painting
Lesson 19 from: Beginner's Guide to Astro Landscape PhotographyPeter Baumgarten
Post-Processing - Light Painting
Lesson 19 from: Beginner's Guide to Astro Landscape PhotographyPeter Baumgarten
Lessons
Class Introduction
01:02 2Understanding the Night Sky
08:18 3Planning Your Shoot
03:05 4Scouting Your Location
08:47 5Gear Essentials
08:44 6Camera Settings
08:51 7Astro Landscape Composition
08:50 8Light Painting
01:28Time Lapse
13:25 10Photographing the Moon
05:30 11Photographing the Aurora
04:05 12Photographing Meteor Showers
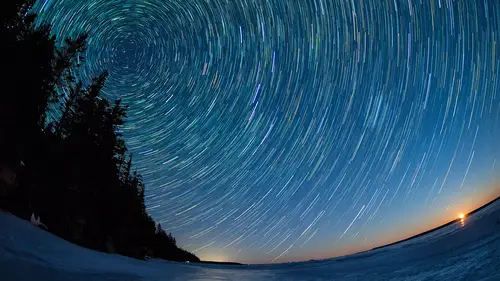
04:08 13Star Trails
07:04 14Capturing Panoramas
03:50 15Shooting Multiple Images for Stacking
05:36 16Getting Creative
04:56 17Post-Processing - Astro Landscape
06:23 18Post-Processing - Stacking
10:22 19Post-Processing - Light Painting
06:22 20Post-Processing - Cloudy Skies
11:59Lesson Info
Post-Processing - Light Painting
So, we finished up our Light Painting on our first night out in Joshua Tree. And, this was the result we got. We used the Live Composite mode, and that's why you're seeing a very long trail of dots from an airplane going through, but you're also seeing the beginning of star trails. And, that's because we ran it for several minutes, as we were painting these rocks in the foreground. And then, as I go to stop the live comp, I accidentally got a little bit of my headlamp beam into the frame, and got a little bit of flare here in the top corner. But, I'm not worried about that, 'cause we're gonna correct all of that. After this light painted shot, I took one more, this one here. And, that's a regular 15-second exposure, in this case, just so that I could get for the sky. So, in this case, this first shot, all the while I was worried about was the foreground, and the second one, I'm just worried about the sky. But, when I looked at this, I realized, I don't really like the color cast on tho...
se rocks. Those rocks aren't green, they're definitely more tan, earthy brown color. And so, I'm gonna start playing with my white balance to get a more natural looking rock formation here. So, I'm gonna go over to the temperature slider, and I'm gonna start pumping that up. And, I'm not worried about the sky, I'm not looking at it at all. What I'm looking at are the rocks. All right, so, they're become quite yellow. But, now I'm gonna add some magenta tint to it. And, they're actually beginning to look more earthy. And again, you have to look beyond the sky, and ignore that completely, 'cause that now doesn't look natural at all. But, I'm just focused on the rocks. So, I'll just play with this slide. Ooh, that's actually looking pretty good there, that looks kinda earthy tone, very neutral. How'd it look if I added a little bit more magenta, I don't want pink rocks. Now, no, that's too much magenta. All right, so there we go. We now have these earthy colored rocks. I'm now gonna go over to the other image. And, this time, I'm only worried about the sky. I don't care about the foreground. And, I'm gonna bring up the exposure a bit, same place I usually always start. I don't need to bring it up too much, though. And, because of the cirrus clouds that were up in the atmosphere, I definitely want to try to cut through that with the Dehaze tool. And, you can see that that's working just fine there. I might actually try something different here. I'm finding that a little too dark up there. But, what I'm gonna do is use the neutral density filter here, graduated filter. And, I'm gonna slide that down here. Feather that quite a bit. All right. And, I'm kinda liking that. Click "done" there. Maybe add a bit of color to this sky. Maybe a little bit more Dehaze. I wanna try to cut through as much of that cloud as possible. There we go, I can see more stars. All right, so now I've got these two images. I like the foreground in one, the sky in the other, let's bring them into Photoshop. Hold the Shift key down to select both of them. Right mouse click, Edit in, Open as Layers in Photoshop. All right, so I'm gonna actually switch these layers around, I'm gonna bring this layer up. And, I wanna get rid of these rocks down below, to show the other ones in the lower layer, right? And, there are a number of ways of doing a selection. You can use the Quick selection tool, and see how that goes. I'm gonna show you a technique that I like to use in a lot of my images, I'm gonna use the Threshold. So, I'm gonna add a threshold layer here, and I'm gonna drag that until I can clearly see the rocks. Oh, too much, right about... There, that's good. I don't care about the stuff that you still see in the sky. All right, so it looks like everything's selected in the foreground. Use my magic wand tool, click on that. All right, but then I'm gonna inverse the selection. So, go Select, Inverse, all right? Now I don't need that layer anymore, I can turn it off, go back to my top image layer here. And, I'm gonna hit the Mask tool, voila, gone. All right? And now, I have the foreground from one image, the sky from the other. I can tweak those a little bit if I'd like. Now that I see them side-by-side, I might wanna play with, just sort of, the overall color of these rocks. So, I'll click on the bottom layer, add a hue saturation to that. And then, I don't have to worry about clipping it, because it's already above only one layer. If it wasn't, I would clip it. But, now I might play with the hue and saturation a little bit and see what I get. And, that's looking all right. Okay. And, if I wanted to, I could do the same thing here. If I wanna try to make sure that it looks as natural as possible, so now I've added another one on top. This one I'm definitely clipping. And, I don't need to adjust it very much. But, there you go. Again, this was more about just sort of trying to rescue a shot when, you know, the conditions weren't perfect. You know, this is not what I was hoping to capture that evening, but I didn't walk away empty handed. So, there's always a way that you can walk away with an image that, hopefully, you're happy with.
Ratings and Reviews
Lana Froemming
I purchased the Creative Live + Olympus Step Outside Conference Bundle some time ago, and it has taken me this long (too long) to view the astrophotography class. Although not a beginner, I have been using Olympus gear (EPL5 & EM1) for about 7 years now, I have only dabbled in astrophotography – and as a result, blown my fair share of what should have been killer shots. When I did give it a go, I obtained most of my settings’ tips by combing through Peter’s blog posts and then racing out the door. Although I feel that I know my camera pretty well I still learned so much from this course. I appreciate that he walked the viewer through multiple night time photography events including shooting the milky way, the moon, aurora, meteor showers & star trails as well as talked about the different camera features including night sky panoramas, in-camera multiple exposures, live comp & time lapse and presented a variety of lens choices and why (plus so much more). What I love about Creative Live is that once you purchase a “class” you own it and can return to your classroom over, and over again. I also appreciate that they work with experts who are also amazing teachers. Peter is one of those.
Doug Marshall
Some classes are just fantastic and this is one of them! Peter Baumgarten is a wonderful presenter of his extensive knowledge, experience and passion for the subject. This is a course I will return to watch again and again. Highly recommended if you are like me and are interested in getting into astrophotography and landscape.
elizabeth chambers
To my way of thinking this was the best photographic genre instructor featured during the Olympus Step Outside series. He may be a more seasoned instructor than the photographers demonstrating landscape and bird photography. Whatever the reason, I thought he seemed to understand his audience particularly well. Great advice and the post processing was interesting. Likely because of my familiarity with Lightroom, I found the post production done by the bird and landscape photographers rather mundane whereas the astro photography post production was new and interesting to me.