Compositing 3D Objects in Photoshop
Lesson 9 from: Beginner's Guide To Working With 3D in PhotoshopJesús Ramirez
Compositing 3D Objects in Photoshop
Lesson 9 from: Beginner's Guide To Working With 3D in PhotoshopJesús Ramirez
Lesson Info
9. Compositing 3D Objects in Photoshop
Lessons
Class Introduction
03:03 2Understanding 3D - Concepts and Principals
07:03 3Working with Photoshop's 3D Interface
11:02 4Creating a 3D Earth Using Mesh Presets
01:39 5Texturing 3D Objects in Photoshop
18:05 6Finalizing 3D Object in Photoshop
05:48 7Project Intro: Create a Flyer Using 3D Models and Adobe Stock Templates.
02:55 8Customizing and Importing Adobe Stock Assets
03:31Compositing 3D Objects in Photoshop
08:12 10Create and Animate 3D Characters in Adobe Fuse
04:01 11Customizing 3D Characters in Fuse CC
05:39 12Importing Fuse CC Characters into Photoshop
03:33 13Compositing and Animating Fuse CC Characters in Photoshop
16:09 143D and 2D Assets in Adobe's Project Felix
06:43 15Compositing 3D elements in Project Felix
11:23 16Working With Project Felix Renders in Photoshop
03:28Lesson Info
Compositing 3D Objects in Photoshop
- [Jesus] So now let's talk about compositing 3D objects in Photoshop. We have our 3D object here as we saw in the earlier example with the 3D Earth. We can rotate around the camera and place the 3D object. So I'm just going to move it and maybe place it right about there, maybe scale it down right about there. But remember the 3D layer is a layer. I can place it anywhere I want so I'm going to place it behind the text, and rotate around some more. Position it. I can double click on that 3D object and you'll see how this file is created. It's got all these different meshes. If I disable them, you can see what enables and disables. That's the football itself, and they're all labeled football, football_shoelaces. They disappear. They appear. So you can adjust them accordingly. What I'm going to do is I'm going to use the model but I'm not going to use any of the textures that were brought in. I want to use my own. So I'm going to open all these guys up. I'm going to click on this top one...
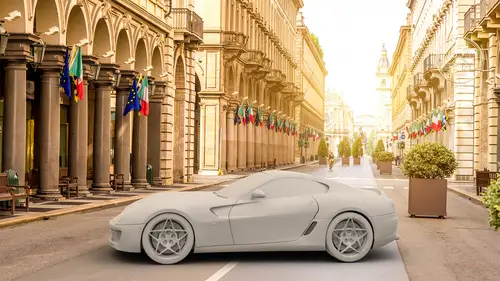
, hold Shift, and click on the bottom material. Notice how it says Mat after all of these, that's material. So click on the top material, hold Shift, click on the bottom one, it selects all the materials. Now, I can tell Photoshop, I don't want to use any of the textures so click on Remove Textures. It removes all of the textures. Some of these materials, not all of them, have something that is called a Normal map. We're not going to work with them in this class but just for reference, a normal map is sort of like a better version of a bump map. Bump map only has up and down, a normal map also has left and right. They're a little bit harder to create, and Photoshop can actually create them as well under Filter, 3D, and then Generate Normal Map. In case you're curious. But anyways, so Normal, Remove Texture to remove the normal map, and you'll notice that before, we had that football leather texture on there but if we remove the normal map, it removes it so we don't have that anymore. Also, I want the football to be black. So now, everything is black. You guys get where I'm going with this, right? It's like a silver Super Bowl type of football thing. So then we have the football there and we also want to make it reflective, so I'm going to increase the Reflection. See here, Reflection in the Properties panel? I still have all my materials selected. Click and drag the Reflection, and now, it's reflecting something. We don't know what it's reflecting yet but you will in a moment. If you click on Environment, we're reflecting the IBL. That is the image based light. The image based light, it does two things. First, it casts light based off an image and it also projects the image that the reflection is going to catch. So if I go into Edit Texture, you'll see what that looks like. See these little dots? It's gray. And it's got these little dots here. If I just come in with the Marquee tool and I have one giant white line and then make everything black, you'll see how it's going to change the light of the football. So press OK, save it, go back. You see how it changed? So it's catching the reflection and it's also emitting light. So with that knowledge, we could use the contents of our image to reflect onto the football so that it looks like it's in the actual scene so I can go back into the Layers panel, I can disable my football layer and I can copy everything so Command+A to make a selection out of everything. Then go to Edit, Copy Merged, and I can go back into my 3D scene. In the Environment, I can go into the IBL and click on New Texture. I'm going to create a new texture, press OK. It looks white. And then, notice how the football turned white, that's because our texture is completely white. So if I go into Edit Texture, you'll see that it's completely white. If I paste that flyer on there and then I scale it down, it doesn't really matter that it is distorted. It'll still work. And let me just make sure it covers the entire area here and save. Close it. Go back into my football. Notice the football. Now, it's catching the reflections of the background. And even cooler, we can click on the Move tool, we have the Environment selected, and we can click and drag on this little sphere and you can see that even the text is being reflected onto the football so you can find the best spot for your... your image's best (inaudible). So you can click and drag, and when you find a spot, remember, click on the M key on the keyboard and then click and drag and make a selection and then click on the Render button and see how the final output is going to look. And you don't have to let it render all the way. This is a good preview. The only difference is that between this and a final render, is that it's going to be less noisy. The lights are going to...lights and shadows are going to be more gradual. So, you can press Escape and continue working by clicking on the Move tool and clicking and dragging this around, maybe coming into the Environment and disabling the Shadows on the Ground Plane by clicking and dragging this to the left and continue adjusting this design, and you might not be happy with the football there because maybe it doesn't look good behind the text, maybe you want it somewhere else so you can either adjust its position in the Layers panel, maybe underneath some of these brushes might look better, maybe something like that or you can move it in 3D space, make it smaller, rotate it, move it somewhere else, maybe move it below. So now you have more flexibility as to how your 3D model would look in this design. So yeah, that's pretty much all I had for this example. You can bring in a 3D model to enhance any graphical elements that you're working with and you can make them fit into your scene. And again, you may not be working on flyers but think of what we just did. We just took a 3D model and applied the background behind it. You can do that for anything, you can do that for a photograph. So maybe you're a photographer and you want to have a 3D model of a car, now you know how to make the model reflect the environment that it's in. So you can use these examples for a ton of other things, not exactly for what I'm just showing you. Any questions, Jim? - [Jim] Let me take a look, Jesus. So one thing it says here, from Lorean Davy, earlier, you showed a kind of Bump Map technique where you use black and white brush strokes to produce indents into your sphere. Could one continue with this technique to model the sphere into another shape? - So the short answer to that is no. The bump maps are not modeling anything, they're creating the illusion that you're modeling so you're not changing the shape of the 3D model but you're using...essentially what Photoshop is doing, is using light to create the illusion of texture. This is really what you're doing.
Ratings and Reviews
Maria
Very informative class! I was expecting only basic information, but Jesus went into quite a few specific details and showed some useful tricks. Many many thanks!
Chouaib Rama
Of Course this is amazing class
Student Work
Related Classes
Adobe Photoshop