Lessons
Lesson Info
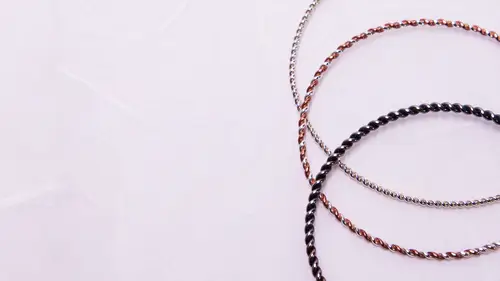
Creating the Earrings
So the earrings I twist around the loop, so you've got the ear wire here's the ear wire and you can also take metal and just twist it over it. So I'm going to cut this into a couple fifteen centimeters. This is thinner. This is twenty two gauge wire, so it's a little bit thinner than what we've been working with, and I'm going to cut it into fifteen centimeter length. Okay? Just show you one last thing. Couple last things that you can do here so you can also then twist around here. So I'm taking the wire. I'm sticking it through the loop of the hearing, folding it in half like I've done before twisting the end. And then you can literally took place this into the end of the check into the flexible shaft and twist this welt on here and come up with the sticks that air just hanging. So what, you want to do it that you still want to hold the same tension? You want to make sure the ear wire is an up close to the end or anything like that? It's boy back right in the center, same thing you ta...
ke a little drill bit or something like that, hold it taught. And twist even do multiple ones to get these hearings, which is really pretty fun so you can twist on two things as well because you're utilizing that little loop at the end as a design element right where it folds and half to using that as a design element here, so just snipping it off to make the hearings does that make sense? Right? And one other cool things with these so there's the end of the wire and you like to but I like to ball it up so instead of just melting it together and or filing the end flat so it just ends in his nice you can melt the ends together so after twisting a few pieces on, you've got these ends that air the first the beginning twists that you made, which is a little bit it's not so nice it's a little bit less of a clean, even consistent twist and you can take that and you khun ball it up by again over overheating the medal on purpose especially silver it naturally wants to just ball up into a little pool and could be great another really simple trick here that it's not really a trick but it's learning about the nature of the material and so a lot of times you don't want to melt the metal obviously it'll ruin your project if you overheat but working it on purpose so you can have it be stuck up like this or facing down, and I'll show one with both melting that s o on those hearings, you have three different three different sticks, so can you really do? Is money as as many is the ring that they're held on to will? Whole? Absolutely yeah, it'll have a different personality because they'll be they'll sort of like stick out and instead of just laying straight and down, the more sticks you have, the fuller gets and they start to get out but you could have different lengths fifteen centimeters makes it more less this length, but you play around with the length that you want and you can have all kinds of different designs really simple so ok, my torts going heating up a little bit away from it starts to get red hot see that it's pretty fast so heating up and balls and as soon as that happens, you want to move away it's done like there's no reason to stay there so often you can see in necklaces you might notice that there's a kind of a hammered out little end too people link on a chain and there's a hole drilled or something like that you can ball up an end, hammer it and you get a certain effect that happened so people use the balled up technique for different different reasons. Working with wire this is just a nice, finished moment for these hearings. It's. Why I like to use them so a mystic. This into the pickle. Too clean.
Class Materials
bonus material with purchase
Ratings and Reviews
Beth Soll
Raissa's work and explanations here are wonderful. 5 Star quality! I am a beginning jewelry student but I have many of the items on her list because I decided to go further with this. She also tells you how to use other tools if you don't have them (i.e. Dremel or even hand-held to twist instead of a flex shaft for twisting the wire)! The dude that wrote that beginners don't have the tools must be joking. There are things you can do ahead of time to prepare yourself if you want to get serious. For example, I previewed this class so I would be ready and got a few things. I will eventually own everything on her list. I'm so glad you included her as a teacher. More please!!
Luminary Organics
This is a fantastic class for a beginning jewelry maker. Raissa is a wonderful teacher. She explains what she is doing as she does it and takes her time to make sure the student understands why she is doing each step. I have watched this class twice so far. The first time I made three different twisted wire pieces for bracelets. The second time through, I made two bracelets and three rings! Thank you CreativeLive for bringing Raissa Bump to your platform!
Nadja Meyer
Good starting point if you have never done any Jewelry at all before