Retouching: French Postcard - Longhand vs Actions
Lesson 27 from: Boudoir PhotographyRachel Stephens
Retouching: French Postcard - Longhand vs Actions
Lesson 27 from: Boudoir PhotographyRachel Stephens
Lessons
Day 1
1Empower Your Client, Empower Yourself
35:00 2Creating a Nuturing Experience for Your Clients
17:16 3Demo Shoot with a Client
45:14 4Shoot: Implied Nude
15:41 5Shoot: Maintaining a Connection with Your Client
29:03 6Retouching with Actions: Focus on Skin & Curves Part 1
38:19 7Retouching
19:24Retouching Using Photoshop Actions: Recap
25:03 9The Intimate Business of an Intimate Business
26:56 10Finding Your Client
34:14 11Why to Lose the Pre-Shoot Consultation
14:02 12Shoot: Shooting with a Vulnerable Client
44:04 13Shoot: Stripping Down Client Defenses
37:20 14Shoot: Posing and Mixed Lighting
47:57 15Retouching: Longhand vs Actions Part 1
28:19 16Retouching: Longhand vs Actions Part 2
19:57 17Retouching: Longhand vs Actions Part 3
23:49 18Retouching: Longhand vs Actions Part 4
20:25 19Tips for Male Boudoir Photographers
09:37 20Shoot: Creative Posing with Couples Part 1
24:00 21Shoot: Creative Posing with Couples Part 2
17:10 22Marketing: From Prospect to Client
39:42 23Business Practices: How We Do It
48:43 24Size Shaming & Pin Up Shoot
35:51 25Shoot: French Postcard
25:37 26Retouching: Pinup - Longhand vs Actions
34:16 27Retouching: French Postcard - Longhand vs Actions
41:01 28The Value of Failure
27:34Day 2
Day 3
Lesson Info
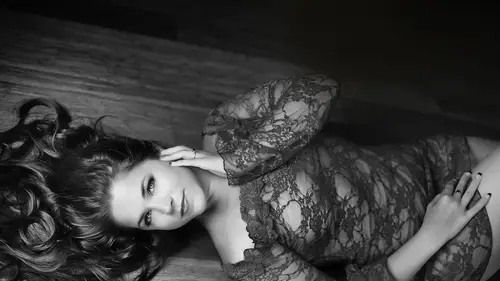
Retouching: French Postcard - Longhand vs Actions
So I want to show you guys really quickly. At the end, we went ahead and put on our, um stocking. So do you guys see the diffusion? It makes it nice and soft. So you can see here the diffusion that the nylon made back in the day that images were not sharp. So doing these really cooled? If you see what it does here to the tool as opposed Teoh before where the The tool is just sharper, it really kind of just makes them more painted. Look, see that If you guys watch here, here's before we put on the nylon and here's after So just putting that nylon on just really does make a really cool effect. So play around. I'm kind of loving these with the nylon, but let's see, let's go ahead and retouch one with the nylon for fun. I really love this one. I love that one to go. All right, let's do this guy. So I'm just gonna kind of toggle through my things here, okay? And like I said, these air just for me. So I know that they don't always do with their name to Dio. All right, let's go ahead and play...
around in here a little bit. Don't bring the exposure down a little bit. Fell like down some kind of really liking the kind of diffusion. That's the kind of, like, under exposed. Look, let's go ahead and do that. Working with this image, I'm going to show you guys, um, how to play around with texture overlays. And I know that you guys have heard as we were going throughout the workshop about s r lounge SLR lounge, giving away their paper texture. So we'll be playing around those a little bit today, so you guys can see how to use him for whoever is going to get them or who has won them. Okay, okay. I am just loving this image so much So the first thing that I'm looking at this overall image is right in here. I'm kind of wanting her ways to go smaller, So we really I'm looking at this like an art piece. So when I'm when I'm doing an image for more, more artistically, I do want to still stay true to the person. But I also wanna have a little bit more artistic creative control as well so I may take it further than I would for just a regular boudoir portrait. When I'm doing a fine art piece, somebody's gonna have liquefy here on just gonna tuck in here a little bit. And remember, you can wiggle to keep the softness. And I think I think for this because I really love the way that these that this is looking here. I don't think I'm gonna go anymore. Using liquefy for this thing to go back and use my lasso tool toe, finish the manipulations I want to do right there. But let's just address some of the other things really quickly. It all looks awesome to me. So I'm gonna go in here with my lasso tool 25% and I'm gonna bring it about here. Let's go about there. Okay. We're gonna copy, control paste and transform. I'm sorry was doing PC that controls again. Here we go. All right. So I'm looking up in here to make sure that I don't lose my way. Looking down here here to make sure that I don't lose the lines. Gonna come in a little bit more right here. That's just seeming to me better I like that better for this image. I was gonna check my lines here. Everything looks good. I think I got a little bit of bleed right here. Someone take care of that real quick with my clone stamp tool? About 30%. I was gonna clean this up right here. You always want to make sure that you, uh, keep looking. These are really, really, really easy to miss. So since we use the nylon, we already have some of the really cool, uh, vintage treatment already on it. We did that by hand, using the, um, nylon. So I'm still going to do it. But that was that's the cool thing about having those little hacks to use. There we go. It's gonna bring this guy down, hide that. Here we go. And we're gonna mask that out. Just gonna get Remember we checked Thea strap. Luckily, it's it's really not too bad in here, but we're gonna clean that up. That kind of get just a little bit of a harder brush. And I'm just gonna get rid of this guy here. Just kind of smooth that down, and then I'm gonna go ahead and I'm gonna go grab my skin. Clean action. I normally use my shortcut keys, but I can't figure out how to get them to work on this mat keyboard. So I apologize, you guys. So when you're working with frequency separation technique, it's interesting toe learn, like what's texture and what's color. Sometimes I'll be like trying to work on an area, and I'm like, That's not doing anything. And then I realized, Oh, it's because it's this is actually not color that I'm tryingto manipulate. So what I'm doing right now is I'm just smoothing out the strap that I took that we tucked underneath her. Of course it that's bulging out under the material. We're just gonna clean that up a bit. It doesn't have to be totally perfect because it still does have this texture in here. We just don't want it like you can see this right here. We don't want that. We're going to smooth out. There we go. Okay, so I'm gonna go ahead, and we, um we already did The, uh, exposure in color balances longhand yesterday. So again, I'm gonna do my perfect prep, which does have all of those that we went through longhand yesterday in this one action. So all these things other than recover mid tones, which I don't remember how to do long hand. I apologize, and I don't have notes for it. All of these things we've already done yesterday, um, clarity, punch. It's just sharpening using high pass and ah, blending motive overlay liking that about their And I'm just going to paint away in a few different areas right here. I'm gonna paint that away. The pain away over the wides. It's kind of paint away in here, over the skin of it. And around here, I know yesterday we talked about creating vignette by just bringing in dark around them and keeping it light just around their head. That's just what I'm doing here. I'm absolutely loving this shadow. You could really play around with shadows if you brought the light over here and had someone say, leaning against a wall, you had a light like that and you had the light coming in this way, you would have a really cool shadow of their form right here. Just really creates interest to an image. All right, so I'm just gonna take away a little bit more in here. Kind of bring it down a little. They're perfect. Okay, so it's still feeling a little bit more, Um, like it's got a little bit more saturation that I'd like. So I'm going to go back to our hue saturation. I'm gonna grab our little hand here, and I'm just gonna pull back the skin tone a little bit. I'm just gonna play with the hue a little, Okay? Now, I'm just gonna go ahead and paint in where I want that. So what I'm looking at when I did that as I'm looking at the skin and a little in the hair kind of hear a little in the stocking arm a little bit. Ah. See, Let's go about there with it. All right, Now let's get in and do some detail work. So again, with the hair, I'm gonna go to the shadows highlights. And I'm just gonna kind of play around in here, see where the where I'm liking it and just play around with all the different sliders. I mean, as far as like, what things they're doing in photo shop, I've always been kind of of the mind light. I don't really need to know the how. I just need to know if I want something done, it gets it done. So I just I play around sliders without really knowing, Technically, what doing? I just know it's shuttle. It's called shadow Highlights. Okay, cool. I get it. So I was going in to see what it would do to the hair, but I'm actually really liking what it's doing overall here. I just want Teoh kind of bring down just a teensy bit in here, so I'm just dabbing. Okay, let's go into the eyes. So because she has really pretty blue eyes, I believe, but be with the, um, with the stocking. It does diffuse that. I'm not gonna worry about it too much, because this is a full body, but we do kind of want to brighten those eyes up for her. So I'm just gonna go here. I'm gonna go here. Just gonna kind of play around a little. I was gonna paint that back into the eye, so this may not even really be something that we would be able to notice in the picture. But this is just I get I tweak out in photo shop a lot. Oh, let's see if we have a happy accident here. So I just did that, um, color balance. And then I saw what it did here on. It was like it was that's kind of cool. So I just duplicated the layer and I removed the mask. And now I'm just gonna go ahead and play with it a little bit. So I was really loving that. Now I'm seeing this only Well, that's pretty cool. I think I'm gonna keep part of it. Probably about right there. But I do feel like it kind of made this a little too bright than my liking. So I'm gonna bring that out a little and maybe even bring the coolness out of the white as well. Okay, so we really don't have much to do with her skin. And that's the beauty of using a nylon. It softens this kitten for you. So I'm just gonna clean a teensy bit in here and on the backdrop, using skin clean the high frequency separation. I'm gonna kind of go heavy on it at 70% and my flows on and it's a painted backdrop, so I'm not gonna tweak out too heavily on it. Just the just the ones that are distracting to me. I'm going to get rid of those guys. Kind of look around. If you hold your space bar down that turns any tool into the hand, you can just drag around. I do this a lot just to make sure I'm not missing a tiny detail that can completely destroy an image. And I'm aware that we can see the edge I'll take care of at the end. The edge of the backdrop. I know that's in the shot. Okay, so just in here, just gonna clean right around here a little bit cleaning in here a little bit. Get some color on the color layer. It's kind of bring down the color and kind of take out that blue magenta color. Okay. When things start looking too heavy to remember, it's okay. You're gonna You're gonna be able to bring it down with Europay City. Rarely do we ever do anything. Rarely do I ever do anything in photo show and keep it at 100% opacity. Okay. So obviously, because I'm awesome. I brought back these dots. I tried to get rid of did I mention I really suck it? Forethought. I was gonna hit this. Gonna hit this with the spot healing tool real quick Just cause it's gonna totally annoy me if it's still there. Okay, so I'm gonna hit. We did this yesterday. The skin spots smoother. I'm gonna hit that real quick. And if any time you want me to do it, longhand just shout out are the paper textures in this folder where the where these images live, we will find out for you. So under spot smoothing I'm not going over everything. I'm just doing little spots. Rachel. Sounds like everything is in the same folder. Sweet. Thank you are welcome. Okay. Yesterday we did lips. I'm gonna do the lips again real quick. Gonna go about 10%. Here. Let's go a little more here. Yeah, I did it right this time for a strike. Okay, there we go. Now we're gonna mask that out. Gonna bring it in. So obviously the grain is crazy with the stocking. I love it. I think it's super cool. If you are not a fan of green, don't use a nylon over your lands. Okay, so I'm going to go ahead and I'm going. Teoh, do the, um I'm gonna sharpen it real quick Before I start putting any other, um, texture files over it. You have to forgive me. I usually use UCSF 10 whatever that I usually use those. And I can't get them to work on this keyboard. So So that there's actually a question on this from current Katie, A photography. So do you do other things after you to the photo after you sharpen it? She thought that sharpening was the very last thing that people did. Correct. I normally that is my, um that is my workflow process. I love using treatments. I love using overly files. But in my experience, when I've tried to get creative just without talking to a client, I think an image looks awesome and I want to throw a texture layer over it kind of make it more of an art piece. Not everyone gets it. And then they complain Why? I really liked it in my proofs. And I don't know why. It's all there's these scratches on it or, you know, so I just I don't do it anymore. Just not for that not for the to my typical boudoir client. If I have a concept like this, then I take artistic license to do what I like. So I'm liking what the sharpening is doing here. And you can see we still have some nice grain I'm not gonna worry about. Um I'm not gonna worry about whitening the eyes or anything like that. I do kind of want to keep this, um, true Teoh a classic retro image, and they didn't whiten eyes or anything like that. So that's why I'm not doing that right there to try to make him a little more blue. And that's all we did on that. So, um, I'm seeing a little bit of of discoloration between here and here, so I'm gonna address that really quickly. And, um, I'm gonna dio that with my skin clean because it's the quickest way to do anything for me. Now, when I'm when I'm dealing with trying to color match skin, it's like it. I almost feel like I'm cheating using this. And what does it What does it do? I can just sample I can grab my brush, and I just hit option or Ault and I Congrats, Aiken. Sample the color from one place that I want it and then just painted over where I want it to go. And over the years with photo shop. I don't know about you, but I have spent so many hours upon hours upon hours trying to figure out how to realistically color match skin that this this makes me almost want to laugh. It's so easy. So you want to make sure you have a nice soft brush and I'm gonna just bring my flow down to here, Okay? Do you see how easy that Waas done? Okay, so let's do our little digital hug, so I don't want too much here. So I think what I'm gonna dio is I'm gonna keep it there. But I'm just gonna start kind of painting away over certain areas. All right? So I'm just kind of bringing back some of that. It's almost like more of the flat. Look, I don't want there to be too much before I put on my texture. I'm liking that a lot. I'm gonna save that. And the white is lovely, but it's kind of not feeling the white right now as we go further along in this image. So what I'm gonna do is I'm gonna just create a layer here, and I'm gonna put this onto color mode and I'm going to grab my brush and I'm gonna sample this color over here from the tool. It's kind of sample it more from the chair. And I'm just going to kind of bring down that white, and this could be done under the frequency separation the skin clean. But I'm just trying to show you guys different ways to do things. So there's the white. There's when we put color over it, go about their with it. Okay, so now we're gonna have a little bit of fun with texture. So before we do that, there's a conversation going on in the chat rooms, and people are still trying Teoh understand exactly why you flatten so often and then and then have in the history. So just explain that for everybody who works who didn't hear you explain that the other day, Of course. So, uh, flattening your images and not saving your layers was kind of a difficult process for me. It's just like deleting images I used to take save everything I took like it was I, like could not let go of any raw file. I don't know why it was really hard. And then it started getting to a point where, you know, I can't Storage costs money, you know, I need to figure this out. This is a lot of work. I don't need to be doing this. And that's kind of the same thing that happened to me in photo shop. And I was like, How can I flatten and save but save myself? So I was trying to figure out, trying to figure out. And then I discovered here in the history palette, you go to history options. If this is by default, the 1st 1 is always checked. But if you check this 2nd 1 automatically create new shop snapshot when saving Every single time I flatten, I save every single time I save. Photo shop is saving a snapshot. You guys want to go through it real quick? So these are all every time I flattened every step we went, you can see I do it a lot. So there's from start to finish. We could end here like this. Could This could very well be the end of it. If I was going to be done here, I'd probably bring this back. I'd probably do that and be done. In fact, I'm gonna go ahead and keep that cause it's awesome. Okay, so I know a lot of people don't know how to use textures and how to do overlays. So inside my action set, I have little over late helpers, um, with the different effects that are most commonly used. So I'll go ahead and do you want me to show you longhand or just burn the action? It's the same way their way. I mean, I will stood along. Let's do the longhand. Okay, So, file, would it? Where would it be? This one? I'm so smart. Okay, so I was making my own textures by taking pictures of stuff than trying to get all fancy with it and trying to digitally I sucked at it. But I did package them, and I was trying to sell him with this. It just didn't really feel great about it. So it's trying to research how to do it. And then I found SLR loans, and they have this amazing textures pack And they have all these insane textures in each one. They have foundation grunge, burned effects, blends. They have a video that shows you how to do it. And then they have a video of how they made it. So they actually took paper and, like, put stuff on its puts a sick of sandpaper on it, took pictures of those and put, like, some kind of, um, Olean on it, burned it, you know, hung it up, then took pictures of those, and I was like, Yeah, that's way too far for me. I'm just gonna buy this. So they've been so generous to let us use this on creativelive and to offer it to you guys at a discount? I believe so. I'm just going to go to one of our foundation images here. Is there a way to look at it? Ah, here we go. Oops. My bad. This one. All right. So you have all these different ones. Let me look at my image. We since we have this awesome backdrop and we have already shot through a nylon, we have texture going on already. So we don't want to go to nets with it and I really am liking the tones that are going on here. So I know that when I'm looking for my foundation image, I want to stay along those lines. I kind of want to keep the colors the same. I don't wanna offset them too much. And I really like the background texture. So I'm gonna go for one of these more, um, melo textures that see this guy and it opens up in camera raw. So once you find a texture that you like, you can then tweak it if you want Teoh and then we're going Teoh, select all and copy. And we're going Teoh paste in place if it will let me. Oh, I did a bad thing. Pay special paste in place. There we go. Okay, so once you have your texture file on and you just wanna always make sure that you see, I always kind of drag mine off the off the outside just a little bit just to make sure that there wasn't that little bit on the top that I wasn't seeing. And then you can just start going ahead and toggle ing through your different, um, blending mode so you could this working with textures really helps You understand what blending modes, dio and how cool they are. So typically the ones that are used the mostly I use the most overlay. Ah, you soft light. I use screen and I use multiply. Those are the ones that are like my go to textures so you can see here. Let's go in and see You want to be careful when you apply a texture that the texture will lay over the skin. I'm kind of really liking that right there the way it is living shit. Let me see here. I just I'm feeling more and more drawn. Teoh this that this kind of like dark, mysterious, under exposed feel for this image. Something to create a mask Here I grab a brush. Go about There is good someone up a city on the 20 flow. I'm a 30. I'm just gonna kind of pain away over the scan a bit. You got what you want to get close up to make sure that you're getting all the areas. I don't mind if the texture, if you can see I don't mind if it kind of bleeds into the skin a little bit, and sometimes it does look cool over the skin. It's just totally depends on the image. I really like that. So then what I'm gonna do now is I'm gonna go. Shaun's laughing at me. You're going to go to effects and effects, has a whole bunch of different grain files. And I absolutely love to play with grain. So for this one, I am going to go. So they pretty much start with a really low, low grain, then go up crazy grain. So I'm gonna go like, let's go in like a middle on the low range. Let's just open this guy. Let's copy it and let's do it this way since I can't seem to do it the other way. And then I always hit mine on overlay so you can see it's all that grain that it's doing. So here I might even I might even blur this a little bit. I see just for fun. I'm just checking. See it? Let's do the blur. Later, I'm liking this. Let's just do the blur later, so let's bring this down all right, And again, we're gonna dress the skin. I don't mind if there's some grain on her skin because there already was some grain. This is Thies. This is the grain here is larger than the grain from the stocking. But I'm really liking what it's doing here. Now it's starting to lend the treatment Starting toe lend to a more painterly effect, which I really like, but we kind of want We don't want it over the phase. And we don't want the face to be, you know, look, to stand out from the rest of it. Look weird. So we're just gonna kind of dab Just so we have some uniformity in the image. Yeah, I'm really liking that. Okay, so now what I'm gonna do is I'm gonna don't duplicate the layer, and then I'm gonna go to filter Blur, and I, like shape blurred myself. Like to kind of play around and see. But what it does and what I'm doing is I'm looking. Even though we already have a blur, I kind of want to blur a little more kind of give it that dreamy effect. So I'm looking. I'm not. I'm looking kind of what I want to do down here in the image I usually like arrows and then I'm just going to blend. So I'm gonna kind of a little higher here and keep my flow. I'm just gonna blend. It's it's kind of around our I've been here a little Whenever I do treatments that are like soft and ethereal I feel like I always start whispering I have to turn my music down. It's like when I have ladies on the bed I start to whisper like a creeper But we've established I'm a little different having way Wouldn't want you to be out of character. Exactly. All right, so I just want to be careful with the shoe here. I'm really liking that. I'm loving that like a lot. So when you go to with treatments over, um and I mean, I've done where I've, like, slapped five or six on him. I just keep going. Just go nuts with it. Um, you always want to go back and go back to your skin and have a look. So I do that by going, I run my skin clean action, which is the frequency separation, And I will just kind of clean up a little bit kind of areas where maybe the textures have. Maybe I didn't mask away. Or maybe they kind of, you know, put some shadow where I don't want it. What kind of come in here and just clean up a little bit? So I'm really loving that. And I think what I want to do Teoh is I love this little beauty mark here. I think I want to really accentuate it. Some kind of ground grabbing, more of a dark brown color. We go up here. Oops, my bad. There we go. Okay, So I'm going to go ahead. And I did this long hand for you guys yesterday. I'm gonna do the quick color fix real quick and then just kind of see where we are, and I'm kind of liking it right in the middle there, and I'm all done. That is amazing. Oh, I should I should mention that I would crop that edging out, or I would just grab it and transform it over
Class Materials
bonus material with purchase
Ratings and Reviews
a Creativelive Student
Let me first start off by saying that Rachel puts her subject first. She has a passion for empowering the everyday woman, showing them that Boudoir photography by no means only belongs to the "supermodels". She shows them that they're amazing and beautiful, and it was so comforting and heartwarming to see this in action in her Creative Live course! When Rachel's shooting with a client it's almost like no-one's in the room but the two of them. Rachel gives her undivided attention to the client's safety and well-being and general comfort. I was so glad I tuned in for the course as I learnt countless tips and techniques about lighting, angles, posing, different settings for the different types of shots you'd want to grab. Another reason that watching the class was such a pleasure for me is that Rachel comes across as that awesome, down to earth, lovely friend you might have in your life, who just happens to be one of the BEST Boudoir photogs on the planet! This was an excellent workshop, top to bottom, and I'd recommend purchasing it to anyone who wants to learn everything about this type of photography, including the business side of things which her husband, Sean, explained thoroughly. I have absolutely no idea what a couple reviewers were "disappointed with" but take it from me - this is a STELLAR course and if you're looking to get into the business, or just even honing your skills on photographing the ladies, this is most definitely the course for you! Tons of info - great guidelines on how to handle your models, great info on lighting, lenses and settings! Rachel will make you fall in love with Boudoir photography like your life depended on it! She's just THAT good! So go on, purchase the course and have her invaluable instruction at your fingertips whenever you need it!
SunSoBright
I mainly photograph landscapes but I'm interested in learning other types of photography. Being introverted it's a challenge for me to photograph people but I it's a barrier I want to get over. I purchased this course and some others on portraiture and boudoir photography. While Rachel and her husband aren't polished speakers I thought they were honest and straightforward. The "clients" being photographed seemed a bit nervous but I imagine that had a lot to do with the fact they were doing the boudoir session live in front of thousands if not millions of viewers. Rachel also had to keep in mind she was tethered and the recording of the session while photographing her client so I don't think this was optimal and Rachel's back began to bother her so I'm sure she was in some physical pain. Regardless, the resulting pictures were beautiful so Rachel was able to make her clients feel "safe" enough to get through the session. Also it seems part of the audience were women who had been photographed by Rachael so it says something that they came to learn from and support Rachel. I appreciated Rachel was photographing real women, not models. What I liked most about this course is it made me feel like little 'ol ordinary me could be a boudoir photographer too If I am ever inclined to do so. Her style of photography isn't quite mine, but the session was still useful and instructive especially with regard to her lighting set up. I wish Rachel had talked a bit more about setting up the support team that goes around with her like her make up and hair artists, how she finds and decides on houses to rent and what cities she goes to, etc. but I guess you can't go over every single thing in a single course or maybe that can be a future course. Rachel and her husband seemed like a nice down to earth couple who put their family first and they were quite honest about some of the difficulties and their concerns over safety for themselves and their clients. I was touched that Rachel photographs women who have gone through cancer treatment for free as I do volunteer work in a hospital. I thought the bonus and included materials which had Rachel's Lightroom presets and her client info packet was very generous. Some of the other photographers charge for getting a copy of their client documents and presets. I purchased Rachel's eBook off Amazon and wanted to purchase Rachel's Photoshop actions but in searching for the purchase links I read Rachel is going through some health issues, I think it was spinal fusion, and it seems has suspended her business until she recovers. It looks like she plans to still make her "return" sessions starting with Hawaii during April 2017. I wish her and her family the best and will say a prayer for her quick and complete recovery. Thank you Rachel and Sean for coming to Creative Live and I hope you will teach another class or at least participate in a critique of boudoir photographs.
WellsWells
Warning: You are about to encounter a large number of exclamation points. ;-) This was such a great course! It was great to learn boudoir with such a caring, generous, and knowledgeable pair! Rachel really brought it with her posing, shooting, and building rapport with her clients. She even kept going while in intense pain! Also, the sections on retouching were EXCELLENT! I had trouble following the first retouching segment where she used her actions, but then she came back to retouching later and showed us how to do each step "longhand". Knowing what each action is designed for makes such a difference! I feel like Rachel read the audience and saw that we were floundering, and tailored her presentation to just what we needed! Sean was also very thorough in his presentation of the "business" side. It is hard, as an artist, for me to run my business like a business. Sean showed how it can be done. He also showed the need for a strong "why" to focus on when telling others about policies. "It's a business. I need to feed my kids." I need to reach down and find my "why" that will keep me strong enough to stand behind my policies and pricing. I haven't gotten a chance to sit down and go through all of the bonus materials yet, but I am so excited to see what's in there! I saw that Rachel had posted a longhand version of the "little hug," and I watched it, and I have been trying it out on some of my older images. Just that one little tweak makes such a difference! Thank you, Rachel and Sean, for giving us SO MUCH usable content! I'm so glad I decided to watch and then purchase this course! And I can't wait to see the two of you again for your next creativeLIVE!
Student Work
Related Classes
Glamour & Beauty